Amarok/QuickStartGuide
Congratulations on installing Amarok, the most advanced music discovery software available. Amarok will help you explore your music, and enjoy it as never before. Also, you can tour different sources of music, radio stations and audio books online. In this guide, we'll show you how to let Amarok find your collection, play it for you, and also how to use Amarok to find things online. We'll assume that you know nothing about Amarok, but do know how to use menus, a mouse, and your keyboard.
The Amarok window
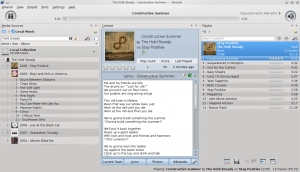
The Amarok window is the default User interface designed to let you rediscover your music. In addition, it is also designed to give you as much visual information about your music as possible. While many users will find the default layout suitable for their needs, the layout is fully customizable if you prefer another layout.
Default layout of the Amarok window
Upon installation, Amarok will look like this

The Amarok window has four main components:
- right under the top-level menus is the Toolbar that lies above three panes:
- your Media Sources (music collection and other media) in the left pane,
- the Context pane in the center, and
- the Playlist in the right-hand pane
Using the Amarok window to manage and play your music
Playing music using Amarok usually takes two steps:
- Create a playlist by selecting some of the music in your collection you want to listen to in the Playlist pane.
- Play the music in your playlist, using the Playlist pane and/or the Toolbar.
Additionally, you may wish to transfer some of your music to a mobile music player, such as an iPod. The following sections will help you with these tasks.
