digiKam/Злиття експозицій
Злиття експозицій за допомогою digiKam
This article originally appeared in Scribbles and Snaps and is reproduced with permission from Dmitri Popov.
No matter how good your camera is, taking a well-exposed photo of a high-contrast scene like a black bird on snow can be really tricky. Even if you switch to the manual mode and tweak the exposure settings, there is still a risk that you will end up with a shot containing under- or overexposed areas. One way to solve this problem is to use exposure blending. This technique involves taking several shots of the same scene or subject with different exposures and then fusing these shots into one perfectly exposed photo.
While exposure blending sounds simple in theory, achieving usable results can be a rather laborious and time-consuming process. Fortunately, digiKam can do the donkey job for you thanks to an bundled with the Kipi plugins. The exposure blending tool relies on the hugin application for processing and fusing photos, so you must install it on your machine beforehand. On Ubuntu, this can be done using the command
sudo apt-get install hugin
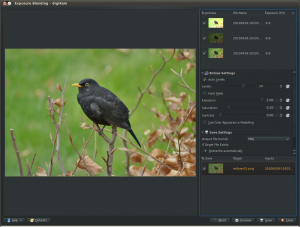
To keep things tidy, move the photos you want to blend into a separate album, select them using the Ctrl+A keyboard shortcut, and choose -> . This opens the Exposure Blending Import wizard that guides you through the entire process. In the window, add other photos if needed, and remove and rearrange the photos that are already in the list. Hit then the button to move to the next step. digiKam can align the selected photos before blending them. This feature can come in handy if you took the photos without a tripod. If this is the case, tick the check box, and press to start the pre-processing. Once digiKam is done, press , and you will be automatically dropped into the Exposure Blending editor.

Hit the button to see the blended photo in the preview pane. If you are not satisfied with the result, you can tweak the available options, including exposure, saturation, and contrast. You can also exclude individual photos from the stack to improve the blending result. The clever part is that every time you tweak the settings and press the button, digiKam generates a preview image which you can compare with the previous versions. You can then save all the generated versions, or save only the one you like most.
Although digiKam’s exposure blending tool is not the most powerful or flexible solution out there, it is capable of producing rather impressive results, especially if you are not afraid of getting your hands dirty with manually tweaking the final results. Tutorials
