KMail/Account Wizard
Appearance
< KMail
Account Wizard

The first time you run KMail you will be greeted with the Account Wizard.
The wizard will take you through the process of creating your email accounts. Your screens will vary depending on how much the wizard can determine on its own. Below is an outline of the screens you may encounter while using this wizard.
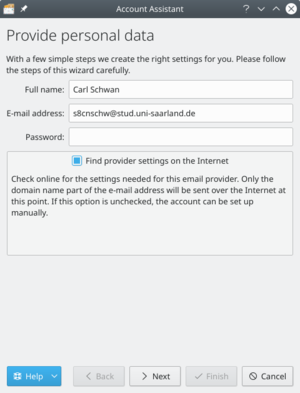
- Provide personal data is the first screen of the wizard. It will prompt you for your basic account information: , , and . By default, the option is checked, the wizard will attempt to retrieve the necessary information from the server. Uncheck this option if you are an expert user and you need to set up advanced configuration. Click the button once finished.
- Select Account Type screen will be next if the wizard cannot determine your account type. Select your account type from the list (if you do not know, you will need to contact your email provider). If your account type is not listed, click the button. Once your account type has been selected, click the button, and you will be presented with the Personal Settings screen.
- Provide personal data screen will show again with the server details it found if the wizard was successful at determining the account type. Click the button, and it will set up the account. Click the to complete the wizard and close the window.
- Personal Settings screen will show if you had to enter your account type. Verify that your information is correct on this page. Select if you want your messages available when you do not have an Internet connection (IMAP only). Click the button once finished.
Your account will then be set up, and you can click the button to complete the wizard and close the window.

