User:IulianB/KMailSetup
We know that KDE has an email client called KMail.
The most popular platform that it can be used on is Linux.
Introduction
KMail is a fantastic email client that does almost everything you need it to do.
It even offers email signing and encryption support to send your email securely and easily.
If it is configured appropriately, it can benefit you a lot and if you are a KDE user and haven't tried out KMail yet, we suggest you to do it.
In this guide we'll learn:
- How to set up our KMail settings where we'll learn to adjust KMail to our preferred usage.
- First we'll introduce the concept of Identities which helps us categorize our mails according to our daily activities.
- Second we'll help you understand the difference between Identities and Accounts the latter of which will help us configure how we want to receive our mails.
- Finally we'll mention other features provided by Kmail to configure and cater to our needs.
- How to send and receive mails.
How to set up Kmail
First of all, we have to open the KMail application.
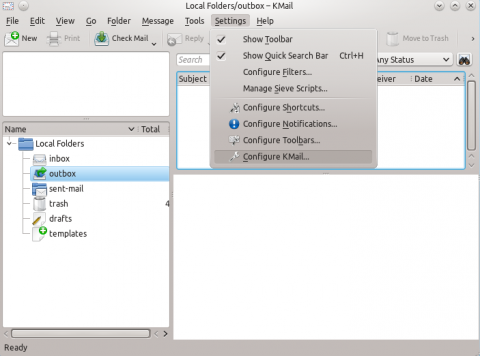
Then we go to the 'Settings' menu and select 'Configure KMail...' option from the menu.
A configuration window appears as shown below.
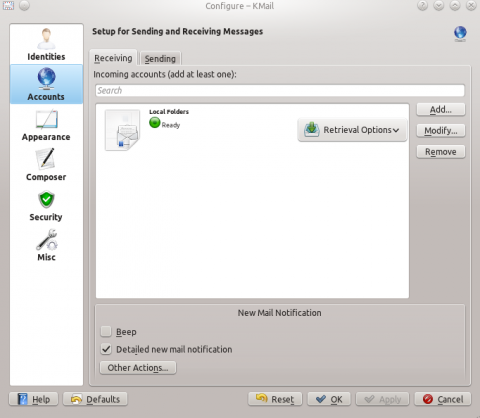
This is where most of the interesting features of KMail can be configured.
One of Kmail's exciting features are sending emails via different identities.
Confused? Don't be. Just read on and you will understand.
Identities
Identities are an intrinsic part of KMail's usage. It defines how the mail (that is sent and or received) affects the many aspects of the user's daily-life activities.
For example, a person who has a job, a family and friends will need to easily differentiate and categorize all the mails he receives to his email account(s).
Thus he can easily categorize them through the Identities feature offered by Kmail. He could use three identities for his case namely - Personal for his family mails, Professional for job and office related mails and Social for his friends and social activities.
To create an identity,
- go to the Identities icon and then click on the Add button.
- fill in the name of your new identity, click Ok.
Voila! There you have it.
Below you have an image:
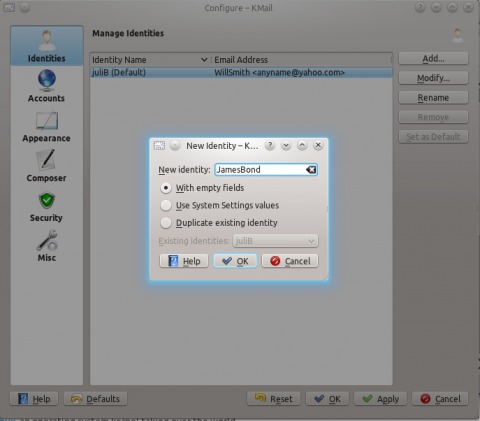
If you want to create a new identity having the same fields as an existing one,
- simply click Add again,
- name the new identity in the field provided,
- select Duplicate existing identity,
- choose the identity that you want to duplicate from the Existing Identities drop-down menu and click Ok.
If you want to create one with empty fields, just select With empty fields instead of Duplicate existing identity.
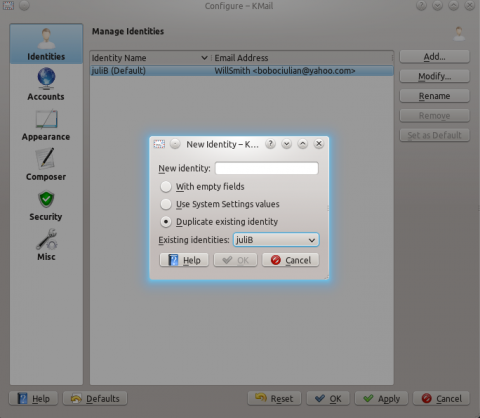
There will be a default identity in the list of those identities.
To specify the properties of an identity,
- select an identity
- choose the Modify button on the right.
- fill in your name, organization, and email address for that particular identity and select Ok, just like in the image below:
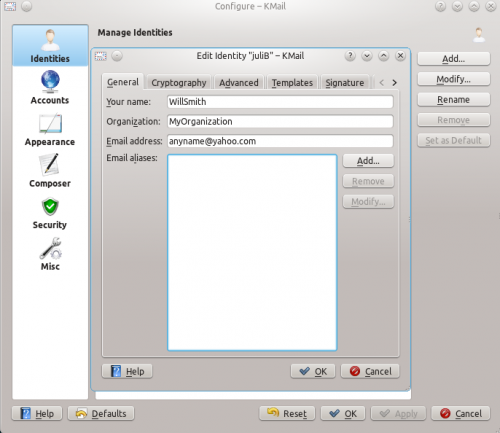
No matter what address you're sending your email from, you can receive your identity's messages to a selected email address. To do this,
- select the identity,
- click Modify button and go to the Advanced tab in the window that appears,
- in the Reply-To address enter the email address where you want to receive your identity's messages.
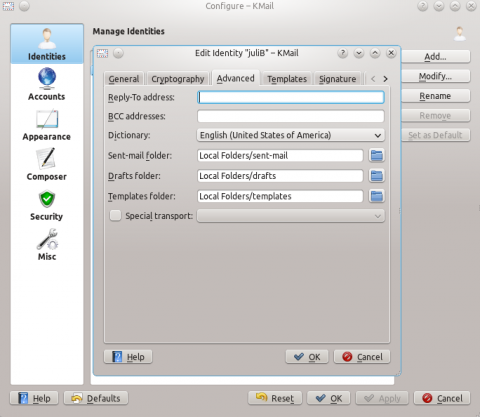
Accounts
An Account is a configuration that pairs your email addresses to your desired identities.
Expanding the previous example introduced in the Contacts section, let's say that the use has four email addresses. Of those two are used for emails related to his profession, one is used for mails from his family and the last used for mails from his friends and social networking and blogging activities. So he would need to pair those email addresses with the identities he created.
Also, you can have different identities even for a single account which could help you make the difference between your activities. It just depends on the need (activities) and the number of email addresses.
Thus to add an Account,
- select the Accounts icon on the left of the Kmail configuration window and then click on the "Add" button.
Some example account setup.
First of all, you have to decide which protocol you wish to use to receive your messages. KMail supports the following accounts : IMAP and POP3 .
Lets presume that you have chosen POP3 protocol. You need to keep in mind that you'll need to look out for the protocol's host name first to fill in all the corresponding lines. Below you'll see two pictures of the setup:
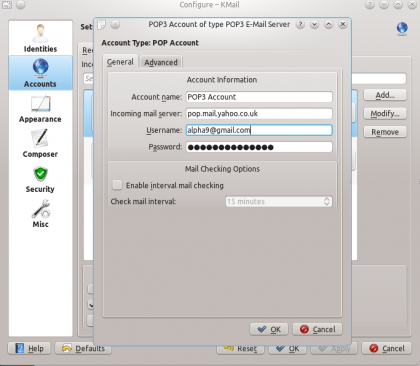
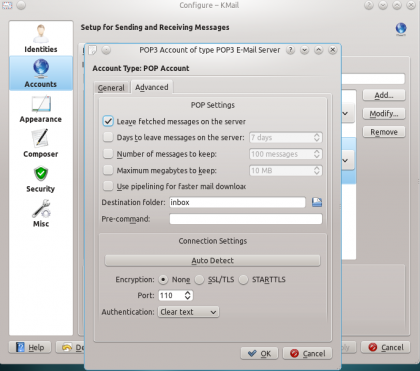
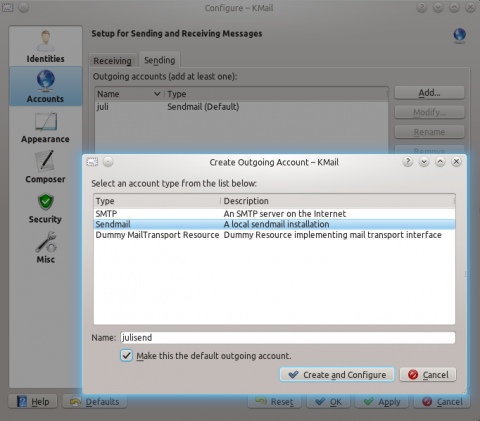
With regard to the Sending tab, it may be noted that it is similar to the Receiving tab. You can Add a new account that you would like to send messages from or use the existing one.
The images below should give a better description:
Appearance
After you've finished setting up your accounts in the Accounts icon, you can choose to select the Appearance icon.
In the Fonts tab , you can choose how to design the aspect of your text , when you will want to send an email.
The Colors tab allows you to change the color of the text by double clicking on an item in the listbox.
The Layout tab lets you configure the layout of the main window.
In the Message List tab you can alter the appearance of the Message List pane and can choose between several date formats.
In the Message Window tab you can:
- Close message window after replying or forwarding
- Show HTML status bar
- Replace smileys by emoticons
- Reduce font size for quoted text
- Show expand/collapse quote marks
- Fallback character encoding
- Override character encoding
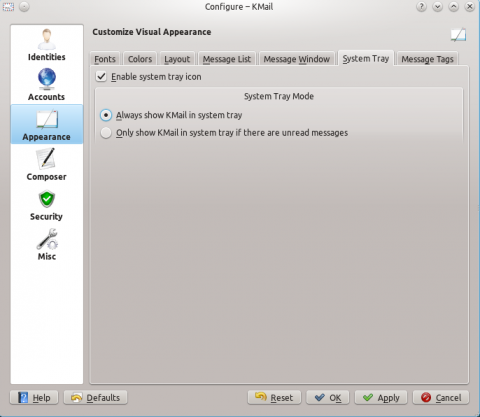
Just be sure that you have the Always show KMail in system tray option checked if you want Kmail to remain in your system tray.
You can do that by going to System Tray tab under the Appearance section and then check the bracket with the option mentioned above.
Here you have an image:
Composer
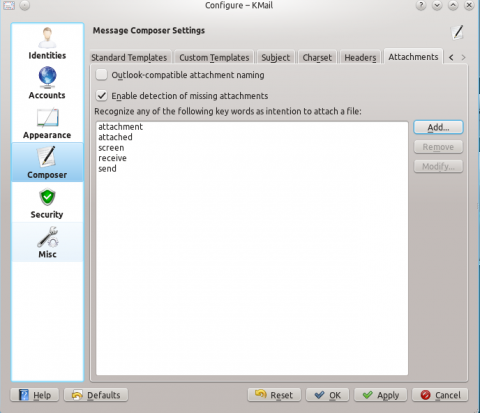
In the Composer icon, there's a feature that notices if you mention the word "attach" or "attached" in the body of your email but are not attaching anything to that message. You can write as many keywords as you like in the Attachments tab. You can look at the picture below as an example:
In the General tab, you can enhance your email page's aspect, when you want to compose a mail.
In the Standard Templates tab, you can add, edit, and delete custom message templates.
In the Custom Templates tab, there are four types of custom templates used to Reply,
Reply to All, Forward, and Universal, which can be used for all kinds of operations.
In the Subject tab, you have a list of prefixes for Reply and Forward.
In the Charset tab you can manage the default charsets used for your own messages.
In the Headers tab , you can:
- Use custom message-id suffix
- Custom message-id suffix
- Use custom Message-Id suffix
- Define custom mime header fields
Security
In the Security icon, you can choose to configure the provided options as you may wish.
For example:
- In the Reading tab you can configure security options for reading messages.
- In the Composing tab you can configure security options for composing messages.
- In the Miscellaneous tab you can switch security warnings on and off.
- The S/MIME Validation tab contains selected entries from GpgSM's.
How to send an email
To compose an email, you simply go to Message menu and select New Message option, right after you launch KMail. Alternately, click the New button below the menu-bar to compose an email.
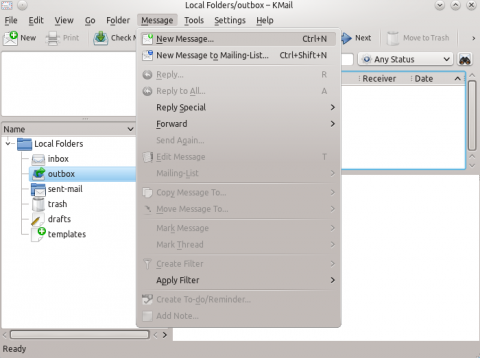
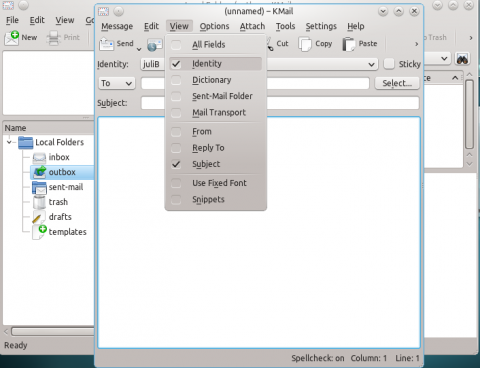
If you have 2 or more identities, go to View menu and check the Identity box.
Look at the image below:
