System Settings/Locale/How To Install and Apply Interface Translation/fr: Difference between revisions
Created page with "Category:Bureau/fr Category:Système/fr" |
Created page with "Démarrez '''KPackageKit''' depuis le lanceur d'applications ou appuyez simplement sur <keycap>Alt + F2</keycap> et tapez {{Input|1=kpacka}} puis appuyez sur <keycap>Entrée</keycap>." |
||
| (2 intermediate revisions by the same user not shown) | |||
| Line 1: | Line 1: | ||
<languages /> | <languages /> | ||
== | <span id="How_To_Install_and_Apply_Interface_Translation"></span> | ||
== Comment installer et appliquer la traduction de l'interface == | |||
Toutes les distributions modernes proposent d'installer les paramètres régionaux appropriés lors de l'installation de la distribution. Si, pour une raison quelconque, vous avez manqué vos paramètres régionaux, voici des instructions étape par étape sur la façon de l'installer et de l'appliquer. | |||
=== Installation | <span id="Installation_of_Language_Package"></span> | ||
=== Installation du package linguistique === | |||
Vous devez d'abord installer le pack de langue pour votre distribution. La méthode d'installation dépend de la distribution. Nous décrivons ici les étapes de certains des outils GUI les plus populaires. | |||
==== KPackageKit (Apper) ==== | ==== KPackageKit (Apper) ==== | ||
Cet outil est une interface pour '''PackageKit''' et est utilisé par '''Debian''', '''Fedora''' et '''Ubuntu'''. La nouvelle version de '''KPackageKit''' s'appelle '''Apper'''. '''Ubuntu''' passera à '''Muon''' à partir de la version 11.10. | |||
Démarrez '''KPackageKit''' depuis le lanceur d'applications ou appuyez simplement sur <keycap>Alt + F2</keycap> et tapez {{Input|1=kpacka}} puis appuyez sur <keycap>Entrée</keycap>. | |||
[[Image:Klaunch_kpackagekit.png|center|thumb|350px|Starting KPackageKit with [[Special:myLanguage/KRunner|KRunner]].]] | [[Image:Klaunch_kpackagekit.png|center|thumb|350px|Starting KPackageKit with [[Special:myLanguage/KRunner|KRunner]].]] | ||
Latest revision as of 22:21, 26 February 2024
Comment installer et appliquer la traduction de l'interface
Toutes les distributions modernes proposent d'installer les paramètres régionaux appropriés lors de l'installation de la distribution. Si, pour une raison quelconque, vous avez manqué vos paramètres régionaux, voici des instructions étape par étape sur la façon de l'installer et de l'appliquer.
Installation du package linguistique
Vous devez d'abord installer le pack de langue pour votre distribution. La méthode d'installation dépend de la distribution. Nous décrivons ici les étapes de certains des outils GUI les plus populaires.
KPackageKit (Apper)
Cet outil est une interface pour PackageKit et est utilisé par Debian, Fedora et Ubuntu. La nouvelle version de KPackageKit s'appelle Apper. Ubuntu passera à Muon à partir de la version 11.10.
Démarrez KPackageKit depuis le lanceur d'applications ou appuyez simplement sur Alt + F2 et tapez
kpacka
puis appuyez sur Entrée.

Type
kde-l10n
in search field and press Enter. Choose the appropriate language pack from the list below.
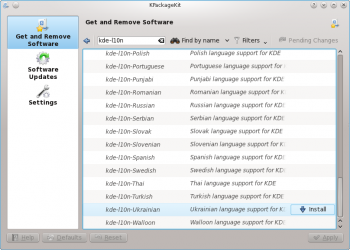
Click then . KPackageKit will ask you to install an additional package.
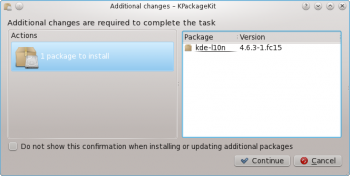
Click .

When installation is finished close KPackageKit window.
drakrpm
Frontend for urpmi. Used in Mageia and Mandriva.
Start drakrpm from Control Center or just press Alt + F2 and type
drakrpm
then press Enter.

Type
kde-l10n
in search field and press Enter. Choose the appropriate language pack from the list below.
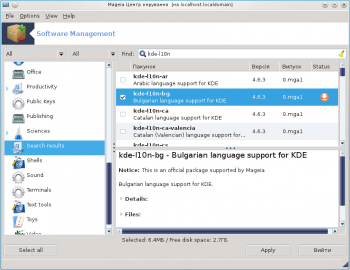
Click . drakrpm will ask you to install an additional package. Click .
When installation is finished close drakrpm window.
Applying Language
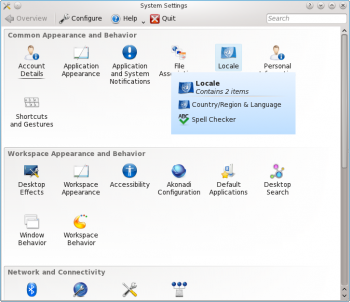
Start System Settings from application launcher.
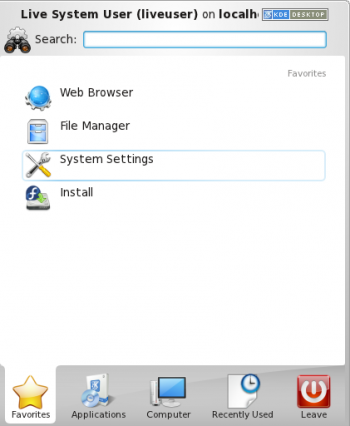
Choose from the list.
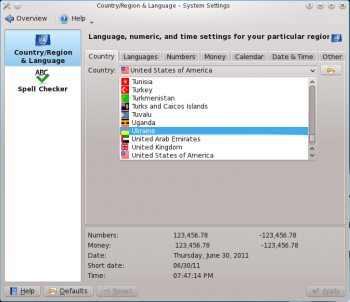
Choose your country from the list on tab. Click .
Go to the tab. Select your language on the left pane and push ![]() to add it to the Preferred Languages list.
to add it to the Preferred Languages list.
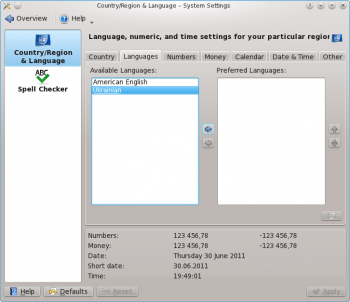
Press . Log off then log on to apply the changes. For the detailed instructions please visit this page. That's all.
