Plan/Engineering To Order project tutorial/planning/uk: Difference between revisions
Created page with "=== Робочий календар ===" |
Updating to match new version of source page |
||
| Line 26: | Line 26: | ||
<span class="mw-translate-fuzzy"> | |||
{{Tip_(uk)|1=Не забувайте час від часу натискати комбінацію клавіш <keycap>Ctrl + S</keycap> для збереження даних! KPlato виконує регулярне оновлення файла резервних даних, щоб запобігти втраті даних у разі аварійного завершення роботи програми.}} | {{Tip_(uk)|1=Не забувайте час від часу натискати комбінацію клавіш <keycap>Ctrl + S</keycap> для збереження даних! KPlato виконує регулярне оновлення файла резервних даних, щоб запобігти втраті даних у разі аварійного завершення роботи програми.}} | ||
</span> | |||
==== Визначення грошової одиниці ==== | ==== Визначення грошової одиниці ==== | ||
<span class="mw-translate-fuzzy"> | |||
Ми можемо вибрати іншу грошову одиницю для виконання проекту. В українській локалі буде визначено гривню (₴). Нехай нам потрібно змінити грошову одиницю на євро (€). Щоб зробити це, скористаємося пунктом меню <menuchoice>Інструменти->Визначити валюту Currency</menuchoice>. У відповідь на вибір цього пункту меню програма відкриє діалогове вікно, подібне до наведеного нижче. | Ми можемо вибрати іншу грошову одиницю для виконання проекту. В українській локалі буде визначено гривню (₴). Нехай нам потрібно змінити грошову одиницю на євро (€). Щоб зробити це, скористаємося пунктом меню <menuchoice>Інструменти->Визначити валюту Currency</menuchoice>. У відповідь на вибір цього пункту меню програма відкриє діалогове вікно, подібне до наведеного нижче. | ||
</span> | |||
| Line 76: | Line 80: | ||
Repeat the same for the other days up to Saturday while for Sunday insert 4 hours from 8 in the morning. | Repeat the same for the other days up to Saturday while for Sunday insert 4 hours from 8 in the morning. | ||
You can also select multiple days or weekdays by using Shift | You can also select multiple days or weekdays by using <keycap>Shift + LeftMouseButton</keycap> or <keycap>Ctrl + LeftMouseButton</keycap> | ||
| Line 130: | Line 134: | ||
{{Tip|1=as entering resource characteristics is a long work that probably is needed for other project, It might be better to maintain you resources in a separate file and insert them when you start a new project using Tools->Insert Project File. This will preserve the (internal) identity of the resources which may come in handy if you want to coordinate multiple projects later. See | {{Tip|1=as entering resource characteristics is a long work that probably is needed for other project, It might be better to maintain you resources in a separate file and insert them when you start a new project using Tools->Insert Project File. This will preserve the (internal) identity of the resources which may come in handy if you want to coordinate multiple projects later. See [[Special:myLanguage/KPlato/Manual/Managing_Resources|Managing Resources]]}} | ||
==== Material Resources ==== | ==== Material Resources ==== | ||
| Line 178: | Line 182: | ||
The estimate is the time required to complete the task, can be in different units: h (hours), d (days), w (weeks) and M (months). | The estimate is the time required to complete the task, can be in different units: h (hours), d (days), w (weeks) and M (months). | ||
{{Note|1=The estimation can be in effort or duration. Effort is the need of working time for a task, Duration is the working duration for a task. The main difference is that for an effort if you use two workers, the total time will be | {{Note|1=The estimation can be in effort or duration. Effort is the need of working time for a task, Duration is the working duration for a task. The main difference is that for an effort if you use two workers, the total time will be cut by two! If you have duration, the total time will be the same even if you use more workers. This implicitly impacts the cost for the task.}} | ||
The risk level as well as the optimistic and pessimistic timing will impact the calculation of the total project considering the PERT technique. In this case -5% and 20% are the value as well as the risk is considered "High". | The risk level as well as the optimistic and pessimistic timing will impact the calculation of the total project considering the PERT technique. In this case -5% and 20% are the value as well as the risk is considered "High". | ||
Revision as of 10:16, 2 January 2011
Фаза планування
Початок роботи
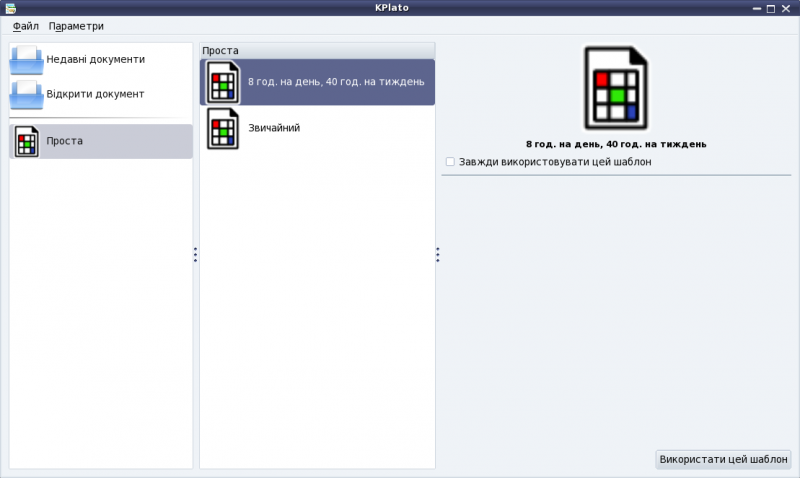
Після першого запуску програми ви побачите вікно, подібне до наведеного нижче.
Для початку ми виберемо шаблон з восьмигодинним робочим днем і сорокагодинним робочим тижнем.
Налаштування основного проекту
Ми вкажемо назву і керівника проекту, а також визначимо деякі інші загальні відомості. Для цього слід натиснути піктограму , розташовану у верхній лівій частині екрана. У відповідь буде відкрито вікно, подібне до наведеного нижче.
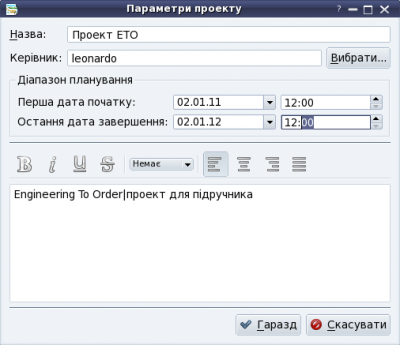
У цьому вікні можна вказати назву проекту, вибрати керівника зі списку облікових записів системи (якщо у вас встановлено KDE і Kontact) або вписати нове зручне для вас ім’я.
Значення Першої дати початку і Останньої дати завершення використовуються для планування проекту. Ми будемо виконувати пряме планування, тому встановимо першу дату початку відповідно до дати, коли ми маємо намір розпочати виконання проекту, а останню дату завершення у дату, коли проект має завершитися. Якщо не вдасться побудувати розклад проекту так, щоб його виконання можна було завершити вчасно, програма покаже повідомлення з попередженням.
За допомогою нижньої частини вікна можна додати коментар щодо проекту. Вказані дані буде використано для звітів або іншої загальної мети під час періоду виконання робіт.
Визначення грошової одиниці
Ми можемо вибрати іншу грошову одиницю для виконання проекту. В українській локалі буде визначено гривню (₴). Нехай нам потрібно змінити грошову одиницю на євро (€). Щоб зробити це, скористаємося пунктом меню . У відповідь на вибір цього пункту меню програма відкриє діалогове вікно, подібне до наведеного нижче.

Змініть у цьому вікні символ грошової одиниці з ₴ на € і натисніть , оскільки інші параметри змінювати немає сенсу.
Робочий календар
Have a look at the work & vacation calendar, on the upper part of the left window view selector under the group. The following view will appear:
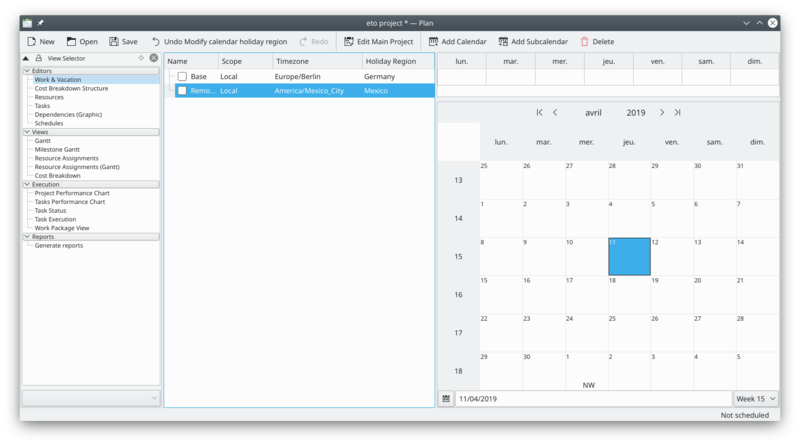
In the centre we can add different calendars for different time zones and week efforts. On the right there's a month calendar, on it's upper part, there's the configuration for the working week hours, typically 8 hours from Monday to Friday and non working days for Saturday and Sunday.
Let's add a new calendar for our future purposes, clicking on the icon, than for the name we write
Installation
and for the time zone we choose from the selection menu.

We now need to select the installation calendar and define the relative working week.
On the right upper corner of the calendar, there are some spaces indicating a typical working week.

Right click on the blank one below the Monday indication and a menu will appear with the possibility to choose between , and .
Click on and the following window will appear
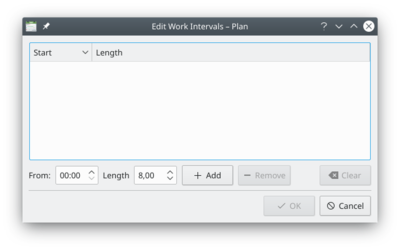
We add typical working hours for installation work. 10 hours per day from Monday to Saturday and 4 hours on Sunday. In case needed we can also choose to insert the pause time.
So, starting from 7 am for 10 hours and then click "add" and then "ok".
Repeat the same for the other days up to Saturday while for Sunday insert 4 hours from 8 in the morning.
You can also select multiple days or weekdays by using Shift + LeftMouseButton or Ctrl + LeftMouseButton
We can also right click on a date in the calendar and doing the same considerations about the working and non working days or time. This is especially needed when you need to work with different holidays from yours!
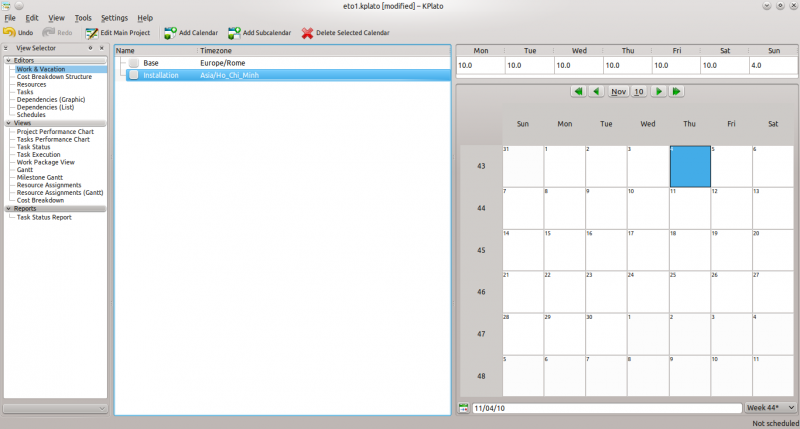
Anyhow, the final result should be similar to the below image.
Cost breakdown structure
Here we define which will be the cost centres we wish to use in the project. We can have different groups and subgroups.
Click on the item on the left side of the window, just under the work and vacation item you pressed before.
As per costs managing needs we divide the structures of the costs in the following way
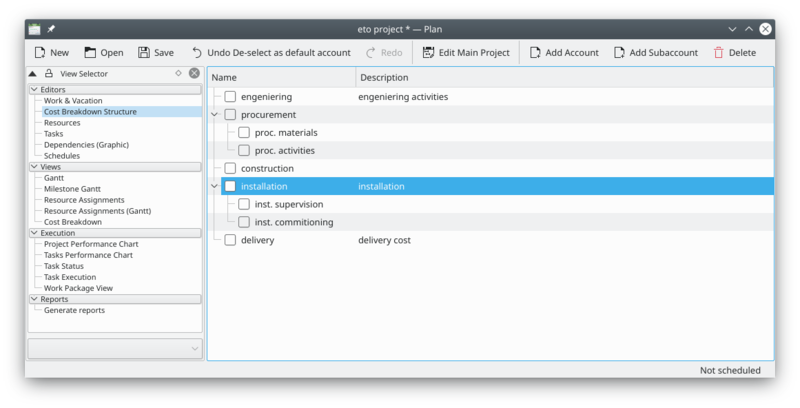
Play with the and icons to reach the full tree! This is a personal approach for a complete ETO project due to my experience.
For example you can have a "direct employee" account to manage the cost for your employee, or to have an idea about the cost of your suppliers using a dedicated account as soon as you insert their work.
Resources
So, now it's time to define our team and the material!!
You can access to the resources window clicking on the item on the left side of the window, just under the cost breakdown structure item pressed before.
The resources are organized as resource groups and resources. So, first we insert the team group as resource group clicking on the "Add Resource group" icon for each item as below.
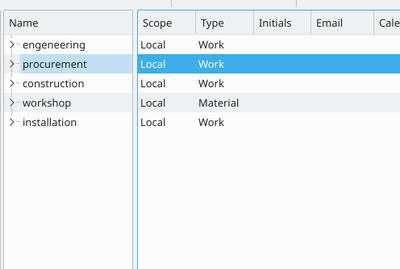
As soon as you complete the group it's time to insert the people and the materials!
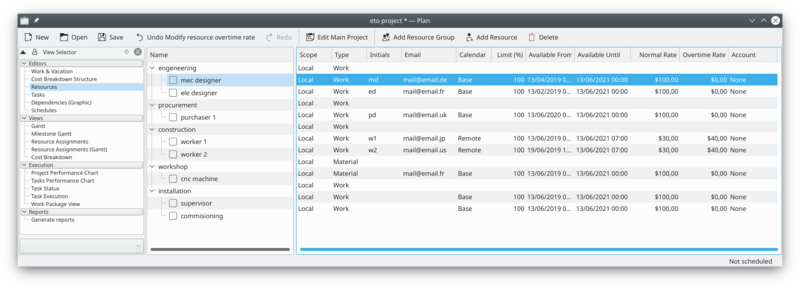
Work Resources
Now it's time to edit each single resource for the purpose to define it. Right click on the resource name to open the resource setting window.
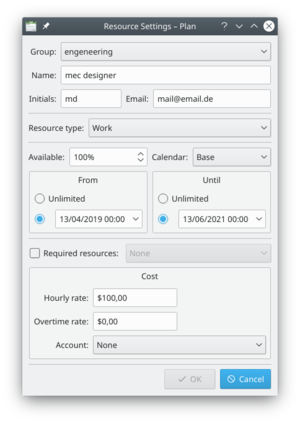
Therefore we add the initials and the email address, switch the calendar to , insert the cost as per need. The account is set to "none" as in this case we do not charge the cost to a specific cost account.
Remember that for the installation resources there will be a different calendar, the "installation", that we inserted before!
Material Resources
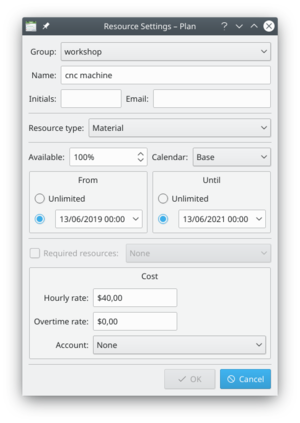
We decided to add the workshop machines to consider some costs as well as their use.
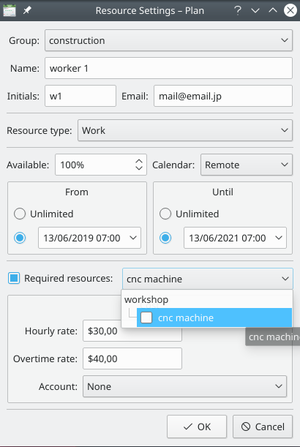
For this purpose in the resource we add the workshop as a material and a CNC machine as well as assembly tools package.
Calendar preference
One other interesting thing to note is that we use different calendars for different resources.
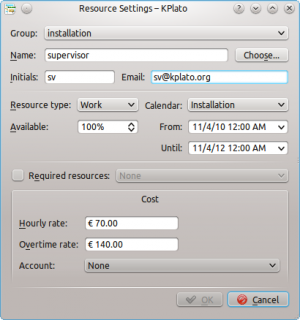
The calendar on the task has the precedence on the resource's calendar. The availability date for a resource largely depend if this resource is available only for a period of time. In this case we need to be sure that all the resources are available from the beginning to the end of the job.
Overtime rate is not yet implemented.
Task
Now it's tasks time !!!!
You can access the task window clicking on the "task" item on the left side of the window, just under the resource item you pressed before.
We have to insert the following items:
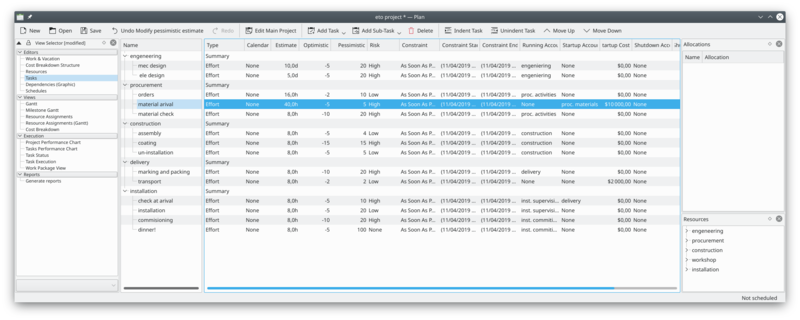
As we inserted the each name, we can edit each item right clicking the name. The following will appear on the first task:
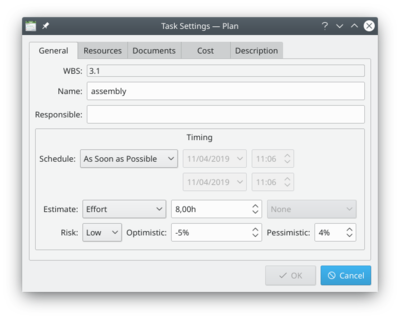
There are five tabs: General, Resources, Documents, Cost, Description.
On the General tab insert the name of the task, you can choose a responsible person if needed, then define the timing and the risk associated to the task. The schedule type is typical for planning, "as soon as possible" is the most used. Other kind of type, generate a need to compile the date and time on the right of the drop-down menu.
The estimate is the time required to complete the task, can be in different units: h (hours), d (days), w (weeks) and M (months).
The risk level as well as the optimistic and pessimistic timing will impact the calculation of the total project considering the PERT technique. In this case -5% and 20% are the value as well as the risk is considered "High".
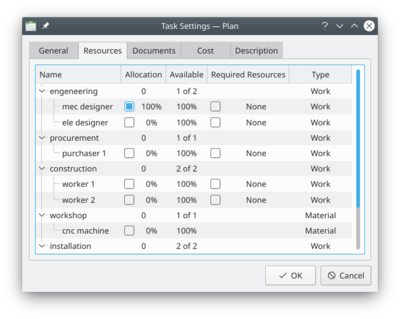
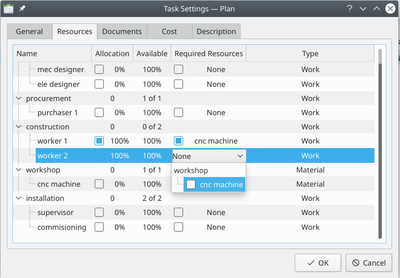
On the Resource tab, we choose the desired resource to be used as well as it's availability in % and eventual resources associated.
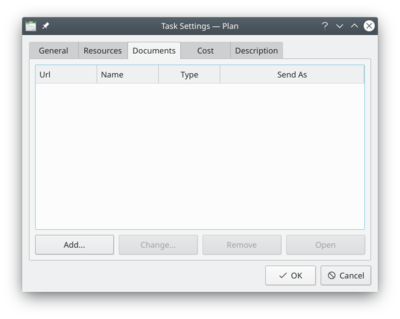
In the Document tab we can link documents pertaining to the task. Not used for our tutorial
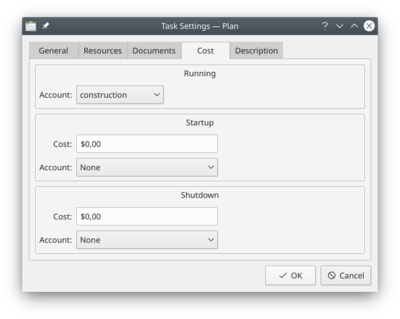
The fourth tab is the Cost tab. Here we can associate the running cost of the task to an account previously defined into the "Cost breakdown structure".
We can also choose to add startup and shutdown cost for the task, that can be associated to different account.
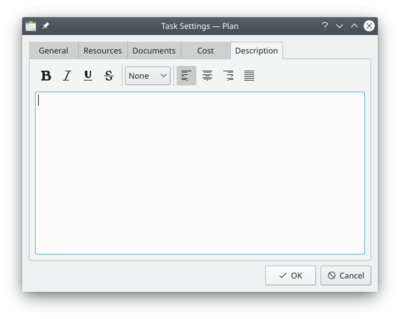
The last tab is the Description tab where we can insert our comments, mainly the list of the deliverables related to the task.
Dependencies
Now it's time to prioritize the activities! Let's click on the item on the left side of the main window.
So this is what should appear as soon as you open the right window.
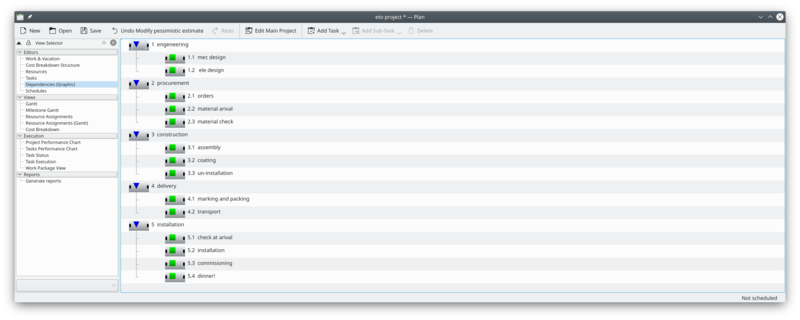
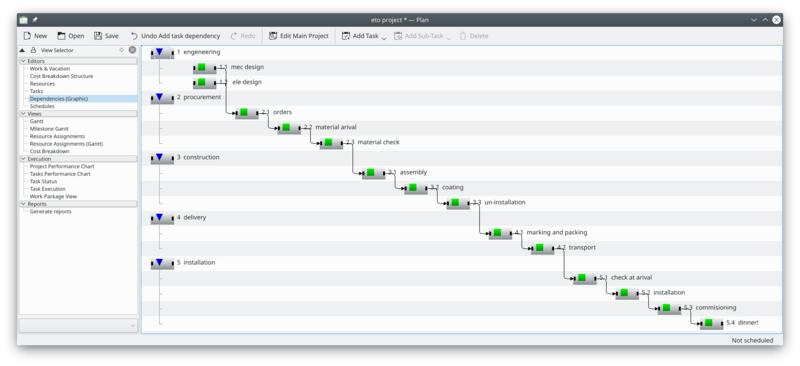
Let's start to give priority at the tasks in order to obtain a full list of dependencies. This can be done graphically with the mouse, clicking at the right or left side of the task and then drag the relative arrow to the desired position of the other task. It should be better to connect only the tasks and not the summary. The result should be like below.
Schedule
Wow, now it's time for schedule and prepare the baseline for the project!!
clicking on the left menu on the will bring you to the schedule activities!
Now we create a new schedule clicking on the button at the top of the window, then we choose a for the distribution type and then we click on button. As soon as the calculation is finished, press on button on the top of the window. The result will be like this:
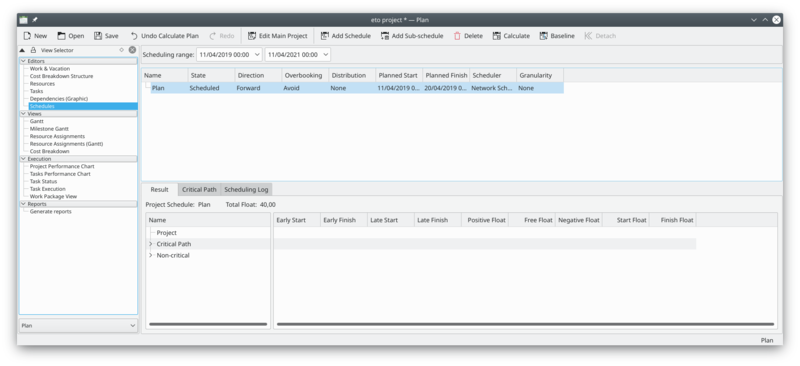
Here, for reference, is a copy from the KPlato manual of the field's definitions in the schedule
| Column | Description |
| Name | The name of the schedule. |
| State | The schedules state. Shows a progress bar during scheduling. |
| Direction | The scheduling direction.
If direction is Forward, the project is scheduled starting at the projects earliest start time specified in the main project dialog. If direction is Backward, the project is scheduled starting at the projects latest finish time specified in the main project dialog." |
| Overbooking | Controls resource overbooking when scheduling.
If overbooking is allowed, a resource may be booked (on working days) to work more than it is available. This can happen if the resource is allocated to multiple tasks or are booked on other projects. If overbooking is to be avoided, resources will not be booked more than they are available. On resource conflict, tasks will be delayed until the resource is available. |
| Distribution | The distribution to be used during scheduling.
If distribution is 'None', the tasks estimate is used as is during scheduling. If distribution is 'PERT', the estimate (E) used is calculated based on the entered optimistic- (O), pessimistic-(P) and most likely (M) estimate. The formula used for this is: E = (O + 4 * M + P) / 6. |
| Planned Start | The scheduled start time. |
| Planned Finish | The scheduled finish time. |
| Scheduler | The scheduler used for calculating the project schedule.
The default built-in scheduler is the Network Scheduler. Other schedulers presently available is RCPS if libRCPS is installed on your system. RCPS is a genetics based resource constrained project scheduler |
So now we have finished our planning activities for the project!!!!!


