Plan/Engineering To Order project tutorial/planning/it: Difference between revisions
Importing a new version from external source |
Importing a new version from external source |
||
| Line 158: | Line 158: | ||
=== Attività === | === Attività === | ||
Ora è tempo delle attività! | |||
You can access the task window clicking on the "task" item on the left side of the window, just under the resource item you pressed before. | You can access the task window clicking on the "task" item on the left side of the window, just under the resource item you pressed before. | ||
Revision as of 09:24, 23 April 2011
La fase di pianificazione
Inizio
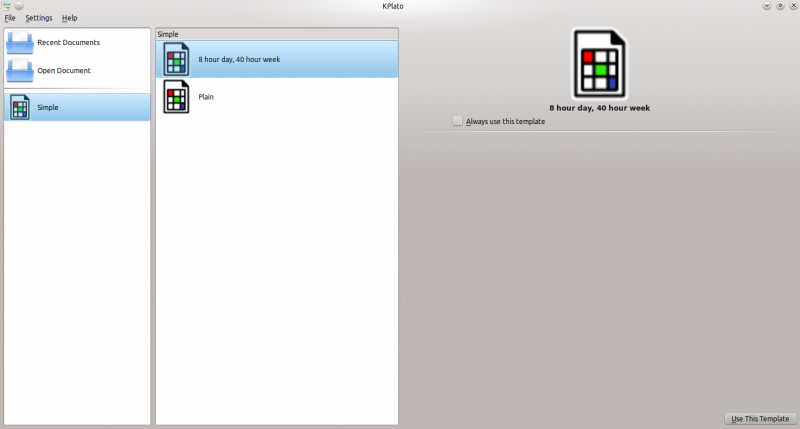
Quando apri il programma per la prima volta, comparirà la finestra sottostante.
Scegliamo il modello per iniziare.
Impostazione del progetto principale
Diamo quindi un nome e un responsabile al progetto e impostiamo alcune altre informazioni generali. Per far questo hai bisogno di fare clic sull'icona in alto a sinistra nella schermata. Comparirà quindi la seguente finestra:
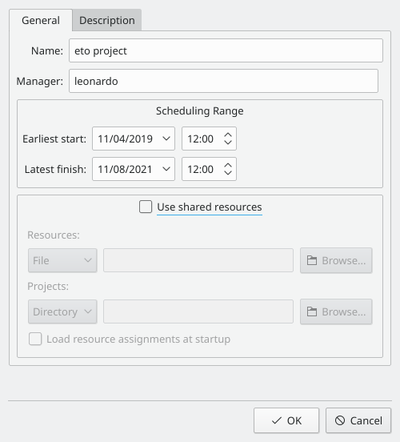
In questa finestra possiamo scrivere il nome del progetto, scegliere un responsabile da un elenco già presente nel sistema (se hai KDE e Kontact) o scrivere un nuovo nome secondo quello che ti è più comodo.
Gli obiettivi temporali Avvio iniziale e Fine al più tardi sono utilizzati per pianificare il progetto. Vogliamo pianificare in avanti, dunque imposteremo avvio iniziale a quando vogliamo che il progetto abbia inizio e termine ultimo a quando il progetto dovrebbe finire. Se il progetto non può essere pianificato per essere terminato prima di questa data, verrà proposto un messaggio di avvertimento.
Nella parte inferiore della finestra può essere inserito un commento sul progetto. Questi dati verranno utilizzati per i resoconti o per altri scopi generali durante il periodo di lavoro.
Impostazione della valuta
Possiamo scegliere di lavorare con differenti valute. Come inglese è impostata su $, noi abbiamo bisogno di passare a €. Per far questo dobbiamo selezionare il menu e apparirà la finestra sottostante.
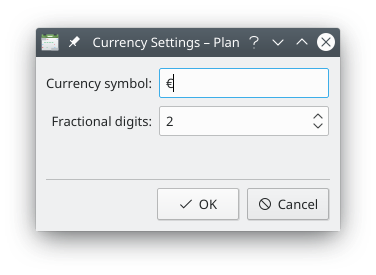
Modifica quindi il simbolo della valuta da $ a € e fai clic su dato che le altre impostazioni vanno bene.
Calendario di lavoro
Dai un'occhiata al calendario di lavoro e vacanze in nella parte superiore sinistra della finestra sotto il gruppo . Comparirà la seguente vista:
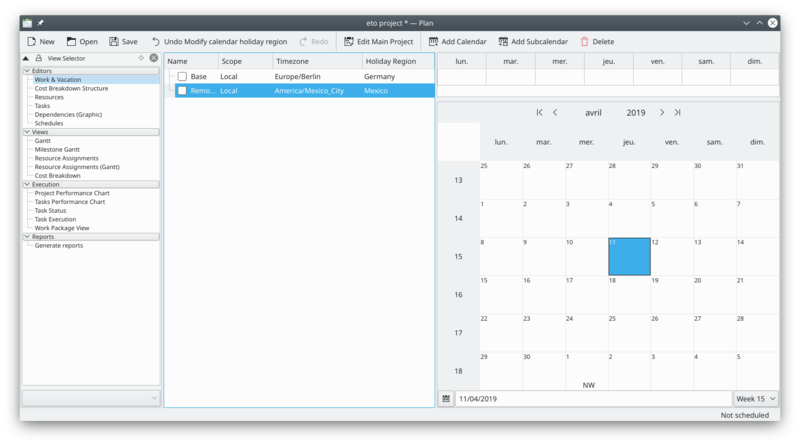
Al centro possiamo aggiungere diversi calendari per differenti fusi orari e settimane di lavoro. A destra è disponibile un calendario mensile, sulla parte in alto c'è la configurazione per le ore di lavoro settimanale, tipicamente 8 ore da lunedì a venerdì e giorni non lavorativi per sabato e domenica.
Aggiungiamo un nuovo calendario per i nostri scopi futuri facendo clic sull'icona , scriviamo poi come nome
Installazione
e come fuso orario scegliamo dal menu di selezione.

Ora abbiamo bisogno di selezionare il calendario installazione e di definire la relativa settimana lavorativa.
Nell'angolo a destra in alto del calendario ci sono alcuni spazi indicanti una tipica settimana di lavoro.

Fai clic destro su quello vuoto sotto l'indicazione Lunedì e comparirà un menu con la possibilità di scegliere tra , e .
Fai clic su e apparirà la seguente finestra
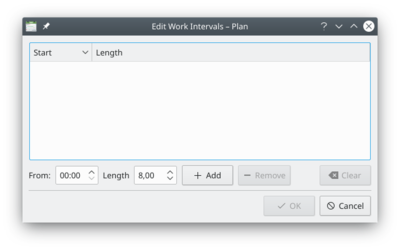
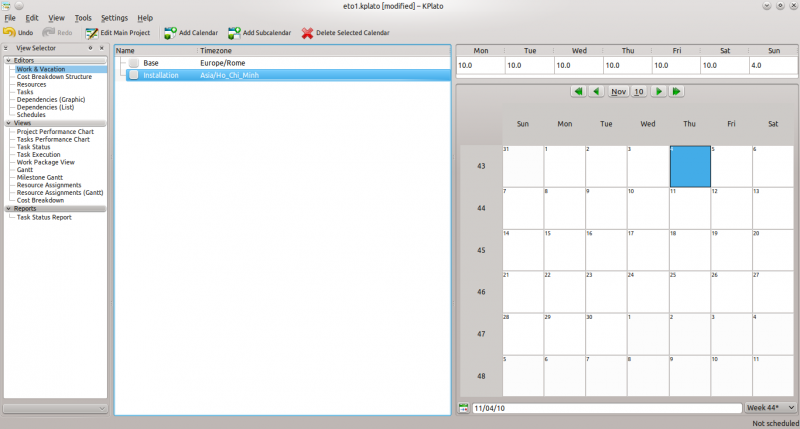
Aggiungiamo le tipiche ore lavorative per un lavoro di installazione. 10 ore al giorno da lunedì a sabato e 4 ore di domenica. In caso di necessità possiamo anche scegliere di inserire l'orario di pausa.
Dunque a partire dalle 7 per 10 ore e poi facciamo clic su e quindi .
Ripetiamo lo stesso per gli altri giorni fino al sabato, mentre per la domenica inseriamo 4 ore dalle 8 di mattina.
Puoi anche selezionare più giorni o giorni feriali utilizzando Shift + pulsante sinistro del mouse o Ctrl + pulsante sinistro del mouse.
Possiamo anche fare clic destro su una data nel calendario e fare le stesse considerazioni relative ai giorni o all'orario di lavoro e non. Questo è particolarmente necessario quando hai bisogno di lavorare con vacanze differenti dalle tue!
In ogni caso il risultato finale dovrebbe essere simile all'immagine sottostante:
Struttura funzionale dei costi
Qui definiamo quali saranno i centri di costo che desideriamo utilizzare nel progetto. Possiamo avere diversi gruppi e sottogruppi.
Fai clic sull'elemento nel lato sinistro della finestra, proprio sotto all'elemento Lavoro e vacanze che hai premuto prima.
Secondo le necessità di gestione dei costi, dividiamo le strutture dei costi nel modo seguente
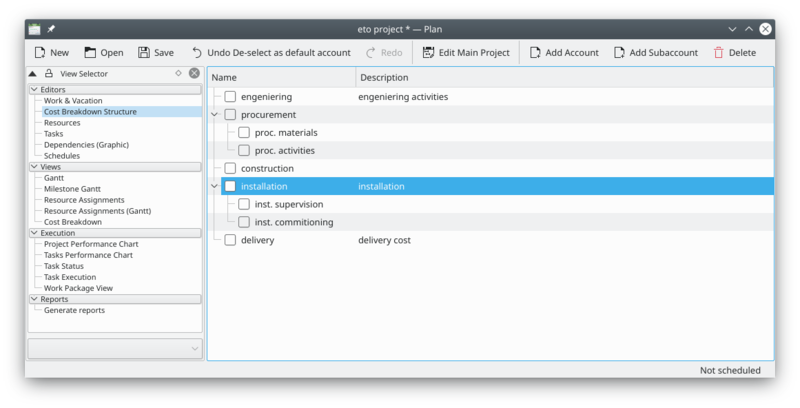
Utilizza le icone e per arrivare ad avere l'albero completo! Questo è il mio personale approccio a un progetto ETO legato alla mia esperienza personale.
Per esempio puoi avere un conto "dipendente diretto" per gestire il costo del tuo dipendente o puoi avere idea del costo dei tuoi fornitori non appena inserisci il loro lavoro utilizzando un conto dedicato.
Risorse
Dunque ora è tempo di definire il nostro gruppo di lavoro e il materiale!
Puoi accedere alla finestra delle risorse facendo clic sulla voce nella parte sinistra della finestra, appena sotto all'elemento Struttura funzionale dei costi premuto prima.
Le risorse sono organizzate in gruppi di risorse e risorse. Dunque prima inseriamo come risorsa il gruppo di persone facendo clic sull'icona per ogni elemento come mostrato sotto.
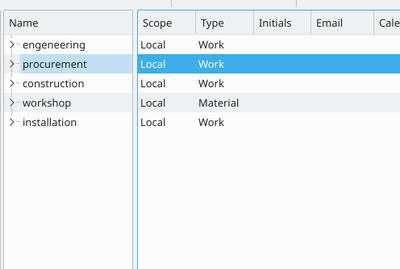
Appena completi il gruppo è tempo di inserire le persone e il materiale!
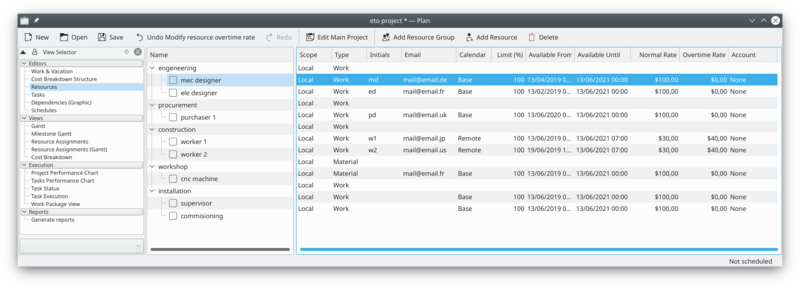
Risorse di lavoro
Ora è il momento di modificare ogni singola risorsa con lo scopo di definirla. Fai clic destro sul nome della risorsa per aprire la finestra Impostazioni della risorsa.
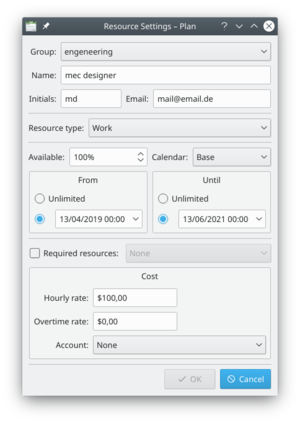
Quindi aggiungiamo le iniziali e l'indirizzo di posta elettronica, passiamo a , inseriamo il costo secondo necessità. Il conto è impostato su dato che in questo caso non addebitiamo il costo ad uno specifico conto dei costi.
Ricorda che le risorse dell'installazione ci sarà un calendario differente, "installazione", che abbiamo inserito prima!
Risorse del materiale
Abbiamo deciso di aggiungere i macchinari di laboratorio per considerare alcuni costi oltre al loro utilizzo.
A questo scopo tra le risorse aggiungiamo il laboratorio come materiale e un macchinario CNC oltre a un pacchetto di strumenti di montaggio.
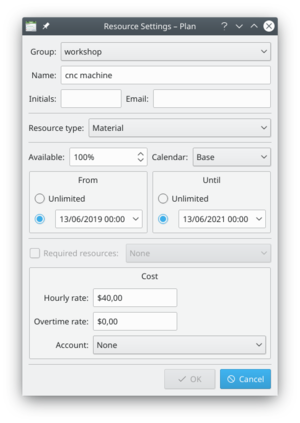
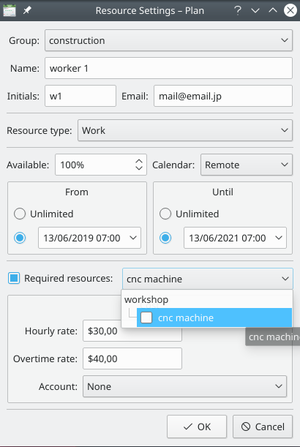
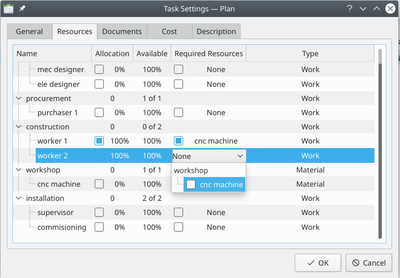
Preferenze per il calendario
Un'altra cosa interessante da notare è che utilizziamo diversi calendari per differenti risorse.
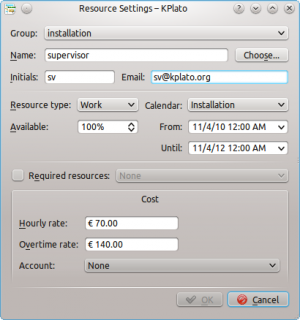
Il calendario dell'attività ha la precedenza su quello della risorsa. La data di disponibilità di una risorsa dipende in gran parte dalla possibilità che questa risorsa sia disponibile solo per un periodo di tempo. In questo caso abbiamo bisogno di essere sicuri che tutte le risorse siano disponibili dall'inizio alla fine del lavoro.
Il costo dello straordinario non è ancora implementato.
Attività
Ora è tempo delle attività!
You can access the task window clicking on the "task" item on the left side of the window, just under the resource item you pressed before.
We have to insert the following items:
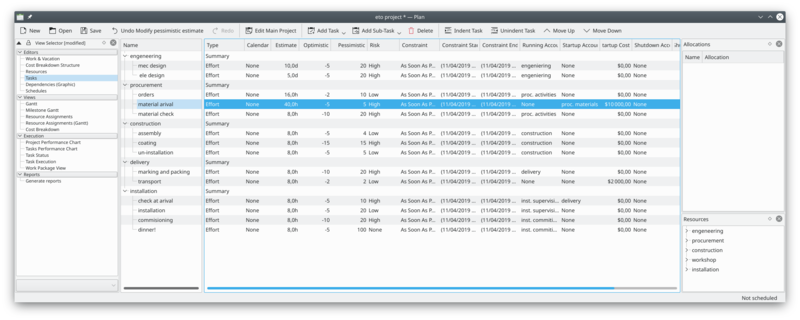
As we inserted the each name, we can edit each item right clicking the name. The following will appear on the first task:
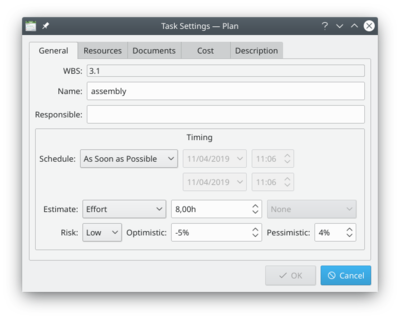
There are five tabs: General, Resources, Documents, Cost, Description.
On the General tab insert the name of the task, you can choose a responsible person if needed, then define the timing and the risk associated to the task. The schedule type is typical for planning, "as soon as possible" is the most used. Other kind of type, generate a need to compile the date and time on the right of the drop-down menu.
The estimate is the time required to complete the task, can be in different units: h (hours), d (days), w (weeks) and M (months).
The risk level as well as the optimistic and pessimistic timing will impact the calculation of the total project considering the PERT technique. In this case -5% and 20% are the value as well as the risk is considered "High".
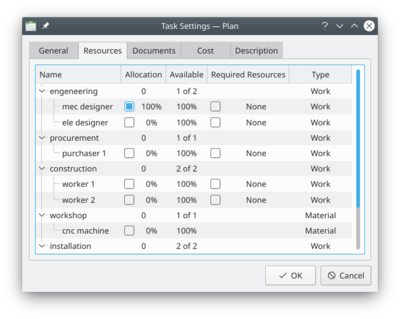
On the Resource tab, we choose the desired resource to be used as well as it's availability in % and eventual resources associated.
In the Document tab we can link documents pertaining to the task. Not used for our tutorial.
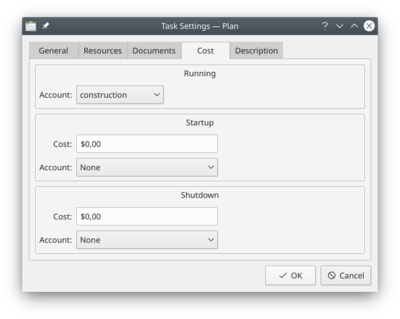
The fourth tab is the Cost tab. Here we can associate the running cost of the task to an account previously defined into the "Cost breakdown structure".
We can also choose to add startup and shutdown cost for the task, that can be associated to different account.
The last tab is the Description tab where we can insert our comments, mainly the list of the deliverables related to the task.
Dependencies
Now it's time to prioritize the activities! Let's click on the item on the left side of the main window.
So this is what should appear as soon as you open the right window.
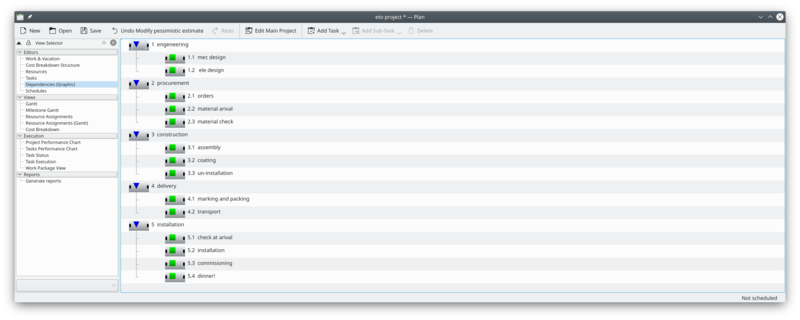
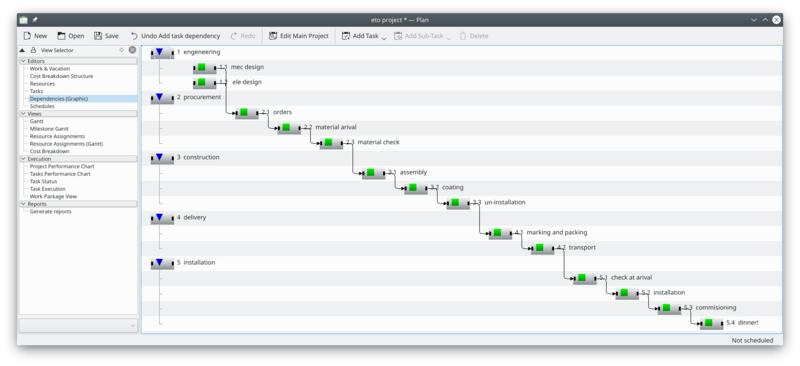
Let's start to give priority at the tasks in order to obtain a full list of dependencies. This can be done graphically with the mouse, clicking at the right or left side of the task and then drag the relative arrow to the desired position of the other task. It should be better to connect only the tasks and not the summary. The result should be like below.
Schedule
Wow, now it's time for schedule and prepare the baseline for the project!
Clicking on the left menu on the will bring you to the schedule activities!
Now we create a new schedule clicking on the button at the top of the window, then we choose a for the distribution type and then we click on button. As soon as the calculation is finished, press on button on the top of the window. The result will be like this:
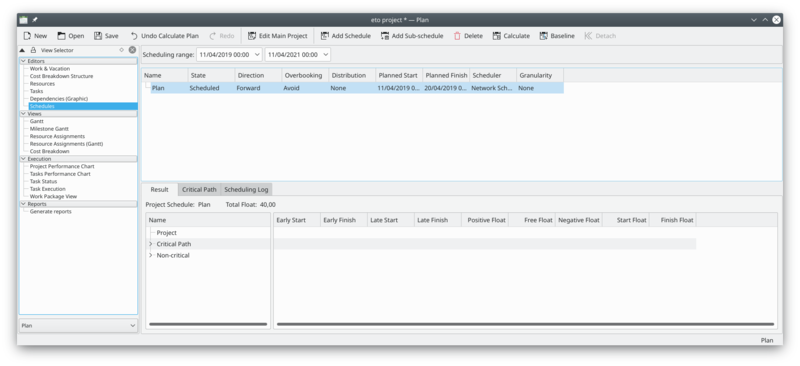
Here, for reference, is a copy from the KPlato manual of the field's definitions in the schedule
| Column | Description |
| Name | The name of the schedule. |
| State | The schedules state. Shows a progress bar during scheduling. |
| Direction | The scheduling direction.
If direction is Forward, the project is scheduled starting at the projects earliest start time specified in the main project dialog. If direction is Backward, the project is scheduled starting at the projects latest finish time specified in the main project dialog. |
| Overbooking | Controls resource overbooking when scheduling.
If overbooking is allowed, a resource may be booked (on working days) to work more than it is available. This can happen if the resource is allocated to multiple tasks or are booked on other projects. If overbooking is to be avoided, resources will not be booked more than they are available. On resource conflict, tasks will be delayed until the resource is available. |
| Distribution | The distribution to be used during scheduling.
If distribution is 'None', the tasks estimate is used as is during scheduling. If distribution is 'PERT', the estimate (E) used is calculated based on the entered optimistic- (O), pessimistic-(P) and most likely (M) estimate. The formula used for this is: E = (O + 4 * M + P) / 6. |
| Planned Start | The scheduled start time. |
| Planned Finish | The scheduled finish time. |
| Scheduler | The scheduler used for calculating the project schedule.
The default built-in scheduler is the Network Scheduler. Other schedulers presently available is RCPS if libRCPS is installed on your system. RCPS is a genetics based resource constrained project scheduler |
So now we have finished our planning activities for the project!!!


