Plan/Engineering To Order project tutorial/planning/it: Difference between revisions
Created page with "Aggiungiamo le tipiche ore lavorative per un lavoro di installazione. 10 ore al giorno da lunedì a sabato e 4 ore di domenica. In caso di necessità possiamo anche scegliere di ..." |
Created page with "Dunque a partire dalle 7 per 10 ore e poi facciamo clic su <menuchoice>Aggiungi</menuchoice> e quindi <menuchoice>OK</menuchoice>." |
||
| Line 72: | Line 72: | ||
Aggiungiamo le tipiche ore lavorative per un lavoro di installazione. 10 ore al giorno da lunedì a sabato e 4 ore di domenica. In caso di necessità possiamo anche scegliere di inserire l'orario di pausa. | Aggiungiamo le tipiche ore lavorative per un lavoro di installazione. 10 ore al giorno da lunedì a sabato e 4 ore di domenica. In caso di necessità possiamo anche scegliere di inserire l'orario di pausa. | ||
Dunque a partire dalle 7 per 10 ore e poi facciamo clic su <menuchoice>Aggiungi</menuchoice> e quindi <menuchoice>OK</menuchoice>. | |||
Repeat the same for the other days up to Saturday while for Sunday insert 4 hours from 8 in the morning. | Repeat the same for the other days up to Saturday while for Sunday insert 4 hours from 8 in the morning. | ||
Revision as of 17:32, 21 February 2011
La fase di pianificazione
Inizio
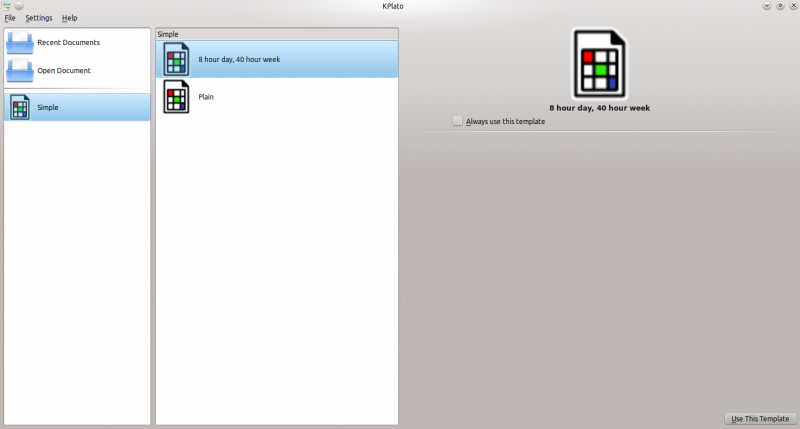
Quando apri il programma per la prima volta, comparirà la finestra sottostante.
Scegliamo il modello per iniziare.
Impostazione del progetto principale
Diamo quindi un nome e un responsabile al progetto e impostiamo alcune altre informazioni generali. Per far questo hai bisogno di fare clic sull'icona in alto a sinistra nella schermata. Comparirà quindi la seguente finestra:
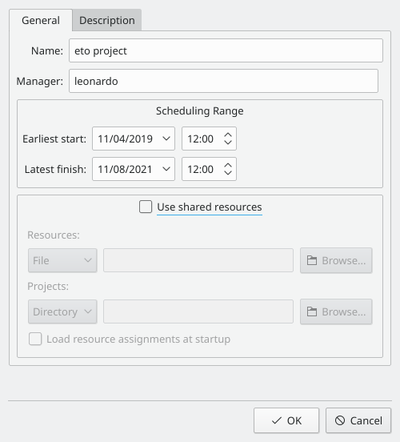
In questa finestra possiamo scrivere il nome del progetto, scegliere un responsabile da un elenco già presente nel sistema (se hai KDE e Kontact) o scrivere un nuovo nome secondo quello che ti è più comodo.
Gli obiettivi temporali Avvio iniziale e Termine ultimo sono utilizzati per pianificare il progetto. Vogliamo pianificare in avanti, dunque imposteremo avvio iniziale a quando vogliamo che il progetto abbia inizio e termine ultimo a quando il progetto dovrebbe finire. Se il progetto non può essere pianificato per essere terminato prima di questa data, verrà proposto un messaggio di avvertimento.
Nella parte inferiore della finestra può essere inserito un commento sul progetto. Questi dati verranno utilizzati per i resoconti o per altri scopi generali durante il periodo di lavoro.
Impostazione della valuta
Possiamo scegliere di lavorare con differenti valute. Come inglese è impostata su $, noi abbiamo bisogno di passare a €. Per far questo dobbiamo selezionare il menu e apparirà la finestra sottostante.
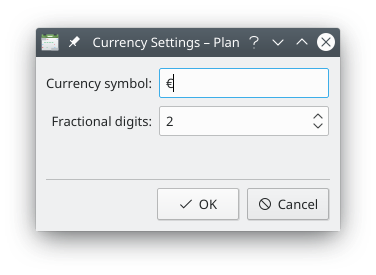
Modifica quindi il simbolo della valuta da $ a € e fai clic su dato che le altre impostazioni vanno bene.
Calendario di lavoro
Dai un'occhiata al calendario di lavoro e vacanze in Visualizza selettore nella parte superiore sinistra della finestra sotto il gruppo . Comparirà la seguente vista:
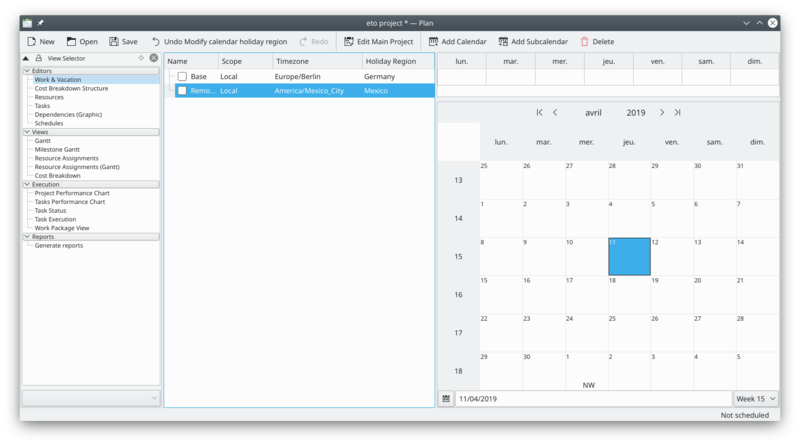
Al centro possiamo aggiungere diversi calendari per differenti fusi orari e settimane di lavoro. A destra è disponibile un calendario mensile, sulla parte in alto c'è la configurazione per le ore di lavoro settimanale, tipicamente 8 ore da lunedì a venerdì e giorni non lavorativi per sabato e domenica.
Aggiungiamo un nuovo calendario per i nostri scopi futuri facendo clic sull'icona , scriviamo poi come nome
Installazione
e come fuso orario scegliamo dal menu di selezione.

Ora abbiamo bisogno di selezionare il calendario installazione e di definire la relativa settimana lavorativa.
Nell'angolo a destra in alto del calendario ci sono alcuni spazi indicanti una tipica settimana di lavoro.

Fai clic destro su quello vuoto sotto l'indicazione Lunedì e comparirà un menu con la possibilità di scegliere tra , e .
Fai clic su e apparirà la seguente finestra
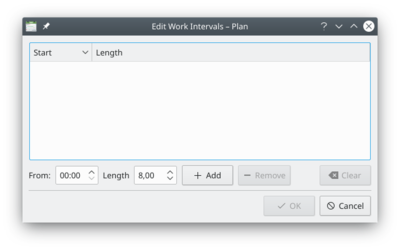
Aggiungiamo le tipiche ore lavorative per un lavoro di installazione. 10 ore al giorno da lunedì a sabato e 4 ore di domenica. In caso di necessità possiamo anche scegliere di inserire l'orario di pausa.
Dunque a partire dalle 7 per 10 ore e poi facciamo clic su e quindi .
Repeat the same for the other days up to Saturday while for Sunday insert 4 hours from 8 in the morning.
You can also select multiple days or weekdays by using Shift + LeftMouseButton or Ctrl + LeftMouseButton
We can also right click on a date in the calendar and doing the same considerations about the working and non working days or time. This is especially needed when you need to work with different holidays from yours!
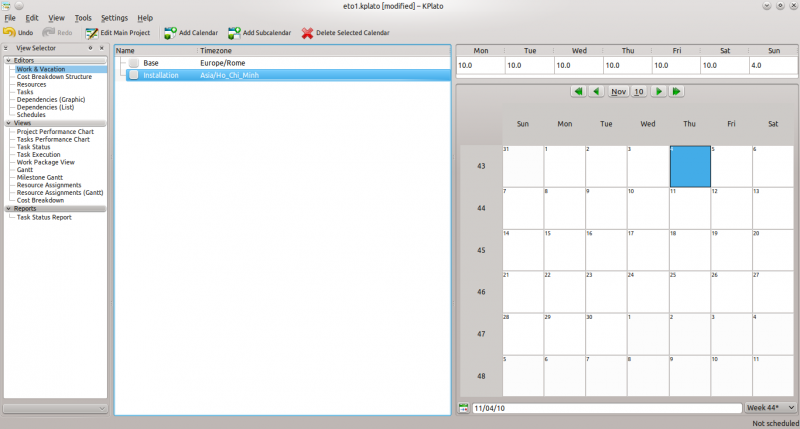
Anyhow, the final result should be similar to the below image.
Cost breakdown structure
Here we define which will be the cost centres we wish to use in the project. We can have different groups and subgroups.
Click on the item on the left side of the window, just under the work and vacation item you pressed before.
As per costs managing needs we divide the structures of the costs in the following way
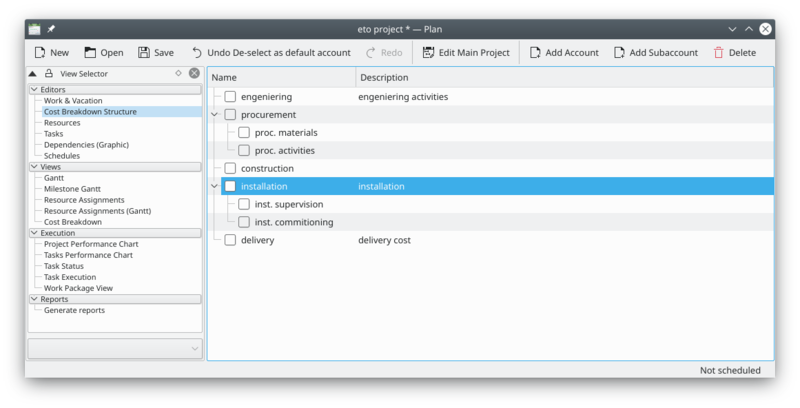
Play with the and icons to reach the full tree! This is a personal approach for a complete ETO project due to my experience.
For example you can have a "direct employee" account to manage the cost for your employee, or to have an idea about the cost of your suppliers using a dedicated account as soon as you insert their work.
Resources
So, now it's time to define our team and the material!!
You can access to the resources window clicking on the item on the left side of the window, just under the cost breakdown structure item pressed before.
The resources are organized as resource groups and resources. So, first we insert the team group as resource group clicking on the icon for each item as below.
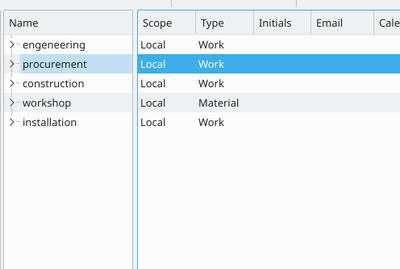
As soon as you complete the group it's time to insert the people and the materials!
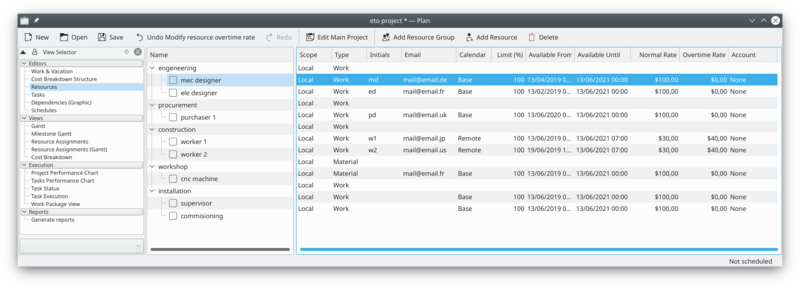
Work Resources
Now it's time to edit each single resource for the purpose to define it. Right click on the resource name to open the resource setting window.
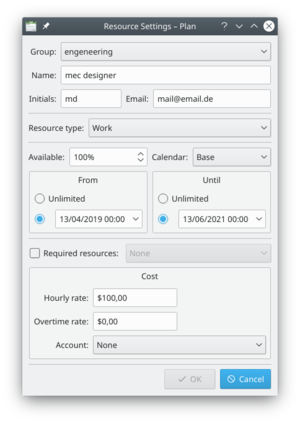
Therefore we add the initials and the email address, switch the calendar to , insert the cost as per need. The account is set to as in this case we do not charge the cost to a specific cost account.
Remember that for the installation resources there will be a different calendar, the "installation", that we inserted before!
Material Resources
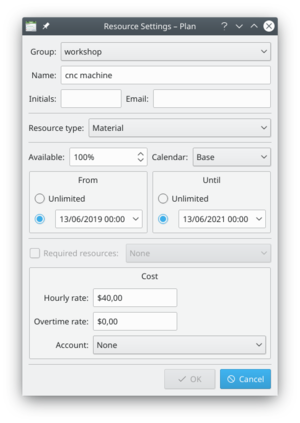
We decided to add the workshop machines to consider some costs as well as their use.
For this purpose in the resource we add the workshop as a material and a CNC machine as well as assembly tools package.
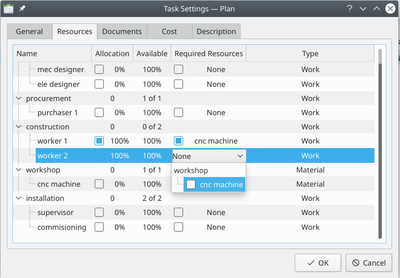
Calendar preference
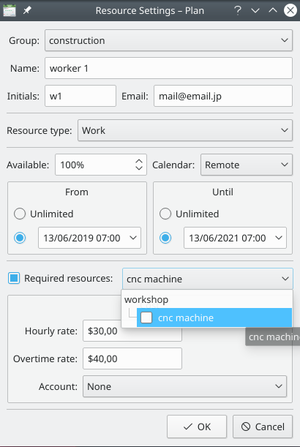
One other interesting thing to note is that we use different calendars for different resources.
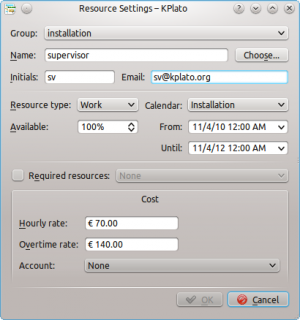
The calendar on the task has the precedence on the resource's calendar. The availability date for a resource largely depend if this resource is available only for a period of time. In this case we need to be sure that all the resources are available from the beginning to the end of the job.
Overtime rate is not yet implemented.
Task
Now it's tasks time !!!!
You can access the task window clicking on the "task" item on the left side of the window, just under the resource item you pressed before.
We have to insert the following items:
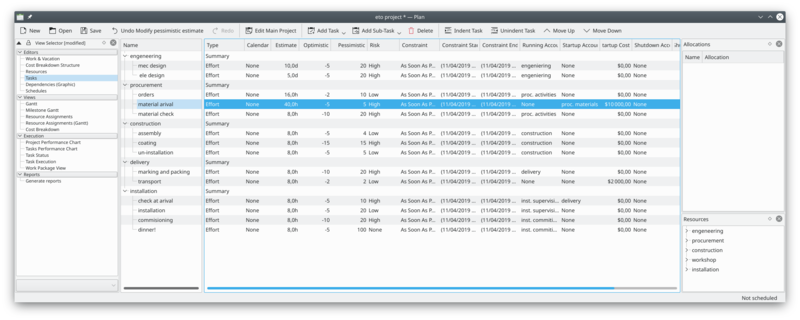
As we inserted the each name, we can edit each item right clicking the name. The following will appear on the first task:
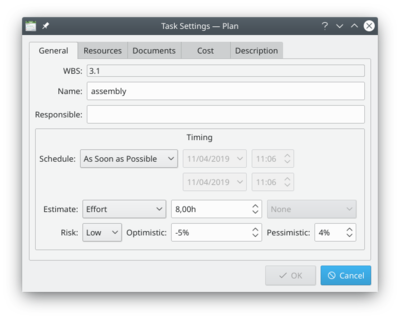
There are five tabs: General, Resources, Documents, Cost, Description.
On the General tab insert the name of the task, you can choose a responsible person if needed, then define the timing and the risk associated to the task. The schedule type is typical for planning, "as soon as possible" is the most used. Other kind of type, generate a need to compile the date and time on the right of the drop-down menu.
The estimate is the time required to complete the task, can be in different units: h (hours), d (days), w (weeks) and M (months).
The risk level as well as the optimistic and pessimistic timing will impact the calculation of the total project considering the PERT technique. In this case -5% and 20% are the value as well as the risk is considered "High".
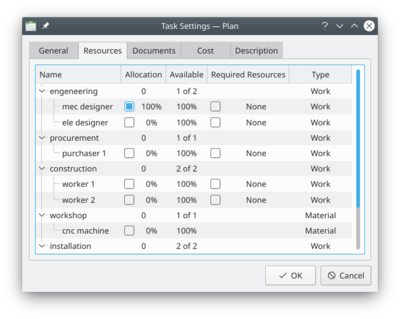
On the Resource tab, we choose the desired resource to be used as well as it's availability in % and eventual resources associated.
In the Document tab we can link documents pertaining to the task. Not used for our tutorial.
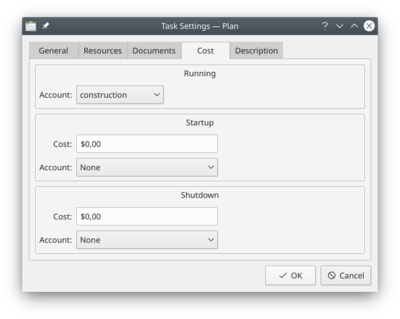
The fourth tab is the Cost tab. Here we can associate the running cost of the task to an account previously defined into the "Cost breakdown structure".
We can also choose to add startup and shutdown cost for the task, that can be associated to different account.
The last tab is the Description tab where we can insert our comments, mainly the list of the deliverables related to the task.
Dependencies
Now it's time to prioritize the activities! Let's click on the item on the left side of the main window.
So this is what should appear as soon as you open the right window.
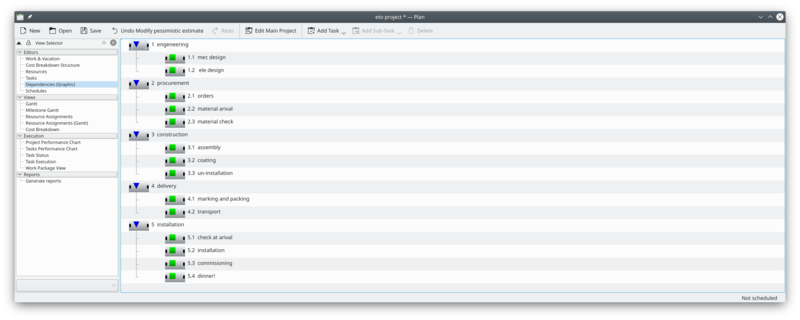
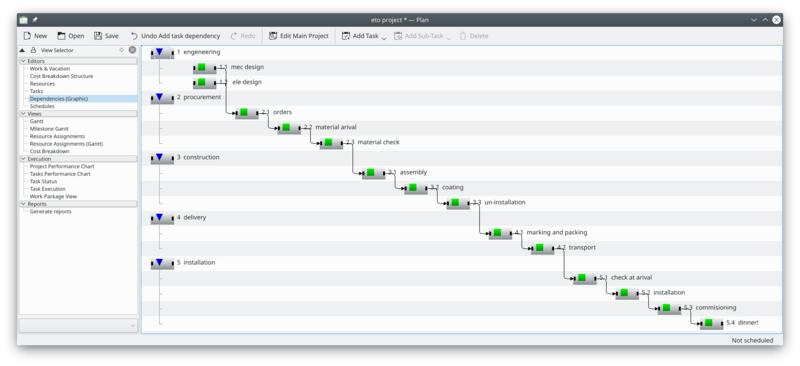
Let's start to give priority at the tasks in order to obtain a full list of dependencies. This can be done graphically with the mouse, clicking at the right or left side of the task and then drag the relative arrow to the desired position of the other task. It should be better to connect only the tasks and not the summary. The result should be like below.
Schedule
Wow, now it's time for schedule and prepare the baseline for the project!
Clicking on the left menu on the will bring you to the schedule activities!
Now we create a new schedule clicking on the button at the top of the window, then we choose a for the distribution type and then we click on button. As soon as the calculation is finished, press on button on the top of the window. The result will be like this:
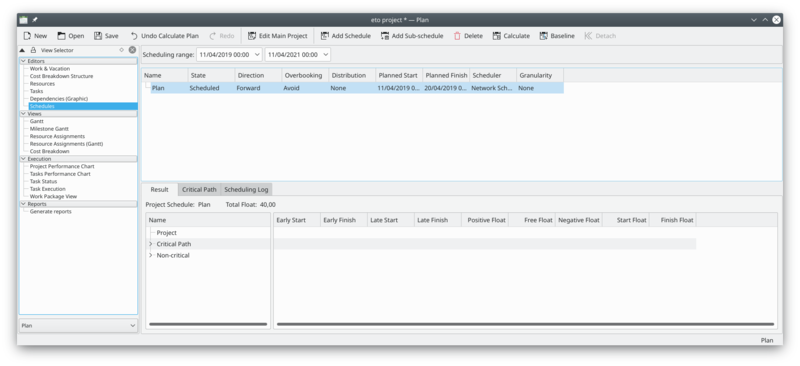
Here, for reference, is a copy from the KPlato manual of the field's definitions in the schedule
| Column | Description |
| Name | The name of the schedule. |
| State | The schedules state. Shows a progress bar during scheduling. |
| Direction | The scheduling direction.
If direction is Forward, the project is scheduled starting at the projects earliest start time specified in the main project dialog. If direction is Backward, the project is scheduled starting at the projects latest finish time specified in the main project dialog. |
| Overbooking | Controls resource overbooking when scheduling.
If overbooking is allowed, a resource may be booked (on working days) to work more than it is available. This can happen if the resource is allocated to multiple tasks or are booked on other projects. If overbooking is to be avoided, resources will not be booked more than they are available. On resource conflict, tasks will be delayed until the resource is available. |
| Distribution | The distribution to be used during scheduling.
If distribution is 'None', the tasks estimate is used as is during scheduling. If distribution is 'PERT', the estimate (E) used is calculated based on the entered optimistic- (O), pessimistic-(P) and most likely (M) estimate. The formula used for this is: E = (O + 4 * M + P) / 6. |
| Planned Start | The scheduled start time. |
| Planned Finish | The scheduled finish time. |
| Scheduler | The scheduler used for calculating the project schedule.
The default built-in scheduler is the Network Scheduler. Other schedulers presently available is RCPS if libRCPS is installed on your system. RCPS is a genetics based resource constrained project scheduler |
So now we have finished our planning activities for the project!!!


