KMail/Backup Options: Difference between revisions
m Fix minor typos |
m Updated to current version |
||
| Line 87: | Line 87: | ||
<!--T:27--> | <!--T:27--> | ||
* | * {{menu|Settings|Configure KMail ...|Accounts [Tab]|Receiving [Tab]|Modify [Button]}} | ||
<!--T:30--> | <!--T:30--> | ||
| Line 99: | Line 94: | ||
<!--T:31--> | <!--T:31--> | ||
This dialog | This dialog can be shown for each of your configured accounts including '''Local Folders''' and you will need to configure all accounts that you wish to use this feature with. | ||
<!--T:32--> | <!--T:32--> | ||
Revision as of 10:38, 9 October 2020
Backup Options ...
Several backup options within KMail, the email application from KDE.
Manual Archiving
Or the context menu launched with a right mouse button, then select This will open a dialog that allows you to create a single archive of the currently selected folder. The archive file name will consist of the prefix Archive_, the path of the selected folder in KMail's folder list, the date in format year-month-day and the selected file extension e.g. Archive_Local Folder_inbox_2013-09-03.tar.bz2.
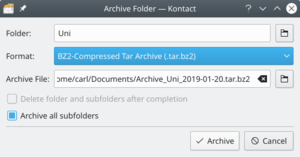
The text box Folder: shows the currently selected folder, if you wish to change the folder to be archived click the ![]() icon.
icon.
The drop down menu allows you to choose a format (choices are: zip, tar, tar.bz2, and tar.gz).
If you would like to change the default name or location, click the icon ![]() at the end of .
at the end of .
Check the if you would like everything you archived deleted.
By default all sub-folders will be archived, deselect if you only want to archive the parent folder.
Automatic Archiving
Since KDE 4.12, you can configure automatic archiving of a KMail folder.
This is a powerful tool that can be used to assist in backing up your email automatically. The archive file name will consist of the prefix Archive_, the path of the selected folder in KMail's folder list, the date in format year-month-day and the selected file extension e.g. Archive_Local Folder_inbox_2013-09-03.tar.bz2.
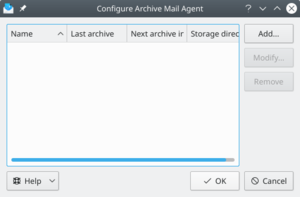
First, select the folder you would like to archive by clicking the button.
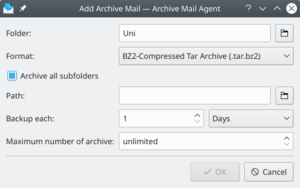
Select the format you would like to save it in. e.g. .tar.bz2 in the drop down list.
By default is enabled. Deselect this if you only want the parent folder archived.
You can type in the location you would like to save your archive, or click the ![]() button (Open File Dialog) to select the folder.
button (Open File Dialog) to select the folder.
Select how often you wish to backup through the drop down menus next to .
- If you are limited on drive space you will want to set a limit on Maximum number of archive.
- If you have added or modified an archive job it will be executed automatically after closing the dialog.
- If you have already added mail archive jobs the Configure Archive Mail Agent dialog will list and allow to modify them.
You can use the check box at the left of each entry in the list to enable or disable archiving of this job.
Using the context menu launched with a right mouse button click on an archive job you can open the folder containing the archives or start the archive job immediately.
- → → → →
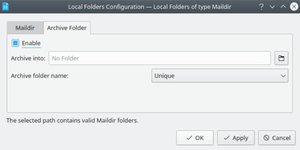
This dialog can be shown for each of your configured accounts including Local Folders and you will need to configure all accounts that you wish to use this feature with.
The first option allows you to enable/disable the folder archive agent. It is disabled by default, to enable check the check box.
You can set the location of your Archive folder by clicking the ![]() icon next to and selecting the folder you wish to use.
icon next to and selecting the folder you wish to use.
For example, you could create a folder called “bill receipts” by clicking the and typing bill receipts in the dialog. You may choose a folder location anywhere, e.g... a folder in your Local Folders or on your IMAP server.
You have several choices on how the emails will be archived:
- - Uses the selected folder sorted by date.
- - Creates new folders inside the selected folder by months.
- - Creates new folders inside the selected folder by years.
Now when you receive a bill receipt, right mouse button the email and select from the menu. The email will be archived into your configured archive folder for easy viewing later on.
Exporting
Or pimsettingexporter can be run as a standalone application by running pimsettingexporter in the application launcher.
This feature exports settings and local mail to a compressed file.
Backing up is an essential practice for all users. PIM Setting Exporter is a great tool for backing up or moving all of your settings and email to a new installation. You also use PIM Setting Exporter to import previous backups.
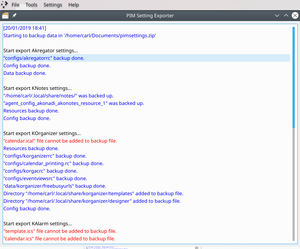
To perform a backup, select , it will prompt you to close all kdepim applications.
Once you have closed them, click to continue, or to cancel.
You will be prompted to create a backup name, enter the name into the textbox, e.g. mymailsettings.
The default file type it saves as is .zip, if you want a different type, deselect and append the extension to the end of your file name.
The next screen will allow you to select what you wish to backup, by default everything is selected.
The final screen shows the log of the backup process. You can close the window once you have reviewed the log and verified your backup was successful.
To restore your backup, select within pimsettingexporter.


