Kdenlive/Manual/時間軸
Appearance
時間軸

時間軸位於 Kdenlive的中心部分。它由四部分組成。(請看畫面截圖)。
- 1 - 影音軌調整大小功能。這兩個圖示允許您增加或減少影音軌的高度。預設的高度可以在 Kdenlive's Settings 對話盒裏設定。
- 2 - Timeline ruler. This shows the time in frames or in hh:mm:ss notation. The area highlighted in green is called the selection zone, and is useful if you want to render only a part of your project. Left clicking in the timeline ruler will move the timeline cursor and seek to that position. The Timeline ruler context menu allows you to manage Guides.
- 3 - Track header. This box shows some options for a track. First is the track name (Video 2 in the screenshot). That name can be changed by simply clicking in it. Below are icons to (prevent adding / removing clips), , and from this track. Right clicking in the track header will give you a context menu allowing to manage (add / delete) tracks.
- 4 - The track itself, this is where you can drop your clips.
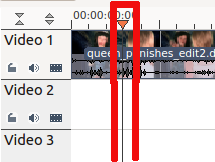
Timeline Cursor/Position Carat/Playhead
This indicates the position we are displaying in the Project Monitor. You can scroll the position by dragging the Timeline cursor (aka Position Carat or Playhead).
With version 0.9.4 dragging the timeline cursor will play the audio of the clip (a.k.a. Audio Scrubbing). This feature only works if you have checked "use Open GL for video playback" in Settings>Configure_Kdenlive>Playback
Tracks
The timeline is made of tracks. There are two kind of tracks: audio and video. The number of tracks is defined when creating a new project in the Project Settings Dialog. Adding a clip in timeline can be achieved by dragging it from the Project Tree or the Clip Monitor.

