KWord/1.5/Manual/Characters
Formatting Characters
Mike McBride
This section will cover the changes that can be made to individual characters or blocks of characters including:
- Character size
- Font
- Font style (italic, bold, etc).
- Underlines, superscript, subscript, strikeout, etc.
- Character color and background color.
- Character case.
Changing Size, Font, Font Style, Text color and Background Color
Using the Keyboard or toolbars
There are several keyboard shortcuts which you can use to make common changes to character formatting. After selecting the text, you can use these key combinations to toggle each attribute.
The Format toolbar also has buttons which you can use to toggle these same attributes.
The following table details each attribute, the toolbar buttons and the keyboard shortcuts.
- You cannot change the all text attributes using the keyboard or a button on a toolbar. For these attributes, you must use the dialog box.
Using the Dialog Box
If you have many changes to make, you can also use a dialog box to set these same attributes.
You can open the Select Font dialog box in one of three ways:
- Select Format->Font... from the menubar.
- Click on the selected text with the right mouse button. A small menu will appear. Select Font... from the menu.
- You can use the keyboard shortcut: Alt-Ctrl-F
Either method will open a dialog box
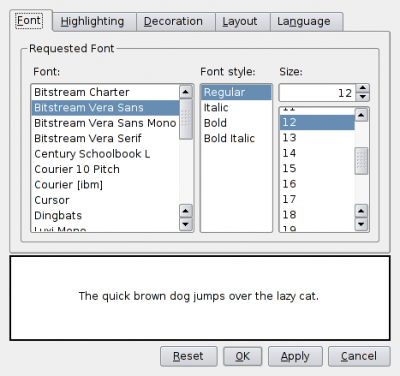
Using this dialog box, you can select the font, size, italics and boldface options from the top three list boxes.
The preview box along the middle of the dialog, will show you how your current settings will appear.
- If the default preview string is not appropriate, you can change it by clicking once inside the preview box with the left mouse button. A text cursor will appear. You can edit the text to suit your needs.
- The sample sentence will revert to the default the next time you open this dialog.
If you click the tab labeled Highlighting, the dialog changes to:
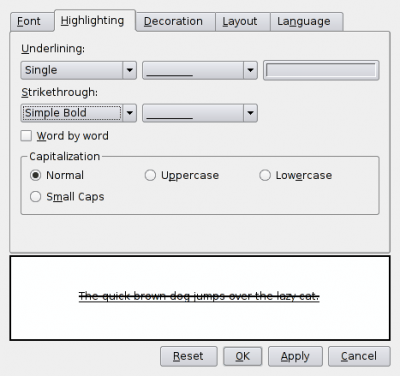
The subsection labeled Underlining: has two combo boxes and a color selector box. In the left most combo box select between no underline (None), Single, Simple Bold, Double or Wave underlining.
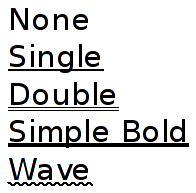
Use the center combo box to select the style of underlining (Solid line, dashed line, etc.).
Use the right color selector box to select a color for the underline using the color selection dialog box.
The subsection labeled Strikethrough: has two combo boxes. Use the left combo box to select between no strikethrough (None), Single, Double or Simple Bold strikethrough. Use the right combo box to select the line style.
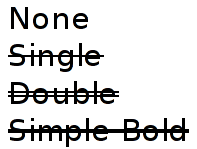
The checkbox labeled Word by word determines how underlining and strikethrough are drawn.

The section labeled Capitalization lets you select one of four special capitalization options. This will change the capitalization of the selected text. Examples of each scheme are shown below.

- The changes to capilalization will only affect the selected text at the current moment. This formatting is not enforced after closing the dialog box.
The third tab labeled Decoration allows you to change the color of the font, change the background color and create artificial shadows for your characters. Click on the tab:
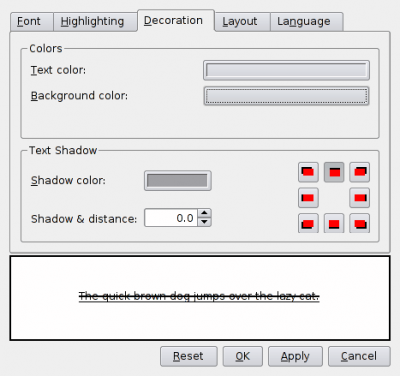
Using the buttons labeled Text color: and Background color: you can change the color of the text or the background behind the text.
To create the illusion of a shadow behind your text, select the color you want your shadow by clicking the button labeled Shadow color:. Then select the distance between the shadow and the text using the spin box labeled Shadow & distance:. Finally, select the direction of your shadow by selecting one of the eight red squares. A preview of your shadow appears at the bottom of the dialog box.
The fourth tab labeled Layout allows you to create superscripts and subscripts. It also lets you select automatic hyphenation on a character by character basis.
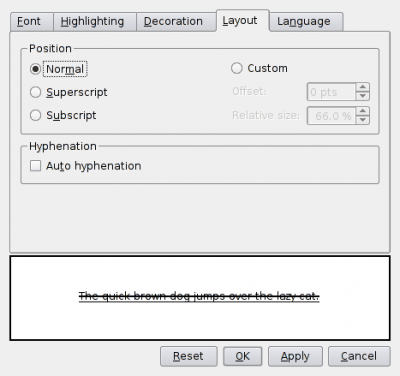
The section labeled Position has four radio buttons and two spin boxes. SelectingNormal, produces text of normal height and at the normal vertical position. Selecting Superscript or Subscript will convert the currently selected text. If you select Custom, you can use the spin box labeled Offset: to move the selected text up or down relative to normal text alignment. Look at the example below:

Notice how a positive offset raises the text, and a negative offset lowers the text.
You can also use the spinbox labeled Relative size: to make the selected font larger or smaller.
The checkbox labeled Auto hyphenation is used to toggle automatic hyphenation on or off for the selected text.
The fifth tab labeled Language allows you to change the language. Click on the tab:
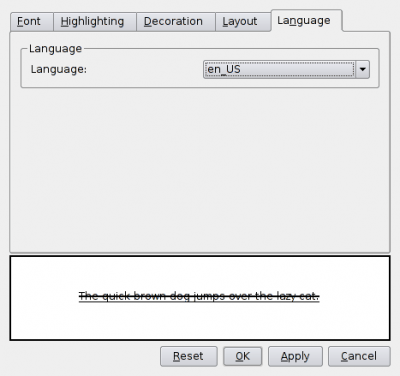
You can select the language to use on the selected text with the drop down box. If the selected text allows for automatic hyphenation, KWord will use general rules of spelling for the selected language to automatically hyphenate the selected text.
Clicking OK will commit your changes to the document and close the dialog box.
Clicking Apply will commit your changes to the document but keep the dialog box open.
Clicking Reset will restore the default settings to the selected text.
Clicking Cancel will abort all changes made.
Changing Font Case
KWord can change the case (uppercase or lowercase) of large blocks of text to one of five pre-defined styles. Begin by selecting the block of text you want changed. Select Tools->Change Case... from the menubar.
A small dialog box will appear with five options:
Uppercase
- Will convert all characters to uppercase.
- Example: KWORD WILL AUTOMATICALLY CHANGE CASES.
Lowercase
- Will convert all characters to lowercase.
- Example: kword will automatically change cases.
Title case
- Will capitalize every word.
- Example: Kword Will Automatically Change Cases.
Toggle case
- Converts all lowercase letters to uppercase and converts all uppercase letters to lowercase.
Sentence case
- Capitalizes the first character after a period.
When you have selected the desired options click OK and KWord will make the changes.
| Prev | Contents | Next |
| Using Tab Stops | Text Styles |


