Kopete/Jabber/Useful configuration hints/es: Difference between revisions
(Created page with "thumb|center|300px|Genenera una clave OTR") |
(Created page with "Esto puede comar un tiempo y tendrás que esperar hasta que Kopete termine. Después de esto, cierra la ventana de OTR pulsando en <menuchoice>Aceptar</menuchoice> y <menuchoice>...") |
||
| Line 32: | Line 32: | ||
Esto puede comar un tiempo y tendrás que esperar hasta que Kopete termine. Después de esto, cierra la ventana de OTR pulsando en <menuchoice>Aceptar</menuchoice> y <menuchoice>Aplica</menuchoice> los cambios. Es probable que tengas que reiniciar Kopete después de esto. Luego abre una ventana de charla con el contacto con el que te quieras comunicar de forma segura. Ve a <menuchoice>Herramientas -> Preferencias OTR -> Comenzar sesión OTR</menuchoice> o usa el icono <menuchoice>Codificación OTR -> Comenzar sesión OTR</menuchoice>. Kopete iniciará la sesión si tu contacto es capaz de usar OTR, de lo contrario recibirás un mensaje de error. | |||
Revision as of 21:43, 1 January 2011
Todas estas sugerencias se refieren a la ventana principal de configuración de Kopete que reside en . Asegúrate de hacer clic en o si quieres que se guarden los cambios.
Todos los ajustes que afectan a la configuración de tu cuenta y la configuración de varias cuentas en Kopete (Jabber/XMPP, así como ICQ, MSN y muchos otros protocolos de mensajería) se encuentran en la pestaña . Si quieres establecer tu información personal o quieres usar una foto de contacto, haz clic en y haz los ajustes. Puedes subir una fotografía haciendo clic en el pequeño icono de la parte inferior izquierda del área de la imagen.
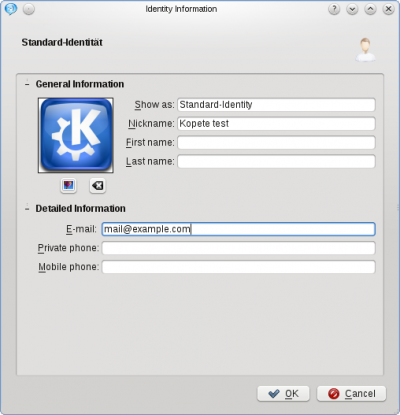
La siguiente pestaña de la lista vertical de la izquierda es . Estos ajustes se explican por sí mismos en su mayoría y parece útil activar . Las otras tres pestañas horizontales (, y ) incluyen opciones especiales que quizás quieras ajustar cuando hayas usado Kopete durante unas semanas.
Las configuraciones de te permiten ajustar tus mensajes de estado predeterminados cuando estás disponible, ausente, invisible, etc
Clicking on opens a quite detailed set of configuration. The most interesting ones, that can be found in the tab are and . The first one decides if incoming messages from your contacts open instantly a new window or if they are queued until you open Kopete yourself. The second one tells Kopete if it shall go online when you start the program. When you set this, you are always available for your contacts once you run Kopete. The tab lets you set in what cases Kopete notifies you via your computer's notification system (in most cases KNotify). When you want Kopete to set your status automatically to "Away", open the tab and enable the first checkbox. You can set the time that has to pass after your last action (keyboard input or mouse movement) that Kopete will set you as "away". The default value is 10 minutes. Options located in are again self-explanatory and already set to useful values.
The next item in the vertical row on the left is . The first tab in there, , can be used to set another appearance than the default one. You can also install your own styles or download new ones from the Internet by clicking on . When you type in an Emoticon during a conversation, Kopete will convert it into a graphical emoticon by default. To disable this feature or to use another set of emoticons go to . The last tab, is again self-explanatory and configures these preferences of your chat window.
Las Webcams son compatibles con Kopete, pero en este momento (Noviembre de 2010) todavía hay algunas dificultades relacionadas con las videoconferencias, por lo que los cambios en las opciones de se deben hacer bajo tu propia responsabilidad, ya que es bastante posible que no funcionen de la forma adecuada. Los foros de KDE pueden ser de ayuda al tratar con temas de cámaras web.
Complementos
Una característica muy potente de Kopete es la capacidad de usar complementos. Hay un conjunto de complementos pre-instalados (puedes instalar nuevos utilizando, por ejemplo, el gestor de paquetes de tu distribución Linux) y pueden ser activados y configurados desde . Puedes activarlos marcando la correspondiente casilla. La mayoría de ellos se explican por sí mismos, pero de todas formas los más útiles se explicarán aquí. Un complemento muy útil es el . Con esta opción activada, Kopete registrará todas tus charlas y las escribirá en el disco duro. Puedes leerlas en tu ventana de chat, seleccionando el icono o abriéndolo desde .
OTR
Uno de los complementos más importantes en lo que respecta a la privacidad es OTR. Este software encripta toda la conversación de un extremo al otro y hace imposible que terceras personas puedan leer tu conversación. Después de activar el complemento, tienes que abrir sus opciones (haz clic en el icono de la llave inglesa) y una clave.
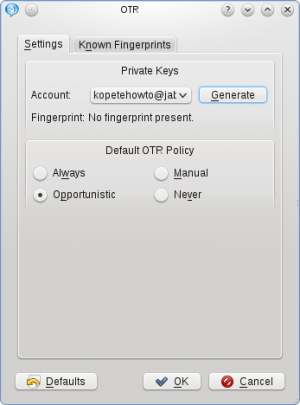
Esto puede comar un tiempo y tendrás que esperar hasta que Kopete termine. Después de esto, cierra la ventana de OTR pulsando en y los cambios. Es probable que tengas que reiniciar Kopete después de esto. Luego abre una ventana de charla con el contacto con el que te quieras comunicar de forma segura. Ve a o usa el icono . Kopete iniciará la sesión si tu contacto es capaz de usar OTR, de lo contrario recibirás un mensaje de error.
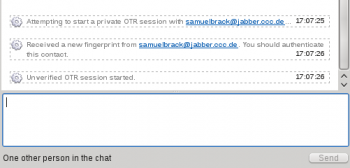
To ensure your added contact is really the one he or she is pretending, it's necessary to authenticate him or her one time. You can do this by calling . You may choose between three options:
- The first one is to ask your chat partner a question whose answer can only be known by him or her and you.
- The next possibility is a secret passphrase your partner has to know (you may consider giving the secret to him or her via another secure communication channel, e.g. telephone).
- Thirdly, there's the option of manually checking the OTR fingerprint. This is the most secure option, but it's not very handy and if you can choose one of the others it may be more comfortable and faster. When checking the fingerprint, you have to ask your partner for his or her OTR fingerprint over a secure connection (e.g. telephone or encrypted E-Mail) so that the fingerprint can be checked.
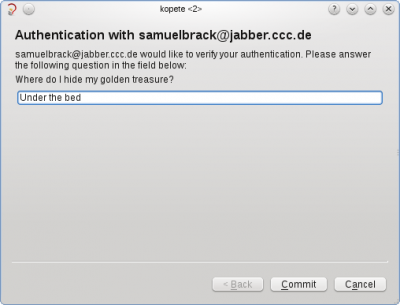
Let's assume we choose option one and ask our partner a question. Type it into the field and define the expected answer your partner has to give, so that he or she can be authenticated.
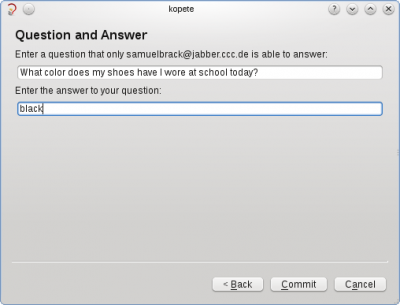
When we continue, your partner will see the question and if the answer is correct, OTR is set up ready now.
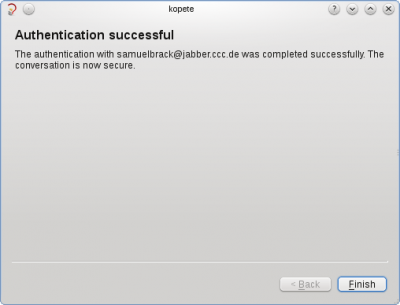
Your partner may do the same thing in return, so when you see a window asking you for authentification just answer the question and you are an authentificated user in your friend's contact list, too.
Every time you communicate safely, you'll see the green armored keylock icon at the top of your chat window. To finish the secure connection, you can either close your chat window or click on .
- ← Volver al índice
- Kopete/Jabber/Useful configuration hints/es
- Página 8 - Más información sobre Kopete →
