Digikam/Windows/es
Instalación de digiKam en Windows
Reproducido del blog por Dmitri Popov, 2010/11/21
Si quieres instalar digiKam en Windows, tienes dos opciones: puedes compilar la aplicación desde el código fuente o puedes usar el Instalador de KDE para Windows. El último enfoque es de lejos el más fácil, pero tiene un inconveniente: el instalador normalmente incluye una versión antigua de digiKam. Si puedes vivir con eso, y no te apetece ensuciarte las manos compilando digiKam desde las fuentes, entonces el Instalador de KDE es el camino a seguir.
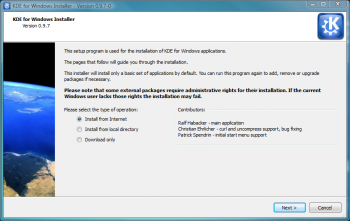
First off, create a new KDE directory on your hard disk, grab then the KDE installer from the KDE on Windows project’s Web site, and move it into the created directory. Launch the installer, select the option, and press .

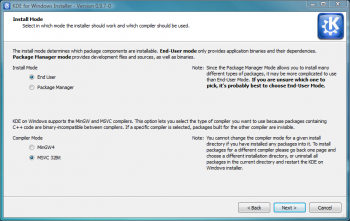
In the field, enter the path to the KDE directory, and press . Select the option in the section, and from the section.

Keep the settings in the next several screens at their defaults. When you reach the screen, choose the www.winkde.org server, since it offers the newest as well as older versions of the KDE bundle. Press and find the version of KDE that contains the digiKam and kipi-plugins packages. Select then both packages, and press . Hit the button once again, and the installer does the rest. Wait till the installer has finished downloading and installing the software, press the button, and you are done. Now you can launch and use digiKam as any other Windows application.
