User:Claus chr/DPL/Test
Testing DPL
<DPL>
  namespace=Main |User
  nottitleregexp = .*(/..(.|-..)?|_[(].*[)])$
  titlematch = A%|B%|C%|D%|E%|F%|G%|H%|I%|J%
  include = *
  includematch = #\[[Cc]ategory:#
  includemaxlength = 0
  resultsheader = The pages in the translation containing a category statement (A-J): %TOTALPAGES%\n
  format = ,\n* [[%PAGE%|%TITLE%]],,
</DPL>
The pages in the translation containing a category statement (A-J):56096
KDE Applications Catalogue

The KDE community ships over a hundred applications for almost every need and interest. There are applications for viewing and editing images as well as organizing your photo collection. There are programs for playing videos and managing your music collection. There are also educational programs for students and teachers, as well as games to entertain you for hours. KDE's software compilation even comes with its own office and productivity suites!
And if that's not enough, there are literally hundreds of applications that are available from KDE-Apps.org for you to try out and use.
You may also find what you need in the table of equivalent applications.
The Desktop

These applications provide the core functionality of a basic Desktop, giving you the power to manage and customize your desktop to your liking. These are probably the most common programs you'll be using for day-to-day tasks.
Internet & Networking

No computer is an island these days. KDE presents some apps that let you receive and send data to other computers, whether it be on the Internet or on a local network, giving you access to the world.
Graphics & Imaging

If a picture is worth a thousand words, then hundreds of images would say millions. KDE provides programs that let you view and manage your images and photos, view different kinds of documents, as well as to create your own images.
Multimedia

Transform your desktop into a mini-media center. Play your music, watch your videos, manage your collections, or back them up on CDs and DVDs. Liven up your experience with KDE's multimedia selection.
Office & Productivity

Get organized with KDE software! With a standards-compliant office, productivity and groupware applications, as well as other useful tools, KDE software helps you take control not only of your computer, but your life and work as well.
Education

KDE software isn't only for the big guys and gals. Whether it be in between atoms, or across the globe, or even beyond the stars, our software helps strive for a brighter future with a whole bunch of educational applications for kids and students, as well as aids for teachers and parents.
Science

Plotting data, graphing, simulations and information systems - we have them all
System Administration

Be the king or queen of your own castle as KDE gives you the tools to be the master of your own computer. From system monitors to consoles to system settings, KDE lets you take control.
Utilities & Tools

KDE provides dozens of tools that add value to your desktop. They may not be big or sophisticated, but these utilities are a class of their own, providing convenience and power to your everyday computing.
Games & Toys

All work and no play makes for a stressful life. That's why KDE provides a variety of games to keep you entertained and even occupied for hours. Pick a card, avoid bouncing balls, or even conquer the world, all from the convenience of your computer. Be careful though, you might become addicted.
Development & Programming

A Free Software project such as the KDE Software Compilation wouldn't be complete without tools to create software. The rich software ecosystem includes applications to make programmer's lives a lot easier, from simple file comparison tools to a full-blown Integrated Development Environment.
Accessibility

The KDE community cares for its users, whatever age, gender, race, or physical condition. It provides tools, both built-in utilities and standalone applications that enable people with physical handicaps to still be able to use their computers easily and efficiently.
Welcome!
Welcome to the KDE community and to the UserBase wiki. Whether you are completely new to KDE software, a previous user or a current fan, these pages will help you learn more about both the KDE community and its software, as well as assist you in getting started. But first, something to whet your appetite!
Here's an example of a KDE desktop. Please take note that it may look differently depending on your version of the software, and distribution. As an example, here is a screenshot of a Plasma Desktop and the latest version of KDE Frameworks 5:
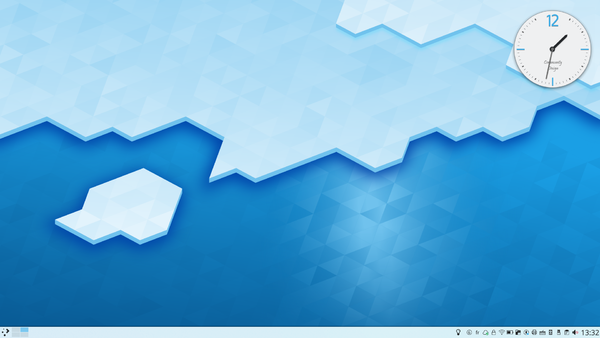
You can see more screenshots of current and previous releases in the Screenshots page.
Let's Go!
Now that we've got your attention, it's time to get to know KDE, up close and personal.
- What is KDE? - Get to know what KDE is (and some other interesting things)
- Quick Start - Whether you are just beginning to find your way around, or ready to contribute, this is your springboard
- Glossary - Let's talk the KDE talk
- Live CDs - Try out KDE software, without installing!
- All about Plasma - Tame that funky, shiny new beast on your desktop
- Getting Help - How and where to find help
- KDE System Administration - Understand how things work inside the Plasma system.
- Glossary
This page sets out to provide a non-technical reference, together with links for further information or demonstration. See also Jargon File.
Activities
- Activities are sets of Plasma widgets that have their own wallpaper. A bit like Virtual Desktops, but not quite.
- For example you have a "work activity" with commit rss feeds, a note with your TODO, a Folder View with your work related files, and a subtle wallpaper.
- Next to it, you have your "freetime activity", with previews of family photos and dogs, rss feeds from your favourite blogs, a Folder View showing your movie collection, a twitter applet and of course that Iron Maiden wallpaper you have been loving since the early 80s.
- At 1700 hours sharp you switch from the "work activity" to your "freetime activity".
More Information:
Akonadi
- The data storage access mechanism for all PIM (Personal Information Manager) data in KDE. This allows various applications to access the required information in one place. Note that use of Akonadi does not change data storage formats (vcard, iCalendar, mbox, maildir etc.) - it just provides a new way of accessing and updating the data.
- The main reasons for design and development of Akonadi are of a technical nature, i.e., having a unique way to access PIM-data (contacts, calendars, emails..) from different applications (KMail and Calligra, for instance), thus eliminating the need to write similar code over and over again.
- Another reason is to de-couple GUI applications like KMail from directly accessing external resources like mail-servers -- this was a major reason for bug-reports/wishes with regard to performance/responsiveness in the past.
More Information:
Baloo
Baloo is a file indexing and search service that Dolphin and Elisa use to get metadata for files and to allow global searches. In a terminal type, balooctl check to find out whether an index was created already. balooctl disable and balooctl status are helpful instructions as well.
More Information:
Breeze
Breeze is the default theme starting with Plasma 5.
More Information:
Containment
- A Containment is a top level grouping of widgets. Each Containment manages the layout and configuration data of its set of widgets independently from other Containments.
- The end result is that you can group widgets within a Containment according to the significance to your working pattern, rather than by directory grouping.
D-Bus
- An inter-service messaging system. D-Bus allows multiple programs to interact. Developed by Red Hat®, it was heavily influenced by KDE3's DCOP, which it supersedes.
More Information:
Dolphin
- The default file manager in KDE Plasma. It has a side panel (Places), but navigation is mainly by the breadcrumb trail above the main window. It has various advanced features such as split windows and individual views in different windows. Mounting and umounting USB devices can be done in the side-panel. Other directories can be added to the Places panel. A Tree view is also possible.
More Information:
Flake
- Flake is a programming library to be used in Krita and Calligra. Functionally, it provides Shapes to display content and Tools to manipulate content. Shapes can be zoomed or rotated and can be grouped to work as a single Shape, around which text flow is possible.
More Information:
Get Hot New Stuff
- Get Hot New Stuff (GHNS) is an open standard that makes it easy for users to download and install various extensions for their applications. Our implementation of GHNS is used by Plasma (for example to get new desktop themes), and by many applications and widgets.
More Information:
Home Directory
- That's the place in your system where all your files are kept. You can write your files outside of this folder, but all applications are configured to propose this folder as place to write your files to. It is easier when you keep your things here.
More Information:
KHTML
- KHTML is a HTML rendering engine that was the base of WebKit, the engine that powers many browsers still in use today (e.g. Safari).
Kirigami
- Kirigami is a set of components allowing developers to create applications that looks good and works well on mobile platforms as well as on the desktop.
More Information:
Kickoff
- Kickoff is a launch menu in KDE Plasma in which apps are sorted by functional groups. Right-click also offers the possibility of adding applications to the desktop or panel. Rapid access to a less-used application is made possible with the search box. There are also alternatives, such as the fullscreen app dashboard.
More Information:
KJS
- KDE platform's JavaScript engine.
KInfoCenter
- KInfoCenter originated as part of KControl standing alone from KDE 3.1. It can display data about your system such as energy usage, hardware info and many more.
More Information:
KIO
- KDE Input/Output framework provides a single API for operating on files, whether local or on a remote server. Additionally, KIO Slaves provide support for individual protocols. Some particularly useful ones are http, ftp, sftp, smb, nfs, ssh (fish), man, tar, google drive, and zip.
More Information:
Kiosk
- Kiosk is a framework for restricting user capabilities on a KDE platform system, ideal for use in locked-down environments such as Internet cafés. It has been unmaintained for quite some time now.
KPart
- A KPart is an individual component of the KDE Plasma desktop and allows applications to share their services with other applications. KParts allow KMail and KOrganizer to integrate (as plugins) into the Kontact suite, or KHTML to display sites in Akregator.
Kross
- Kross is a scripting framework, enabling support for multiple scripting languages. A plugin system allows for the support of further languages in the future.
KRunner
- The mini-command-line that is accessed from the Classic menu, the keyboard shortcut Alt+F2, or a right-click on the desktop.
More Information:
KWin
- KWin is the window manager of KDE. This is where window decorations can be changed and themes applied.
More Information:
Pager
- A pager is a small program or panel applet which shows the position of windows on your desktop and usually, if you have several Virtual Desktops, gives an overview over all.
Panel
- See Kicker. In KDE Plasma the name "kicker" is dropped, and the name "panel" is the norm. "Applets"; are largely replaced by Widgets
More Information:
Phonon
- A cross-platform multimedia API, interfacing with existing frameworks, such as gstreamer and xine engines.
More Information:
Plasma
- Plasma is the desktop environment from KDE. It is the part of the desktop that you can see. Plasma also acts as a glue between panels, plasmoids and Kickoff. Plasma Mobile allows Plasma to run on smartphones and uses the same underlying code base.
More Information:
Qt
- (Pronounced "cute") A framework/toolkit for writing cross-platform applications. It is used by many cross-platform applications such as Krita, GoogleEarth and many others. Qt forms the underlying library KDE software is built on.
More Information:
Solid
- Solid provides a single API for hardware management. Hardware is grouped into "domains". The initial domains relate to HAL, NetworkManager and the Bluetooth stack. Since the backends for Solid are pluggable, Solid helps application developers write less code, and have it platform independent.
More Information:
System Settings
- The system settings are the unified place where you can change and customize many aspects of the Plasma desktop and KWin such as icon themes, desktop effects and shortcuts.
More Information:
Threadweaver
- This thread programming library spreads work among multiple-core processors where available, prioritising them before queueing them for execution. ThreadWeaver provides a high-level job interface for multithreaded programming.
More Information:
Virtual Desktops
- A popular concept of Unix based window managers is the one of virtual desktops. This means you have not only one screen where you can place your windows on but several. When you switch to a different desktop (usually with a pager) you will only see the windows which you started on your new desktop or moved to it. A window can also be made "sticky" which means it appears on all virtual desktops.
WebKit
- HTML rendering engine, originating from a fork of KHTML. Adopted by Apple and developed for Safari.
More Information:
Widget
- Collins English Dictionary: "Any small mechanism or device the name of which is unknown or temporarily forgotten." In KDE software terms, a widget is a single component on the canvas. Other common names that are analogous are "applet" or "gadget". Superkaramba Themes, Apple's Dashboard, Google Gadgets, Yahoo Widgets, Vista Sidebar Widgets, Opera Widgets are all examples of other widget systems (some of which are supported by Plasma as well).
X Server
- The X Server represents a basic layer upon which the various GUIs like the KDE Plasma desktop are built. It manages the basic mouse and keyboard input (from the local host as well as from remote hosts) and provides elementary graphic routines to draw rectangles and other primitives.
XMLGUI
- A programmers' framework for designing the user interface. It is extensively used by KParts
More Information:
- ← An Introduction to KDE
- Claus chr/DPL/Test
Using IRC to get help
Here are a few tips on asking questions, especially in #kde on Libera Chat, in a way that is more likely to get answers:
- Don't ask to ask, just ask: the irc.libera.chat channel #kde is a user support channel, so we expect your questions - go right ahead
 .
.
- Be ready with as much relevant details about your system as you can find: Questions you are likely to be asked are:
- What distribution do you use (and what version?) e.g. Kubuntu 18.04
- what version of Plasma you are running — if you don't know, open Konsole and type
plasmashell --versionand look at the version number given there - how you installed it — mostly likely from your distribution repositories.
You probably won't need to give all of this information straight away, but if you know how to find it quickly it often helps
- Try to do some troubleshooting yourself before asking: Google is your friend (entering error messages into Google often finds something useful). You should also take a look at Troubleshooting KDE Problems - the advice there is probably what you'll be told in #kde anyway, so try it first

- Also, try to make sure that the problem you're having is a problem with KDE software and not some other component of your system (for example, a problem with X or with ALSA). If possible, try an alternative, non-KDE application to see whether the problem also occurs there. Of course, if you're not sure, please ask.
- Use the Forum. Try asking a question on the forum. If the discussion brings up interesting information you might add it to UserBase, so that it can help others.
- Be prepared to wait! Often on IRC, someone will notice your question a little while after you ask it, so wait around for a while after you ask. There's nothing more annoying than typing out a long answer for someone, only to realise that they left 3 minutes after asking their question! In some cases there could be hours between your question being asked and someone who knows the answer coming on-line (remember that KDE users are all over the world) so sometimes you just have to ask again at a different time of day.
- If you don't get an answer on #kde, you can also try the channel for your distribution (eg, #suse, #kde-freebsd, etc), or an appropriate mailing list: see lists.kde.org or forum.
- Above all, be patient and polite. Remember that the people who help are all volunteers, and could be spending their time doing other things than helping.
If your problem is with sound, you might want to first read Sound Problems.
If your question relates to development, please see KDE TechBase's contribute page
Because KDE is so actively developed, changes arrive very frequently, so don't be surprised if you can't find any written information. Ask in IRC, the Forum or a mailing list, and when you have an answer, register an account on UserBase and add the information to the relevant page. At the same time as learning about your system you will be helping others do the same ![]()
The Forums
Another great place to get help is the KDE Community Forums. It is always a good idea to search the forums first. Maybe your question has already been answered. If not, find an appropriate forum and start a thread. Don't expect an immediate answer, but remember to come back regularly to participate in the discussion as it gets going. Remember that the forums are run by users like yourself.
The KDE Community forums offer a "guided post" feature that can help you post your question in the appropriate forum, increasing the chance of having it seen by people knowledgeable on the matter. It is accessible as a large "New Post" button on the forums' homepage, so if you have any doubts, that is the place to start.
The forums have an extensive search feature: prior to posting try finding if your question has already been answered, or there are hints that might help you solve your issue. If there is no satisfactory solution for your problem, make a new post. To search, enter keywords in the upper right box of any forum page. By default this will search the whole forums. For extended searches, click on the "Search" link under the "KDE Community Forums" banner.
If your question has been properly answered, consider marking a topic as "solved". It is a very little step, but quite helpful for other users and staff, because it tells them that there are no more issues. To mark a topic as solved, choose the topic with the best answer in the thread, and click the green tick mark under it. If you go back to the topic list you will notice a green tick mark next to the topic's title as well.
Most distributions have forums of their own; these can also be valuable. The web pages of your distribution should provide links to its forums.
Operating-System-Specific Questions
For questions relating to the desktop use of Plasma with a particular operating system (OS), you can try the above methods, but unless the question directly involves KDE software or KDE/GNU/Linux you are unlikely to find the answer. If your question does not directly involve KDE, please do not post the question on the "normal" KDE mailing lists. An example of questions that do not directly involve KDE is "my sound card does not work". In that case, please direct your questions at sites devoted to helping users of that system. For example, for GNU/Linux questions you may try looking at www.linuxnewbie.org or www.linuxnewbie.com, or the kde-linux mailing list mentioned above.
If you are not using GNU/Linux, you might want to try the kde-nonlinux (subscribe) mailing list. Also particularly useful are searches on your favorite search engine, such as Google, and searches on the Usenet archives.
In addition, many OS distributors have their own mailing lists which can address distribution-specific issues. You can find out more about these mailing lists at your distribution's website or find them through your browser search engine.
If you are searching for packages you may consider checking the ftp servers for your distribution, including the "contrib" sections, as well as indexing servers such as rpmfind.net. Wherever possible, install the package that your distro offers directly through its package manager.
Reporting KDE Bugs
Reporting bugs is a small but valuable contribution to KDE, and there's a website where you can report any bug or feature request you have about KDE: bugs.kde.org. The only requirement on your side is basic knowledge of English. With that, and following some additional guidelines, you'll be able to report helpful bug reports and thus help the whole KDE community and yourself.
The first thing you need is to open an account in the website. You can start here. Once you have a validated account, you can report.
There are usually two different situations to report a bug:
- You notice something which is not working properly or not working at all, a bad design, a missed functionality... If this is your case, open the application menu. You will then be guided to bugs.kde.org. Some information will be automatically picked up, like the application version number.
- Your program disappears and another window appears named "The KDE crash Handler". Don't get scared! You will be guided to efficiently report this crash. The link in the dialog "Learn more about bug reporting" will explain you the process. If you choose to report the problem, click on and an assistant will guide you through the steps. The requisite to report a crash is to have your distribution debug packages installed in order to provide a valid backtrace.
And these are a few tips on how to write good bug reports:
- Write it in English. You can switch every KDE application language through , so go there and choose American English as the primary language. Then restart the application. That can help you in explaining what happens.
- Be specific. One bug per report only! Do not mix different problems in the same report.
- Be clear. Explain the steps that lead to the bug so that we can reproduce them easily.
- Include screenshots: a picture is worth many words so attach a screenshot to the bug report. You can use KSnapshot to take screenshots. Also, do not link to an external web link which can expire, use the Attachments link at the bottom of the bug report.
- Include the backtrace within the bug report as a comment, it makes it easier to find duplicates for us (do not attach the backtrace as a text file).
- Clearly separate facts from speculation: only describe what happens. For a design problem, include a mock-up if possible.
If you are testing trunk or the beta, if you kept your precedent settings, sometimes you will want to check with a new user.
Also notice that Forums have a section about Beta Releases.
A good guide to bug reporting can be found here.
How to open a console
Typically when reporting a problem in IRC or on a mailing list, your helpers will ask you to open a console. A console is a text-based window that you can use to give commands for your computer to execute. You can open a console by typing Alt + Space. An input box called Krunner opens. Type the following to open a console:
konsole
If this does not work, you may not have it installed. In this case, type Alt + F2 and input:
xterm
| Back to Getting_Help |
Getting Started with IRC
Sometimes people will tell you that they can help you more if you visit an IRC channel. If you've never done it before, that sounds scary, but it's easy to set up. There are even ways that will work equally well in Linux and in Windows. How to chat with other KDE users tells you in detail one easy way to get started. Give it a try! More developers are on IRC than read mailing lists or any other help channel.
Registered KDE-Related IRC-Channels
You can find the following KDE-related IRC channels in the Libera Chat IRC Network:
Community/Support
| Channels (click on the icon to sort) |
|---|
| #kde - Main channel for users of KDE software |
| #kde-devel - For general KDE development |
| #kde-quality - For KDE quality assurance |
| #kde-bugs - For KDE BugSquad |
| #kde-chat - For Off-Topic discussions |
| #kde-docs - Official KDE Documentation Project |
| #kde-women - Women who use KDE software |
| #kde-www - The channel for discussion regarding the KDE community web sites |
| #kde-soc - The channel for Google Summer of Code and Code In students |
| #visualdesign - KDE V Design Group channel |
| #kde-i18n - Localization team |
| #kde-promo - Promotion and communication team |
Communities by Country
| Channels (click on the icon to sort) |
|---|
| #kde-ar - KDE software in the Argentine |
| #kde-be - KDE software in Belgium |
| #kde-brasil - KDE software in Brazil |
| #kde-cn - KDE software for Chinese speakers |
| #kde-de - KDE software in Germany |
| #kde-el - KDE software in Greece |
| #kde-es - KDE software in Spain |
| #kdehispano - KDE software for Spanish speakers |
| #kde-fi - KDE software in Finland |
| #kde-fr - KDE software for French speakers |
| #kde-gl - KDE software for Galician speakers |
| #kde.hu - KDE software for Hungarian speakers |
| #kde-in - KDE software in India |
| #kde-ir - KDE software in Iran |
| #kde-italia - Italian user support |
| #kde-latam - KDE software in Latin America |
| #kde-nl - KDE software in the Netherlands |
| #kde-pt - KDE software in Portugal |
| #kde_ru - KDE software for Russian speakers |
Communities around a distribution
Some problems are specific to the way individual distributions do things, so it's a good idea to find the IRC channels for your distribution as well.
| Channels (click on the icon to sort) |
|---|
| #debian-kde - KDE software on Debian. Note a different network: irc.debian.org also known as oftc. |
| #exherbo-kde - KDE software on Exherbo |
| #fedora-kde - KDE software on Fedora |
| #gentoo-kde - KDE software on Gentoo |
| #freebsd-desktop - KDE software on FreeBSD |
| #kubuntu - KDE software on Kubuntu/Ubuntu |
| #kubuntu-es - KDE software on Spanish Kubuntu/Ubuntu |
| #mandriva-kde - KDE software on Mandriva Linux |
| #mageia-kde - KDE software on Mageia Linux |
| #kde-neon - KDE software on KDE neon (Linux distribution) |
| #opensuse-kde - KDE software on openSUSE |
| #kde-windows - KDE software on MS Windows |
Applications
Any new channels should be called #kde-* to comply with Libera Chat guidelines, we however have many legacy channels due to the age of KDE.
If you would like a new official channel please see the IRC Services page for details.
Note: some of these applications are not KDE projects. E.g. KVirc.
| Channels (click on the icon to sort) |
|---|
| #akonadi - Users and developers of Akonadi |
| #akregator - Users and developers of aKregator |
| #amarok - Users and developers of Amarok |
| #amarok-de - German users and developers of Amarok |
| #amarok-es - Spanish users and developers of Amarok |
| #amarok-fr - French users and developers of Amarok |
| #rokymotion - Promotion stuff of Amarok |
| #Calligra - Users and developers of Calligra |
| #gcompris - Users and developers of GCompris |
| #kate - Users and developers of Kate |
| #kde-accessibility - Users and developers of accessibility apps, including KDE Text-to-Speech (KTTS) |
| #kde-edu - Users and developers of KDE's Educational programs |
| #kde-fm - Users and developers of Dolphin and KIO |
| #kdevelop - Users and developers of KDevelop |
| #kde-games - Users and developers of KDE's games |
| #kde-telepathy - Users and developers of KDE-Telepathy |
| #kexi - Users and developers of Kexi |
| #kmymoney - Users and developers of KMyMoney |
| #kontact - Users and developers of Kontact |
| #konversation - Users and developers of Konversation |
| #kopete - Users and developers of Kopete |
| #kphotoalbum - Users and developers of KPhotoAlbum |
| #krita - Users and developers of Krita |
| #kvirc - Users and developers of KVirc |
| #kwin - Users and developers of KWin |
| #marble - Users and developers of Marble |
| #okular - Users and developers of Okular |
| #plasma - Users and developers of Plasma |
| #choqok - Users and developers of Choqok |
| #yakuake - Users and developers of Yakuake |
Note that more channels for applications appear from time to time and may be added to this list. You can sort any list for ease of finding entries, by using the icon at the head of each list.
| Back to Getting Help |
Helping the KDE Community
How can I help in development? Do I need to learn how to code?
There are many ways to help the KDE community, not only through programming. There are other areas of contribution that need talent of other kinds. All that's necessary is the desire to help and some commitment. Of course, if you want learn how to program in order contribute, we will be more than willing to get you started as well.
Some other ways to help include
- End-user support - if you are experienced, consider joining a mailing list or the Forum to help support newer users.
- If you are able to help with translation as part of the official team, consult this list to find a contact point. If you would like to help with UserBase translation, use the sidebar link to get a translator account, then read the Tasks and Tools page.
- English documentation is also needed, and here on UserBase is a good place to start.
Login questions
Q: When I log in to KDE, some programs are/are not started and I want to change this. How can I do this?
A: See Autostart
Keyboard shortcuts
Q: When I take a break, I just want to hit the Break key and the desktop should be locked. How can I achieve this?
A: Open System Settings.
Select . Click on the Shortcut, type the key you want to associate (Break in this example). Click on . As Command/URL enter
/usr/lib64/kde4/libexec/kscreenlocker_greet
Then click on .
Other FAQ pages
General configuration of your workspace
Plasma K~Runner FAQs, hints and tips
Configuration hints and tips for various browsers
Hints and tips for using KDevelop4
Office & Productivity

Get organized with KDE software! With a standards-compliant office, productivity and groupware applications, as well as other useful tools, KDE software helps you take control not only of your computer, but your life and work as well.
Calligra
Productivity Applications
Words

Calligra Words is for creating word processing documents. Its focus is to provide a powerful and easy to use experience for everyone without being the specialized tool for any specific group of users. Author

Calligra Author is a refined version of Words, specifically for authors of novels and textbooks, with the additional tools required by them combined with distraction-free screen. Sheets

Sheets is a scriptable spreadsheet program which provides both table-oriented sheets and support for complex mathematical formulas and statistics. Stage

Prepare presentations for screen or print. Embedding of objects is supported. Kexi

Kexi is a "MS Access-like" desktop database creator supporting tables, queries, forms and reports. Flow

Flow is an easy to use diagramming and flowcharting application
Creativity Applications
Karbon

Karbon is the scalable vector drawing application from KDE Krita

Krita is a painting application. Braindump

Open source tool to dump and organize the content of your brain (ideas, drawings, images, texts…) to your computer.
Management Application
Plan

Plan is a project management application with Gantt, resource and account view.
Kontact
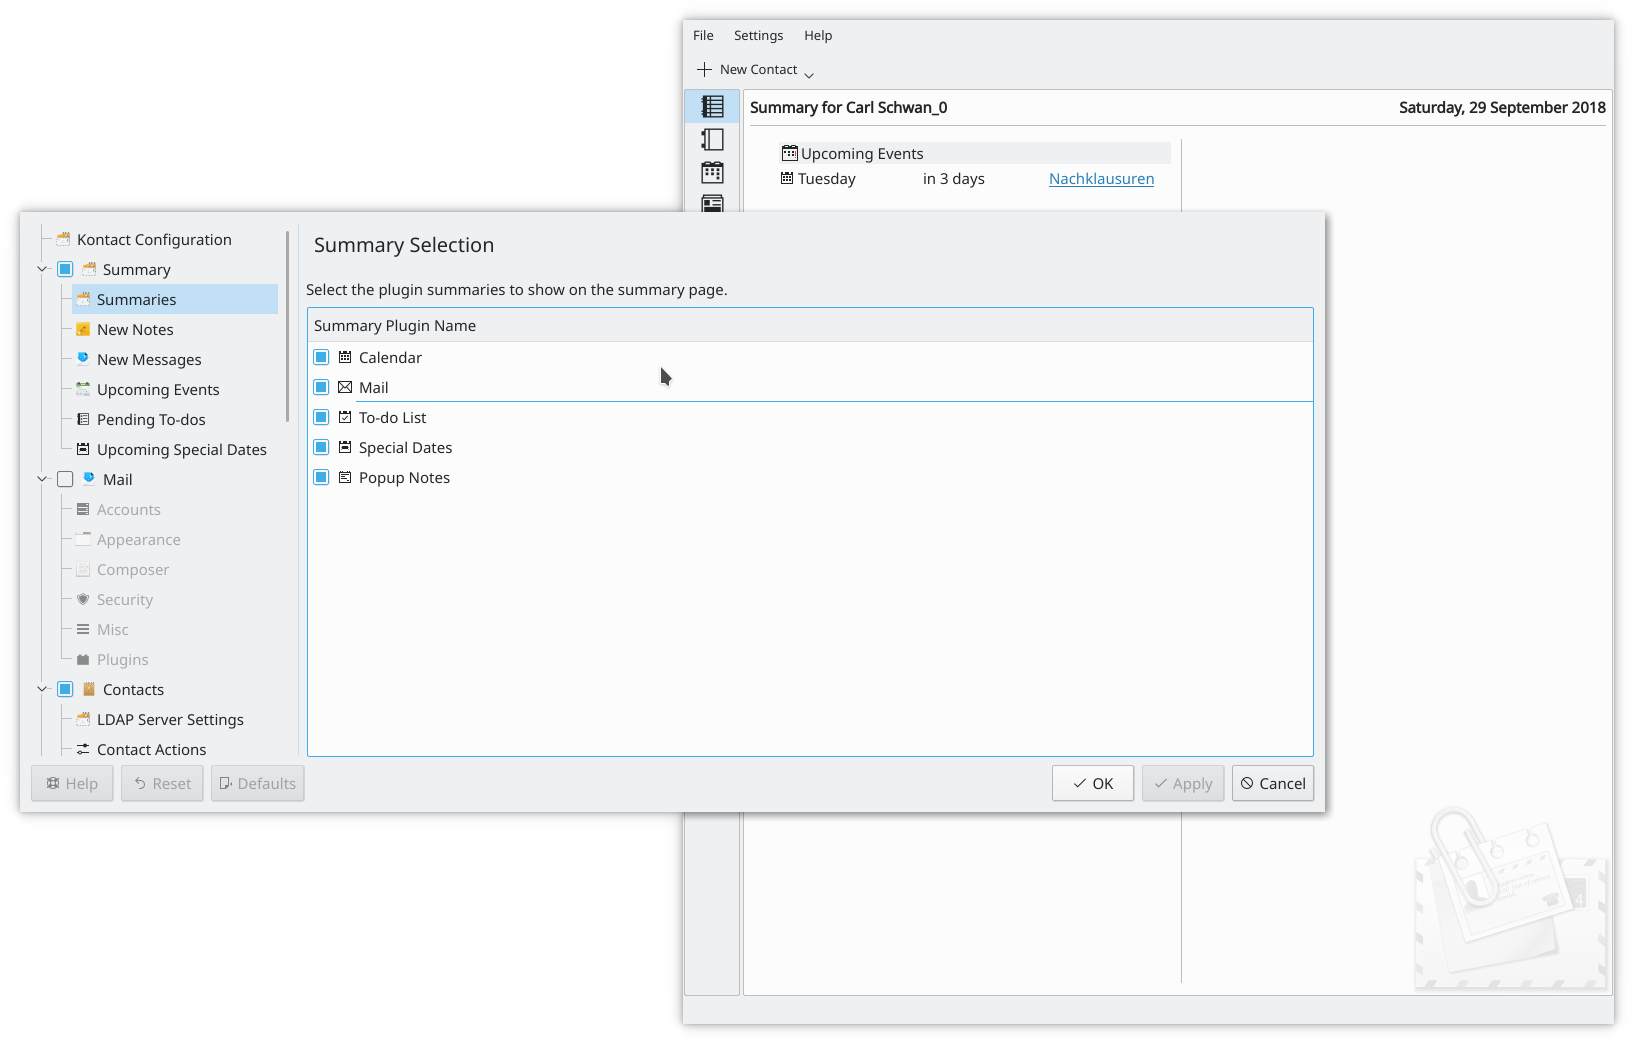
Summary

Open Kontact at this page for an overview of your commitments, including your appointments and selected mailboxes. KMail

A POP3 and IMAP mail client, capable of GpG signing and encryption KOrganizer

Your diary and journal, with reminders and integration to To-Do List KAddressBook

Store contact details, personal details, and birthdays and anniversaries for your reminders Akregator

Read all your RSS news feeds
KNotes

Sticky notes on your desktop or inside Kontact.
KJots

Your notes organised as pages in a book. KPilot

Synchronise data between your PC and many handheld devices
Related Pages
- See also: How to send SMS using Kontact
Other Applications
KAlarm

A personal alarm message, audio, command and email scheduler. Trojitá

A fast, IMAP-only email program KonsoleKalendar

KonsoleKalendar is an application to administer a calendar without a graphical user interface KNewsTicker

KNewsTicker is a plasmoid that can scroll news feeds on your desktop
KTimeTracker

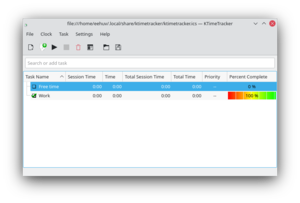
KTimeTracker tracks time spent on various tasks. It is useful for tracking billable hours and can report the hours logged by task and day. Kile

Kile is a user-friendly integrated TeX/LaTeX environment for the KDE workspace. KtikZ

KtikZ is a tikZ file editor with live preview. Useful when creating graphics in a TeX/LaTeX environment. KMyMoney

KMyMoney is a Personal Finance Manager for KDE workspaces, which may also be suitable for small businesses. Skrooge

Skrooge is a personal finances manager for KDE SC 4.x, aiming at being simple and intuitive. Kraft

Kraft designs quotations, invoices etc. for small businesses, using templates and a stock database. Semantik

A mindmapping-like tool for document generation. LemonPOS

A point of sales application for small and mid-size business RKWard

An easy to use tool for statistical work, transparent frontend to R. KBibTeX

An application to manage bibliography databases in the BibTeX format. Tellico

Tellico is a collection manager for KDE workspaces, able to track collection of books, videos, and any other type. BasKet

A note-keeping application with strong organisational features. Zanshin

Zanshin is a powerful yet simple application for managing your day to day actions.
![]() Support for this application can be found from the project's home page
Support for this application can be found from the project's home page
Internet, Networking, & Communication

KDE makes the exchange of information between computers easy by providing a wide variety of applications for the Internet, networking, and communication. Browse web sites, communicate with others, control another computer, access remote files as if they were in your own hard drive, and more! KDE software connects you to the world.
Browsing
Falkon

A fast and secure web browser Konqueror

A file manager, web browser, universal file viewer, and more! Rekonq

A lightweight Web Browser from KDE based on WebKit. Plasma browser integration

Integrate Firefox, Google Chrome or Chromium with plasma.
- The Browser Configuration page helps you configure your browser to blend with your Plasma theme, use mouse gestures, and more.
Communication
Telepathy

Telepathy is an emerging framework for peer-to-peer communication. ChoqoK

ChoqoK is a microblogging client for the social networking sites like Twitter and Identi.ca. KMess

KMess is an alternative Live/MSN Messenger chat client for Linux. Kopete

An Instant Messaging client that supports Jabber, Yahoo, MSN, AIM, and other protocols. Konversation

A no-nonsense, dedicated IRC client. Quassel

A distributed IRC client.
File Transfer
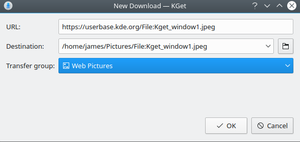
KGet

A download manager and simple bittorrent client. KTorrent

A specialized bittorrent client with a lot of features and plugin extensions. KFTPgrabber

A graphical FTP client from KDE, supporting SSL encryption and multiple FTP sessions. KMLDonkey

A Graphical User Interface (GUI) for the MLDonkey P2P file sharing tool.
EMail & News
KMail

A POP3 and IMAP mail client, capable of GpG signing and encryption. Akregator

A feed reader, supporting RSS and Atom. Blogilo

Blogilo is a blogging client, focused on simplicity and usability. Trojitá

An IMAP mail client emphasizing speed/efficiency.
Networking
KDE Connect

KDE Connect is a project that enables all your devices to communicate with each other. Krdc

The Remote Desktop Connection client, allowing you to view and even control another machine running a compatible server, such as Krfb. Krfb

The Desktop Sharing server from KDE, allowing you to share your session with others who can connect using a VNC client like Krdc. KVpnc

A GUI for various Virtual Private Network (VPN) clients.
Connection Managers
KPPP

A dialer for PPP (Point-to-Point Protocol). KNemo

The KDE Network Monitor. KNetworkManager

A GUI for NetworkManager and supports both wired and wireless devices. Kbluetooth

KBluetooth is a program which aims to provide a complete application for the usage of bluetooth. Bluedevil

BlueDevil integrates bluetooth into your Plasma workspace, allowing you to browse the files in a cell phone from you favorite file manager.
Related Applications
There are other network-related programs that work under the hood to give you a seamless networking experience
- KIO lets you to access any file as though it were on your own computer
![]() Support for this application can be found from the project's home page
Support for this application can be found from the project's home page


Adding an account
You can configure your Google Talk account in Kopete, by following these steps:
First you will need to add a Jabber account: . There, choose an identity and press in the right column. A service list will be displayed, and you have to choose , and then press .
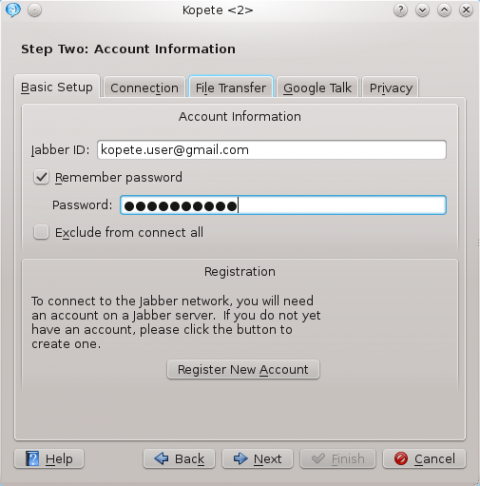
In the first tab you have to enter your complete Google Talk address and password.
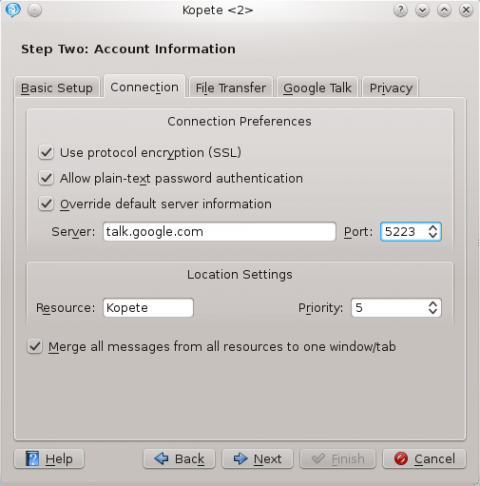
Then go to the tab, and check , , and checkboxes. Then set server to talk.google.com and port to 5223. If you are behind a firewall and can't connect to the 5223 port you can use the 443 port (standard SSL port).
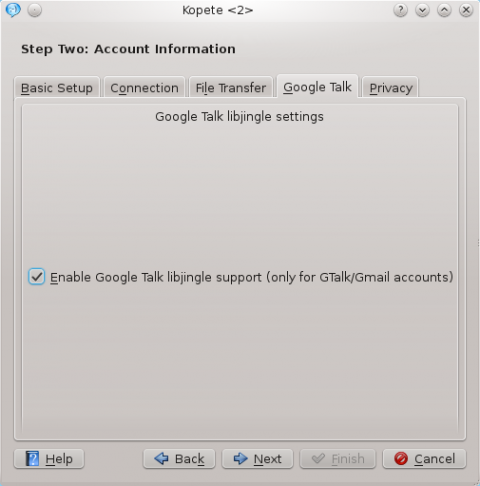
If you want to enable voice chat, go to the tab and check the checkbox you'll find.
Read more about Kopete Google Talk voice chat support here.
You may need to restart Kopete to get the connection to work if you are editing an existing account.
QCA
Kopete Jabber uses a library called "QCA" (Qt Cryptographic Architecture) for encrypted connections as used by Jabber. Kopete has an internal copy of this library but your distribution may have separated it out. If so, make sure you have "QCA" installed. This may be called "libqca1-tls".
Information on "QCA" for various distributions:
- openSUSE: the package is called qca but is installed by default along with Kopete.
- Debian: the package is called qca-tls. You may also need the libqca2-plugin-ossl package.
- Fedora: the package is called qca-tls and is available via yum from the Fedora Extras repository.
- Gentoo: the package is called app-crypt/qca-tls for KDE 3.5, and app-crypt/qca-ossl for KDE 4.0.
- Mandriva: just install libqca1-tls
- Slackware: install qca-* packages from www.linuxpackages.net and then run ldconf as root.
- Kubuntu: the required package is libqca2-plugin-ossl
The qca-tls plugin can also be compiled from source code which can be obtained here. The required file is qca-tls-1.0.tar.bz2 (qca-1.0.tar.bz2 is not the plugin which Kopete needs but the library).
Home » Applications » Graphics » Digikam
 |
View, manage, edit, enhance, organize, tag, and share photographs. |
DigiKam supports import of photos from cameras, creation of albums, tagging with dates, subjects and other properties, and excellent search facilities. Please consult the manual for full details, including picture formats supported.
Features
Managing your Photos
Digikam provides advanced functionality to manage your photos. You can view your photos in chronological order, or classify the photos in different albums, there is also the possibility to organize your photos with the localization they were taken.
-
Create Album
-
Timeline View
-
Map View
Moreover, Digikam also provide multiple search features, you can do a simple keyword search, but also advanced search on the metadata and even some fuzzy search, where you draw a pattern and Digikam try to find matching photos. Digikam can also found duplicate in your library.
-
Simple Search View
-
Detailed Search
-
Fuzzy Search
-
Identify duplicates
Digikam can also display the Exif information of your photo.
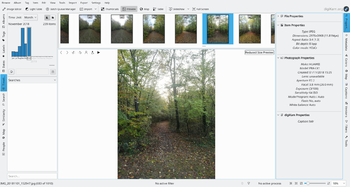
The Image Editor
-
Edit metadata
-
Assigning a Rating
-
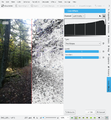
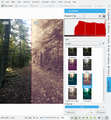
Adjust Colour Levels
-
White Balance Adjustment
-
Convert to Black and White
-
Red-eye correction
-
Auto Colour Correction
-
Lens Auto Correction
-
Find Edges effect
-
Washout effect
The Camera Interface
-
Read from Removable Media
-
or from Camera
-
Save direct to Albums
-
Add Geolocation to Individual Photos
The Light Table
-
Compare from a range of photos
-
Examine Details
-
Rating makes choice easier
-
See the camera settings
ShowFoto
For those who find the DigiKam interface a tad too technical, ShowFoto gives access to the same tools, with a popular interface.
-
Browsing
-
Image Properties
-
See image properties
-
Geolocation again
-
Preset zooms
-
Histogram
-
General Settings
-
Tooltip Options
-
Raw Image Settings
-
Colour Management Settings
-
File Saving Options
-
Configure a Slideshow
The support page of the project has links to Frequently Asked Questions (FAQs) and to Mailing List subscription details.
The section on Digital Asset Management is no longer on the web pages, but in the manual, which may be present on your installation as digikam-doc, or you can download a set of .pdf files, digikam.pdf, showfoto.pdf and kipi-plugins.pdf
The blog Open Source Photo Processing Comes of Age by rm42 highlights developments since the KDE 3 version, and provides a useful tour.
We have a growing collection of tutorials that will help you get more enjoyment and productivity from digikam. The Digikam tutorials page lists them with a brief comment on content.

Useful digiKam Tricks
Transcribed from Dmitri Popov's blog, 26 September 2011
- To quickly adjust thumbnail size in the Album view, press and hold the Ctrl key, then use the mouse scroll wheel to make the thumbnails larger or smaller.
- With the feature enabled, digiKam automatically hides originals and displays the latest modified versions of the photos. For example, if you process a NEF file and save it in the JPEG format, digiKam hides the original RAW file and shows only the JPEG photo. To disable this feature, choose and make sure that the option in the In main view section is enabled. To keep things tidy, you can then group the original and all its versions. To do this, select the photos you want to group, right-click on the selection, and choose .
The trash has reached its maximum size! Cleanup the trash manually
If you receive this error message and emptying the Trash doesn’t help, then the following command may solve the problem:rm ~/.local/share/Trash/metadata
- Need to quickly locate all untagged photos? In digiKam, expand the left sidebar, and press the button. In the window, tick the check box and press to run the search.
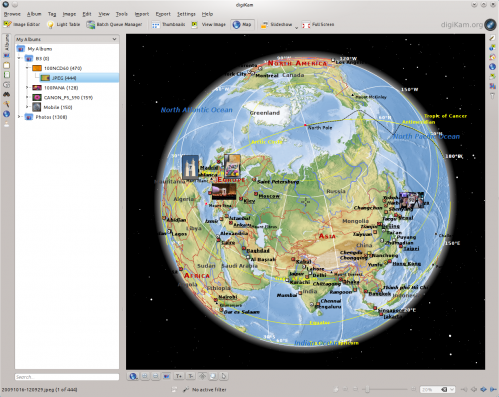
- Instead of the conventional thumbnail view, digiKam lets you map your photos on a globe. Choose , and you should see photos from the current album mapped on the 3-D globe. You can then use the mouse to rotate the globe and the mouse wheel to zoom in and out. Obviously, the Map view displays only geotagged photos.
Download
Digikam is available for Linux, Windows and MacOS. For Linux, you can find Digikam in your distribution repository or you can also download Digikam as an AppImage.
For Windows and MacOS, you can download Digikam binary on the digiKam website download page.
Beta version and source code are also available on the digiKam website download page.
Tutorials
There is a lot of tutorials about using Digikam. These tutorials are taken from Dmitri Popov and Mohamed Malik blogs about using Digikam, and have given us permission to reproduce them.
More Information
- Project home page
- Documentation
- Wikipedia
- The support page
- Frequently Asked Questions (FAQs)
- Mailing List
- Digikam album.png
- Digikam assigntags.png
- Digikam main.png
- Digikam search2.png
- Digikam tags.png
- Image Kimdaba
General Description
Image::Kimdaba is a Perl module available on CPAN for parsing the KPhotoAlbum database
Installation
Here we will assume that you want to install the module as a user, say in $HOME/local;
$ mkdir -p ~/local/bin
$ perl -MCPAN -e shell
Answer a bunch of question the first time. At some point, you have to enter:
PREFIX=~/local
Then, in the CPAN shell, type
> install Image::Kimdaba
You need to modify two environment variables (change the version number accordingly):
export PERL5LIB=~/local/lib/perl5/site_perl/5.8.3:~/local/lib/perl5/5.8.3
export PATH="$HOME/local/bin:$PATH"
If everything is OK, it's now time to test if it works. Launch KPhotoAlbum's demo (in the menu) and run:
$ kim_example.pl /tmp/kphotoalbum-demo-$USER
Upgrade
Thanks to the CPAN infrastructure, you only need to type:
$ perl -MCPAN -e 'install Image::Kimdaba'
Installation on Debian
On Debian it's possible to automagically install Image::Kimdaba . Install first dh-make-perl, and then (as root) :
# dh-make-perl --build --install --cpan Image::Kimdaba
Scripts coming with Image::Kimdaba
Here we describe scripts already made that you may find useful.
Synchronize comments between KPhotoAlbum and digiKam
The first time, do:
$ ./kim_2_digikam <rootfolder>
which will create the digikam.db database used by digiKam (>= 0.7 and < 0.8 )
Launch KPhotoAlbum, do some changes, relaunch the script
$ ./kim_2_digikam <rootfolder>
which will update the digikam.db database (you have to restart digiKam to see the changes, though).
Add some categories in digiKam to some pictures and relaunch the script
$ ./kim_2_digikam <rootfolder>
Then you can import the modifications you made with digiKam by doing in KPhotoAlbum:
The good thing with synchronizing with digikam.db is that you can then use the digikamtags:/ KIOSlave to browse by Persons or Keywords or Locations in every KDE app. (And add a tab "KPhotoAlbum" -> url=digikamtags:/ in Konqueror sidebar for example).
JAlbum gallery export
If you really like the many beautiful ways that JAlbum will let you display the images, but you are not willing to abandon KPhotoAlbum, use this script to duct tape your KPhotoAlbum's comments to JAlbum.
- Download kim_jalbum.pl from here , and do:
$ ./kim_jalbum.pl <rootfolder>
Then download JAlbum and install it (Java required). You need to do some setup first:
- Tab main:
- Image directory: KPhotoAlbum's root folder
- Output directory: Your album folder
- Tab advanced:
- Ignore pattern: \..*|ThumbNails|CategoryImages|index.xml
- Menu File -> Save as default
JAlbum only allows you to make a gallery from one folder (and its subfolders) while KPhotoAlbum does not have this restriction. Here is a solution:
In KPhotoAlbum
- Eventually delete the "jalbum" keyword to restart from scratch.
- Set the "jalbum" keyword for each pictures you want to export.
- Save your changes
In Konsole
Create a directory with symlinks to your tagged pictures :
$ kim_jalbum.pl ~/Images --exportdir ~/Syms/patou/
That's it, now use ~/Syms/patou/ as Image Directory
Auto-assign categoryimages
In KPhotoAlbum's browser, you can see the list of the persons on your pictures by name, or by icons. In the viewer, you can assign an icon for a person of the pictures by Right click -> , but it's a bit long if you have 500 persons. So this script will choose it for you.
$ mkdir -p <rootfolder>/CategoryImages
$ ./kim_category_images  <rootfolder>
It's faster than to set the 500 pictures by hand, isn't it? You can still use the category editor to choose a better picture for this person or that keyword, the script will not overwrite it.
Really rotate your pictures
In KPhotoAlbum, you can rotate pictures, but the pictures will not be really rotated, the rotation will only be stored in the index.xml database. To improve interoperability with other software, it's useful to really rotate. Quit KPhotoAlbum and use this script (you need the jpegtran tool)
$ ./kim_rotate.pl <rootfolder>
Export a hierarchy of symbolic links
(This is a bit proof-of-concept for Kimdaba.pm, but could be useful when using non kde apps (see kim_2_digikam ))
Edit the first line of the script, then
$ ./kim_2_filesystem <rootfolder>
Write your own
If you need to export your comments in another format, or you want to do some fun thing not available with Kimdaba and you know a bit of Perl, you can Write your own extension , it's very easy.
If you feel the need, you can share your script with other people by editing this page and sending an email to the KPhotoAlbum mailing-list.
The KDE Community is friendly and helpful, so here you'll find hints on where to get help, and some guidance on using the different channels.
| Asking Questions properly and hints about things to check before you ask, and information to gather. | |
 |
Sometimes you may want to dig a little deeper to fine tune your system or troubleshoot a problem. KDE System Administration tells You more about the inner workings of Your Plasma Desktop. |
 |
You will often be asked "which distro do you use?" If that sounds confusing, What is a distribution (distro)? will explain for you. |
 |
Troubleshooting is the place where you'll find guides to fix common hardware and software problems. [under construction] |
 |
Here is how to chat with other KDE users. Also a list of IRC Channels is available. |
 |
Mailing Lists for help in using KDE applications. You receive all mail that goes to a Mailing List. |
 |
Forums are where you leave a message and check later for replies. Look for the check-box to get notifications of replies. |
 |
Websites lists KDE-related sites, as well as articles about using KDE software. |
 |
The world of computing abounds with strange words and unfamiliar concepts. In The Jargon File you will find an explanation of some of them. |
 |
The docs may answer your question. |
Graphics & Imaging

KDE provides a wide variety of applications to suit your graphics and imaging needs. View documents of different formats. Browse through your pictures. Manage your photo collection and digital camera. Or even create your own artistic masterpiece. Bring images to life with KDE.
Viewers
Gwenview

A fast and easy to use image viewer for KDE. Okular

KDE's universal document viewer. Kuickshow

A very fast and comfortable imageviewer, somewhat inspired by ACDSee. KFax

Fax file viewer for KDE, supporting all page sizes. KGraphviewer

GraphViz dot graph viewer for KDE. Koko

A simple image viewer and sharer for KDE.
Photo Management
KPhotoAlbum

A tool which you can use to easily sort and view your images. Showfoto

An lighter-weight digital photo viewing and management application. Digikam

An advanced digital photo management application.
Image Creation
Krita

A professional digital painting application. Karbon

The scalable vector drawing application in KDE. KolourPaint

A free, easy-to-use paint program targeted at average users. KIconEdit

A basic icon editor for KDE. KXStitch

Cross stitch pattern editor. SymbolEditor

A cross stitch symbol editor.
Scanning
Skanlite

A scanning application for KDE4. Simple interface and easy to use. Kooka

A scanning application for KDE3 incl. gallery management
Utilities
Spectacle

A very handy utility for taking screenshots of desktops, windows, or regions of the screen. KSnapshot

A very handy utility for taking screenshots of desktops, windows, or regions of the screen. KColorChooser

KDE color and palette chooser, featuring mixing of colors, saving to palettes, and an eyedropper function. KColorEdit

A palette files editor, for editing color palettes and for color choosing and naming.

KRuler

An onscreen ruler that allows you to measure objects on the screen. Kbarcode

A utility to create barcodes. KIPI

A collection of plugins that can be shared across different graphics programs.
Photo Editing Tutorials are also available:
- In addition, a great many tutorials are available for Digikam. Please see the page Digikam Tutorials for details.
Color Management
The first color management implementation comes with KDE 4.10, but it will not impact the graphics applications directly for the time being. This will change in the future. See the corresponding page on how to enable color management.
Home » Applications » Graphics » Gwenview
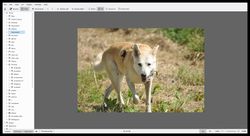 |
Gwenview - browse, edit and print your images |
Features
- Supports simple image manipulations: rotate, mirror, flip, and resize
- Supports basic file management actions such as copy, move, delete, and others
- Functions both as a standalone application and an embedded viewer in the Konqueror web browser
- Can be extended using KIPI plugins.
More Information
- Gwenview User Manual
- Gwenview Forum
- Aurelien Gateau's blog explains how burst shots get shuffled, and what you can do about it.
- Hidden configuration options
- Semantic Information (rating, tags, description) added are stored in extended file system attributes. To list them, run
attr -l file.jpg. - Danimo
- Desktop 4.1.png
- Application-x-executable.png
- Dialog-ok.png
- Application-exit.png
- Application-exit32.png
- Dialog-ok32.png
- Applications/Games
Games and Toys

The KDE Community recognizes the value of recreation and fun in life. That's why the KDEGames team have delivered a wide variety of games with stunning graphics and engaging gameplay, keeping you entertained and occupied for hours. Pick a card, avoid bouncing balls, or even conquer the world, all from the convenience of your computer. But be careful. It's addicting.

Note: The applications below all link to their KDEGames pages
Arcade
KBounce

Fill at least 75% of the field to advance to the next level while avoiding bouncing balls. KDiamond

Swap two adjacent diamonds to form a line of three similar diamonds to eliminate as much as you can within the time limit. KGoldrunner

Collect all the gold while avoiding pursuing enemies. Or dig holes to trap and walk over them. Kolor Lines

Move colored balls to form a line of 5 similar balls as quickly as possible to make them vanish before the board fills up with multicolored balls. Kolf

A top-down 2D miniature golf game that can accommodate up to 10 players. Kollision

Use your mouse to dodge red balls in the field. Be careful as the ball increase in number and vary in speeds. KSpaceDuel

Eliminate your opponents satellite while controlling your own satellite revolving around a sun. Don't get too close or your will burn up.
Board
Bovo

Opponents alternate in placing their pieces on the board trying to connect five pieces in an unbroken row while trying to block the opponent's pieces.

Battle Ship game for KDE workspaces. Players try to sink each other's ships without knowing where they are. KMahjongg

Remove all the stacked tiles from the board by finding each tile's pair as fast as possible. KReversi

Capture your opponents pieces and turn them over to your color. Get control over majority of the board to win. KShisen

Similar to Mahjongg, except the tiles are not stacked on top of one another. Find a tile's pair to remove them from the board. KFourInLine

Be the first to get four connected pieces of your color into a straight row of any direction.
Card
KPatience

A relaxing solitaire game. Arrange the cards in a certain order, either by the same color or alternating colors, in the shortest time possible. LSkat (Lieutenant Skat)

A two-player card game based on the German Skat game. Win by scoring more than 60 points in one game.
Dice
Kiriki

Earn the most score points by rolling 5 dice up to three times in a single turn. KJumpingCube

Conquer all squares on a board either by occupying an empty square or conquering your opponent's. A maxed out square will distribute its points around it, causing empty squares to be occupied. Watch out for chain reactions!
Logic
KAtomic

An educational and fun game based around molecular geometry. Form the resemblance of a molecule by sliding atoms around. KBlackBox

A game of hide and seek. Use lasers and markers to guess the location of hidden atoms in the box. KMines

Uncover all the squares without triggering a mine. A classic Minesweeper game. KNetWalk

Construct a network by connecting all terminals to the server with wires by rotating these elements around. Use as few rotations as possible. KSquares

Players take turn in connecting two adjacent dots to form a square. The player with the most number of completed squares win. KSudoku

Fill the grid so that each column, row as well as each square sector on the game field contains only one instance of each symbol.
Strategy
Konquest

Build an interstellar empire by sending ships to conquer other planets, including your opponent's planets. KsirK

Conquer the world using your armies. Attack and conquer neighboring countries and expand your army. All at the comfort of your computer.
Toy
KTuberling

A character constructor game for kids. Drag different facial parts onto Mr. Potato and come up with the funniest face you can. KTux

KTux is a Tux-in-a-spaceship screen saver. Note: This app is not part of KDE Games
Use this template for content that needs to be specially emphasized. Syntax:
{{Box1|2=Title|3=Image|4=color|1=text}}
The template takes four arguments:
- The text of the main body of the box
- The title of the box
- An image file to be displayed in the top left of the box - the image size should be 40 x 40 (optional)
- The background color (optional): possible values
- default 'alert-warning' is yellow
- alert-info gives blue - use with care; it doesn't work well with links
- alert-success gives green
- alert-error gives red
Example:
{{Box|2=Example|3=[[Image:Dialog-information.png|left|40px|link=]]|1=This is an example box}}
Please avoid using this template directly in pages. If you need something that doesn't already exist, consider making a new template based on this template. That way it will be much easier to maintain TechBase, and the risk of introducing unintended effects on your page is reduced considerably.
Existing templates based on this template: Template:Info, Template:Note, Template:Tip, Template:Warning, Template:Remember.

Displays an information box. Parameters
- Text of the main body
- (optional) Title of the box (default: Information)
Example: {{Info|This is an info box}} gives

Code:
{{Box|2={{#if: {{{2|}}} | {{{2}}} | Information }}
|3=[[Image:Dialog-information.png|left|40px|link=]]
|1={{{1}}}
|4=alert-success
}}
- Category-user-desktop.png
- Applications-internet.png
- Applications-development.png
- Applications-education.png
- Applications-graphics.png
- Applications-multimedia.png
- Applications-office.png
- Applications-accessories.png
- Axiom
- Applications/Desktop
The KDE Plasma Desktop

These pages talk about the basic KDE Plasma desktop. These applications are common programs usually found in base KDE SC 4 or Plasma 5 installations. They provide core desktop environment functionality. These KDE base programs allow users to operate, manage and control their desktop and programs easily and flexibly.
The Workspace
The Desktop and Panels

Learn about the basics of the default settings, how to configure the panels and desktop to fit your preferences and how to add new features with downloadable content. KWin

Discover KWin, KDE's reliable and flexible window manager with hardware accelerated effects for added beauty and usability. KRunner

The traditional "Run Command" window has become a "power launcher" with not only command launching but also desktop search, a calculator and even online Wiki look ups. Find out how to use this new interface, called "KRunner", to streamline your workflow.
System Settings

The new control center for KDE platforms.
The Applications
Dolphin

Discover Dolphin: the default, easy-to-use file manager in the KDE Plasma Desktop. Konqueror

A power user's dream file manager, web browser and universal file viewer. Kate

A simple but powerful text editor. Konsole

A tabbed terminal emulator allowing the use of several shells or profiles.
The Pillars of a KDE Platform
There are other parts of the KDE platform that work "under the hood" to give you the best desktop experience. You might be interested in knowing about them.
- Oxygen gives your desktop a refreshing and breath-taking visual appearance. Replaced with Breeze in Plasma 5.
- Breeze is the default Plasma 5 theme, which gives your desktop a modern, clean visual experience.
- Phonon brings the magic of sound and video into your desktop.
- Solid helps make your hardware just work.
- Baloo attaches meaning and order to your files.
- Applications/Multimedia
Multimedia, Sound & Video

KDE brings entertainment to your desktop with a selection of multimedia applications, ranging from simple players to powerful media managers. Listen to music or watch your videos. Rip your music CDs or burn your files onto DVDs. All from the convenience of your desktop. Liven up your experience with KDE.
Audio Players
Amarok

All you need to play your music and manage your music collection and covers. Offers lots of advanced features and extensions through scripts. Elisa

An audio player for mobile and desktop.
Juk

A somewhat simpler but still powerful music player and manager KsCD

Simply a music CD player, with all the controls that you would find on a hardware player.
Video Players
Bangarang

A media player which integrates KDE technologies like Nepomuk and Phonon to provide a streamlined multimedia experience for your music, movies, TV shows, audio and video feeds and more. Dragon Player

A simple video player, which can resume where you stopped watching KPlayer

A KDE GUI for MPlayer. It can handle files, DVDs, video CDs, audio CDs, and TV and DVB cards. KMPlayer

A video player plugin for your web browser. It can also be used as a standalone player. Kaffeine

A player that supports audio and video CD and DVD, digital broadcasting and audio CD encoding SMPlayer

A GUI frontend for MPlayer, with optional KDE support. It can handle files, DVDs, video CDs, audio CDs, and TV and DVB cards.
Others
K3b - Optical Disk Burning

Burn CDs, DVDs, and ISO images, to all formats of disk. K9Copy - DVD authoring and Backup

A DVD backup and DVD authoring program. Kid3 - Audio File Tag Editor

An MP3, Ogg/Vorbis and FLAC tag editor. Kio-audiocd - KIO-slave for audio CD

Transparent integration of audio CDs with KDE Plasma and KDE applications with data conversion capabilities. KMediaFactory - DVD authoring

A template based DVD authoring tool. KMid- MIDI player

A MIDI player. KMix - sound mixer

Adjust every channel on your sound card. Kdenlive - Video Editor

Kdenlive is a non linear video editor for the KDE environment running on Linux. Kwave - Sound Editor

Kwave is a sound editor designed for the KDE Desktop Environment. Phonon - multimedia framework

Phonon is the multimedia framework in KDE 4. Audex - CD ripper

A simple and intuitive CD ripper to work with the codecs you have available. Kamoso - Photo/Video Recorder

Kamoso is a great program to use your webcam to take pictures or make videos.
![]() Support for this application can be found from the project's home page
Support for this application can be found from the project's home page
![]() Support for this application can obtained by asking questions on the application's Discussion page
Support for this application can obtained by asking questions on the application's Discussion page
The KDE Education Project

The KDE Community brings education and the future of children at the forefront of today's computing technology. With a variety of applications for different fields, such as Language and Science, KDE shows that the community isn't just serious about empowering computer users, it is serious about empowering our young with knowledge as well.

Languages
Artikulate

A language learning software that helps improving pronunciation skills. Kanagram

A word-guessing game, where letters of the word are mixed up for the user to guess. KHangMan

Another word-guessing game, this time in the tradition of the classical hangman game. Kiten

A Japanese reference and learning tool. KLettres

An aid for learning the very first sounds of a new language. Over a dozen languages are available. KWordQuiz

A general purpose flashcard program, useful for vocabulary training and other subjects. Parley

Another general-purpose memorizing tool with language support. Uses a spaced repetition learning method.
Mathematics
Cantor

A GUI for fancy computer algebra systems. KAlgebra

An algebraic calculator with support for the MathML markup language. KBruch

A tutorial program for practicing calculating with fractions. Kig

A program for exploring geometric constructions. KmPlot

A powerful mathematical function plotter for KDE workspaces. Khipu
An advanced mathematical function plotter.
Science
Kalzium

An application for viewing information about the elements in the periodic system. KStars

A desktop planetarium from KDE, accurately representing the night sky from any location on the planet. Marble

A powerful virtual globe and world map. It is able to use OpenStreetMaps. You can see it in action in this video Rocs

An interactive Graph Theory IDE for Students. Step

An interactive physical simulator which shows how a scene will evolve according to the laws of physics.
Miscellaneous
blinKen

Our version of the well-known game Simon Says. GCompris

High quality educational software suite, including a large number of activities for children aged 2 to 10. KGeography

A geography learning tool that includes a map browser and some games. KTouch

A program for learning touch typing on a keyboard quickly and correctly. KTurtle

An educational programming environment that can be used to teach kids math, geometry and programming. It uses a language loosely based on Logo. Minuet

Free and open source software for music education. Pairs

A program to improve your memory and logic skills.
System Administration

KDE lets you be the master of your own computer. Control how your desktop behaves instead of running around after its every whim. Monitor your system for problems. Setup your desktop just the way you like it. Enjoy the power brought to you by KDE.
System Monitors
KSystemLog

A system log viewer for KDE workspaces. KInfoCenter

Has all the information about your hardware, with searchable facilities. KSysGuard

A highly configurable tabbed system monitor application. SystemActivity

See and control your processes.
System Configuration
System Settings

Settings center for KDE software and workspaces. May also be referred as Personal Settings or Configure Desktop Discover

KDE's software center Apper

A package manager for installing or removing applications. It has been replaced by Discover KPackage

A package manager for installing or removing applications. It currently uses the Smart Package Manager system. KPackageKit

A package manager for installing or removing applications. It has been replaced by Apper. KUser

User and group account manager. Printer Config

A GUI for the system-config-printer application. KCron

An application for scheduling programs to run in the background using cron. Power Devil

A power manager supporting screen brightness, laptop lid closing actions, and battery status, all controlled by definable profiles
System Tools
Konsole

A tabbed terminal emulator allowing the use of several shells or profiles. Yakuake

A drop-down terminal emulator based on KDE's Konsole technology. Dolphin

An easy to use file manager. Krusader

An advanced twin panel (commander style) file manager.
Konqueror

A file manager, web browser, universal file viewer, and more! Kate

An advanced text editor with many features including syntax highlighting. KDE Partition Manager

A utility to manage your disks, partitions and file systems. KWrite

A simple text editor.
Development and Programming
Software Development
KAppTemplate

Generates the basic directory and file structure for a KDE development project. Kate

An advanced text editor with many features including syntax highlighting. RKWard

RKWard is an easy to use and easily extensible IDE/GUI for R. Kdesvn

A client to subversion. It integrates nice in your Desktop and many applications. KDevelop

A powerful and flexible Integrated Development Environment based on KDE technologies. Supports a number of languages such as C, C++, and Ruby. Kompare

See the differences between two versions of a text file clearly. KDiff3

A viewer to compare or merge 2 or 3 files or directories. KDbg

A Graphical Debugger. It provides an intuitive interface for setting breakpoints, inspecting variables, and stepping through code. KFileReplace

A very capable multi-line, multi-file, multi-directory find and replace. KUIViewer

Display Qt Designer user interface (.ui) files. Lokalize

Computer-aided translation system using a paragraph-by-paragraph translation approach when translating documentation. Plasmate

Plasma add-ons creator that provides a "mini-IDE" for creating scripted Plasmoids, DataEngines, Runners, etc. Umbrello

A diagramming tool for creating models of object-oriented software using UML. Okteta

An editor that allows you to look into any file and modify the bytes in it. KTechlab

An IDE for microcontrollers and electronics.
Web Development
Quanta+

A feature-rich web development environment with support for various markup and scripting languages, such as HTML, XML, and PHP. KImageMapEditor

An HTML image map editor from KDE. KLinkStatus

A link checker from KDE, based in LinkStatus. KXSLDbg

A GUI for debugging XSLT scripts
![]() Support for this application can be found from the project's home page
Support for this application can be found from the project's home page
Utilities & Tools

KDE also brings you utilities, tools, and accessories to ease your work. Do not underestimate these applications, as they can provide you with added functionality that you will not be able to live without. Ranging from file tools to system tools, these small utilities give that added "oomph" to your desktop.
File Management
Ark

A program that enables you to handle file archives in a lot of formats.
Filelight

Shows how the disk space is being used, drawing it as a set of concentric pie-charts.
KDiff3

A viewer that can compare 2 or 3 files or directories.
KDiskFree

A tool for viewing disk usage and for mounting and unmounting partitions.
Krusader

An advanced twin panel (commander style) file manager.
KFind

KDE's file find utility, featuring search using regular expressions and searching within files.
Kfloppy

A floppy disk format tool. Supports 3.5" and 5.25" disks.
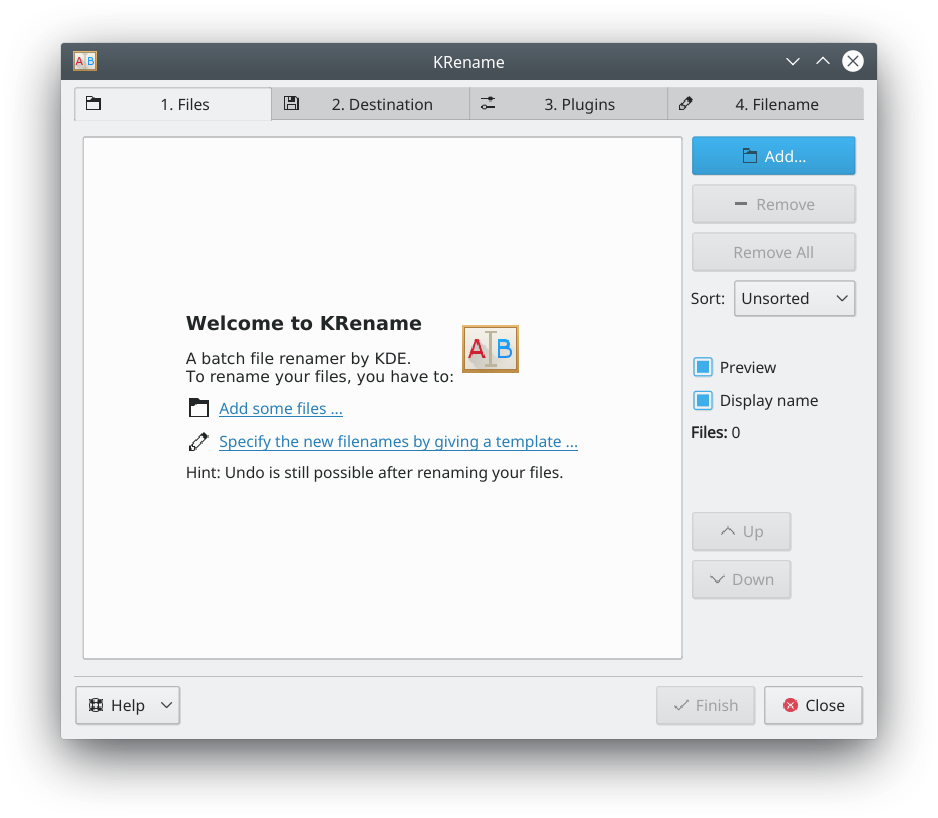
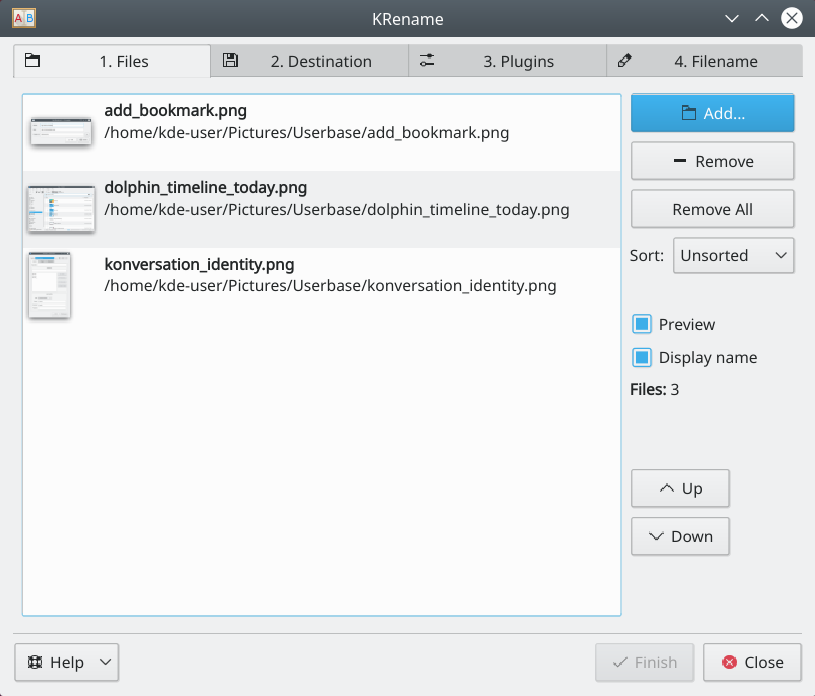
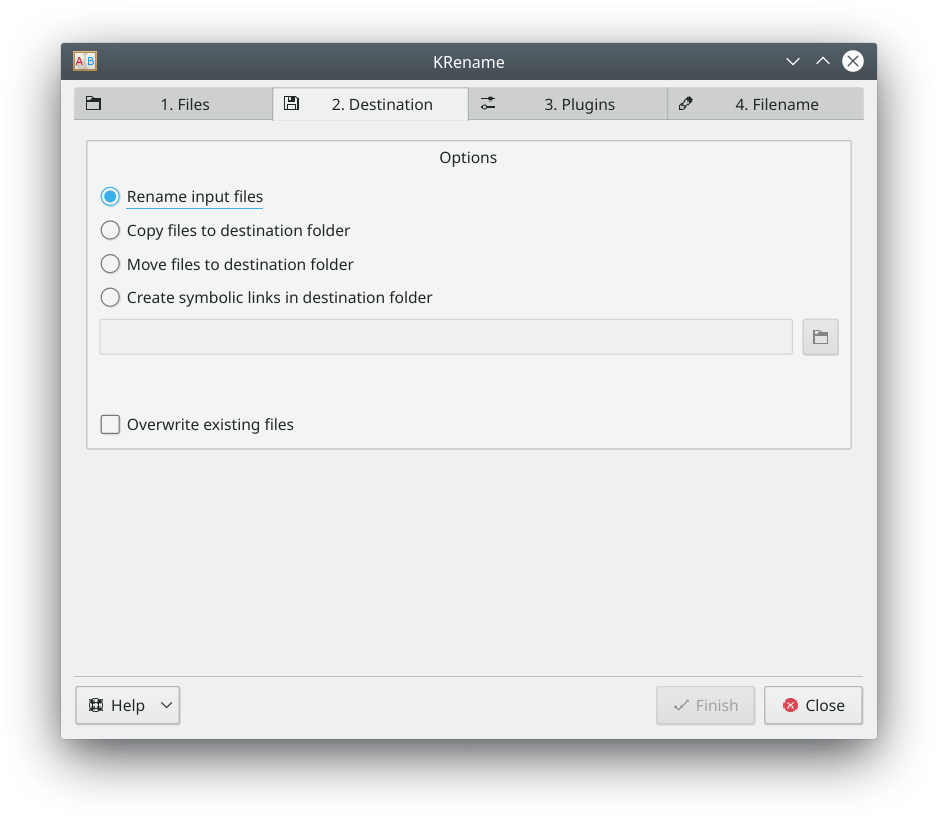
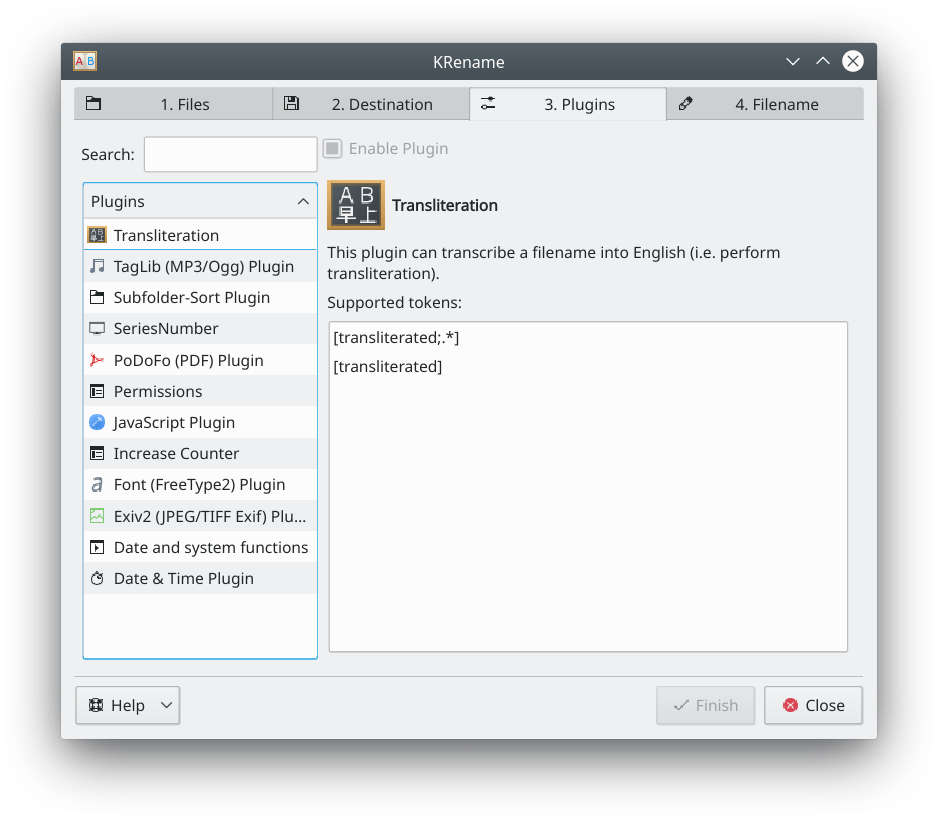
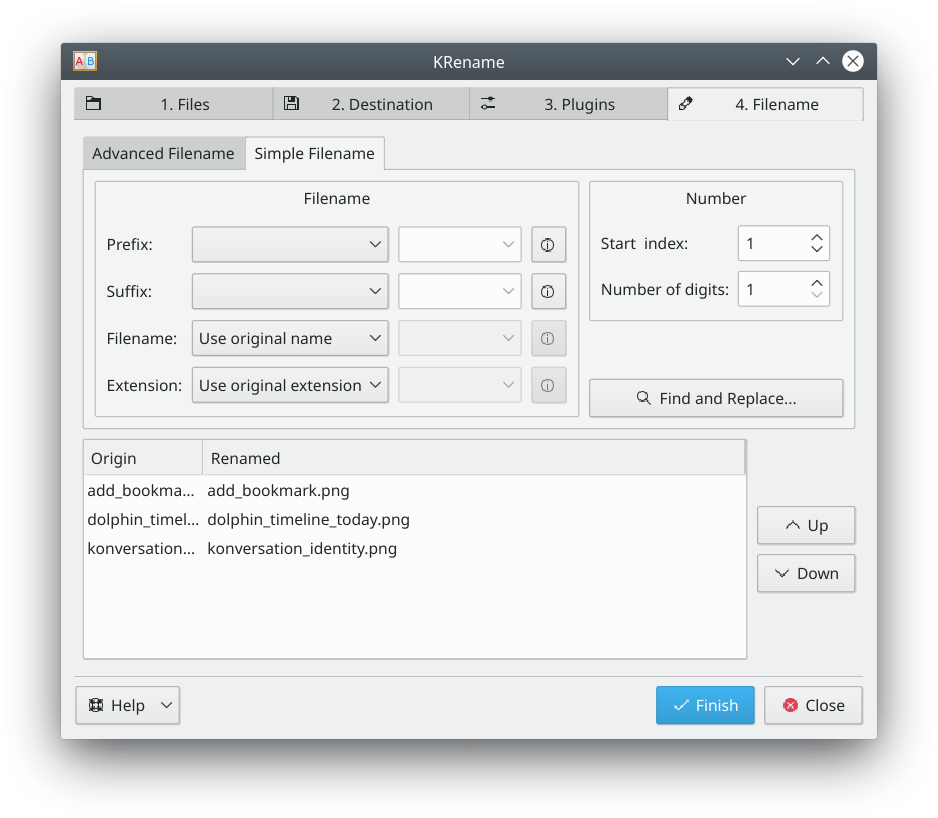
KRename

A batch rename application.
Security
KDEssh

A graphical front-end to utilities that run a program on a remote host. KDE Wallet Manager

A tool to manage all your passwords stored in the KDE Wallet. KGpg

KDE's manager for all your GPG keys. Kleopatra

KDE certificate manager and universal crypto GUI.
Sweeper

A maintenance tool to clean unwanted traces from your system.
System
Power Devil

A power manager supporting screen brightness, laptop lid closing actions, and battery status, all controlled by definable profiles
Kate

An advanced text editor with many features including syntax highlighting. KHelpCenter

A documentation viewer that allows you to read all KDE application handbooks from one convenient location. Klipper

A powerful clipboard history manager. KPager

A standalone desktop switching application for KDE workspaces. KWrite

A simple text editor. Yakuake

A drop-down terminal emulator based on KDE Konsole technology.
Various
KAlarm

A personal alarm message, command and email scheduler. KCalc

A versatile desktop calculator offering basic as well scientific functions. KCharSelect

A tool to select special characters from all installed fonts and copy them into the clipboard. KEuroCalc

A universal currency converter and calculator. KRecipes

A recipe book from KDE. Kronometer

A versatile stopwatch application. KRuler

An onscreen ruler that allows you to measure objects on the screen. KTimer

A little tool that enables you to execute some program after a given time. Okteta

An editor that allows you to look into any file and modify the bytes in it. Printer Configuration Applet

A system tray utility that shows you the current print jobs and lets you configure new printers.
RSIBreak

A small utility which bothers you at certain intervals, reminding you to take breaks. Smb4K

An advanced network neighborhood browser. KSniffer

Capture packets from Internet interfaces and devices.
![]() Support for this application can be found from the project's home page
Support for this application can be found from the project's home page
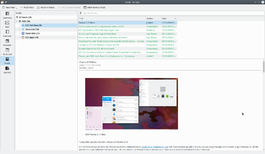 |
Akregator automatically collects stories from RSS/Atom-enabled websites |
Akregator helps you to keep informed about new stories on websites like KDE Dot News and Planet KDE blogs. The technology used is RSS and many sites support it.
- Akregator is part of the Kontact suite.
Features
- Simple to use
- Can accept dozens of feeds
- Can notify you of unread feeds
- Uses tabs to give access to internal reading of full stories
- Feeds archive
- Import and export feeds
- Integration with Konqueror
Using Akregator
Since Akregator can check any RSS or atom feed that exists, the first thing you need is to find a feed for Akregator to follow. This is probably easier than you think. Check your favorite pages to see if they have links to RSS or atom feeds. Most sites that feature some kind of news-like content have one.
Once you have the URL for a feed, getting Akregator to follow it is easy. All you have to do is select "Add Feed" from the feed menu or use its default key shortcut, "Ins".
After that, you can set an interval which defines how often Akregator must check for and update the subscribed feeds.You can define a global setting or have separate intervals for different feeds.
Akregator has the ability to store and archive the contents of subscribed feeds for as long as you set it to. Again, one can define a global setting that affects every subscribed feed(Settings-Configure Akregator-Archive) , or define an individual setting per feed by right-clicking a feed, clicking "Edit Feed" and going to "Archive" tab.
You may want to import feeds from another browser or if you have created a backup in the past. In order to import feeds, all you have to do is clicking 'Import Feeds...' on the 'File' menu and then locate the file which contains the information about feeds. This is an OPML , XML based file that's a common format for exchanging feeds between many compatible feed readers. To export the subscribed feeds, the procedure is the same as above, except that you will of course select 'Export Feeds'.
For integration with Konqueror, you can install the plugin 'konqueror-plugin-akregator' which lets you add feeds that you find interesting while surfing the web to Akregator, with the ease of just one click.
hotkeys
+ - read the newest unread entry in feed
- - read the oldest unread entry in feed
Tutorials
Download
Akregator is available in all major Linux distribution repositories, as tarballs, and soon a Flatpak version will also be available. Ancient versions were compatible with Windows, the Kontact team is looking for help to improve Windows support. For more information look at the Kontact download page.

More information
- Website
- Handbook
- Axiom
- Jstaniek
- Jstaniek
- Cr48-app-kpilot.png
- Appointments.png
- Birthdays.png
- Application-rss+xml.png
- Internet-mail.png
- Applications-engineering.png
- Dialog-warning.png
- GPU-Performance
- Action stop.svg
- Action stop.png
- Action pen.png
- Cr48-app-kugar.png
- Hwinfo.png
- Amarok icon.pngAmarok icon.
- Juk.png
- Blinken.png
- Bovo-icon.png
- Hi128-app-kscd.png
- Dragonplayer.png
- Amor.png
- Hi64-app-kplayer.png
- Ark.png
- Help-browser.png
- Accessories-character-map.png
- Cervisia.png
- Amarok
Home » Applications » Multimedia » Amarok

|
Amarok is a music manager from the KDE Community |
Amarok is a free, cross-platform, versatile, powerful and feature-rich music player. It allows easy collection management, automatically retrieves information and covers, and has built-in compatibility with services such as Jamendo, Last.fm, Magnatune, and Librivox. It also can be completely customized, so users can modify its look and layout so it fits their needs. The current stable release is version 2.9, which was released on March 7, 2018.
If you are new to Amarok, you might want to have a look at the Amarok Quick Start Guide or browse the complete Amarok Handbook.

Interface
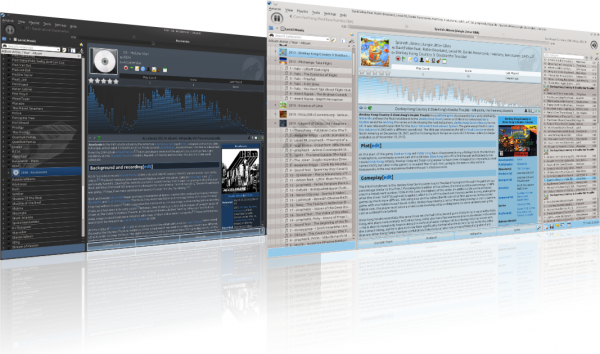
Amarok sports a three-pane interface by default.
The left pane (Media Sources)
 |
The Media Sources pane on the left is the place where you access your local collection as well as other services: on top, which is the primary interface to your local collection and connected media such as mp3 players and CDs. There is a section for all that you have enabled. Here, you can browse listings of radio stations and podcasts; listen/subscribe to them, interact with your last.fm account, purchase music from online stores such as Magnatune and download independent artists' music from Jamendo and more. The section allows you to create and manage Dynamic Playlists, access your Saved Playlists as well as the Automatic Playlist Generator. The section displays an integrated file browser and the section will let you access your podcast subscriptions. |
The central pane (Context View)
 |
This is where all the information is displayed. The central pane contains applets that dynamically change to display context information about the track that is currently playing. You can see the rating, score and play count of the Current Track applet or the last played tracks if nothing is playing, the Lyrics of the song and the Wikipedia page on the artist. More applets can be added, removed or rearranged using the settings icon on the Applet Bar at the bottom of the pane. |
The right pane (Playlist View)
Features
Music Playback
Device Support
 |
Amarok offers support for a great variety of Media devices such as iPods, MTP and UMS devices.
The button at the top of the collection lets you merge collections. This means songs from your local collection, audio CD, mp3-player and so on will be shown in one unified collection. It is a toggle switch so you can easily revert to showing the separate sources. |
Configurable Context View
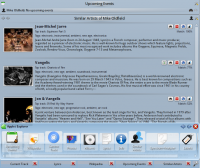 |
The Context view, the centerpiece attraction in Amarok, can automatically fetch contextual information about the currently playing song (such as album art, lyrics or Wikipedia information) from the Internet and display them. This is one of the unique features of the Amarok series. |
More Internet Services
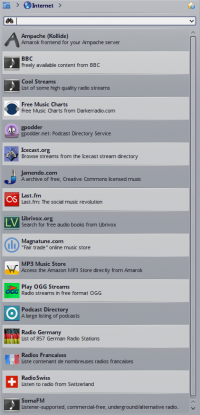 |
Amarok opens the gateway to a rich multimedia experience on the Internet.
And that is just the beginning — you can add even more Internet services using the . |

Script Manager
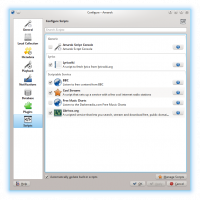 |
Scripts are add-ons that allow you to extend Amarok’s functionality in innovative ways. You use the option to open the Amarok Add-on Installer window. |
Cover Manager
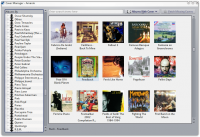 |
You can browse through your music collection using the nifty that displays the album art, download covers from various sources or let Amarok check automatically for covers in the internet. |
Rating and scoring
Pop-Up Dropper
Configurable Playlist View
Dynamic Playlists
Replay Gain Support
Amarok supports Replay Gain tag information embedded in files and automatically adjusts the overall volume of the song to a common level.
Rediscover your music!
If you have problems
- You may find an answer in the FAQ's page.
- For more difficult questions have a look at the Troubleshooting page.
- For support, please have a look at the Amarok Forum.
- You can also get direct support in the #amarok channel on the irc.freenode.net network Please ask your question and be patient, as soon as somebody is around who can help you will get an answer. There also are localized channels, please have a look at #amarok.de for questions in German and #amarok.fr for questions in French as well as #amarok.es for questions in Spanish.
More Information
![]() Support for this application can be found from the project's home page
Support for this application can be found from the project's home page
- Akregator-kde4.png
- Dolphin default.png
- Dolphin show in groups.png
- Dolphin show in groups effect.png
- Dolphin folder hovered.png
- Dolphin folder selected.png
- Dolphin folder hovered deselect.png
- Dolphin split view.png
- Dolphin
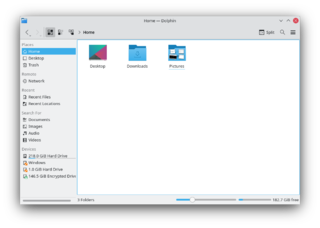 |
The dedicated file manager focusing on usability |
Feature Overview
Dolphin is a lightweight file manager. It has been designed with ease of use and simplicity in mind, while still allowing flexibility and customization. This means that you can do your file management exactly the way you want to do it. You will find more information on how to handle Dolphin in this tutorial or in the official Handbook.
At first look, this is a simple file manager, but it has many talents. Some features include:
- Split windows - view and use two directories at the same time
- Viewing attributes can be set (and remembered) independently for each window
- Tabbed browsing
- Use the optional informational panel on the right
- Or elect to have essential attribute information displayed in the window
- Use 'breadcrumb' navigation for speed
- One-click change to editable navigation bar
- Add Folders panel for traditional navigation
- Add a terminal in the directory you are currently browsing
- Many functions controlled by keyboard shortcuts
Tutorials
Hints, Tips and Troubleshooting
Problem: Dolphin's menu entries and/or don't have any options. Nepomuk is enabled in System Settings.
- Solution: Rename the folder ~/.kde4/share/apps/dolphin (in some distros it will be ~/.kde/share/apps/dolphin) and restart dolphin. This will purge your dolphin customizations but the entries should be back. If everything works as expected you can then delete the folder. This happened to me after an upgrade from KDE 4.4 to 4.5
Problem: When I choose the application to open a specific filetype with, it seems to affect other filetypes too. It’s like Dolphin cannot tell the difference between the two different filetypes.
- Solution: Probably the KDE platform does not know about one of the two filetypes, so it associates the filetype to a different, known filetype. This is common with XML-based filetypes; even if they use a file extension of their own (e.g. .xliff or .graphml), if they are not a filetype known by the KDE platform, they will be treated as any other XML file, and opened with the default application to open XML files.
- To solve this issue, you can use File Associations to create an entry for the unrecognized filetype.
Problem: Dolphin's Find File service doesn't find files you know are on your computer.
- Solution: Reindex Baloo. Baloo is a file indexing and search service that Dolphin uses to search for files. It needs to be indexed to work. To solve this problem, in a terminal type, balooctl check
Problem: There is no file transfer dialog.
- Solution: As of KDE 5 jobs like file transfers are handled by default in centralized notification system; file transfer is also shown in task manager. To enable separate file transfer dialog disable file transfer tracking on both the System Tray notification area and the task manager plasmoid and re-login.
If your problem is not in this list, you may also look into the forums or ask your question there.
Keywords
File management, file manager, file browser, tags, metadata, Nepomuk
This tutorial explains how to configure Opera so that it will blend with your Plasma applications. To do this, we'll need to install the Opera Oxygen Project skin, set Opera to use your chosen Plasma Desktop scheme, and change Opera's default fonts to the ones which KDE uses.
Step 1: Installing the Skin
Open Opera and navigate to the following link:
http://my.opera.com/community/customize/skins/info/?id=8141
Click to install the skin.

Step 2: Applying the Skin & Changing the Color Scheme
Go to .
In the Skins box, you will see a list of all the skins that are currently installed. Click on to apply the Opera Oxygen Project skin to Opera.
Click on the menu box next to Color Scheme and select to let Opera use KDE's color scheme.
Step 3: Changing the Font
Go to . Click on the tab.
Opera has two default fonts - the normal font and the monospace font. You can change these default fonts by clicking on them. Change the normal font to DejaVu Sans and change the monospace font to DejaVu Sans Mono.
That's it! Now Opera will look and feel just like your Plasma applications.
Source
This tutorial is based on Patrick Trettenbrein's blog entry entitled “How to make Opera 9.5 look native in KDE 4” (which no longer exists). Additional updates have been made as Opera has been updated.
- General KDE Software FAQs
- Glennie
- ControlKeyKDE3.png
- ControlKeyKDE4.png
- Copyrights
- Besteci-Pardussian
- Arksnapshot1.png
- Arksnapshot2.png
- Ark
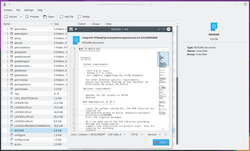 |
Ark is an application to manage file archives |
Features
Ark allows you to
- Create a compressed archive
- View the contents of an archive file
- Extract the contents of an archive to a directory of your choice.
It can handle many formats, including tar, gzip, bzip2, zip, rar and 7z.
Creating an Archive
- Files can be added to form the archive using the Archive menu
- Alternatively files can be dragged from a Konqueror or Dolphin window into the main Ark window
- Also on the Archive menu is which can pull a whole directory into the archive
- Files can be added to a saved archive at any time.
Extracting Files
This is the use that most people will meet first.
- With a single file highlighted you will be asked whether you want to extract that one file or all files.
- The archive remains complete and the file you selected is placed in the directory of your choice.
There are two ways that you can control the Extraction.
- When viewing the archive within Ark, use button on the toolbar or Ctrl-E . This gives you a navigable tree where you can select your destination.
- When viewing the archive in Dolphin, right click on it and you will get three options:
- Extract here, Autodetect Subfolder
- Extract to....
- Extract here.
- The second option works the same as Ctrl-E within Ark.
- The third option does exactly what it says - if no folder is defined within the archive, all the extracted files will end up in the current directory. If the archive does contain a folder, then a folder will be created under the current folder, and all files extracted into that folder.
- The first option is similar to the third one, but when no folder is defined within the archive, Ark will create one, then all files extracted into that folder. If, for instance, your archive is called Patterns.zip and it contains all the designs, you would end up with a structure like ~/Patterns/design1 etc.
Working with Files
- Very often an archive will contain a README or some other instruction file. It is often useful to be able to preview that file before starting work with the archive. Double click any file in archive will open preview.
- It may be that one file in an archive becomes irrelevant. The file can be deleted within the archive.
- It is also possible to any suitable application and edit the file (if the archive is not read-only).
External links
- Project homepage
- Il pinguino volante
- Il pinguino volante
- Dolphin panel.png
- Dolphin terminal.png
- Introduzione a KDE
- Emonkey
- Common.css
- Annew
Check these pages:
- Using Jabber Transport in Kopete
- Using Jabber GroupChat in Kopete
- Configure Google Talk account in Kopete
Releases
Testing Archives
Archive_Test1 - begins a set of pages for testing the effects of moving pages to the Archive namespace
Results noted:
- If a page is archived with a redirect in place, the page name survives, and the page automatically redirects.
- Any links in such a page continue to be blue (active) links.
- Because the original page name survives, it will always be counted in any DPL report.
- When a page is archived without a redirect the page name is freed up, appears entirely as an empty page, reusable as any other empty page.
- Any page that previously linked to it will see a red (empty page) link.
- The link from the original page is therefore broken and it will be necessary to guess the URL or search for it.
- Where pages are not likely to be needed much in future, such as the old-style translations, the advantage is that the pages that have been archived can easily be excluded from reports, giving more accurate results.
- __NOINDEX__ on the page suppresses search spider visits and results in a new category, Category:Noindexed pages
- Category:Noindexed pages is strange, though, as only one of this set of pages is included, yet all four bear the category statement.
Following a particular language
Q: Is there any way to review the translation process by some particular team? A: You can use an Atom feed and your favorite feed reader (applet, widget). Example: http://userbase.kde.org/w/i.php?translations=only&trailer=%2Fuk&title=Special:RecentChanges&feed=atom
Subpages of User:Claus chr/DPL/Test
{{:Special:PrefixIndex/{{FULLPAGENAME}}/}}
Translation stats Graph of translation stats
This template is for KDE applications that are developed by the community and not distributed by or with KDE.
Usage: Place {{Community-app}} at the end of a sentence or name, like you would a footnote.
To be used together with Template:Community-app-footnote.
Included content begins here:
Included content ends here:
This template is for KDE applications that are developed by the community and not distributed by or with KDE.
Usage: Place {{Community-app-footnote}} at the bottom of the page where Template:Community-app was used.
To be used together with Template:Community-app.
Included content begins here:
![]() Support for this application can be found from the project's home page
Support for this application can be found from the project's home page
Included content ends here:
- Infobox SoftwareThis is a test for an Infobox Software.
- InfoboxTemplate loop detected: Template:Infobox
Dolphin or Konqueror?
Dolphin is the file management application of Plasma Workspace. It is designed to be simple to use, yet powerful.
Konqueror was the default file manager in KDE 2 and 3, and is still available for those who prefer its interface. It is a web browser, a file manager, media viewer and more. For file management it uses the Dolphin KPart, and so has all of the functionality of Dolphin.
Discover Dolphin
The first section takes you on a guided tour of Dolphin. The second section deals with the concepts of different types of bookmarks. The third section discusses archive management. Finally we look at 'More Cool Things'. The images are clickable - you can see the enlarged view.
Introduction to Dolphin
Dolphin is the file manager of the KDE Software Compilation.
I'll show how to use Dolphin for common file managing tasks, and how to customize it to your needs.
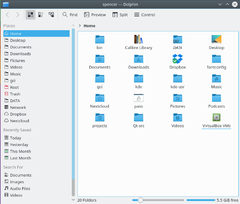
When we open the Dolphin from the Kickoff menu it shows your starting directory - by default it is your Home directory.
To open a file, or go to a folder just click on it. (This can be changed to double-click in → → or in → → for older versions of System Settings)
To select and deselect files and folders hover mouse cursor above icon and click the emerging plus sign to select and minus sign to deselect. Like this:
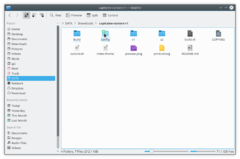
When you click the plus-sign, this file or folder will be added to your selection. You can select multiple files in the same way. Selection can be done also by dragging a rectangle (sometimes called the "rubber band" method), and selection and deselection with Ctrl + click for one at a time and Shift + click for a consecutive range.
Many selected files looks like this:

Creating a new folder: You can create a new folder in the active directory using → or the F10 shortcut.
Tabs: Dolphin supports tabbed browsing. A new tab can be opened for example from → (if you have enabled menu bar), by Ctrl + T or by middle mouse click on folder icon and navigation buttons.
Dolphin opens by default when we click on any folder. It can also be started from Kickoff menu.
The Interface
Location Bar
Dolphin integrates a new concept to use the location bar in a faster and more precise way: therefore a breadcrumb location bar is used. Instead of displaying the complete path only the navigation points starting from one of the places are displayed as buttons. By clicking one of these buttons you navigate directly to this folder. In this way you can reach a parent folder from a sub folder in a very quick way.
Between the buttons which represent a folder there is a small arrow which is a button as well. By clicking this arrow you can see a list of all the subdirectories on the same level as your current one, giving you a quick directory change.
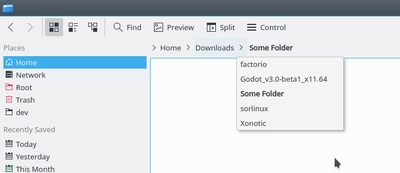
There is also a classical location bar which displays the complete path. To use this style you can right click on the Location Bar and select . If you want the Location bar to become editable, trigger the keyboard shortcut Ctrl + L or select → → . By clicking on the free space next to the last displayed folder in the breadcrumb style you can switch to an editable Location Bar as well. If the editable style is selected a checkmark is displayed at the end of the location bar. This checkmark is a button which can be used to change back to the breadcrumb style. Of course menu and keyboard shortcut can be used, too.
Split View
Dolphin offers the possibility to split the current folder view so that two folder views are displayed next to each other as known from Midnight Commander, or Krusader. This is a very comfortable view to copy or move files from one folder to another.
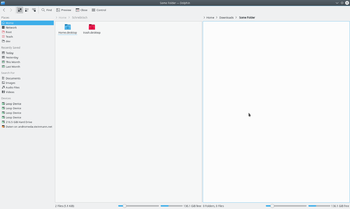
You can split the view by clicking on in the tool bar or, if you have enabled menu bar, (keyboard shortcut F3). To change back to only one folder view you can click on or just press F3 again. The symbol will show you which view will be closed. Depending on the currently active view the minus sign will be shown in the left or right part of the symbol. The active view will be closed. This is important to know if you want to use the keyboard shortcut. There is also a button for splitting and closing the view situated in the toolbar. This button displays the minus symbol as well, so it is easy to know which view would be closed.
Of course each view has its own location bar and each view can use a different view mode.
Sorting Files
By default, the files in the currently displayed folder are sorted in ascending alphabetical order. However, this can be changed by selecting → .
Files may be sorted by the following attributes
- Name
- Size
- Date
- Permissions
- Owner
- Group
- Type
- Link Destination
- Path
The sorting method can be changed by selecting from the toolbar and then select or . Additionally you may choose whether folders should be listed first by selecting .
View Mode
Dolphin features three different folder view modes:
 Icons shows each file or folder as an icon with its name
 Compact is the same as icons, but in a more compact form, allowing more folders and files to be displayed at once
 Details presents a list of files and folders, giving information on each, including but not limited to size and date
The mode can be changed from within Dolphin
- Select from the menu. This option is only available if the main Menubar is enabled
- Select from the menu. This option is only available when the main Menubar is disabled
- By selecting the appropriate icon from the main toolbar, if it is enabled
- Using the default keyboard shortcuts:
- Ctrl+1 switches to the Icon display mode,
- Ctrl+2 switches to Compact and,
- Ctrl+3 switches to Detailed view.
View as Icons
Each file and each folder is represented by an icon in this mode. Instead of displaying an icon a preview of the file can be shown. This feature can be turned on/off via the menu → (if menu bar is enabled) or via the main toolbar button .
There is the possibility to display additional information below the icons. These can be turned on/off via → or → (if menu bar is enabled). In principal the same criteria which are available as search criteria can be selected.
You can group the icons to achieve a better overview. This is turned on via → or → (if menu bar is enabled). Now the icons are grouped and the groups are divided by a horizontal line containing the name of the group as caption. The grouping is related to the selected search criteria.
Details
In view mode "Details" additional information is displayed by default in contrast to view mode "Icons". All files are listed in a tabular. The context menu of the table header offers the possibility to add additional columns. The following columns are available:
- Size
- Date
- Permissions
- Owner
- Group
- Type
- Link Destination
- Path
Column "Name" is always displayed. By clicking on the header of one of the columns the table will be sorted by this column. By clicking on the same column header the sorting sequence is reversed.
It is possible to display the folders as a tree. In this mode a > symbol is shown next to the folder. By clicking on this sign the folder is expanded and all containing sub folders and files are also shown in the table but they are attenuated. By clicking the sign, which displays an arrow pointing downwards, again the expansion is closed. Of course the tree structure can be used for as many folders as wished. In latest KDE releases, the tree view is enabled by default, but can be deactivated via → → → with option .
Setting defaults for all folders
Under → (or under the menu item → if you have enabled menu bar) you can set any of these attributes to be the default for all folder views.
Panels
Dolphin contains several panels, which can be activated via menu → . A panel can be placed in either the left or right docking area. To move a panel, ensure that panels are unlocked (right-click on a panel and select ). Then click on the header of the panel you want to move and drag it to the desired location. The new location of the panel is highlighted as you move the cursor around, before releasing the mouse button. Dropping a panel on top of another combines them into a tabbed view.
In some versions of Dolphin, the header of each panel contains two buttons. The button near to the caption undocks the panel. This makes the panel an independent window which "floats" above Dolphin. The window is still combined with Dolphin and cannot be displayed without Dolphin and cannot for example be minimized like normal windows. By clicking the button again the panel is docked again. The second button closes the panel.
Non Modal Dialogs
When Moving, Copying or Deleting files/directories the dialog disappears even when the operation has not yet completed. A progress bar then appears in the bottom right of the screen, this then disappears also, if you want see the progress you need to click a small (i) information icon in the system tray.

Places
Dolphin contains a new kind of bookmarks Places. These are displayed in a panel which can be activated via → → (keyboard shortcut F9). The default Places are identical to the ones shown in the category Computer of the K-Menu Kickoff.
By clicking one of these places it will be opened in the current folder view. The context menu offers the possibility to edit the places or to remove them again. It is also possible to hide entries temporarily.
The context menu of a folder can be used to add this folder an another entry to the Places panel. Therefore there is a menu item . You can also Drag&Drop a folder to the Places panel.
The places panel also contains entries to connected removable devices like USB-keys or CDs. A small plug icon indicates if the device is mounted. The context menu offers the possibility to unmount the device.
The places are used as the basis in the breadcrumb navigation bar. Each address is shown in relation to the nearest parent folder which is one of the places.
Information
The information panel can be activated via → → (keyboard shortcut F11). This panel displays a preview or an icon of the currently selected file/folder or of the file/folder below the mouse cursor. Some additional information like change date or size to the file/folder is displayed as well.
The information panel offers the possibility to rate files, add a comment or tag a file. This is one of the interfaces to the semantic Desktop Nepomuk which provides the advantages of the semantic web for the desktop. Starting from KDE 4.2 it is possible to search for the semantic links given by the tags.
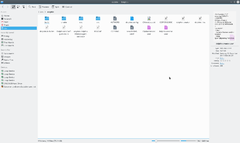

Folders
A panel providing a tree structure for the file system can be displayed via → → (keyboard shortcut F7). The tree structure offers the possibility by clicking the > and ↓ signs to expand/collapse sub folders. By clicking on one of the folders the content will be displayed in the current view.
Terminal
The terminal emulator Konsole can be displayed directly in Dolphin via → → (keyboard shortcut F4). This makes it possible to use shell commands directly in Dolphin. The terminal is opened in the folder which is displayed in the current view. Shift + F4 opens Konsole in new window.
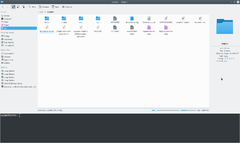
Bookmarks and Places
KDE Plasma offers two different systems of user-based links to different locations in the file system. One is called Places and the other one is called Bookmarks. They reside in different files, and have different functions. This offers more flexibility, however, it makes it necessary to learn the differences.
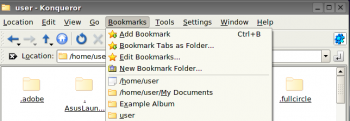
In contrast to the way Konqueror stored the bookmarks back in KDE3, both Places and Bookmarks are available to all applications as well as the Dolphin file manager. More of that later.
Places in applications
There is a default set of Places -
- Home
- Network
- Root
- Trash
but you can add other places. In Dolphin, right-click on a folder and select , or just drag a folder onto Places.
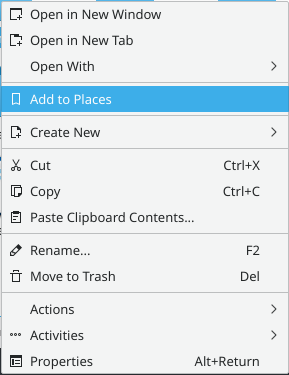
By default this "Place" will be visible in all applications. If you want to keep it constrained to Dolphin, you need to right-click on the new name in the Places list, where you will find the option to Edit it. There is a check-box for .
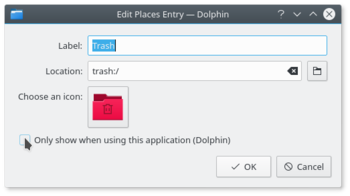
You can see the result of that command if you read ~/.local/share/apps/kfileplaces/bookmarks.xml.
In some applications too there is an option in the File menu to add a folder to Places. At this stage, however, applications vary in which features are available. The important thing to remember is that the default is for Places items to be available to all applications in the → dialogue.
Constraining to one application
Some applications allow you to edit items in the Places menu. For instance, if in Gwenview you right click on a folder in Places you can set an option to .
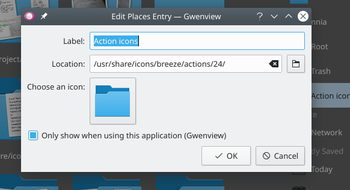
If you need to constrain to an application that does not yet allow you to do that, the only way left is to edit the file ~/.local/share/kfile/bookmarks.xml. Immediately before the </metadata> tag you will need to add the line
<OnlyInApp>appname</OnlyInApp>
Bookmarks in applications
Enable bookmarks
Bookmarks are not enabled in dialogs by default. To enable them
- Open the menu and select or
- Click the Options
 icon
icon - Select
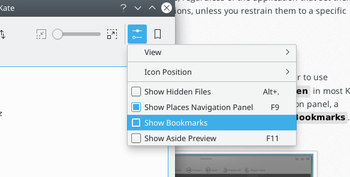
Using bookmarks
Bookmarks are the second class of user-based links to the file system. Remember opening → and using the spanner/wrench? Next to it is a yellow star. This is the bookmark management menu.
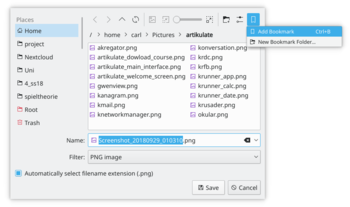
Here you can define bookmarks that will be visible in the same menu on any application. They are stored in one file, ~/.local/share/kfile/bookmarks.xml, which is used by all applications having that menu.
Archive Management in Dolphin
Managing archives now becomes simple. In any directory in Dolphin, highlight the files that you want to compress, and right-click. Here, using the Compress option, you can elect to create a RAR archive, a Gzipped tar archive, or define another compression mode that you have already set up.
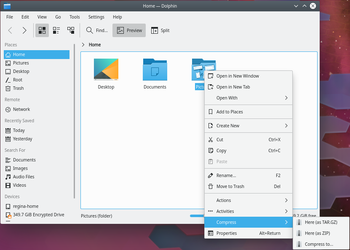
Similarly, if you right-click on an existing archived file you get a range of actions added to the right-click menu. You can extract the archive to the current folder, to an autodetected subfolder or to another place of your choosing.
Should you wish to add files to an existing archive, you can choose .
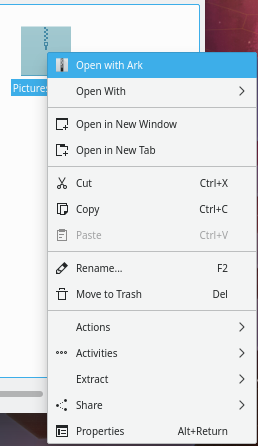
More Cool Actions
Change a File Association on-the-fly
Have you ever wanted to open a file, only to find that it is associated with an application that is not of your choice?
You can, for one, alter this in → → → → . This is the same as running kcmshell5 filetypes in a Konsole.
Alternatively, if you want to change multiple associations right quick, you would edit the *.desktop file directly, e.g. the file /usr/share/applications/org.gnome.Builder.desktop. For example, Gnome Builder associates with a great number of file-types which may not be desirable. So the line
MimeType=application/javascript; # we do not want all of these ....
may be shortened or commented out with # . Maybe a line
   InitialPreference=2
   X-KDE-InitialPreference=3
in the builder.desktop file helps to keep your previous default associated app, with builder being only secondary or tertiary option.
Thirdly, Dolphin and Konqueror offer a quick method for changing a single association:
Right-click on the file and select . The first line there is descriptive, something like:
Type: XML document
At the same level, on the right, there is a spanner (wrench). Click on that and you can add or change an association.
Similarly, by working on a folder, you can change the default file manager to/from Konqueror, if you choose, or add another image browser to the possible associations.
The sub-menu opens up a whole lot more cool things to do from Dolphin. Some possibilities only appear when applicable to the file you have selected. An apps .desktop file below /usr/share/applications defines what actions are applicable for a particular type of file. Some of the options are
- Convert an image file to a different format
- Preview the file
- Download a remote file with KGet
- Sign and/or encrypt the file, according to the encryption software installed
Encode and copy audio CD tracks
- Insert an audio CD
- Navigate to this CD in Dolphin: it must appear as "Volume" in your Dolphin 'Places' or you can reach it by typing audiocd:/ in the address bar.
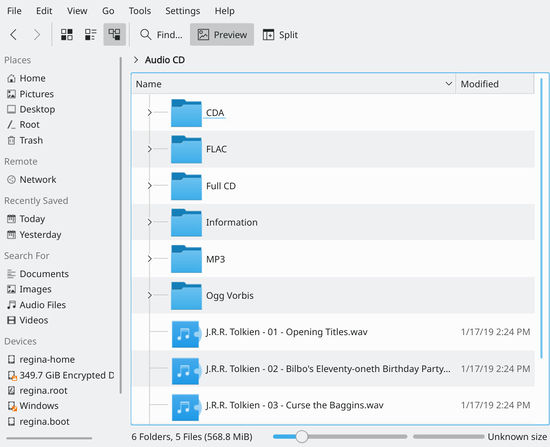
You now notice that Dolphin is proposing a WAV file for each track, plus:
- a CDA folder containing indexing information in the usual CDA format.
- a Whole CD folder, containing one file for each format (.cda, .flac, .mp3, .ogg, .wav) holding all the tracks
- a FLAC folder, containing the tracks encoded into FLAC format (lossless information format)
- an Information folder containing the CDDB informations
- an MP3 folder, containing all the tracks in MP3 format
- a Ogg Vorbis folder, containing the tracks encoded in OGG format
You then just have to copy the folder of your choice, in your preferred format to obtain the relative encoded version of your CD!
Using timeline to have your recent files as startup folder
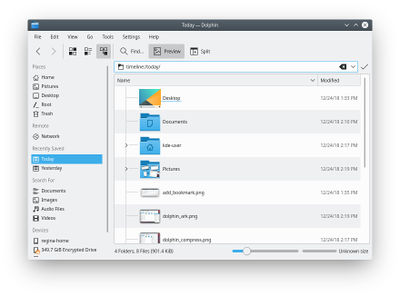
You can start up dolphin (with baloo up and running) with a view of recently modified files: Just navigate to the address/location of timeline:/today/ (copy paste it to the address bar) or use it as dolphin start-up-folder in dolphin-settings.
External links
Introduction
The Akonadi framework is responsible for providing applications with a centralized database to store, index and retrieve the user's personal information. This includes the user's emails, contacts, calendars, events, journals, alarms, notes, etc. In SC 4.4, KAddressBook became the first application to start using the Akonadi framework. In SC 4.7, KMail, KOrganizer, KJots, etc. were updated to use Akonadi as well. In addition, several Plasma widgets also use Akonadi to store and retrieve calendar events, notes, etc.
At the time of writing (August, 2011), the following applications are enabled to use the Akonadi framework to centrally store and access user data. Follow through to each application's page to learn more.
KMail

Mail Client Uses Akonadi to store emails
KAddressBook

Contact Manager Uses Akonadi to store contact information
KOrganizer

Personal Organizer Uses Akonadi to store calendars, events, journals, etc.
KJots

Note Taking Application Uses Akonadi to store notes
In addition to this, plasma widgets like the Digital Clock widget, the Notes widget also use Akonadi to store and retrieve events and notes.
Controlling the Akonadi server
The Akonadi control module started by the context menu of the Akonadi tray icon provides an easy means to starting, stopping, restarting and querying the status of the Akonadi server. You may also accomplish this from the commandline using the command akonadictl. Using this method, you can get additional useful information on the console.
To start the Akonadi server,
akonadictl start
To stop the Akonadi server,
akonadictl stop
To restart a running Akonadi server,
akonadictl restart
To query the status of the Akonadi server,
akonadictl status
Disabling the Akonadi subsystem
The Akonadi server is started by any Akonadi-enabled application. If you don't want Akonadi to be started after login, you have to ensure that no Akonadi-enabled application is launched at login or thereafter. Remember to check Plasma widgets as well — the Digital Clock widget in the default panel, for instance uses Akonadi to (optionally) display calendar events and this is enabled in its settings by default (see the "Display Events" option) . You must remove any widgets that may start it from your start-up, if you wish Akonadi to start only when you start KMail or other applications.

The Akonadi server is launched automatically at login whenever any Akonadi-enabled application requests access to it.
To disable the Akonadi subsystem, shut down the running Akonadi server from the control module or the command line:
akonadictl stop
To ensure that Akonadi is not started, check that no applications require it at login. In particular, open the Plasma clock applet preferences, go to and uncheck to prevent Plasma from requesting information from Akonadi and thus allowing it to start.
Frequently Asked Questions
Where is my data now?
A full explanation of where the data is stored and Akonadi's interaction with it is available in Andras Mantia's blog
How to upgrade my PostgreSQL database?
After updating your PostgreSQL server to a new major version, sometimes you will have to convert your Akonadi database for use with this new version. Instructions can be found on this page.
Migration problems
Akonadi's Glossary entry has a brief description of Akonadi's purpose, and other useful links. This page explains how Akonadi and KAddressBook work together.
Configuring your desktop has changed a lot between KDE 3.5 and KDE 4 and 5. For those updating, a bit of explanation is needed.
In older versions of Plasma it was possible to edit the right-click menu and remove the item and its keyboard shortcut. If that happened, and you want your item back this is what you do:
In a terminal run
kate ~/.config/plasma-org.kde.plasma.desktop-appletsrc
and under section [ActionPlugins][0][RightButton;NoModifier] make sure these lines are present:
configure=true
configure shortcuts=true
After relogin, is visible again.
Icons
Challenge: You want to place icons on your desktop (like: "watch TV" or "play pingus")
Solution:
- with KDE 3.5, right-click and choose "Create link to Application"
- with KDE 4 it is much more complicated:
- the "Desktop folder" approach
- start Konqueror, choose . Verify you have KDE 4.2 at least.
- right-click onto your desktop, choose
- in 4.5 that becomes
- right-click onto your desktop, choose
- the "drag and drop" approach
- Open a file manager and drag the file you would like onto the desktop. It will appear there as icon.
- the "Desktop folder" approach
Example
Let's assume you want an icon on your desktop that starts Konqueror:
- find out where the executable is located
- start a konsole by Alt + F2 and then typing
konsole
- type
which konqueror
let's assume the response is/usr/local/bin/konqueror
- point your konqueror to where you can find your executable, in this case /usr/local/bin
- drag-and-drop konqueror onto your desktop
- start a konsole by Alt + F2 and then typing
Now you can start konqueror by clicking onto the konqueror icon on your desktop
Plasma
Your desktop is now based on Plasma. This makes it possible to run widgets (sometimes referred to as plasmoids) on it, e.g. a clock that docks directly to your desktop and is not surrounded by a border. To add the "clock" widget, right-click onto your desktop and choose . E.g. choose the Analog Clock Widget there.
Rearrange your Panel
Most of us are creatures of habit, and like our panel to show icons in a familiar order. Plasma appears to drop icons in a random order, but you can re-arrange them as long as you have KDE 4.1 or later. If you have the Panel Controller (which looks like a Cashew in a semi-circle) on the right hand edge of your panel, you can re-order or change the size and justification of the panel. See Can I move the applets on the panel?
Many more such hints are on the Plasma FAQ pages.
Access your files on a remote desktop
Under KDE3, if you had an fstab mount to a remote directory you got an icon on your desktop. This doesn't happen in KDE4, but there's an even better way to reach your files.
Create a folderview (right-click on desktop, ). It will be pointing to your home directory by default, but click on the spanner on the handle, to get properties, and you can direct it to open in your remote home. If you keep your folder fairly small you'll be able to scroll down to the exact directory you need, and open it in Konqueror (which in some versions seems to be the default for remote directories. It may well be that this can be changed, too.)
More than one File Manager
Everything mentioned as possible in Konqueror can also be done in Dolphin. At first glance you might think Dolphin lacks features, but read the pages linked from the Dolphin page to learn the new features that make it so powerful.
- Amarok2.png
- Hi48-apps-kjots.png
- Ajashton
- Dolphin-rename-multiple.png
- GPU-Performance
- Choxos
- An introduction to KDE (fa)
- Akonadi
- DolphinAdd.png
- EnablingBookmarks.png
- BookmarkManagement.png
- Compress.png
- Dragon Player
Home » Applications » Multimedia » Dragon Player
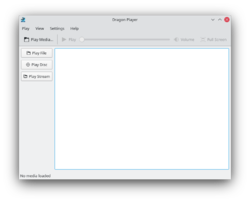 |
Dragon Player is a simple interface for playing movies or music |
DragonPlayer is the default movie player of KDE SC 4.x. It was previously known as Codeine.
Features
- Simple interface
- Resuming videos: Starts playing a video where you were watching it last time
- Support for subtitles: Automatically loads subtitles with the matching name
- Video display settings (brightness, contrast)
- Due to using Solid and Phonon DragonPlayer is independent of any multimedia framework or hardware abstraction layer
- Supports playing CDs and DVDs
Screenshots
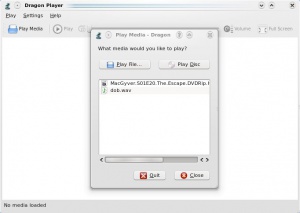 |
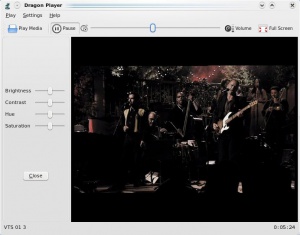 |
For Music
- Select and your music begins. No distracting playlist, just sound.
- opens a dialogue to allow you to find and play single files. A playlist can be built, but this isn't the primary function.
More Information
- official KDE web page for Dragon Player
- official Dragon Player Handbook
- Dragon.jpeg
- Dragon1.jpeg
- CompressIcon.png
- Dolphin/File Management
- Google Talk support
- Fileprint.png
- Jucato
- Im-status-message-edit.png
- Help-hint.png
- Applications/Accessibility
Accessibility

The KDE Community cares for its users, whatever age, gender, race, or physical condition. The community provides tools, both built-in utilities and standalone applications that enable people with physical handicaps to still be able to use their computers easily and efficiently.
Kmag

Also known as KMagnifier, a screen magnifier from KDE. KMouseTool

An automatic mouse "clicker" for people with Repetitive Strain Injury (RSI) or similar. KMouth

A type-and-say GUI for speech synthesizers. Jovie

The KDE Text-to-Speech system. simon

A speech recognition system to replace mouse and keyboard.

- Back.png
- Beginning.png
- End.png
- Forward.png
- Basicmenu.png
- Fileprint2.png
- Filetb.png
- Clearright.png
- Dpalacio
- Emblem-important.png
- Event.png
- Attendees.png
- Icalshare.png
- Hellebore.png
- Hellebore1.jpg
- Hellebore2.jpg
- Hellebore3.jpg
- Image-shape.png
- Add-artistic-text-shape.png
- Artistictext-tool.png
- Cool-artistic-text-shape.png
- Boring-artistic-text-shape.png
- Draw-freehand.png
- Cool-artistic-text-shape-and-curve.png
- Artistictext-attach-path.png
- Cool-curvy-artistic-text-shape.png
- Artistictext-detach-path.png
- Amarok ru.png
- Common.js
- Common.js/search.js
- Amarok2.1svn965006.pngAmarok 2.1 (svn 965006) playing a song.
- Amarok2.1left.pngThe collection pane.
- Amarok2.1ipod.pngAmarok2 showing a mounted iPod.
- Amarok2.1contextviewconfig.png:This image shall be deleted in favour of this one, which is up-to-date and has a better naming approach for future image updates.
Configuring the context view.
- Amarok2.1internetservices.png:This image shall be deleted in favour of this one, which is up-to-date and has a better naming approach for future image updates.
Some Internet services.
- Amarok2.1scriptmanager.pngScript Manager.
- Amarok2.1covermanager.pngCover Manager.
- Amarok2.1popup.pngPop-Up Dropper
Screenshot was token by me, and I release it to the public domain, as Creative Commons defines it: http://creativecommons.org/publicdomain/zero/1.0/ )
- Amarok2.1rating.pngRating and Scoring.
- Amarok2.1pleditor.pngPlaylist Layout Editor.
- Amarok2.1dynamicplaylist.png
- Amarok2.1center.pngThe center pane.
- Amarok2.1right.pngThe right pane.
- Amarok2.1lastfm.png
- Ivan
- Image-x-generic.png
- Jaham
- Edit-find.png
- Finding Your Application
If an application's name or location has changed or is dubious, please document it here.
- KControl - is replaced by System Settings
- Kcron - in SC 4.4 is now found in . SC 4.5 has it in . It looks rather different, but the screen will look familiar.
- KSnapshot - the name hasn't changed, but some distros now disable the use of the PrtSc key to launch it. However, it can be configured in SystemSettings. This YouTube video shows you how to do it.
- KRunner The KRunner launcher is notorious for not having an "About" window to identify itself to the user. It is used very often (just hit the key K or Alt-F2 while desktop is focused) but the user cannot find out the name of the software from within KRunner. Without a name they cannot look up its' documentation. In some translations, the icon and some references to KRunner are ambiguous or not specific, further leading to confusion about KRunner.
- Kross cross-scripting extension tool not documented here wikipedia entry
- Komparator directory diff tool not documented here.
- KBabel Translator tool not documented here.
- Dolphin nav.png
- Atomopawn
- Basket.png
- BasKet

| BasKet is a note taking application that allows you to quickly and easily organize information. It is great for making todo lists, menus, schedules, and other lists. |
Features
Unlike many note-taking applications, BasKet allows the user to organize notes into a hierarchy of baskets. Notes in a basket can be grouped together for easier manipulation and can themselves contain embedded media (movies, pictures, even sound clips) as well as plain text, links, and rich text.
BasKet can import notes from a variety of other applications, including KNotes, TomBoy, StickyNotes, KJots, and TuxCards.
Notes can be tagged as important, completed, in progress, or can be given many other designations. Using tags, it is very easy to check off and uncheck items on a list. BasKet also enables the creation of custom user-defined tags.
Some other features of BasKet include:
- password and public-key protection of baskets
- integration into Kontact and the system tray
- and the ability to export your notes to an HTML web page.
- Guaka
- Editing
- Community-app da
Dette template er for KDE applicationer, som er udviklet af fællesskabet og som ikke distribueres af eller med KDE
Brug: Placer {{Community-app_da}} efter en sætning eller et navn, som du ville gøre med en fodnote
Bruges sammen med [[Template:Community-app-footnote_da]].
Included content begins here:
Included content ends here:
Dette template er til KDE applikationer, som udvikles af fællesskabet og ikke distribueres af eller med KDE.
Brug: Placer {{Community-app-footnote_da}} i bunden af en side, hvor [[Template:Community-app_da]] er blevet brugt.
Bruges sammen med [[Template:Community-app_da]].
Included content begins here:
![]() Hjælp til denne applikation kan findes på projektets hjemmeside
Hjælp til denne applikation kan findes på projektets hjemmeside
Included content ends here:
- Applications/Office
- Device-notifier.png
- Jolaco
- Cwp1.png
- Cwp7.png
- CwpDetails.png
- ChoqokIcon.png
- Hans
- Georgekutty
- Hans/SystemSettings
- Info (uk)

Qt, the GUI toolkit used to create KDE applications was originally not under a completely free software license as Trolltech also had a commercial arm. The main consequences of this were that proprietary programs created for KDE required a license from Trolltech, the creators of Qt, and any upgrades to Qt had to go through Trolltech. As KDE software is an open-source project, the choice to use Qt created controversy among open-source purists. Qt has been re-licensed under the GPL and these arguments have become obsolete, but remain an important part of KDE's history.
Why did KDE developers choose Qt?
- Qt is the best GUI toolkit available for the UNIX platform. The success of a desktop environment depends critically on the availability of applications. Using Qt would push forward application development, and thus KDE.
- Qt is available free of charge to anyone, including its source, for free software development and distribution.
- We actively encourage commercial software companies to develop applications for KDE. Those companies need a mature, high quality toolkit and technical support. None of the GPL'ed toolkits would have been able to meet these stringent requirements.
- Creating an LGPL'ed version of the Qt toolkit that matched the quality of Trolltech's implementation would take time and was deemed lower priority than creating a usable, free, open desktop first.
The KDE Free Qt Foundation
To tackle this problem, the KDE Free Qt Foundation was founded by the KDE project and Trolltech. This foundation ensured the continued availability of Qt as a free software development framework. Namely, should Trolltech no longer make Qt available for free software, the currently released version will be re-released under the BSD style license - a license similar in nature but less restrictive than the GPL or LGPL.
This decision to re-release would be moderated by a team of 2 members representing the KDE foundation (unaffiliated with Trolltech) and 2 members from Trolltech to vote. In case of a tie, the KDE vote will gain higher weighting.
The Harmony Project
Those who prioritised the release of an GPL licensed formed the Harmony project - a project to clone Qt under a GPL license. Rapid progress was made during its time and thus gave purists no excuse to reject KDE as a respectable and compliant desktop environment. However this project was depreciated as Trolltech made the decision to re-license Qt under the GPL.
Significant Dates in the History of KDE software
12 July 1998 - KDE 1.0 Announcement "An integrated Desktop Environment for the Unix Operating System. We are pleased to announce the availability of release 1.0 of the KDesktop Environment"
23 October 2000 - KDE 2.0 released "The KDE Team today announced the release of KDE 2.0, KDE's powerful, modular, Internet-enabled desktop. This highly anticipated release constitutes the next generation of the award-winning KDE 1 series, which culminated in the release of KDE 1.1.2 just over a year ago. KDE 2.0 is the work product of hundreds of dedicated developers originating from over 30 countries. "
17 December 2001 - KOffice 1.1.1 Released "Currently KOffice has functionality well-suited for home and SOHO users, who generally write letters, faxes, memos and similar documents. KOffice 1.1.1 is a minor update release for KOffice 1.1."
3 April 2002 - KDE 3.0 Released "KDE 3.0 is a major step for the KDE project. A hundred words could be written here, but to stop boring you with details, lets just say: Check it out!"
11th May 2007 - KDE 4.0 Alpha 1 Released "KDE Project Ships First Alpha Release for Leading Free Software Desktop."
16th October 2007 - KDE 3.5.8 Released "Project Ships Eighth Translation and Service Release for Leading Free Software Desktop."
11th January 2008 - KDE 4.0 Released "KDE Community Ships Fourth Major Version for Leading Free Software Desktop."
19th February 2008 - KDE 3.5.9 Released "KDE Community Ships Ninth Maintenance Update for Third Major Version for Leading Free Software Desktop."
29th July 2008 - KDE 4.1 Released "KDE Community Ships Major Update to Leading Free Software Desktop."
26th August 2008 - KDE 3.5.10 Released "KDE Community Ships Tenth Maintenance Update for Third Major Version for Leading Free Software Desktop."
12th October 2008 - KDE Forum Launched "KDE Launches Web-based Bulletin Board."
27th January 2009 - KDE 4.2.0 Released "KDE Community Ships Second Major Update To Leading Free Software Desktop."
4th August 2009 - KDE 4.3.0 Released "KDE Community Ships Third Update to the KDE 4 Desktop, Applications and Platform."
9th February 2010 - KDE SC 4.4.0 Released "KDE announces the immediate availability of the KDE Software Compilation 4.4, "Caikaku", bringing an innovative collection of applications to Free Software users."
10th August, 2010 - KDE 4.5.0 released Focusing on "stability, the overall polish and performance gain".
26th January 2011 - KDE SC 4.6.0 Released Major updates to the KDE Plasma workspaces, KDE Applications and KDE Platform
27th July 2011 - KDE 4.7.0 released Containing compelling new features and improvements to the Plasma Workspaces, the KDE Applications and the KDE Development Platform
9th October 2011 - Plasma Active One Arrived First KDE version of cross-device UX.
14th December 2011 - Plasma Active Two Released Second version of cross-Device UX, boosting performance and adding new features.
25th January 2012 - KDE 4.8 Released Gaining adaptive power management, offering faster and more scalable file management, enhancing interoperability and introducing touch-friendly components.
1st August 2012 - KDE 4.9 Released Providing many new features, along with improved stability and performance. Dedicated to the memory of KDE contributor Claire Lotion.
15th October 2012 - Plasma Active 3 Released Improving performance and bringing new applications.
6th February 2013 - KDE 4.10 Released Improving mobile device support, opening up more APIs to Qt Quick and improving performance and usability.
14th August 2013 - KDE 4.11 Released Refined user experience, PIM improvements, better performance.
5th September 2013 - Plasma Active 4 Released Improving overall performance and usability.
18th December 2013 - KDE Applications and Development Platforms Released Bring Huge Step Forward in Personal Information Management and Improvements All Over.
For a more detailed look at the history, including details of all the KDE 3.x releases, see this page
Home » Applications » Multimedia » Juk
 |
Juk is audio jukebox. |
JuK
JuK is an audio jukebox application, supporting collections of MP3, Ogg Vorbis, and FLAC audio files. It allows you to edit the "tags" of your audio files, and manage your collection and playlists. It's main focus, in fact, is on music management.
JuK is part of the KDE Multimedia package. Features include
- Collection list and multiple user defined playlists
- Ability to scan directories to automatically import playlists and music files on start up
- Dynamic Search Playlists that are automatically updated as fields in the collection change.
- A Tree View mode where playlists are automatically generated for sets of albums, artists and genres.
- Playlist history to indicate which files have been played and when.
- Inline search for filtering the list of visible items.
- The ability to guess tag information from the file name or using MusicBrainz online lookup.
- File renamer that can rename files based on the tag content.
- ID3v1, ID3v2 and Ogg Vorbis tag reading and editing support (via TagLib).
History
JuK was originally started by Scott Wheeler in 2000. It was called QTagger at this time. Over the time it has grown into a mature audio application. It is an official part of KDE since KDE 3.2.
Links
- Juk on kde.org
- The JuK Handbook
- Amarok
- Digikam 01 levels.jpeg
- Digikam 02 saturation.jpeg
- Digikam 03 crop.jpeg
- Digikam 04 sharpening.jpeg
- Digikam auto-correction.jpeg
- Digikam final equalized.jpeg
- Digikam final normal.jpeg
- Digikam original loaded.jpeg
- Digikam original raw1.jpeg
- Digikam/Tour

Introduction
People who enjoy digital photography as a creative outlet are very familiar with software products from companies like Adobe™, Corel™, ACD Systems™, Bibble Labs™, Light Crafts™, and even Google™. Most of them are also likely to be familiar with what until recently was the premier open source photo editor, The Gimp. Unfortunately, the Gimp has lacked a very important feature for a lot of photographers, 16 bit per channel editing. Because of that, most serious photographers do not consider the Gimp a viable alternative. True, there is also Cinepaint, which forked off of the Gimp a few years ago, and it does offer 16 bit per channel editing. Unfortunately, its interface leaves a lot to be desired and does not seem to be heavily maintained.
Happily, there is now another open source alternative with 16 bit mode editing capabilities which appears to be getting ready to give the big guys a run for their money – digiKam. I have personally only recently discovered digiKam. Well, I had tried it before, but only since I tried its KDE SC 4 edition did I think it was ready for my use. I was actually quite surprised to see how much it has improved and how many features have been included with it. Some of its features are:
- 16 bit per channel support.
- Curves and levels tools.
- Color management support.
- White balance tool with color picker.
- Lens correction tools.
- Aspect Ratio Crop tool with several standard formats available.
- Proper black & white conversion tool.
- Batch processing.
- Tagging and searching features.
- Export to Facebook, Flickr, Picasa, etc.
And there are many, many more that I just don’t have time to even mention. Of course, digiKam is not perfect. And there are a couple of items that I expect to be improved or corrected soon. But, I assure you that if you are into photography, you are going to be hearing a lot more about digiKam in the future and, hopefully, you will be enjoying its use too.
Now, allow me to take you through a quick tour of what it is like to work in digiKam. I am currently using digiKam version 1.0.0-beta4 as found in PCLinuxOS KDE4 repositories.
RAW Editing
For this tour I decided to use this photo because of its somewhat challenging lighting.

This is a RAW image taken with my old Pentax istDS*. This is how it looks in digiKam’s editor, which by the way exists as a standalone application as well called showFoto.
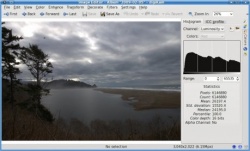
If you are familiar with histograms, you may have noticed that the histogram on this picture seems rather odd. The reason for that is that digiKam can show two different types of histograms, linear and logarithmic. The one displayed here is the logarithmic histogram, but most people are only accustomed to the linear type. One can switch between histogram types by clicking their respective little buttons above the histogram. Unfortunately, when clicking on the linear histogram button for this image all I get is a flat line. This is what digiKam’s documentation says regarding this:
“for images that contain substantial areas of constant color a linear histogram will often be dominated by a single bar. In this case a logarithmic histogram will often be more useful.”
I am sure there are technical reasons for this, but I do wonder why other programs, like Cinepaint, are able to show a linear histogram for this image just fine. I mention this because I know that some people do rely on the histogram a lot and I do think that the linear type is more useful. But I agree that having the logarithmic histogram is better than nothing. So, since this is not really a show stopper lets move on.
I am by far not a post-processing expert. My normal work-flow when editing an image is to edit the levels, adjust the saturation, crop or resize, and then sharpen the image. So, lets try to do that with this image.
Levels
First lets use the levels tool found under .
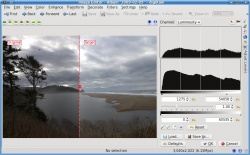
I basically just added a bit of contrast by moving the left lever (below the second histogram) to the right and lighten the image by moving the right lever to the left. The preview window adjusts automatically as I make my adjustments so that I know what the result will be.
Saturation
Now, lets increase the saturation to try to bring out the color a little. For that we use the saturation tool found under .
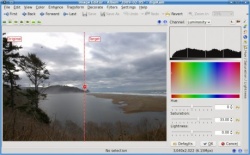
I don’t like the “Disney” look that some point and shoot cameras default to with supper saturated colors. I like to keep my images somewhat realistic looking. So I don’t like to bump the saturation too much. I feel that, for this picture, that amount of saturation is just enough to give it a bit of life without going too far into cartoon land.
Cropping
Now I am going to crop the image. This is really an important step if you are planning on printing the image. If you have ever taken your DSLR images to be printed without cropping them first, you may have been unpleasantly surprised by the fact that they were not centered correctly, or that an important part of the image was left out. The reason for this is that the image you gave them did not have the same proportions as the paper you asked them to print it on. And so they had to crop it for you. To prevent that from happening you need to crop your images to the same proportions of the paper you will be printing on. Yes, that means that you will need a different image if you want to print 8×10 than if you want 5×7, 14×20, etc. Fortunately, digiKam makes this step a breeze with its aspect ratio crop tool found under .
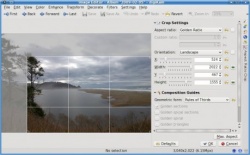
As you can see I chose to use the “Golden Ratio” option for this image, but digiKam has predefined settings for all the common printing paper ratios in the market and even allows you to choose a custom ratio if you desire.
Sharpening
The final step in my photo processing work-flow is to sharpen the image. I am used to using the method for this purpose, but in reading digiKam’s documentation I was surprised to learn that they actually recommend the method as a way to obtain better results. This is how the Sharpen tool looks, found under .
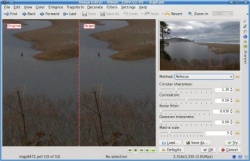
As you can see, you can change the sharpening method used with a drop down button. You can zoom in to the image as much as you want using the button, and you can move the zoom window around in the small preview image above the settings area. I was conservative in the amount of Circular sharpness specified because I could see in the preview area that going for more would result in a lot of grain being visible. This amount improved the sharpness significantly while still retaining the smooth look of the overall image. This is my final result.

As you can see, there is quite a bit of improvement over what we started with.
Auto-Correction
Normally I would have been content with leaving it at that. But since I am still in the exploring digiKam mode, I decided to test some of the tools available. To do that, I went back to the original RAW image, and after importing it, I went straight into . This is what it looks like.
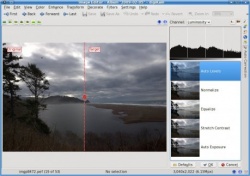
As you can see, there are five automatic correction levels that you can choose from to improve your image. In most images that I have tried this with, the option gives the best results. However, in this particular image the result was too dark. I had not seen any image for which the option resulted in an improvement, but for this particular image the results it gave me were surprisingly good. This is what the digiKam documentation says about the method of :
"Equalize: this method adjusts the brightness of colors across the selected image so that the histogram for the Value channel is as flat as possible, that is, so that each possible brightness value appears at about the same number of pixels as each other value. Sometimes Equalize works wonderfully at enhancing the contrasts of an image. Other times it gives garbage. It is a very powerful operation, which can either work miracles on a image or destroy it."
Well, looks like they were not kidding. My image turned out much better using this method of correction instead of my normal level adjustment step. This is how the image looks after adding saturation, cropping it, and sharpening it.

Conclusion
Without a doubt digiKam has a lot to offer for the photographers among us. Unfortunately, it still has one glaring omission – a clone tool. You may have noticed that the original RAW image had some dust specks in the sky above the trees and in other parts of the clouds. In digiKam, the only tool available for trying to remove such things (other than cropping them out as I did here) is a tool called , found under . However, that tool is not easy to use and is rather slow. With a proper clone tool, as available in most other photo editors, removing such items only takes a few seconds. The good news is that the digiKam developers have acknowledged this omission as a bug and we can expect to see it implemented in a future version of digiKam. In the mean time we can use the Gimp to take care of these items as a final touch up step.
I think you will agree that digiKam is an amazing open source tool. It has now become my main photo editor. If you are into photography, why not give it a try?
This page was written in October 2009. Can you add to it, talking about a later version?
- Digikam-banner.png
- Digikam album.jpg
- Digikam timeline.jpg
- Digikam exif.png
- Digikam geolocation.png
- Digikam search.png
- Digikam search-details.png
- Digikam find-dupes.png
- Digikam fuzzy-search.jpg
- Current rekonq icon.png
- Digikam tagging.png
- Digikam rating.png
- Digikam adjust levels.png
- Digikam white balance.png
- Digikam b w.png
- Digikam redeye.png
- Digikam colorCorrection.png
- Digikam lens correct.png
- Digikam card media.png
- Digikam camera.png
- Digikam geolocation2.png
- Digikam album-save.png
- Digikam compare-range.png
- Digikam examine-details.png
- Digikam rate-range.png
- Digikam lt-settings.png
- EvaIcon.png
- Blogilo.png
- Blogilo
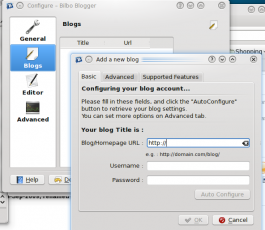 |
A simple interface for full-featured blogging. |
Blogilo is an fully-featured blogging client. It allows local creation and editing of blog posts. Various blogging APIs are supported for publishing.
Features
- Fully-featured WYSIWYG or html editing
- Allows you to preview with your style-sheet, see it as your visitors do.
- You can create, modify and delete posts, create drafts, and schedule posting
- Supports Blogger1.0, MetaWeblog, MovableType and Google GData APIs
- Supports adding media files if your API supports them.
- You can add images to post from your system, if your API supports it.
- Can save a local copy before publishing the post
- Save your writing copy to prevent data loss, at configurable intervals.
- Check spelling, using KDE's spell-checker (most languages available)
- Can fetch your recent blog posts
More Information
 |
ChoqoK is a microblogging application from KDE, with support for Twitter and Identi.ca. |
ChoqoK is a small but powerful microblogging application from KDE. It provides integration with Twitter and Identi.ca, support for twitpic URLs and URL shorteners and shows unread updates as well as providing the ability to send notifications to a single or all microblogging accounts.
Feature highlights
- Support for Twitter and Identi.ca. Useful for a single Twitter account, or for multiple Twitter and Identi.ca accounts.
- View multiple types of update. View your friends statuses, @-replies and inbox/outbox messages.
- Search for updates for various criteria. Search for updates from a user, mentioning a user, including a hash-tag or mentioning an Identi.ca group. Click on , , and in the time-line to open it in a separate search window.
- Reply, favourite or re-tweet from the time-line. Buttons on the contact's picture allow you to instantly reply to a tweet/dent, favourite a tweet/dent or / straight from the time-line.
Learn more about how to use it, by reading official manual or this tutorial.
Mousegestures for all Browsers provides premade set of mouse gestures for basic operations in many file and web browsers.
Have you never used mousegestures? Read Mousegestures to learn about them in general. See Mouse Gestures to learn how they are used in Plasma.
Installation and usage
Step One - download the gestures file
Click here to download browsergestures.khotkeys file.(requires KDE SC 4.3 or later)
Currently supported applications:
- Konqueror
- Firefox
- Opera
- Arora
- Rekonq
- Chromium
- Chrome Browser
- Dolphin
- Kontact
Step Two - Import the downloaded file
Import the file you downloaded, using and navigate to the browsergestures.khotkeys file.
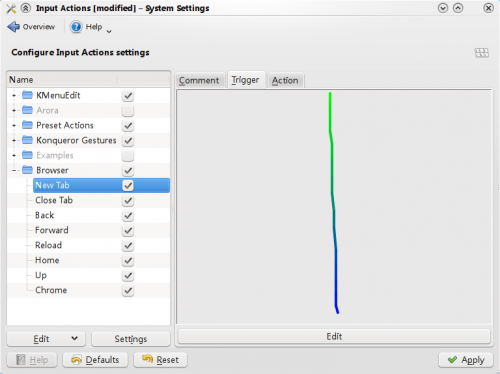
Step Three - Configure
Click , and enable . The default mousebutton is set to "2" (mouse wheel). You can choose (right button) if you prefer it.
Special Case
Opera :Because Opera has its own mousegestures, you can delete Opera in the tab
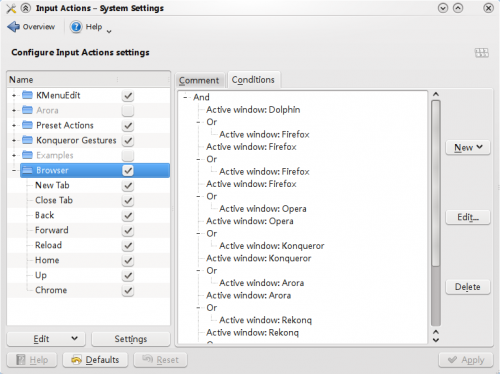
- Claus chr== Subpages of User:Claus chr/DPL/Test==
Contributors the last two days
Last 2 days (Top 20) |
|||||
|
Links
Wiki Team Page
/Technical Problems
team Dansk
Pages that needs attention
Importér opersatte sider
Brugerrettigheder
Alle specialsider
Claus, I need help. I'm asked about how to keep userbase page translations in sync with changes on the English pages. You are among the most prolific of translators, so would you mind sharing with us your methodology? How do you monitor changes? What tools do you use? Anything you can tell me would be very helpful. Thanks. --annew 15:50, 18 October 2009 (UTC)
- Hi Anne. I haven't got much of a methodology. I try to remember allways to add both the original page and my translation to my watchlist as soon as I translate it. Most days I see if there are any new entries on my watchlist, and as soon as I see an edit on a page I have allready translated I bring the translation in sync with the original. It is definitly much easier to translate changes one at a time.
- I have allways tried to keep the translations as close to the original as I can. Formatting is simply copied from the original, and text is usually translated sentence by sentence - this is not allways ideal, but it makes maintaining the translation much easier.
- I realise that spending time on translation (even if it isn't much) every day may not be posssible for all translators. Perhaps it would be helpful, if the watchlist could show more than the last 7 days, and it might also be useful to be able to remove entries from ones watchlist once they are dealt with (I don't know if the wiki software makes this possible). I hope You can use some of this. --Claus chr 19 october 2009
- Arranging that is beyond my capability, but I'll talk to tstaerk, to see whether he thinks it can be done.
- Thanks for explaining how you manage translations.
- Meanwhile, at the prompting of tsdgeos I've been looking at what can be done towards automation. sayakb, from the forum team, believes that much could be done to ease the burden. He's going to experiment with his ideas and will get back to us. --annew 08:13, 20 October 2009 (UTC)
- Thanks, that sounds great. --Claus chr 21 October 2009
I have been in touch with the Kopete devs. They plan to completely update their website 'soon'. I propose that we do nothing more about Kopete until that happens, then we can start a complete re-write. The current info was taken from wiki.kde.org, and was out of date even when I imported it. I'll keep an eye out for the kopete site update and alert you when I start to make changes worth translating. No point in making work for you :-) --annew 10:34, 23 October 2009 (UTC)
- Thanks for telling me. I shall leave those pages for now, then, and wait for the updated version. --Claus chr 24 October 2009
Over the last few days I've done a lot of work on categorising pages because I wanted to add an extension that uses them. I have now discovered that the extension is unsuitable for userbase, so that work is useless. Please don't waste your valuable time in adding the category marks to your translations, and please accept my apologies--annew 13:06, 26 November 2009 (UTC)
- Thanks for letting me know. Actually it didn't take up too much time, it was all a simple matter of copy and paste. Claus chr 17:44, 26 November 2009 (UTC)
Please read and add your comments to http://userbase.kde.org/Talk:Category_Translation. Thanks --annew 19:20, 2 January 2010 (UTC)
When you have time, could you start converting your categories to match the page suffixes - eg. [[Category:Sider på dansk_(da)]] becomes [[Category:Sider på dansk/da]] Thanks annew 14:45, 12 August 2010 (CEST)
- It is done. All danish pages (except some of the original versions of pages that have already been migrated to the new translation system) have had their categories updated, so all the _(da) categories can be removed. Claus chr 09:06, 13 August 2010 (CEST)
- Thanks. I'm taking a few days holiday, from Monday, so I'll be a bit pushed for time this weekend, but I'll leave myself a reminder to do it when I get back. annew 20:50, 13 August 2010 (CEST)
- I think it's completed now :-) --annew 16:17, 24 August 2010 (CEST)
- Applications-education-language.png
- Document-new.png
- Document-edit.png
- Dragonplayer2.png
- Archdron
- Audio-volume-high.png
- Autoconfirmed users
- Cdaudiodolphin.jpeg
- Hi48-app-kmid2.png
- Choqok Home new message.png
- Harriseldon:Choqok
- ChoqoK/Using ChoqoK
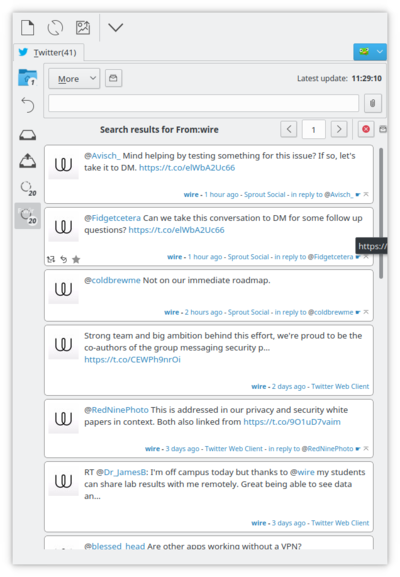 |
Choqok is a micro-blogging client for the KDE Desktop. |
Its features include:
- Twitter and Status.net integration including Identi.ca
- Twitpic integration
- Multiple simultaneous accounts
- Message search
- KWallet integration
Please see this site for a full feature list.
The Main Screen
The main screen of Choqok provides easy access to your accounts and messages. Each account, denoted by its alias, has a tab. When new messages are received, the unread count appears in the account tab.
Each account contains the following tabs: , , and .
Home
The tab contains all of the messages to which you are subscribed. Each message in the timeline includes the message, avatar, time sent (relative to now), and information on the micro-blogging client used.
Reply
The tab shows messages that were direct to you or in which you were mentioned.
Inbox
The shows messages in the timeline to which you have subscribed. They are in reverse chronological order with the newest first.
When reading a message you can click on tags, denoted by #, groups, denoted by !, or users, denoted by @. If you select a group or tag, the search window will open with tweets or dents for this group or about this topic. If you select a user, you can choose for what to search. The exact options depend on the capabilities of the network. Twitter supports one additional for tweets including this user.
Outbox
The is arranged in reverse chronological and shows the private messages that you have sent. Private messages are sent directly to a specific user. See Direct Messages for details on creating a private message.
Configuring Choqok
Creating an Account
Choqok supports connecting to Twitter, Identi.ca, and all sites that are based on Status.net.
Each account, in addition to login credentials, includes an alias. The alias defines the resulting tabs in the main window.
General Settings
The general settings provides access to common settings. Key settings include the update interval, default 10 minutes, and the number of new messages retrieved per account, default 20.
Notifications
Choqok integrates well with desktops supporting both knotify (KDE) and libnotify (Gnome, XFCE). You can also group new notifications. Please note that when starting Choqok, you may receive more than 20 notifications if you have more than 1 account or your configuration allows for more messages. This may fill your screen depending on your resolution.
Creating your First Message
Begin typing your message in the message area. As you type a message the remaining characters will countdown toward 0 from 140. When you have completed your message, press Enter. If the message is successfully posted, it appears in your inbox.
Replying to Messages
When reading a message in the timeline, you can click on the button. This button appears as you hover over the avatar for the creator of that message.
Once you choose , the recipient is pre-populated in the message section. Type your message and press Enter to send it.
Direct Messages
When creating a message select the checkbox to make the message private.
Details of a conversation
Each conversation contains an avatar at the far left and information about the user in the bottom right. This information includes the author's handle, how long ago the message was sent, and the client the author used to create the message.
If you hover your cursor over a message, the author's bio appears in the tooltip.
For Identi.ca, you can see the full conversation by clicking on the button located in the bottom right of the conversation.
Information about a User
When you click on the author's handle in a conversation or a user mentioned in the message, you can retrieve information about the user from the popup menu.
Who is this user?
This option is only available when clicking on the author's handle. It will show a popup containing the user's avatar, full name, location web site, and bio. You may subscribe to this user as well by clicking the add icon in the upper right.
From this user
This option launches the search window showing tweets or dents created by this user.
Replies to this user
This option launches the search window showing tweets or dents that were directed at this user. For Identi.ca, this will also emulate the including this user feature of the Twitter network.
Including this user
This option is only available with users on the Twitter network. It launches the search window showing any tweet that contains this user, but is not from this user.
Keyboard Shortcuts
Quick Message
To create a quick message, you can use Ctrl + T. This will launch a small window in which you can type your message.

If Choqok is not in the foreground, i.e. minimized to the system tray, you can use Meta + Ctrl + T. On most computers, the Meta key has the Windows logo. On computers manufactured by Apple, this is the Option key.
Mark All Read
When Choqok is active, you can use Ctrl + R to mark all of the messages as read. You can also close the Choqok window via the button. This will not actually exit Choqok: instead it will minimize it to the tray.
Update Timelines
When Choqok is active, pressing F5 will refresh the timelines for all of your accounts.
Insert Now Listening
Choqok provides integration with Amarok. Pressing Ctrl + L when Choqok is active will insert information about the current track playing in Amarok. The exact information posted is configured in the general settings.
The default now listening message is
Currently listening to %title% by %artist% on %album% [Amarok].
The words surround by "%" represent fields taken from the currently playing track. Possible fields include %title%, %album%, %artist%, %year%, %genre%, and ;%track%.
Other keyboard shortcuts
Ctrl + F - Launch the find window, Ctrl + N - Toggle notifications, Ctrl + U - Toggle auto-updating of timelines.
Links
- Bogzab
- Bogzab/kaff-draft
- Desktop-theme-details-dialog.png
- Desktop-settings-rightclick.png
- Desktop-config-customized.png
- Getting StartedThe pages in this list all deal with subjects that you encounter when you first start to add content or edit pages in UserBase.
- ApplicationsHere you will see a list of the application groups
- DesktopThese pages comprise the group Applications/Desktop
- File ManagementPages relating to all aspects of File Management
- InternetThis group of pages concern Internet, Networking and Communication
- Alisha
- Gdebure
- GraphicsThis page lists applications that are concerned with images. They include image viewers, photo manipulation, scanning applications, applications to create bitmap and vector graphics, together with 3D modelling. There are also several small but very useful utilities
- Hidden categoriesThese are pages that the user does not need to see
- DevelopmentThis page lists applications whose primary concern is software development, including documentation and translation of documents.
- AccessibilityThis page lists applications that are intended to increase accessibility for those who have physical impairments
- Home & Hobby
- Home and HobbyThis list has pages for your home life - cooking, hobbies or holidays. See also the Games Category.
- EducationEducational and training fun for young and old
- Admin
- Chgonzalez
- Fpuelz
 |
KrossWordPuzzle is a crossword playing game and editor. |
Introduction
You can use KrossWordPuzzle to play crosswords or to create new crosswords. It can open and save *.puz-files (AcrossLite) and it's own *.kwp files (which are XML files) or *.kwpz (which are compressed *.kwp files). You can download lots of crosswords from within the game.
KrossWordPuzzle is a community app
![]() See footnote
.
See footnote
.
Screenshots
TODO: More screenshots
Features
- Many crossword types:
- American
- Swedish
- Number Puzzle
- Crossnumber
- User defined crossword types based on a set of rules
- Barred crosswords can be played/designed in each type (bars added automatically)
- See Crossword Types for a detailed description of the different crossword types
- Many crossword types:
- Many cell types:
- Empty Cells
- Letter Cells
- Clue Cells (containing the clue text, eg. for swedish crosswords)
- Double Clue Cells (two half clue cells inside one cell in the crossword grid)
- Image cells (can be stretched across multiple cells, can display local or remote images)
- Solution Letter Cells (all solution letter cells of a crossword form it's solution word)
- Many cell types:
- A Library, to store crosswords in
- Add crosswords in different file formats to the library (.puz, .kwp, .kwpz)
- Download lots of .puz-crosswords from the Internet directly into the library
- Export to many file formats (.puz, .kwp, .kwpz, .pdf, .ps, .png, .jpg)
- Thumb creator for crossword files. It's used to get thumbnails for crosswords in the library. Can also be enabled for crossword files in dolphin.
- A Library, to store crosswords in
- Print crosswords, print preview
- Themes. There are currently three themes available: Default, Scribble and an Egyptian theme.
- Features in Playing Mode (edit mode not enabled)
- Give hints, check and solve whole crosswords or single answers/letters
- Set confidence values for filled out letter cells
- Clue list in a dock, which also shows the current answers
- Eraser tool to clear letter cells / whole clue answers
- Context menus for all cells
- Easy navigation using the mouse and/or the keyboard, there are also navigation commands in the Move menu and in the toolbar
- Fill out crosswords by selecting clues and writing the answer with the keyboard directly in the crossword view
- Features in Playing Mode (edit mode not enabled)
- Edit crosswords (edit mode)
- Add / remove / change clues and images
- Change correct letters
- Interactively change selected cells in a dock (clue texts / orientation / answer offset / dictionary / ..., image sources / cell span / ...)
- Convert between crossword types
- Resize the crossword grid
- Move all cells in the grid
- Interactively change answer-lengths by dragging a bar after the last letter cell of a clue
- Check for 180 degree rotation symmetry
- View statistics
- Templates for new crosswords
- Undo / redo for all edit actions. The undo stack can also be saved with the crossword in XML files
- A dictionary to find matching answers for new clues
- A solution word can be defined by converting some letter cells to "solution letter cells". The solution word is displayed in a toolbar
- Context menus for editing
- Edit crosswords (edit mode)
- Restore lost crosswords after a crash of the game (hopefully there is none ;)).
More Help is on these Pages
- Using KrossWordPuzzle - Solve crosswords or create new ones
Using KrossWordPuzzle

TODO: Higher resolution
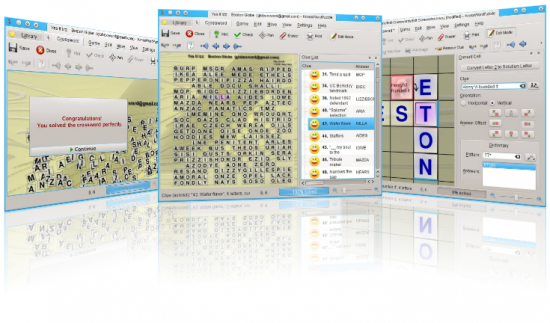
Settings

TODO: Higher resolution
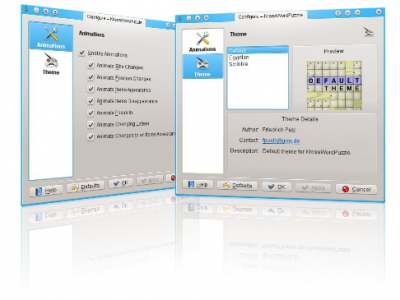
Crossword Types

TODO: Higher resolution
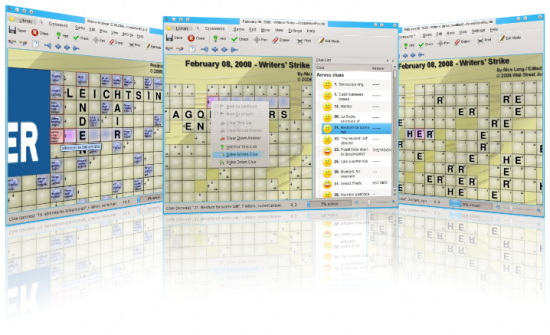
KrossWordPuzzle has a page on kde-apps.org, where you can download the latest sources and binary packages for various distributions.
![]() Support for this application can be found from the project's home page
Support for this application can be found from the project's home page
- Hacky
- Category TranslationTranslation team - please read and comment on the attached Discussion page
Current Category Translation rule is listed in Translation Help Needed.
- Category TranslationAs you may know we intend to make some important changes to UserBase over the next few months. Language translation is one of the areas that we want to make much easier, so we have been running tests on a sandbox wiki and talking to some of our more prolific translators about problems and solutions.
One aspect that has been brought to our attention is the fact that currently, page names and categories will only appear in English. With regard to page names, Yurchor has done some work on this, and we'll follow that up shortly. First, though, I want to tackle the problem of categories, because I see them as the easy way to guide users into finding other pages of similar interest.
The current system, such as it is, means that you get pages such as Applications, Applications_(de), Applications_(uk), Applications_(zh). This is unsatisfactory on at least two counts - first that we end up with a very cluttered list of categories, making it difficult to find things, and second, even more important, it still depends on the reader recognising the English category name. Even worse, some readers will not be familiar with Latin script. I propose that we use translations of category names. However, we feel that this needs to be controlled, so that consistency is easy.
One way we could do that is to create a table of categories and translations, on this page, for reference by all translators. It would have to be built up over a period, but it means that once one translation of a term has been used, all future category translations will use exactly the same term. If this is felt to be the answer, I'll create a skeleton table for translators to fill as necessary.
I'm willing, too, to listen to any other suggestions. The only criteria is that it should be easy to follow when created, and easy to use while being created. Please post your thoughts here.--annew 17:04, 2 January 2010 (UTC)
- It can be useful, surely more useful than English category names, even if, in general in wiki software, I think the bottom position for categories doesn't allow them to express their usefulness totally.--Caig 19:36, 2 January 2010 (UTC)
- This is a mediawiki issue - which doesn't necessarily mean we can't do anything about it, but does mean that it may take a little longer. I'll make sure that this, and any other similar comments, are logged on our to-do document. --annew 13:05, 3 January 2010 (UTC)
- This should be fine. From a translators point of view it would be straightforward to deal with. It is going to be a large table, though, with all the languages we have. Have You considered making a template table with just one translation - translators could then fill out a copy of that on a separate page for each language. Alternatively there could be a way to show only one translated language at a time - selecting the language from a drop down list or something like this.
- One problem we might as well face from the start: Some categories are going to have identical strings in many languages. "Internet" is a good example - it is the same in Danish as in English and probably several other languages using the latin alphabet. I suggest, that we use the same method as with the translated pages, i.e. appending the language code.
- The question is: should this be done consistently or only when necessary? The latter might seem best, as the category pages are going to look better without all the appended codes, but I actually favor the former for two reasons. First, not having obligatory language codes will make creating and maintaining the table much more difficult as it is not always obvious which other languages should be checked. Secondly, if two translators choose the same string for their translation of a category, they may not notice the problem straight away. And when the problem is noticed, the category in question may appear on many pages, which means a lot of pages needs to be edited to solve the problem. --Claus chr 08:46, 3 January 2010 (UTC)
- These are the sort of issues that need resolving as soon as possible. Does anyone see any flaw in Claus' assessment? If not, we'll go for it. --annew 13:12, 3 January 2010 (UTC)
:-) --Qiii2006 05:10, 4 January 2010 (UTC)
Following up on this - I've compromised a little on the question of translation tables, setting English + four languages to a page. You can see them listed at http://userbase.kde.org/Category:Admin - I don't know why the Arabic to Česky page is listed last. At the moment, the tables look odd, but that should resolve itself as content gets added. The alternative was for me to paste something like 'content' into every cell, but that would just have created work for translators, having to remove it before putting the real content in, so I decided against it.
I have written a short header to the pages - I think it would be useful to have this translated when you fill your section of the table, although of course translators will necessarily be able to read the English. What do you think about that? Is it worth doing, or not?
While making your entries, please remember Claus' comment about adding language codes.
As soon as we have columns filled I'll help with changing the Category entry on all the relevant pages. Should I contact the i18n mailing list and ask for help with this? Maybe one of you could do that for me, since I'm not subscribed.
Anything I've overlooked? --annew 16:57, 24 January 2010 (UTC)
- Well, I hit the first snag. I forgot to make it clear that I wanted the country code to be attached to every category. I was going to edit the categories myself, to correct, this, but then I realised that I know nothing about right-to-left languages. Does anyone know whether it is still correct to put the language code to the right of the category name? --annew 20:14, 30 January 2010 (UTC)
Now that category translations are well under way, the Category page is becomming extremely long and difficult to navigate. I feel that in its present form this page is loosing its usefulness. It would be better to have something like a separate category page for each language. I have experimented a little to try to achieve something like that.
- I'm not certain that I understand what you are trying for, so apologies if I go off on the wrong track.
First I made a new category - Sider på dansk_(da), then I added this category to all the Danish category pages. I then tried to make the new category into a subcategory of the main category page, but I couldn't make that work. Is it possible to have subcategories on the main category page - it seems to be treated differently from other category pages.
- If I'm right in thinking that you want this to be a sort of top-level index, I'd suggest that "Sider på dansk_(da)" should contain a list of sub-categories. If that's your idea, then take a look at [[Category:Games]] and the resulting entry in [[Category:Home_and_Hobby]]. I think that would work for you.
If it is possible, I would suggest, that a similar category - fx Pages in English - is created for each language; that way users can quickly find the pages of interest to them. If it is not possible, it might still be a good idea to make such categories, but we would then need to link to them from the Home page or some other prominent place. --Claus chr 08:11, 25 February 2010 (UTC)
- We need to do some considerable re-writing of the pages that people find first, IMO, and this could be brought in at the same time. I've been very busy this last few weeks, but hopefully can get back to such things very soon.
You got me right: I do indeed want a top level category for each language. I did this for the Danish pages to see, if this could be achieved easily. I simply placed [[Category:Sider på dansk_(da)]] in each Danish category page. That works OK
- Yes, it's looking good
- the only problem is, that my new "meta category" appears among all the other categories making it quite difficult to find for those who don't know that it is there.
I had hoped, that it would be possible to make my Danish meta category appear in the beginning of the main Category page, treating it as a subcategory of that page, but I couldn't make that work. A link on the entry page would be even better, though. --Claus chr 06:28, 27 February 2010 (UTC)
- If I'm understanding you aright, I think we can have both a Welcome link and links from every page. Certainly it would be a good idea to have links in the welcome page, and yes, I think you are right that it would be a good idea to have a 'Pages in English' - which would, of course, prompt other translators to do something similar. So, if it would be good to have a link on every page, you can add multiple categories. For instance the page 'UserBase_(da)' would have
- [[Category:Sider på dansk_(da)]] [[Category:Kom i gang (da)]] which would display as [[Category:Sider på dansk_(da)|Kom i gang (da)]] with both being active links.
- I think that would do what you want. --annew 13:27, 27 February 2010 (UTC)
You are right! I think it would be valuable to have the link on each page. I'll get started right away. --Claus chr 07:17, 28 February 2010 (UTC)
- Caig
- Boudewijn
- Algotruneman
- Algotruneman
- Carsten Trunk
- Advanced UsersThe pages in this category are intended to help more experienced users, who are happy to 'get their hands dirty' but do not want to go as far as compiling the whole KDE SC from source. These users have probably used configure/make/make install, and that could be considered a guide for the difficulty level.
I would recommend that as far as possible these pages are linked from application pages, perhaps in a final section with a label something like 'For Advanced Users' and that the pages themselves link to a techbase page where even more advanced information is available.
- BelaLugosi
- Games
- James j catchpole
- BelaLugosi
- Filelight.png
- Irinarempt
- Fpuelz
- Caig
- Fpuelz/Using KrossWordPuzzle
- Fpuelz/Settings
- Fpuelz/Crossword Types
- Applications/Accessibility
- Category Translation TemplatePlease use only the categories defined in this table. If your language translations of the term are not defined, please add suitable definitions now, so that others can follow them.
To avoid edit conflicts, please also use {{Being_Edited}} (then save before continuing) while you work, and remove it when you have finished.
| English | Language1 | Language2 | Language3 | Language4 |
|---|---|---|---|---|
| Accessibility | ||||
| Admin | ||||
| Advanced Users | ||||
| Applications | ||||
| Desktop | ||||
| Development | ||||
| Education | ||||
| File Management | ||||
| Games | ||||
| Getting Started | ||||
| Graphics | ||||
| Hidden Categories | ||||
| Home and Hobby | ||||
| Internet | ||||
| KDE3 | ||||
| Multimedia | ||||
| Office | ||||
| Plasma | ||||
| Security | ||||
| System | ||||
| Template | ||||
| Tutorials | ||||
| Utilities |

To use, add {{Construction}} where it is to be displayed

If this notice persists for an unreasonable time, please either notify irc.freenode.org #kde-www or report on Annew's Talk page
Note: Pages should not normally be marked for translation while they are being actively worked on
To use, add {{Being_Edited}} where it is to be displayed.
 |
The KDE Text-To-Speech System, Jovie |

Features
- Converts text into audio
- Highly Configurable
- Substitute misspoken words
- Choose speech synthesizers
- Configure Audio Output
- Manage Jobs
- Runs in the System Tray
- Integrates with most KDE applications
- Speak text from clipboard
- Speak all or sections of text file in Kate
- Speak all or sections of HTML page in Konqueror
- Can be used for notifications (KNotify)
Description
The KDE Text-To-Speech System Jovie is an application that can run in the background to provide speech output of text throughout the desktop. It integrates with many applications and is simple to use.
Setup
Once installed you can start Jovie by going to your applications menu and under open . Or just start KRunner Alt+F2 and run
jovie
. Jovie is not initially setup and you will need to do this before using its speaking abilities.
The first step is to make sure you have a compatible speech engine installed. The following synthesizers are compatible with Jovie: Festival, Festival Lite (flite), Hadifix, Epos, and FreeTTS. Any engine that can be run from commandline can also be used with Jovie.
Now you can continue on and create a Talker. Select the tab from the and click .
Select which language and synthesizer to use. You will need to have a voice installed to use Festival, you can configure this afterwards by selecting the button. Jovie should now be setup and you can test it by selecting and then .
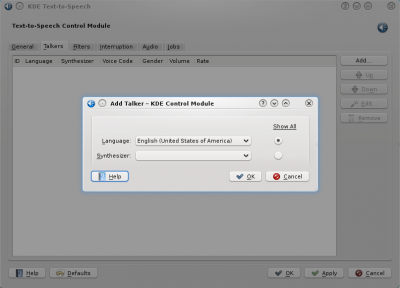
Configuration
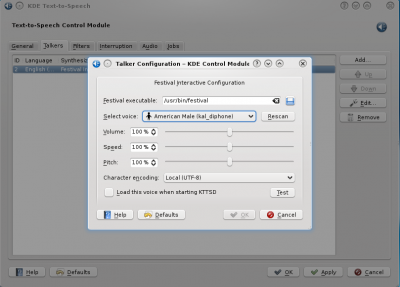
To configure the speaker's voice, volume, speed, and pitch go to the tab and click on the speaker. A window such as the one in the above screenshot will popup and allow you to configure it. To change the voice you will need to have other voices installed.
Using Jovie
System Tray
If enabled in the configuration, Jovie will be availabe to you in the System Tray. Right-clicking it will reveal the menu which is straight forward and allows for control of the speech output.
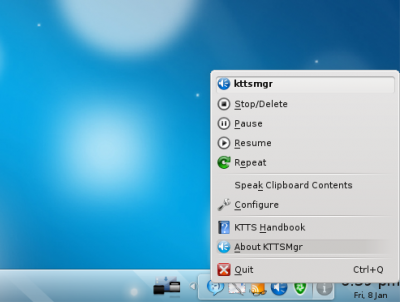
Notice the in the menu, if the application isn't integrated with Jovie (Read more about the applications with Jovie built-in in the next section) you can copy the text you want spoken, and click to hear it read.
Integration with other Desktop Applications
Konqueror
Jovie allows you to speak the text on a web page. In the menu go to . However you may not want to do this because it will also read the HTML headers on the page. Instead highlight the text you want spoken and then select .
Also note this feature is built into Okular as well. In the menu you will be give two choices or .
Notifications
Jovie works with any application that uses notifications. To set this up start an application such as Konversation that uses notifications. In the menu go to
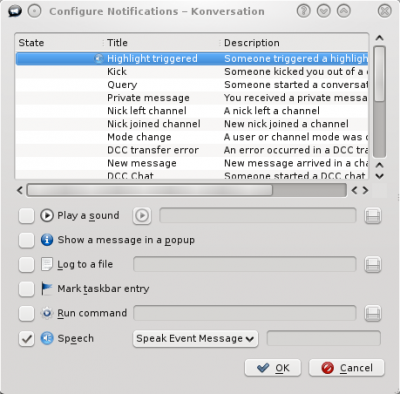
As you can see you can have various notifications for different events, such as when someone triggers a highlight. By selecting it to speak for this event it will notify you through audio output each time this event happens. Of course you can also have more than one notification.

Troubleshooting
If Jovie is silent despite having added a voice, try running the speech-dispatcher configuration tool on the command line.
spd-conf
For more information check out the Jovie Handbook included with Jovie or the Jovie handbook.

使用方法:添加 {{Under_Construction/zh-cn}}到需要显示的位置。
- Bangarang.png
- Csslayer
- Isidor
- ContributingThe pages listed here are intended to help you edit existing pages or add new pages to UserBase. They include topics about content, structure and syntax.
- Crackerjack
- Idirizbey
- Community-app-footnote (de)
Diese Vorlage ist für KDE Programme, die von der Gemeinschaft entwickelt werden und nicht von oder mit KDE veröffentlicht werden.
Benutzung: Plaziere {{Community-app-footnote_(de)}} am Ende der Seite auf der Template:Community-app_(de) benutzt wurde.
Soll mit Template:Community-app_(de) benutzt werden.
Eingefügter Inhalt beginnt hier:
![]() Unterstützung für dieses Programm kann auf der Projekt Webseite gefunden werden
Unterstützung für dieses Programm kann auf der Projekt Webseite gefunden werden
Eingefügter Inhalt endet hier:
Diese Vorlage ist für KDE Programme, die von der Gemeinschaft entwickelt werden und nicht von oder mit KDE veröffentlicht werden.
Benutzung: Plaziere {{Community-app_(de)}} am Ende des Satzes oder Namens wo du die Fußnote haben möchtest.
Soll mit Template:Community-app-footnote_(de) benutzt werden.
Eingefügter Inhalt beginnt hier:
Eingefügter Inhalt endet hier:

Wstęp
Ludzie, którzy poprzez fotografię cyfrową spełniają się artystycznie są bardzo dobrze obeznani z programami takich twórców jak Adobe™, Corel™, ACD Systems™, Bibble Labs™, Light Crafts™, czy nawet Google™. Większość z nich jest także zaznajomiona z czymś, do co niedawna było głównym edytorem zdjęć open source, GIMP-em. Niestety, GIMP-owi brakowało bardzo ważnej dla wielu fotografów funkcji, edycji 16 bitów na kanał. Z tego powodu, większość poważnych fotografów nie uważa GIMP-a za godną uwagi alternatywę. No tak, jest jeszcze Cinepaint, projekt na bazie GIMP-a (fork sprzed kilku lat), który brakującą funkcję posiada. Jednak, jego interfejs pozostawia wiele do życzenia, a sam program nie wydaje się zbytnio wspierany.
Na szczęście, teraz obecna jest kolejna alternatywa w świecie open source, wspierająca edycję 16 bit/kanał, który może spowodować niezłą rewolucję wśród aplikacji tego typu – digiKam. Osobiście odkryłem ten program całkiem niedawno. No dobra, próbowałem go wcześniej, ale dopiero, gdy zobaczyłem jego edycję w KDE SC 4 pomyślałem, że jest na mnie gotowy. Szczerze mówiąc, byłem zaskoczony jak wiele się zmieniło i jak wiele nowych funkcji dodano. Najważniejsze możliwości programu to:
- Wsparcie dla 16 bitów/kanał.
- Narzędzia krzywych i poziomów.
- Wsparcie dla zarządzania kolorami.
- Narzędzie do balansu bieli z pipetą do "zbierania" koloru.
- Narzędzia do korekty soczewki.
- Narzędzie do przycięcia z proporcją, z kilkoma dostępnymi formatami.
- Właściwe narzędzie do konwersji obrazu na czarno-biały.
- Przetwarzanie wsadowe.
- Narzędzia do tagowania i oznaczania.
- Eksport na Facebooka, Flickr, Picasa, itd.
Jest wiele, wiele więcej niż to czego nie mam nawet czasu wymienić. Oczywiście, digiKam nie jest doskonały. Jest parę spraw które mam nadzieję zostaną zmienione lub poprawione w najbliższym czasie. Jednak, zapewniam Cię, że jeśli jesteś zafascynowan(y/a) fotografią, będziesz słyszeć więcej o digiKam w przyszłości i, mam nadzieję, znajdziesz radość w jego używaniu.
Teraz pozwól mi zabrać się na krótką "wycieczkę" pokazującą, jak to się robi z digiKam. W tej chwili używam digiKam wersji 1.0.0-beta4, który znalazłem w repozytoriach KDE4 w PCLinuxOS.
Edytowanie RAW
Na potrzeby tej demonstracji użyłem tego obrazu, gdyż ma dość trudne oświetlenie.

To jest obraz RAW który zrobiłem moim starym aparatem Pentax istDS*. Oto jak wygląda w edytorze digiKam, który swoją drogą istnieje jako osobna aplikacja zwana showFoto.

Jeśli wiesz co to histogramy, pewnie widzisz, że obecny na tym obrazie wygląda raczej dziwnie. Powód jest taki, że digiKam może pokazywać dwa różne typy histogramów, linearny i logarytmiczny. Ten pokazany tutaj to logarytmiczny, jednak większość ludzi kojarzy tylko linearny. Możesz zmieniać pomiędzy nimi klikając w odpowiedni przycisk nad histogramem. Niestety, po kliknięciu w histogram linearny na tym zdjęciu jedyne co otrzymuję, to płaską linię. Oto co dokumentacja digiKam o tym mówi:
|
“Obrazy które zawierają znaczącą ilość obszarów o jednolitym kolorze, linearny histogram zazwyczaj będzie zdominowany przez pojedynczą linię. W tym przypadku histogram logarytmiczny będzie o wiele bardziej użyteczny.” |
Jestem pewny, że to ma powód natury technicznej, ale zastanawiam się, dlaczego programy jak Cinepaint są w stanie wyświetlić poprawnie histogram linearny dla tego obrazu. Wspominam o tym, bo wiem, że wielu ludzi bardzo często używa histogramów i uważa, że typ linearny jest bardziej użyteczny. Trzeba jednak przyznać - algorytm logarytmiczny jest lepszy niż żaden. Także, skoro nie jest to żaden okrutny cierń w boku, możemy ruszać dalej.
Daleko mi do eksperta post-processingu. Moje normalne działania kiedy edytuje obraz to ustawić poziomy, nasycenie, obciąć albo zmienić rozmiar, na końcu wyostrzyć. Spróbujmy zatem zrobić to z tym obrazem.
Poziomy
Na początku użyjmy narzędzia poziomów w Kolor > Ustaw poziomy.

Po prostu dodałem trochę kontrastu przesuwając lewy wskaźnik (pod drugim histogramem) w prawo i rozjaśniłem obraz, przesuwając prawy wskaźnik w lewo. Okno podglądu pozwala na bieżąco obserwować wynik operacji.
Nasycenie
Teraz zwiększę nasycenie aby wydobyć trochę koloru. Do tego użyjemy narzędzia nasycenia, które znajduje się w menu Kolor > Barwa/Nasycenie/Jasność.

Nie lubię wyglądu a'la “Disney”, czyt. zdjęć robionych z ustawieniami domyślnymi z super-nasyconymi kolorami. Lubię jak moje zdjęcia mają realistyczny wygląd - dlatego nie przesadzam z nasyceniem. Myślę, że dla tego obrazu taka wartość nasycenia jest wystarczająca, aby wydobyć nieco kolorów, lecz bez zapadania się w kreskówkowy świat.
Przycinanie
Teraz mam zamiar przyciąć obraz. To naprawdę bardzo ważny krok, jeśli planujesz drukować swe dzieło. Jeśli kiedykolwiek kazał(eś/aś) wydrukować swoje przerobione komputerowo zdjęcia, zapewne wiesz, że mogą być źle wycentrowane albo co gorsza ważna część zdjęcia została poza kadrem. Po prostu zdjęcie, które dajesz nie ma tej samej proporcji co papier, na którym jest drukowane. W takim razie, panowie ze sklepu obetną je za Ciebie. Aby temu zapobiec, musisz przyciąć zdjęcie do takich proporcji, jakie ma papier, na którym chcesz drukować. Tak, to znaczy, że potrzebujesz innego obrazu, jeśli chcesz drukować 8×10 niż 5×7, 14×20 i tak dalej. Na szczęście, digiKam sprawia, że ten proces jest banalny dzięki narzędziu do przycinania z proporcją, które znajduje się w menu Transformuj > Przycięcie z proporcją.

Jak widzisz, używam opcji "Złota proporcja" dla tego obrazu, ale digiKam ma predefiniowane ustawienia dla wszystkich pospolitych proporcji papieru na rynku, a nawet pozwala ustawić własną, jeśli tego chcesz.
Wyostrzanie
Ostatnim krokiem będzie wyostrzenie obrazu. Jestem przyzwyczajony do używania metody “Unsharp mask”, ale po przeczytaniu dokumentacji digiKam, byłem zaskoczony tym, że polecają tam metodę “Refocus” jako dającą lepsze wyniki. Oto jak wygląda narzędzie wyostrzania, do znalezienia pod Ulepsz > Wyostrz.

Jak widzisz, możesz zmienić metodę wyostrzania za pomocą rozwijanego menu. Byłem konserwatywny jeśli chodzi o ilość ostrości kolistej, ponieważ w oknie podglądu mogłem zauważyć ziarnistość. Ta ilość o wiele zwiększyła ostrość, zachowując gładki wygląd ogółu obrazu. Oto mój wynik końcowy.

Jak widać, jest spora poprawa między tym, co jest teraz, a tym, z czym zaczynaliśmy.
Auto-korekta
Normalnie byłbym zadowolony zostawiając to w takiej formie. Jednak skoro nadal jestem w trybie "odkrywanie digiKam", zdecydowałem przetestować trochę z dostępnych narzędzi auto-korekcyjnych. Zaimportowałem początkowy, niezmieniony obraz, następnie zaś uruchomiłem auto-korektę. Oto co otrzymałem.

Jak widzisz, możesz wybierać z pięciu dostępnych poziomów auto-korekty dla swojego obrazu. W większości przypadków, opcja Auto Poziomy daje najlepsze rezultaty. Jednak, w przypadku tego konkretnego obrazu było zbyt ciemno. Nie widziałem zdjęcia, w którym opcja Wyrównaj dawała jakieś dobre wyniki, natomiast w tym przypadku działało znakomicie. Oto co dokumentacja mówi o opcji Wyrównania z menu Auto-Korekty:
|
"Wyrównaj: ta metoda dostosowuje jasność kolorów w wybranym obrazie, aby histogram dla kanału Wartości był tak płaski jak to możliwe, czyli, każda możliwa wartość jasności pojawia się w mniej więcej takiej samej liczbie pikseli jak każda inna wartość. Czasami opcja Wyrównaj działa fantastycznie w zwiększaniu kontrastu obrazu, a czasem wychodzą po prostu śmieci. To bardzo potężna operacja, która może albo zdziałać cuda, albo zniszczyć obraz." |
Hmm, wydaje się, że nie żartowali. Mój obraz wygląda o wiele lepiej po użyciu tej metody zamiast normalnego, ręcznego retuszu. Oto jak mój obraz wygląda po nasyceniu, przycięciu i wyostrzeniu.

Podsumowanie
Bez wątpienia, digiKam ma wiele do zaoferowania tym spośród nas, którzy parają się fotografią. Niestety, wciąż ma jedno oczywiste pominięcie – narzędzie klonowania. Można zauważyć, że oryginalny obraz RAW ma jakieś chmurki nad drzewami. W digiKam, jedynym narzędziem, którym można je usunąć (innym niż wycięcie ich, jak ja tu zrobiłem) jest narzędzie zwane In-painting, do znalezienia w Ulepsz > In-painting. Jednakże, nie jest ono łatwe w użyciu i raczej wolne. Z porządnym narzędziem klonowania, dostępnym w większości programów do edycji zdjęć, usuwanie takich szczegółów to kwestia sekund. Dobrą nowiną jest to, że twórcy digiKam zdeklarowali ten brak jako bug i można się spodziewać implementacji w przyszłych wersjach programu. W międzyczasie możemy korzystać z GIMP-a aby dopieszczać nasze dzieła.
Myślę, że zgodzisz się, że digiKam to fantastyczne narzędzie open source. Stał się moim głównym edytorem zdjęć. Jeśli fotografujesz, może spróbujesz?

This information was provided by Tobias Koenig, KDE-PIM developer.
Some Definitions
- Real data
- By real data we mean the data, like the contacts or events. These data are stored either on a groupware server or in local files. Where exactly depends on the resource you are using. E.g. the Personal Contacts resource stores its data under $HOME/.local/share/contacts while the VCard File resource (which is not recommended to use anyway
 ) stores its data by default under $HOME/.kde/share/apps/kabc/std.vcf.
- Cached data
- The cached data are copies of the real data that are kept in the database for faster access and offline caching. The database also keeps the meta data which are management data needed by Akonadi to work correctly.
- Configuration data
- The configuration data are the data that configure the Akonadi server and the individual resources. The general configuration data for the server can be found under $HOME/.config/akonadi. The configuration data for each indvidual resources are stored under $HOME/.kde/share/config/akonadi_xyz_resourcerc# (xyz is name of resource and # its instance number) or possibly $HOME/.config/akonadi.
- The Akonadi server configuration is a couple of files in $HOME/.config/akonadi - this can be changed through environment variables, $XDG_DATA_HOME and $XDG_CONFIG_HOME, defaulting to $HOME/.local/share and $HOME/.config respectively if not set. It contains which data sources and helper programs are active and will be started and watched (so they can be restarted on crashes) by one of Akonadi's server processes (akonadi_control). KDE's local base directory can be changed using $KDEHOME environment variable, defaulting to $HOME/.kde when not set (or to $HOME/.kde4 if the distributor changed the default by patching the code).
- These paths can be seen using
kde4-config --path data
andkde4-config --path config
- Each data source handler (called resources) or helper program (called agents) can have its own configuration although some agents or resources don't require configuration. The general rule is that for every entry in $HOME/.config/akonadi/agentsrc there is a corresponding configuration file in $HOME/.kde/share/config. For example, if the [Instances] section in agentrc contains an entry for akonadi_ical_resource_2, there is also a config file called akonadi_ical_resource_2rc in the KDE config directory.
- Depending on the type of data, such config files for resources will have filenames or directory names of where the data is stored. Common locations are KDE's legacy default files, e.g. $HOME/.kde/share/apps/korganizer/std.ics. New default locations are files and directories in $HOME/.local/share, e.g. $HOME/.local/share/contacts.
- For now (as in actually released versions) the database is merely used for caching and keeping structural information (e.g. which addressbook a contact belongs to). This will change when Akonadi is being used for email, since state information like read/unread is also stored there (unless the backend is also capable of doing this, e.g. IMAP).
Organising Backups
So now we need to decide what to back up. If you want to backup the "real data", then it depends on the resources you have configured... if you use a groupware server, then the backup should be done there. For contacts, the files under $HOME/.local/share/contacts will normally be what you need.
The Akonadi tray icon offers you a backup and restore function. That backs up the "cache data" which might not include all of your data! It can be helpful if you want to clone a system 1:1, then you can copy the cached data together with the real data and the configuration, so you don't have to load the data again from the sources (e.g. groupware server).
Examining your Resources
KRunner offers you Akonadi Resource Configuration, or you can access this through the . From KDE 4.6 you will find it in You may find several resources set up. You may find one labelled
Address Book - No KDE address book plugin configured yet.
That's the old compatibility bridge (possibly created by the migrator tool). You should remove this one!
std.vcf - Ready
This is the VCard File Resource which points to $HOME/.kde/share/apps/kabc/std.vcf per default. It is not recommended that you use that one, as it doesn't share the benefit of Akonadi.
Personal Contacts - Offline
That's the preferred resource for your local contacts which points to
$HOME/.local/share/contacts
Note that this may say "Offline" when in fact you are using it. This is a display bug, and can safely be ignored.
And when more components use Akonadi?
When the rest of the components move to Akonadi, will all the data be under ~/.local/share? That should make backup easy. Well, contacts and mails are stored there now, I don't know what the plan for events/todos is, but it would make sense to store them there as well. We'll keep it in mind when discussion pops up!
Troubleshooting
Problem: Your update to 4.6 and your addressbook is suddenly completely blank
Solution: This is new behaviour in 4.6 - you can choose whether to display specific addressbooks or all of them. In front of each addressbook name there is a checkbox. Use that to enable the addressbooks you want to use.
Related pages
When common tasks feel strange
If you are new to the Plasma Workspace it's likely that many common tasks will feel strange. Some things are completely new concepts, and other things are just done differently. There are screencasts of how to perform many plasma tasks at this How-To page.
How do I install additional KDE software?
Installing software on your computer, whether with KDE SC or GNOME, largely depends on your distribution's software management system. Please consult with your distribution for more information. Install KDE software has more details.
How do I install drivers for wifi/video/other hardware?
Installing hardware drivers for networking or video is a task that most distributions take care of. Different distributions use different tools for configuring hardware. Please consult with your distribution first for more information. A good way is by asking other users on chat channels.
File Management on Steroids
Dolphin is your new file manager, but it looks and feels very different from older file managers. Learn how to enable previews, give yourself quick access to the directories you use most, and choose how much detail you see about your files. All this and more in this File Management tutorial
Using a more traditional file manager
Konqueror is primarily a web interface, but it can also function as a traditional file manager. If this is your preference, in System Settings, go to the and click on . In the list of Known Types, go to the inode/directory type. In the tab at the right side of the window, select Konqueror in the Application Preference Order and click on the button until it is at the top. Click on to save the changes.
Using Removable Drives
Mounting the drive
Most distros don't, in their default settings, automatically mount removable drives. There are two main ways of dealing with this.
- Using the Device Notifier - click on the device name and you will be shown relevant options, one of which will be . This opens Dolphin with the contents of the device listed.
- Mounting in Dolphin - if you already have Dolphin open you will see the new device appear in the Places panel. Click on that and you will see the contents of the device.
- If you prefer the drive to be automatically mounted, you can now do this by going to and check .

If you choose to automount, remember that you still need to umount it (close it) before removing it. This is the equivalent of Windows software saying "safely remove". In Device Notifier you will see ![]() . In Dolphin, a right-click will offer you the same icon with "Safely Remove" and the device's name.
. In Dolphin, a right-click will offer you the same icon with "Safely Remove" and the device's name.

Umounting the drive
Again, you have two main possibilities.
- Use the device notifier. Instead of the plug icon that you saw before, there will now be an up-arrow icon similar to that shown on VHS and DVD players. That will "safely remove" the drive. However, it will not eject it. Always wait a few seconds after using this, as buffers are flushed and you want to be sure that it has finished writing.
- In Dolphin, look for the name of the device in the Places panel. Right-click on it and you will see the Eject icon. Again, take care not to remove the drive too quickly.
Opening an empty CD tray
Usually you use a hardware button to do this, but if that is not possible you can create a link to a script to do it for you. You will find details of this on this talk page
Renaming Multiple Files
There are times when you need to rename a large number of files or folders at the same time. This is often referred to as "batch renaming," and can be accomplished a number of ways in KDE.
With Dolphin
Dolphin has a ability to rename multiple files by numbering them, though the functionality is currently limited and only useful in certain situations. One useful application would be renaming a set of photos. Here's how it's done
With KRename
KRename has the ability to rename large numbers of files based on many different criteria, including search and replace, file properties, mp3 & ogg metadata, and many others.
KRename can be found in the Kickoff menu in the Utilities section. It may be called "Bulk Rename".
Configuration Help
Workspace
Full KDE on Small Screens (e.g. Netbooks)
- The Plasma Netbook Interface is customised to make the most of the available space and automatically configures window management to give full room to applications.
- KWin's page has hints for slimming down window decorations, making fonts smaller, and disabling tooltips in KMail.
Internet
Session
- Occasionally, when something is not working well, you may be told that you need to set up an Environmental Variable. Here's how to do it
- Getting Help
- Help-contents.png
- IKB crash.png
- IKB solved.png
- IKB bug.png
- IKB goback.png
- Deletereason-dropdown
- Dialog-ok-apply.png
- Configure.png
- An introduction to KDE (ar)
- Dscf1005 jpg.jpeg
- AkonadiResource1.png
- AkonadiResource2.png
- Http://userbase.kde.org/Akonadi 4.4/Troubleshooting
Introduction
This page is mainly concerned with troubleshooting Akonadi, as there are inevitable glitches in early stages of migration. For many people the first signs of Akonadi activity will be in KDE SC 4.4, and many will be confused by it. For a brief description of the purpose of Akonadi, see this Glossary entry. You will also find useful links to further reading. Once the inevitable teething troubles are over, Akonadi will provide a power-house usable by many applications.
Understanding the Structure
You can, of course, simply use Kontact to manage all your addressbooks, but if you have a backup system in place, for instance, you'll want to know where your data is, and how it's handled. The page Akonadi and AddressBook will help.
Troubleshooting Tips
- When reporting problems with the Akonadi server, always include the comprehensive self-test report. This report can be obtained from the self-test dialog which shows up whenever the Akonadi server was unable to start successfully. You can find the selftest dialog in the kcmmodule that is accessable via:
kcmshell4 kcm_akonadi
- Starting the Akonadi server manually on the command line can result in additional useful information. This can be done by running the following command on a console:
akonadictl start
Similarly, with this command the Akonadi server can be stopped again:
akonadictl stop
This command gives more useful information:
akonadictl status
Common Problems
Kontact doesn't start - and doesn't tell me anything
If Kontact doesn't start, and you see no error messages, check that Akonadi is running. Akonadi should start on demand. If yours doesn't, you will have to start it before Kontact will start up if you have any migrated resources (most likely KAddressBook). Use the Akonadi Tray icon (get this by typing "akonadi" into KRunner) or type the commands into konsole to start it.
Kontact doesn't start - version II
Kontact has been known to be hit after an update. If this happens, try starting KMail, KOrganizer or any of the other applications from KRunner (or Konsole). Chances are high that they will work as stand-alone apps while you find what went wrong. This mainly affects version 4.4.0.
Folder not found: "/Local"
Some people have reported this error, when Kontact would not start. In some early versions of 4.4 there seems to be a bug in the migration that is telling KMail to look for local mail in ~/.local/share/Local, a directory that had not been set up. The solution for this is not to attempt to correct it, but, with KMail/Kontact closed, to open the Akonadi Console:
- Use krunner, Alt-F2, or
- "akonadiconsole" konsole
Then remove the resource that it says is for local mail. You should now find that you can start Kontact or KMail, and that a new resource will be created, pointing to ~/.local/share/local-mail
Yes. If your addressbook has migrated correctly a new resource will have been created as ~/.local/share/contacts/
What are /usr/bin/akonadi_maildir_resource and /usr/bin/akonadi_maildispatcher_agent?
The akonadi_maildir_resource is created automatically by the akonadi_maildispatcher_agent, while the latter is always started together with the Akonadi server as it provides basic functionality (e.g. sending mail) that is used by all mail applications that are (and will be) based on Akonadi. So it is ok that these two are running, as a user you can simply ignore them. This autogenerated akonadi_maildir_resource will always point to ~/.local/share/local-mail/ which is your "Local folders" account where your local folders and emails will be stored.
At this point, in KDE SC 4.4, mail is not yet being migrated.
Nepomuk Indexing Agents have been Disabled
Kontact is now working, but you keep seeing this notice:
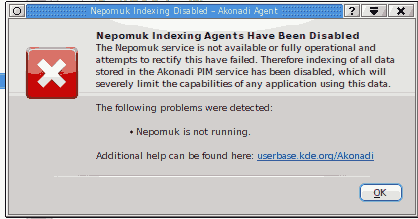
The most common reason for this notice is that Nepomuk is simply disabled in System Settings. Please try enabling it in System Settings under by checking "Nepomuk Semantik Desktop" and clicking "Apply".
If this does not help (or if the option was already checked when you got the error) and if you have previously been using prereleases of KDE SC 4.4, you may be affected by a change to the database layout (due to an upgrade of the Virtuoso database server from version 5 to version 6; production releases of KDE SC 4.4 are expected to be shipped with Virtuoso version 6). The following commands should get it working again:
qdbus org.kde.NepomukServer /nepomukserver org.kde.NepomukServer.quit
rm -r ~/.kde/share/apps/nepomuk
rm -r ~/.kde4/share/apps/nepomuk
nepomukserver
Note that the above commands will not enable Nepomuk permanently if it isn't already enabled, you have to use System Settings for that.
A running Nepomuk is necessary to have a working Akonadi, and thus a working Kontact. However, you can disable the Strigi file indexer, which is not needed for Kontact. Strigi file indexing is used for desktop searching only, which is unrelated to Kontact. Just make sure Nepomuk itself is running correctly for Kontact.
In Kontact, Nepomuk is used for many different things, ranging from displaying upcoming birthdays, over handling free/busy lists to showing a contact photo in the message viewer. If Nepomuk is not running, several different things in Kontact will cease to work. The notice is there to warn you about the reduced functionality. Enabling Nepomuk as described above fixes the problem.
You can check if Nepomuk is correctly running by typing:
akonadictl status
I want to use my current Address Book and Organizer - Can I?
Yes. When you use the Akonadi Console to add a resource it allows you to choose as Standard Addressbook - point that to your std.vcf should work fine. Migration does not destroy your old addressbook. You can continue to use it, though you will lose any benefits that Akonadi can bring. Alternatively you can have both an Akonadi addressbook and your original one, for a time, if you feel safer that way.
I can't see any details in my Address Book
At the moment, the cause of this is not identified, but the cure is simple. Close Kontact, and start KAddressBook as a stand-alone application. After you close it you will be able to use it within Kontact. It seems that something is not being triggered when Kontact launches, and I expect this to be identified and fixed soon. This seems to mainly affect version 4.4.0.
My contacts don't show when I use the Select button in KMail
Check . Make sure that your Akonadi controlled address book(s) are listed there - add them if necessary. At the same time, it's a good idea to make your main Akonadi addressbook, usually called "Personal Contacts", is set to be the default. More details of how this can be found in here.
How do I get my Groupware addressbook back?
Two solutions: using the old framework or the new one.
Old framework: In akonadiconsole, add a "KDE Address Book (traditional)". The KDE Address Book means you can set up old kresources for Akonadi. In the configuration of "KDE Address Book (traditional)", you point it to an "IMAP over KMail" KResource and in KMail, the groupware options should be enabled. This should work for Kolab, eGroupware and similar addressbooks - you will need to check the options to make sure that the correct type is selected.
New framework (only tested with Kolab): In the Akonadi configuration module add an "IMAP E-Mail Server" resource, and set up your mail server name, username and password, then click Auto-Detect. Run this command to see it:
kcmshell4 kcm_akonadi
Then add a Kolab resource. The next step is to wait for the imap resource to synchronize, which can take quite a long time. The status will appear in the Akonadi configuration module. If nothing happens, try restarting akonadiserver. After some time the Kolab addressbook(s) should appear in KAddressBook.
You experience long delays when sending mail
This is accompanied by KMail freezing until the mail is actually dispatched.
A bug has been found in the way Nepomuk checks addresses, which can cause huge delays. This is fixed for SC 4.4.1. If you cannot get 4.4.1 yet, there is this work-around:
Close Kontact, or KMail and KAddressbook if you are running stand-alone apps. Disable Strigi in SystemSettings. Stop Nepomuk, delete the database and restart nepomukserver. The actual commands you need are (as user):
qdbus org.kde.NepomukServer /nepomukserver org.kde.NepomukServer.quit
rm -r ~/.kde/share/apps/nepomuk
rm -r ~/.kde4/share/apps/nepomuk
nepomukserver
This will, of course, wipe out all the database, including any tags you've added. In theory, I understand that it's possible to do a more selective wipe of the database. If this matters to you you can find the instructions at this page
IMAP Resource always claims to be offline
Even though the system has an internet connection, the IMAP resource refuses to switch to online state.
This bug is caused by a misconfigured NetworkManager installation on your system. Check the output of the following command:
qdbus --system org.freedesktop.NetworkManager /org/freedesktop/NetworkManager org.freedesktop.NetworkManager.state
You can get any of the following values:
- 20 (formerly 4), disconnected. If you have access to the internet, your NetworkManager configuration must be wrong.
- 70 (formerly 3), connected. The problem must be somewhere else.
- It might be that one or more network interfaces are not controlled by NetworkManager. If that is your case, give the control of those interfaces to NetworkManager. It might be as simple as removing the entries for the interfaces from a text file (for example, /etc/network/interfaces). Check the help resources provided by your software distribution for more information.
Can't read any details of some messages or big delays to read it
if you aren't able to read some emails and see a message with " please wait ... ", you may logout and login KDE session to reinitialize all processes, might help.
Some Technical Issues
Nepomuk
Starting with KDE 4.4, it is required that Nepomuk is running in order for Akonadi to work correctly. Akonadi will check this and display an error dialog on startup if this is not the case.
Nepomuk only works with the Virtuoso backend. You can check whether the Nepomuk is running with the correct backend by using the Akonadi self-test dialog, as described above.
Although Nepomuk is required to be running, you can still disable Strigi file indexing, which is usually the most resource-intensive part of the Nepomuk framework.
Apparmor
Some distributions using Apparmor have it set up in a way that prevents Akonadi from running its internal database server. This can result in a variety of fuzzy error messages, including but not limited to the following:
unknown error 255 when running akonadictl
"DB error: 'Could not open required defaults file: /home/$username/.local/share/akonadi/mysql.conf"
You can solve this by running the following command with root privileges then reload apparmor:
aa-complain mysqld
On Kubuntu this is:
sudo aa-complain mysqld
sudo /etc/init.d/apparmor reload
Note that you might be using Apparmor even if it does not show up in the process list.
Also note that some distributions ship an additional mysqld binary called mysqld-akonadi which has AppArmor set up correctly. If that's the case on your system and you see this problem nevertheless, there are two possible reasons:
- Akonadi still uses mysqld instead of mysqld-akonadi. You can change that in .
- AppArmor is not setup correctly for mysqld-akonadi either. Try running the "aa-complain" command noted above with mysqld-akonadi instead of mysqld.
---
You will also experience this problem if you are running an encrypted home directory using encryptfs combined with AppArmor as the Akonadi apparmor profile currently does not account for an ecrypted home (common with Ubuntu Jaunty users). Error messages with include:
- dmesg produces:
ecryptfs_do_create: Failure to create dentry in lower fs; rc = [-13]
ecryptfs_create: Failed to create file inlower filesystem
Akonadi will list the following errors:
Akonadi server process not registered at D-Bus
The fix is to edit the following file "/etc/apparmor.d/usr.sbin.mysqld-akonadi". Below the line:
@{HOME}/.local/share/akonadi/** rwk,
Add a new line:
@{HOME}/.Private/** rwk,
Restart apparmor and restart akonadi.
Missing Prerequisite
To use Akonadi you need to have the following packages installed (names might differ depending on your distribution):
- The MySQL server (called mysql on openSUSE)
- The Qt4 MySQL plugin (called libqt4-sql-mysql on openSUSE)
If you compile Qt4 yourself, make sure to tell the configure script to build in MySQL support by passing it the following option:
-plugin-sql-mysql
If "configure" cannot locate the necessary MySQL client code (i.e, says "MySQL support cannot be enabled due to functionality tests") then ensure that the corresponding package is installed (typically called [lib]mysql[client]-dev[el]). Also, depending on the install location of the MySQL headers, additional parameters to "configure" might be needed (eg. "-I /usr/include/mysql" on OpenSuse).
If you get the Qt4 direct from Nokia, such as a download of qt-sdk-linux-x86_64-opensource-2009.05.bin, you will ( by the command "akonadictl start") get an error at Test 1:
Database driver not found.
Details: The QtSQL driver 'QMYSQL' is required by your current Akonadi server configuration.
The following drivers are installed: QSQLITE.
Make sure the required driver is installed.
The driver you need is libqsqlmysql.so
Unfortunately this driver is not part of the distribution (until january 2010). You need to compile the source. Download the following file:
qt-everywhere-opensource-src-4.6.0.tar.bz
Then configure and make as above. But the make install doesn't copy the driver. So you have to copy it by yourself:
cp <qt-src-dir>/qt-everywhere-opensource-src-4.6.0/plugins/sqldrivers/libqsqlmysql.so /usr/local/bin/sqldrivers/
But the Revision 4.6.1, such as qt-sdk-linux-x86_64-opensource-2010.xx.bin has the driver you needed. But it might be necessary to bind again the libqsqlmysql.so if the libmysqlclient.so has changed to a newer version.
Environment Setup
The Akonadi server searches for Akonadi agents and resources in the paths defined in the XDG_DATA_DIRS environment variable. If Akonadi complains about not finding agents or resources, check if this variable is set correctly. Also keep in mind that even if set in a current console session, it might not have been set when starting the server. Starting the server manually in the current console session excludes this cause.
mysqld: unknown variable 'innodb_file_per_table=1'
If the MySQL server log contains the following error, then your MySQL server was built without the InnoDB support which is required by Akonadi or InnoDB needs to be loaded in your mysql.conf file:
[ERROR] /usr/libexec/mysqld: unknown variable 'innodb_file_per_table=1'
[ERROR] Aborting
Try adding:
#sql_mode=strict_trans_tables <- Add underneath this line
#plugins
plugin_dir=usr/lib/mysql/plugin < - This may be a different path
plugin-load=ha_innodb.so
Table 'mysql. servers' doesn't exist
If MySQL server log contains the following error, then, most probably, you don't have your MySQL configuration file in place:
[ERROR] Can't open and lock privilege tables: Table 'mysql.servers' doesn't exist
[ERROR] Cannot open mysql.db
[ERROR] Cannot open mysql.user
[ERROR] Cannot open mysql.event
Copy it from /usr/share/config/akonadi/mysql-global.conf into ~/.config/akonadi/mysql-local.conf. (For debian and openSuSE users the file is located in /etc/akonadi/mysql-global.conf). Then open it and uncomment the line sql_mode=strict_trans_tables. After that, you may get the following errors:
[ERROR] Plugin 'InnoDB' init function returned error.
[ERROR] Plugin 'InnoDB' registration as a STORAGE ENGINE failed.
[ERROR] Unknown/unsupported table type: innodb
[ERROR] Aborting
If so, then in the same file find the line that starts just like the one above (which you have uncommented), but has additional parameters, separated by commas (something like sql_mode=strict_trans_tables,strict_all_tables, ...etc). Comment the shorter sql_mode=... line and uncomment the longer one.
On openSUSE 11.2 running the following command will fix this problem:
mysql_install_db --datadir=$HOME/.local/share/akonadi/db_data/
For Archlinux:
mysql_install_db --datadir=$HOME/.local/share/akonadi/db_data/ --basedir=/usr
Kubuntu 10.04 (Lucid Lynx) Upgrade
This is a summary of other entries here for those upgrading from Kubuntu 9.10 to 10.04 who may have been using a personal package archive (PPA) for KDE 4.3 for bug fixes.
Install missing prerequisites. Remove previous akonadi cache. Start the akonadi service. Install the database. Upgrade the database. Stop and restart the akonadi service.
sudo apt-get install virtuoso-server mysql-server-5.1
rm -r $HOME/.local/share/akonadi
akonadictl start
mysql_install_db --datadir=$HOME/.local/share/akonadi/db_data/
mysql_upgrade --socket=$HOME/.local/share/akonadi/db_misc/mysql.socket
akonadictl stop
akonadictl start
The mysql_install_db command above will report something like the following, which you can safely ignore:
Installing MySQL system tables...
100501 18:04:30 [Warning] Can't create test file
/home/[userid]/.local/share/akonadi/db_data/[hostname].lower-test
Reference: forum.kde.org Akonadi 1.2.1 - some issues
KAddressBook upgrade
In addition to the Kubuntu 10.04 remedy above, problems trying to add a Vcard directory may require the following command while Akonadi is not running:
rm -rf $HOME/.config/akonadi
Can't initialize character set latin1
If you get the following error when starting Akonadi, then you are probably using a MySQL server which has a version > 5.1.42:
Character set 'latin1' is not a compiled character set and is not specified in the '/usr/share/mysql/charsets/Index.xml' file
Nepomuk QueryServer interface not available!
Connecting to deprecated signal
QDBusConnectionInterface::serviceOwnerChanged(QString,QString,QString)
DataStore::unhideAllPimItems()
Character set 'latin1' is not a compiled character set and is not specified in
the '/usr/share/mysql/charsets/Index.xml' file
Database error: Cannot open database.
Last driver error: "QMYSQL: Unable to connect"
Last database error: "Can't initialize character set latin1 (path:
/usr/share/mysql/charsets/)"
Database error: Cannot open database.
Last driver error: "QMYSQL: Unable to connect"
Last database error: "Can't initialize character set latin1 (path:
/usr/share/mysql/charsets/)"
There is a known regression in MySQL 5.1.43 and 5.1.44 which prevents MySQL from starting.
See the bug report for more details.
Restarting after a previous error
If you had problems starting Akonadi and fixed those (such as a missing package or the Apparmor problem) make sure that the Akonadi server is completely shut down before trying to start it again, by calling on the command line:
akonadictl stop
You can confirm that it was indeed shut down completely by running:
akonadictl status
Under some circumstances the Akonadi server can be stuck in a partially running state after a failure which will prevent the next attempt to start it to fail as well. Please file a bug report if you run into this problem including the self-test report of the initial problem.
The so-called "Gentoo-Assert"
That's an especially nasty problem that so far only affects users of source-based distributions, most prominently Gentoo. It is named after MySQL assertions like the following example and is most likely caused by a MySQL protocol mismatch between the MySQL server and the client library or the Qt MySQL driver.
akonadiserver: libmysql.c:4301: setup_one_fetch_function: Assertion
`param->buffer_length != 0' failed.
It is extremely hard to diagnose as the assertion mentioned above is only triggered sometimes. Instead you'll get a wide range of weird symptoms:
- ASAP protocol logs show successful creation of objects which are supposedly no longer available when the next commands access them again.
- SQL protocol logs show INSERT or UPDATE commands with values that mismatch the corresponding column types and nevertheless succeed.
- SQL protocol logs showing large apparently random record ids which are nevertheless considered valid.
References:
- http://forum.kde.org/viewtopic.php?f=20&t=61738
- http://bugs.gentoo.org/show_bug.cgi?id=267513
- https://bugs.kde.org/202623 (contains a possible solution)
- http://bbs.archlinux.org/viewtopic.php?id=78358
Possible solution: Rebuild the Qt MySQL driver after upgrading MySQL (which most likely caused this problem in the first place).
To reset nepomuk and the akonadi system in KMail 2
Be warned that you should not follow this advice, without backing up your data.
After the introduction of KMail 2 in kdepim, since KDE SC 4.6.x, in order to search in emails and to get addressbooks, it is necessary to set enabled, and check the box .
If virtuoso-t occupies almost 100% of CPU cores and the system is nearly frozen, it may be a good idea to reset all.
To do the big reset you need :

akonadictl stop
rm -rf  ~/.local/share/akonadi/db_data/*
akonadictl start
# we should also clean KDE temporary folders before start KMail
rm -rf /var/tmp/kdecache-$USER /tmp/ksocket-$USER /tmp/kde-$USER
You need to check to see whether the Sent folder is correct. Some of mine were not.
Check settings and check whether the incoming folder is correct. Some of mine were not.
Check all filters, before pulling some email. I advise disabling all filters because there may be many folders incorrect or missing.
Also important is that if you have an "expired folder", check all folders to see if the receiving folder is correctly set. If you have checked you may lose important emails because expiring worked with the wrong folder.
In each check Identities, as the associated identity may also be changed or lost in any folder.
After this we are ready to clean up Nepomuk data before enabling Nepomuk Semantic.
After all is cleaned , if you aren't able to read any emails, you should logout and login KDE session again to reinitialize all processes .
- Dario
- Adjustcurves.png
- Hans
- Icon wink.gif
- Fix1.png
- BCG.jpg
- Effects.png
- Fix2.png
- Fix3.png
- Icon mrgreen.gif
- Fpuelz/Service Providers
- Browser Configuration
The following articles help you to configure your browser
Opera
- Configuring Opera to blend with your Plasma workspace
- This forum page also relates to Opera integration
Firefox
- Tell Firefox to use KMail when it sees a mailto: form.
- export your web passwords in firefox to a plain text file using python sourcecode.
- This forum page helps you integrate Firefox's appearance, and set KGet as the download manager.
- The Gentoo wiki archives have HOWTO Integrate Firefox with KDE.
- Using the Plasma Open and Save dialogs in Firefox.
- Use a Breeze inspired theme in Firefox.
- Getting started with KAlgebra
Home » Applications » Education » KAlgebra » Test
KAlgebra is a calculator with symbolic and analysis features that lets you plot 2D and 3D functions as well as to easily calculate mathematical expressions.
The Console Tab
When you first open KAlgebra a blank window shows up, this is the main work area for calculus.
Let's get started with a little example of how KAlgebra works, just type:
2+2
Then type Enter and KAlgebra will show you the result. So far it's easy.
However, KAlgebra is much more powerful than that. It started as a simple calculator, but now it's almost a CAS.
You can define variables this way:
k:=3
And use them normally:
k*4
And that will give you the result:
12
You can also define functions:
f:=x->x^2
And then use them:
f(3)
Which should return
9.
You can define a function with as many variables as you want:
g:=(x,y)->x*y
The possibilities of defining functions are endless if you combine this with the piecewise function. Let's define the factor function:
fact:=n->piecewise { n=0 ? 1, n=1 ? 1, ? n*fact(n-1) }
Yes! KAlgebra supports recursive functions. Give some values to n, to test it.
fact(5)
fact(3)
KAlgebra has recently started support for symbolic operations, to check it out, just type:
x+x+x+x
or
x*x
It doesn't work on some complex structures, though. Only basic support so far.
Moreover, KAlgebra has support for differentiation. An example of the syntax:
diff(x^2:x)
If you have used KAlgebra, you will have noticed the syntax completion support, which is very helpful.
Another resource that can be useful to learn more about KAlgebra comes with KAlgebra: The tab
It contains examples of every function supported by KAlgebra. Maybe this is the best way to learn how to do things with KAlgebra.
Dolphin has a ability to rename multiple files by numbering them, though the functionality is currently limited and only useful in certain situations. One useful application would be renaming a set of photos.
Select the files you wish to rename, then right-click on one of them and select (keyboard shortcut F2). You will be presented with a dialogue where you may specify what you want the files to be named.
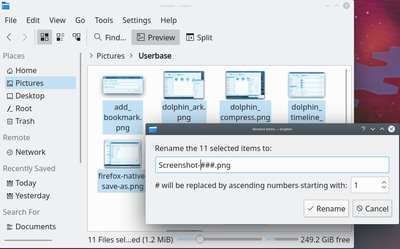
The '#' symbol anywhere within the file name will be replaced with a number, starting with '1' for the first file and continuing up for each file after that. Placing multiple hashes will add leading zeroes to the numbers.
- # will be replaced by 1, 2, 3, 30, 150, etc
- #### will be replaced by 0001, 0002, 0003, 0030, 0150, etc
Introduction
This tutorial describes how to transfer files to and from a remote server using the KDE Software Compilation. This might mean downloading a file from a FTP server or saving a file over SSH.
The KDE SC does not include a standard FTP client as you may know it from other platforms. There are some third party applications like Kasablanca or KFTPgrabber but they are not yet fully ported to the KDE Platform 4. The good news however is, you don't need such an application to manage files on your remote servers. The KDE platform features a far more powerful technique for dealing with such situations.
Basic file transfers
To connect to a remote server you can use almost any KDE application. You may choose the appropriate application depending on the task you want to do. For example, if you wanted to browse a remote server the best choice would be Dolphin or Konqueror. To edit a webpage you can directly use Quanta without the need of a separate FTP application. In this example we will use Dolphin and transfer files using FTP.
Connect to a FTP server
To connect to a FTP server just open Dolphin and click on an empty place in the address bar. Type the address of your server into the address bar. Don't forget the ftp:// at the beginning:
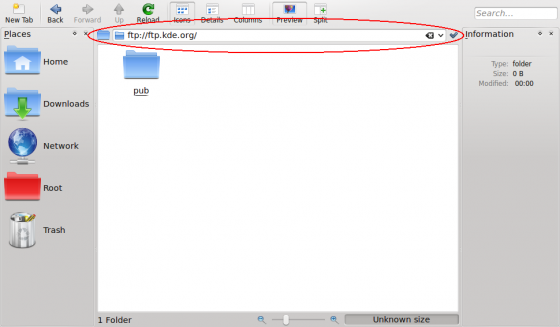
If your server requires authentication you will be prompted for your credentials in a popup dialog. Enter your username and password. If you wish to save them, check the relevant checkbox. Dolphin will store your passwords securely in your KDE Wallet. For faster access you can insert the username and password directly in the address bar using this format: ftp://username:password@ftp.myserver.org; however we do not recommend this, as it is a security risk. Not only is it visible in your location bar, but it is stored in plain text, and so can be easily read by anyone with access to your home folder. Storing the password in KWallet is much safer, providing you have protected your KWallet with a password.
Other protocols
FTP is just one example of the many different protocols that the KDE platform supports. There is a whole lot more to explore. To see a list of all supported protocols, click on the tick next to the address bar to switch to browse mode...

...and then on the ftp button at the beginning.
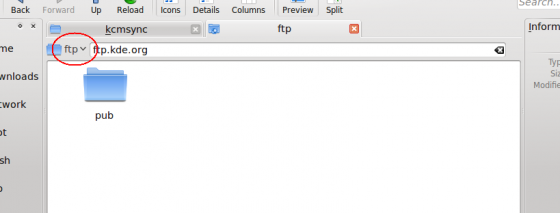
The protocol selector should appear similar as shown on the next screenshot. What protocols are available on your system, depends on which KIO plugins you have installed.
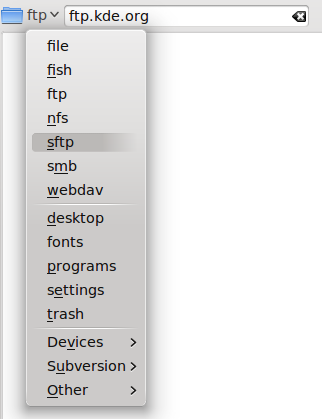
Note: Due to KDE bug #55804, files moved or copied from the local machine to a remote machine via the fish protocol have the wrong timestamps. A workaround is to use SFTP for transferring files to another machine.
Imitate a standalone FTP client using Dolphin
If you want a more standalone-ftp-client like experience you can use Dolphin's split view:
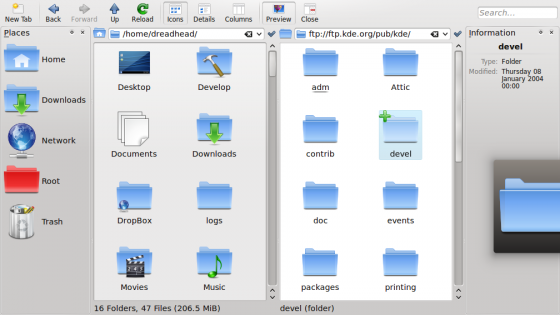
Add a remote folder to your places bar
You can drag and drop a remote folder directly to your places and bookmark it:
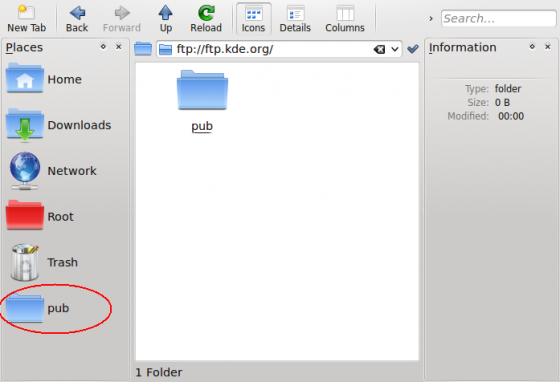
Directly access remote files in other KDE applications
As already said previously, nearly every KDE application is capable of accessing remote files and folders. For example, you can open a remote website directly in Kate by inserting the address in the file open dialog:
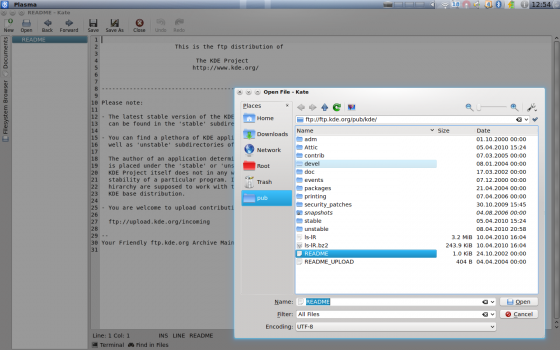
You can now edit the file in Kate. When you click the file will be directly uploaded to the server. That way, you don't need to download files before editing and upload them again after editing.
Changing settings
You probably miss some settings seen in standalone file transfer clients now, such as switching active and passive mode in FTP or timeout settings for your connections. Don't worry, you can find them in System Settings under . The section may be especially useful.
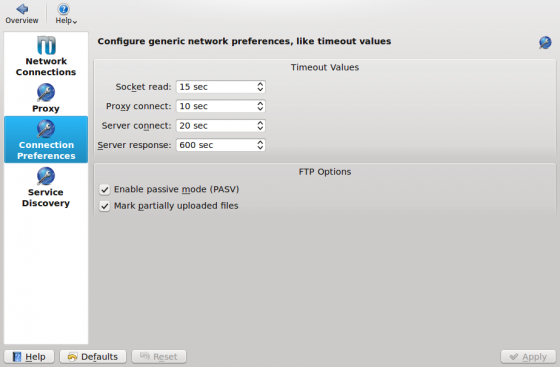
- Dotancohen
- Dotancohen
- Ftp8.png
- Curves adjust.jpg
- BrightnessOrig.jpg
- ConfigurationThese pages will help you configure your workspace and your applications
- Hannie
- Hannie
- Bookmarks.png
- Bookmarkseditor.png
- Configure practice.png
- Configure practice conjugation.png
- Configure blocking.png
- Folder with sound and pictures.png
- Construction/fr

Pour l'utiliser, ajoutez {{Construction/fr}} où il doit être affiché.
Diese Seite dient einer nicht technischen Referenz und zusätzlich enthält sie Links zu weiteren Informationen und Demonstrationen. Sehen Sie sich dazu auch die Begriffserklärungen an.
Aktivitäten
- Aktivitäten sind Zusammenstellungen von Plasma Miniprogrammen und haben ihre eigenen Hintergrundbilder. Ein bisschen wie Virtuelle Arbeitsflächen, aber nicht ganz.
- Zum Beispiel Sie haben eine Arbeits-Aktivität die RSS-Feeds anzeigt, eine Notiz mit ihren Aufgaben, eine "Ordner-Ansicht" mit Dateien für Ihre Arbeit und ein unaufdringliches Hintergrundbild.
- Daneben haben Sie Freizeit-Aktivität, die Vorschauen auf Familenfotos und Hunde enthält, RSS-Feeds von ihren bevorzugten Blogs, eine Ordner-Ansicht die Ihre Filmsammlung zeigt, ein Miniprogramm für Twitter und natürlich das Hintergrundbild mit Iron Maiden, dass Sie schon seit den frühen 80'ern lieben.
- Um Punkt 17.00 Uhr schalten Sie von Ihrer Arbeits-Aktivität auf die Freizeit-Aktivät um.
- Weitere Informationen:
Akonadi
- Der Datenverwaltungsdienst für alle PIM (Personal Information Manager) Daten in KDE. Ein zentrales Speicher- und Abfrage-System erlaubt verschiedenen Programmen auf eine Datenquelle zuzugreifen. Bitte beachten Sie, dass die Verwendung von Akonadi nicht das Format der Datenspeicherung ändert (vcard, iCalendar, mbox, maildir etc.) - es stellt nur einen neuen Weg für den Zugriff und die Änderung von Daten zur Verfügung.
- Die Hauptgründe für das Design und die Entwicklung von Akonadi sind technischer Natur, z.B. um einen einzigen Weg zu haben um PIM-Daten (Kontakte, Kalender, E-Mails, ...) von verschiedenen Applikationen zu erreichen (z.B. KMail, KWord, ...). Dadurch wird es vermieden hier und da ähnlichen Programmcode zu schreiben.
- Ein weiterer Grund ist es GUI Applikationen wie KMail von dem direkten Zugriff auf externe Ressourcen, wie z.B. Mail-Server, zu entkoppeln - welches in der Vergangenheit ein Hauptgrund für Fehlerreporte / Wünsche mit Hinblick auf Geschwindigkeit und Verfügbarkeit war.
- Weitere Informationen:
Baloo
Baloo ist ein Datei-Indizierungs- und Such-Dienst den Programme wie Dolphin und Elisa verwenden um Metadaten von Dateien zu erhalten und um systemweite Suchen durchzuführen. Im Terminal tippen Sie balooctl check um herauszufinden ob Baloo bereits einen Index erstellt hat. Auch die Befehle balooctl disable und balooctl status sind u. U. hilfreich.
- Weitere Informationen:
- Baloo (engl.) - [Anm. des Übersetzers: Der Link verweist auf Kiplings Balu den Bären, ob dieses ein Fehler ist oder die Quelle der Namensbezeichnung angeben soll, ist unklar.]
Breeze
Breeze ist das Standard-Design, das mit Plasma 5 eingeführt wurde.
- Weitere Informationen:
- Git repository (engl.)
Containment
- Ein Containment ist eine Zusammenfassung von Miniprogrammen. Jedes Containment verwaltet das Layout und die Konfigurationsdaten der zugeordneten Miniprogramme, unabhängig von anderen Containments.
- Das Endergebnis ist, dass Sie Miniprogramme aufgrund ihrer Tätigkeiten in einem Containment zusammenfassen können und nicht darüber in welchem Verzeichnis diese abgelegt sind.
D-Bus
- Ist ein System für die Interprozesskommunikation. Es ermöglicht verschiedenen Programmen sich gegenseitig zu beeinflussen. D-Bus wurde von RedHat® entwickelt und war stark beeinflusst von KDE3s DCOP, welches es ersetzt hat.
- Weitere Informationen:
Dolphin
- Der Standard-Dateimanager in KDE Plasma. Er hat zwar eine Seitenleiste (Orte), aber die Hauptnavigation erfolgt über die Brotkrumen-Leiste über dem Hauptfenster. Geteilte Fenster sind möglich und Ansichten können einzelnen Fenstern zugeordnet werden. Das Einbinden von USB-Geräten kann über die Seitenleiste vorgenommen werden. Zusätzliche Verzeichnisse können der Orte-Leiste zugeordnet werden. Eine Baumansicht ist ebenso möglich.
- Weitere Informationen:
Flake
- Flake ist eine Programmbibliothek die in Krita und Calligra verwendet wird. Sie bietet etwas, dass "Shapes" genannt wird und im Deutschen etwa mit "Gestaltung" übersetzt werden kann. Diese "Shapes" dienen dazu Inhalte darzustellen und bieten Werkzeuge um Inhalte zu ändern. "Shapes" können gezoomt oder gedreht werden. Sie können auch gruppiert werden, um als ein einzelnes "Shape" zu erscheinen, um den dann der Textfluss möglich ist.
Weitere Informationen:
- KDE Community Wiki - Flake (engl.)
Get Hot New Stuff
Get Hot New Stuff (GHNS) ist ein offener Standard, der es Anwendern einfach macht verschiedene Erweiterungen für ihre Anwendungen herunterzuladen und zu installieren. Unsere Umsetzung von GHNS wird durch Plasma verwendet (z. B. um neue Arbeitsflächen-Themen zu erhalten) und von vielen weiteren Anwendungen und Widgets.
- Weitere Informationen:
- The KDE Store (engl.)
Home Verzeichnis
- Das Home-Verzeichnis wird im Deutschen manchmal auch als Benutzerverzeichnis und in KDE in der Regel als Persönlicher Ordner bezeichnet. Es ist die Stelle in ihrem System, wo alle Ihre Dateien gespeichert sind. Sie können Ihre Dateien außerhalb dieses Verzeichnisses speichern, aber alle Anwendungen sind so konfiguriert, dass dieses Verzeichnis als Ort vorgeschlagen wird, um Ihre Dateien zu speichern. Es ist einfacher, wenn Sie ihre Dinge hier speichern.
- Weitere Informationen:
KHTML
- KHTML ist eine HTML-Rendering-Engine die die Basis von WebKit war. Sie wird noch heute von einigen Browsern verwendet (z. B. Safari).
Kirigami
- Kirigami ist eine Gruppe von Komponenten, die es Entwicklern erlauben Programme zu schreiben, die sowohl auf Mobilgeräten als auch auf heimischen Arbeitsrechnern gut aussehen und ebenso gut funktionieren.
- Weitere Information:
- Kirigami on kde.org (engl.)
Kickoff
- Kickoff ist ein Startmenü in KDE Plasma in dem die Anwendungen nach funktionalen Gruppen sortiert werden. Ein Rechtsklick auf das Symbol ermöglicht es die Menüeinträge zu bearbeiten. Schneller Zugriff auf weniger oft genutzte Anwendungen ist auch über die Suchfunktion mögliche. Die Bezeichnung Kickoff wird seit einiger Zeit nicht mehr aktiv verwendet. So ist aus dem Kickoff Anwendungs-Starter nur noch der Anwendungs-Starter geworden. Es gibt in Plasma noch alternative Startmenüs wie beispielsweise ein Vollbild-Programm.
- Weitere Informationen:
- Design Dokumentation (Link z. Z: nicht verfügbar)
KJS
- Die JavaScript Engine der KDE Plattform.
KInfoCenter
- Kinfocenter entstand als Teil von Kcontrol und ist eine alleinstehende Anwendung seit KDE 3.1. Es wird in aktuellen Plasma-Versionen in der Regel nur noch als Infozentrum oder KDE-Infozentrum bezeichnet. Hier werden Informationen über das System wie z. B. der Energieverbrauch, Hardwareinformationen und weiteres, angezeigt.
- Weitere Informationen:
- KInfoCenter
- Wikipedia: KInfoCenter (engl.)
KIO
- Das KDE Input / Output-System bietet eine einheitliche API für die Nutzung von Dateien, egal ob lokal oder auf einem entfernten Server. Darüber hinaus bieten KIO-Slaves Unterstützung für einzelne Protokolle. Einige sind besonders nützlich, diejenigen sind: HTTP, FTP, SFTP, SMB, NFS, SSH (fish), man, tar, Google Drive und zip.
- Mehr Informationen:
Kiosk
- Kiosk ist ein Grundgerüst zur Einschränkung der Zugriffsrechte einzelner Anwender auf einem KDE-Plattform-System, ideal für den Einsatz in Locked-Down-Umgebungen wie Internet-Cafés. Kiosk wird seit einiger Zeit nicht mehr weiterentwickelt.
KPart
- Ein KPart ist eine einzelne Komponente des KDE-Plasma-Desktop und ermöglicht es Anwendungen ihre Funktionen anderen Anwendungen zur Verfügung zu stellen. KParts erlaubt es KMail und KOrganizer sich (als Plug-Ins) in der Kontact-Suite zu integrieren oder ermöglicht es KHTML Webseiten in Akregator darzustellen.
Kross
- Kross ist ein Framework für Scriptsprachen, dass die Unterstützung für mehrere Scriptsprachen ermöglicht. Ein Plugin-System ermöglicht die Unterstützung weiterer Sprachen in der Zukunft.
KRunner
- Die Mini-Kommando-Zeile, auf die aus dem klassischen Start-Menü, durch die Tastenkombination ALT + F2 oder mit der Tastenkombination ALT + Leertaste zugegriffen werden kann.
- Weitere Informationen:
KWin
- KWin ist der Fenster-Manager von KDE. Hier können Fensterdekorationen geändert und Themen angewendet werden.
- Mehr Informationen:
Pager
- Ein Pager (Arbeitsflächen-Umschalter) ist ein kleines Programm oder ein Miniprogramm für die Kontrollleiste, dass die Position der Fenster auf ihrer Arbeitsfläche (Desktop) anzeigt. In der Regel, wenn Sie mehrere Virtuelle Arbeitsflächen haben, wird eine Übersicht aller Arbeitsflächen angezeigt.
Panel
- Ist die englische Bezeichnung für die Kontrollleiste. In KDE Plasma wurde der frühere Name Kicker fallen gelassen und die Bezeichnung Leisten wurde zur Norm. Applets wurden weitgehend durch Miniprogramme ersetzt.
- Weitere Informationen:
Phonon
- Eine plattformübergreifende Multimedia-API, die Schnittstellen zu den existierenden Grundgerüsten wie gstreamer und xine bietet.
- Weitere Informationen:
Plasma
- Plasma ist die Arbeitsumgebung von KDE. Es stellt genaugenommen den sichtbaren Teil der Arbeitsumgebung dar. Plasma ist auch die Verbindungsstelle zwischen den Leisten, den Miniprogrammen und dem Anwendungsstarter. Plasma Mobile ist die Plasma-Variante, die besonders an mobile Geräte wie Smartphones und Tablets angepasst ist.
- Weitere Informationen:
Qt
- (Ausgesprochen wie das englische Wort cute) Ist ein Grundgerüst / Werkzeugkasten zum Schreiben von plattformübergreifenden Anwendungen. Sie wird von vielen plattormübergreifenden Anwendungen wie Krita, GoogleEarth oder anderen, verwendet. Qt bildet die zugrundeliegende Bibliothek auf der die KDE-Software aufbaut.
- Weitere Informationen:
Solid
- Solid bietet eine einheitliche API für das Hardware-Management. Die Hardware ist in Domänen gruppiert. Die grundlegenden Domänen beziehen sich auf HAL, NetworkManager und den Bluetooth Stack. Dadurch das die Backends für Solid als Plug-Ins realisiert sind, hilft Solid den Entwicklern weniger Code schreiben zu müssen, der zudem dann auch noch plattformübergreifend ist.
- Weiter Informationen:
- Solid Brings Hardware Configuration and Control to the KDE platform (engl; veraltet)
Systemeinstellungen
- Die Systemeinstellungen ist der zentrale Ort an dem viele Bereiche der Plasma-Arbeitsfläche und von KWin eingestellt werden können. Dazu gehört das Aussehen der Symbole, die Arbeitsflächeneffekte, die Tastatur-Kurzbefehle und sehr viel mehr.
- Weitere Informationen:
Threadweaver
- Diese Thread Programm-Bibliothek verteilt die Arbeit auf mehrere Prozessorkerne, wenn diese verfügbar sind und priorisiert die Arbeit bevor diese zur Ausführung bereitgestellt wird. ThreadWeaver bietet eine High-Level Job-Schnittstelle für Multithread-Programmierung.
- Weitere Informationen:
- Why Multithreading? (Technical article) (Link z. Z. nicht verfügbar)
Virtuelle Arbeitsflächen
- Ein beliebtes Konzept der Unix-basierten Window-Manager sind die virtuellen Arbeitsflächen (Desktops). Das heißt, Sie haben nicht nur einen Bildschirm, um ihre Fenster / Programme abzulegen, sondern mehrere. Wenn Sie zu einer anderen Arbeitsfläche wechseln (in der Regel mit einem Pager), sehen Sie dort nur die Fenster, die Sie auf der neuen Arbeitsfläche geöffnet oder dorthin verschoben haben. Ein Fenster kann auch angeklebt werden, so dass es auf allen virtuellen Arbeitsflächen sichtbar ist.
WebKit
- HTML-Rendering-Engine, die aus einer Abspaltung von KHTML entstanden ist. Angenommen durch Apple und weiter entwickelt für den Browser Safari.
- Weitere Informationen:
Widget
- Nach Collins English Dictionary ist ein widget: Jeder kleine Mechanismus oder Gerät dessen Name unbekannt ist oder den man kurzzeitig vergessen hat. [Any small mechanism or device the name of which is unknown or temporarily forgotten]. Die korrekte deutsche Übersetzung wäre als Dingsbums. Im Begriff auf KDE-Software hat man sich entschieden die Bezeichnung Miniprogramm zu verwenden. Ein Miniprogramm ist eine einzelne Komponente auf der Oberfläche. Andere analoge häufige Namen sind auch Applet oder Gadget. Superkaramba-Themen, Apple's Dashboard, Google Gadgets, Yahoo Widgets, Vista Sidebar Widgets, Opera Widgets sind Beispiele für andere Miniprogramm-Systeme (von denen einige durch Plasma ebenso unterstützt werden).
X-Server
- Der X-Server stellt eine grundlegende Schicht zur Verfügung, auf der die verschiedenen graphischen Oberflächen, wie der KDE Plasma Desktop, aufbauen. Es verwaltet die grundlegenden Maus-und Tastatureingaben (vom lokalen Host als auch von entfernten Rechnern) und liefert elementare graphische Routinen um Rechtecke und andere Basisobjekte zu zeichnen.
XMLGUI
- Ein Framework für Programmierer um Benutzerschnittstellen zu entwerfen. Es wird vorwiegend von KPart verwendet.
- Weitere Informationen:
- ← Eine Einführung zu KDE
- Claus chr/DPL/Test
- Glossary/3/de
- Glossary/4/de
- Glossary/5/de
- Glossary/6/de
- Glossary/7/de
- Glossary/8/de
- Glossary/9/de
- Glossary/11/de
- Glossary/12/de
- Glossary/13/de
- Glossary/15/de
- Glossary/17/de
- Glossary/18/de
- Glossary/19/de
- Glossary/21/de
- Glossary/31/de
- Glossary/10/de
- Glossary/14/de
- Glossary/16/de
- Akonadi/1/de
- Akonadi/de
Einführung
Das Akonadi-Framework stellt eine zentrale Datenbank für unterschiedliche Anwendungen bereit, in der persönliche Informationen des Nutzers gespeichert, indiziert und wieder ausgelesen werden können. Das gilt für E-Mails, Kontakte, Kalender, Ereignisse, Tagebücher, Alarme, Notizen usw. Adressbuch war die erste Anwendung, die das Akonadi-Framework genutzt hat. In SC 4.7 kamen KMail, KOrganizer und KJots hinzu. Darüber hinaus nutzen mehrere Plasma-Widgets ebenfalls Akonadi für ihre Kalendereinträge, Notizen, etc.
Zum Zeitpunkt des Schreibens dieses Textes ist bei folgenden Anwendungen Akonadi für die Speicherung ihrer Nutzerdaten vorgesehen. Näheres erfahren Sie auf den Seiten der einzelnen Anwendungen.
KMail

E-Mail-Programm Verwendet Akonadi zum Speichern von E-Mails
KAddressBook

Kontakte verwendet Akonadi für Kontaktinformationen
KOrganizer

Persönlicher Organizer Verwendet Akonadi zum Speichern von Kalenderdaten, Ereignissen, Journalen usw.
KJots

Notizprogramm Verwendet Akonadi zum Speichern von Notizen
Darüberhinaus verwenden Plasma-Widgets wie Digitaluhr oder Notes ebenfalls Akonadi für ihre Datenhaltung.
Steuern des Akonadi-Servers
Der Akonadi Steuerungsmodul (über das Kontextmenü des Akonadi Symbols im Systemabschnitt der Kontrolleiste gestartet) bietet eine einfache Möglichkeit, den Akonadi Server zu starten, zu stoppen, neu zu starten oder dessen Status abzufragen. Dies können Sie auch über die Konsole mit dem Befehl akonadictl erreichen. Mit dieser Methode erhalten Sie auch weitergehende nützliche Informationen in der Konsole.
Zum Starten des Akonadi-Servers
akonadictl start
Um den Akonadi-Server zu stoppen:
akonadictl stop
Um den Neustart eines laufenden Akonadi-Servers zu erzwingen:
akonadictl restart
Zur Abfrage des Akonadi-Serverstatus:
akonadictl status
Deaktivierung des Akonadi Subsystems
Der Akonadi Server wird von jeder Akonadi fähigen Anwendung gestartet. Wenn Sie nicht möchten, dass Akonadi nach der Anmeldung startet, müssen Sie sicherstellen, dass keine Akonadi fähigen Anwendungen bei- oder nach der Anmeldung gestartet werden. Denken Sie auch an Plasma widgets, wie z.B. die Digitaluhr

Der Akonadi-Server wird bei der Anmeldung automatisch gestartet, sobald irgendeine Akonadi-fähige Anwendung auf ihn zugreifen möchte.
Um das Akonadi-Subsystem zu deaktivieren, stoppen Sie den laufenden Akonadi-Server aus dem Steuerungsmodul oder über die Befehlszeile mit dem Befehl
akonadictl stop
Um sicherzustellen, das Akonadi nicht gestartet wird prüfen Sie, ob keine Anwendungen den Server beim Anmelden aktivieren. Im Speziellen öffnen Sie die Einstellungen der Plasma-Minianwendung Digitale Uhr, wählen den und deaktivieren dort die Funktion , um Plasma davon abzuhalten, Informationen von Akonadi anzufordern und es damit zu starten.
Fragen und Antworten (FAQ)
Wo sind meine Daten jetzt abgelegt?
Eine vollständige Erklärung, wo die Daten gespeichert sind und wie Akonadi damit umgeht, findet man unter Andras Mantia's blog
Wie führe ich eine Aktualisierung meiner PostgreSQL durch
Nach Aktualisierung ihrer PostgreSQL-Server auf eine neue Hauptversion ist es manchmal erforderlich die Akonadi-Datenbank zu konvertieren damit sie mit der neuern Version funktioniert. Anleitungen hierzu finden sich hier.
Umstiegs-Probleme
Akonadi's Glossar-Eintrag enthält eine Zusammenfassung und weitere nützliche Verknüpfungen. Auf der Seite Akonadi und das Adressbuch wird erklärt, wie Akonadi und KAddressBook zusammenarbeiten.
Вступ
Оболонка Akonadi має надавати у розпорядження програм централізовану базу даних для зберігання, індексування та отримання особистих даних користувачів. До таких особистих даних належать повідомлення електронної пошти користувача, записи контактів, календарі, події, журнали, нагадування, нотатки тощо. Спершу у KDE 4.4 для KAddressBook було використано деякі з можливостей Akonadi. У KDE 4.7 Akonadi використано у KMail, KOrganizer, KJots тощо. Крім того, деякі з віджетів Плазми також використовують Akonadi для зберігання та отримання записів подій календаря, нотаток тощо.
На час написання цієї сторінки Akonadi було використано для зберігання і доступу до даних користувачів у наведених нижче програмах. Щоб дізнатися більше, перейдіть на сторінку відповідної програми.
KMail

Клієнтська програма електронної пошти Використовує Akonadi для зберігання повідомлень електронної пошти
KAddressBook

Програма для керування записами контактів Використовує Akonadi для зберігання даних записів контактів
KOrganizer

Особистий щоденник Використовує Akonadi для зберігання записів календарів, подій, журналів тощо.
KJots

Програма для роботи з нотатками Використовує Akonadi для зберігання нотаток
Крім того, Akonadi використовується у віджетах Плазми, зокрема віджеті цифрового годинника та віджеті нотаток для зберігання і отримання записів подій та нотаток.
Керування сервером Akonadi
За допомогою модуля керування Akonadi Системних параметрів можна спростити запуск, зупинку роботи, перезапуск та визначення стану роботи сервера Akonadi. Ті самі завдання можна виконати за допомогою команди aconadictl. За допомогою цього способу ви можете отримати додаткові корисні дані у консолі.
Щоб запустити сервер Akonadi, віддайте команду
akonadictl start
Щоб зупинити роботу сервера Akonadi, віддайте команду
akonadictl stop
Щоб перезапустити сервер Akonadi, віддайте команду
akonadictl restart
Щоб визначити стан сервера Akonadi, віддайте команду
akonadictl status
Вимикання підсистеми Akonadi
Сервер Akonadi запускається будь-якою програмою з використанням Akonadi. Якщо ви не хочете, щоб Akonadi запускалася після входу до системи, вам слід вимкнути запуск усіх програм з використанням Akonadi під час входу до системи або після нього. Не забудьте вимкнути віджети Plasma — віджет Цифровий годинник на типовій панелі, наприклад, використовує Akonadi для додаткової можливості показу подій календаря, і цю можливість типово увімкнено у параметрах віджета (див. параметр «Показувати події»). Вам слід вилучити усі віджети, які можуть запускатися під час завантаження стільничного середовища, якщо ви хочете, щоб Akonadi запускалася лише під час запуску KMail або інших програм.

Сервер Akonadi, автоматично запускається під час входу до системи кожного разу, коли програма, яка використовує Akonadi, надсилає запит щодо доступу до Akonadi.
Щоб вимкнути підсистему Akonadi, завершіть роботу запущеного сервера Akonadi за допомогою модуля керування або командного рядка:
akonadictl stop
Щоб запобігти запуску Akonadi, вимкніть запуск усіх програм, які потребують цієї підсистеми. Зокрема, відкрийте вікно налаштувань аплету годинника Плазми, перейдіть на сторінку і зніміть позначку з пункту , щоб запобігти запитами, які Плазма надсилатиме до Akonadi, отже, запобігти запуску підсистеми.
Поширені питання
Де зберігаються мої дані?
Повне пояснення щодо того, де зберігаються дані, та способів взаємодії Akonadi з даними, можна знайти у блозі Andras Mantia.
Як оновити базу даних PostgreSQL?
Після оновлення вашого сервера PostgreSQL до нової основної версії, іноді, доводиться перетворвювати базу даних Akonadi з метою досягнення сумісності із новою версією. Відповідні настанови наведено на цій сторінці.
Проблеми з перенесенням даних
У записі глосарія ви знайдете короткий опис призначення Akonadi так корисні посилання. На цій сторінці описано принципи спільної роботи Akonadi та KAddressBook.
- Akonadi/2/uk
- Akonadi/3/uk
- Akonadi/4/uk
- Akonadi/5/uk
- Akonadi/5/de
- Akonadi/6/uk
- Akonadi/7/uk
- Akonadi/6/de
- Akonadi/8/uk
- Akonadi/9/uk
- Akonadi/7/de
- Akonadi/8/de
- Akonadi 4.4/Troubleshooting/1/uk
- Http://userbase.kde.org/Akonadi 4.4/Troubleshooting/uk
Вступ
Цю сторінку в основному присвячено усуванню проблем, пов’язаних з Akonadi, оскільки на початкових кроках переходу до нової системи завжди виникають труднощі. Більшість користувачів вперше зіткнуться з роботою Akonadi у KDE 4.4, багато з них залишаться незадоволені роботою системи. Короткий опис призначення Akonadi можна знайти у цьому записі глосарія. Крім того, у тексті статті ви знайдете інші корисні посилання. Після подолання прикрих проблем з Akonadi ця система стане справжнім рушієм роботи багатьох програм.
Про структуру даних системи
Звичайно ж, ви можете скористатися Kontact для керування всіма вашими адресними книгами, але якщо ви користуєтеся, наприклад, системою резервного копіювання даних, вам варто знати, де зберігаються ваші дані, та як програма їх обробляє. У цьому вам допоможе сторінка Akonadi_and_AddressBook.
Підказки з усування проблем
- Якщо ви повідомляєте про помилки, пов’язані з сервером Akonadi, завжди додавайте до повідомлень звіти з автоматично самотестування системи. Дані цього звіту можна отримати за допомогою діалогового вікна автоматичного тестування, яке сервер Akonadi відкриває у разі невдалої спроби запуску. Крім того, доступ до діалогового вікна автоматичного тестування можна отримати за допомогою модуля Центру керування, доступ до якого можна отримати за допомогою команди
kcmshell4 kcm_akonadi
- Запуск сервера Akonadi вручну за допомогою командного рядка може надати вам додаткову корисну інформацію. Здійснити подібний запуск можна за допомогою команди
akonadictl start
Зупинити роботу сервера Akonadi можна за допомогою команди
akonadictl stop
У відповідь на цю команду буде виведено додаткові корисні відомості:
akonadictl status
Типові проблеми
Не запускається Kontact — при цьому програма не повідомляє ні про які помилки
Якщо Kontact не запускається і не повідомляє ні про які помилки, перевірте, чи запущено Akonadi. За запитом Akonadi має бути запущено, але у поточній версії цього не відбувається. Вам доведеться запустити сервер до запуску Kontact, якщо ресурси вашої системи було перетворено (найімовірніше, ресурси KAddressBook). Для запуску сервера скористайтеся піктограмою системного лотка Akonadi.
Kontact не запускається, інша причина
Оновлення роблять Kontact непрацездатним. Якщо таке сталося з вашою копією програми, спробуйте запустити KMail, KOrganizer або будь-яку іншу складову за допомогою KRunner (або Konsole). Ймовірно, ці програми залишаться працездатними, і ви зможете перечекати до наступного оновлення, яке може виправити ситуацію. Все це, в основному стосується, версії 4.4.0.
Не знайдено теки: «/Local»
Про таку помилку повідомляють багато користувачів, яким не вдалося запустити Kontact. У ранніх версіях серії 4.4 була помилка, програма KMail шукала локальні дані пошти у ~/.local/share/Local, каталозі, який не було заповнено даними. Щоб позбутися проблеми не намагайтеся виправити її вручну. Закрийте вікна KMail/Kontact, відкрийте консоль Akonadi:
- натисніть комбінацію клавіш Alt-F2
- або скористайтеся командою "akonadiconsole" у konsole
Вилучіть ресурс, який призначено для локальних поштових даних. Після цього Kontact або KMail мають запускатися у звичайному режимі, має бути створено новий ресурс, що вказує на каталог ~/.local/share/local-mail
Так і має бути. Якщо вашу адресну книгу перетворено належним чином, буде створено новий ресурс у ~/.local/share/contacts/.
Для чого призначено програми /usr/bin/akonadi_maildir_resource і /usr/bin/akonadi_maildispatcher_agent?
Файл akonadi_maildir_resource створюється автоматично програмою akonadi_maildispatcher_agent. Ця програма завжди запускається разом з сервером Akonadi, оскільки надає базові функціональні можливості (наприклад, надсилання пошти), якими користуються всі поштові програми, які засновано (або буде засновано) на Akonadi. Отже запуск цих двох програм є звичною справою, користувач не повинен цього взагалі помічати. Файл autogenerated akonadi_maildir_resource є символічним посиланням, яке завжди вказуватиме на ~/.local/share/local-mail/, обліковий запис ваших Локальних тек, де зберігатимуться дані ваших тек та повідомлень електронної пошти.
У поточній версії, KDE 4.4, поштові дані ще не перетворюються.
Допоміжні програми індексування Nepomuk вимкнено
Kontact працює, але ви бачите вікно з таким повідомленням:
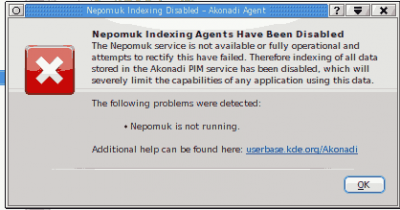
Найпоширенішою причиною є те, що Nepomuk вимкнено у Системних параметрах. Будь ласка, спробуйте увімкнути систему на вкладці . Позначте пункт Увімкнути семантичну стільницю Nepomuk і натисніть кнопку Застосувати.
Якщо вмикання не допомагає (систему вже увімкнено), і ви користувалися тестовими випусками KDE 4.4, ймовірно причиною є зміна компонування бази даних (через оновлення сервера бази даних Virtuoso з версії 5 до версії 6). Змусити програми знову працювати можна такими командами:
qdbus org.kde.NepomukServer /nepomukserver org.kde.NepomukServer.quit
rm -r ~/.kde/share/apps/nepomuk
rm -r ~/.kde4/share/apps/nepomuk
nepomukserver
Зауважте, що наведені команди не призведуть до запуску системи після кожного перезавантаження. Для запуску системи вам варто скористатися Системними параметрами.
Для роботи Akonadi потрібен Nepomuk, а без Akonadi не працюватиме Kontact. Але для роботи зовсім не потрібен індексатор Strigi. Strigi використовується лише для пошуку файлів, його роботу не пов’язано з Kontact. Для належної роботи Kontact достатньо запуску Nepomuk.
У Kontact Nepomuk виконує різні функції від показу даних щодо днів народжень до обробки списку зайнятого часу і показу фотографій контактів. Якщо Nepomuk не буде запущено, деякими з функціональних можливостей Kontact не можна буде скористатися. Це зауваження наведено тут з метою попередити вас про те, що вимикання Nepomuk звузить можливості програм.
Перевірити, чи запущено Nepomuk, можна за допомогою команди
akonadictl status
Я хочу користуватися своїми старими адресною книгою та програмою керування особистими даними. Чи можу я це зробити?
Так. Якщо для додавання ресурсу ви скористалися консоллю Akonadi, ви зможете обрати варіант Стандартна адресна книга — вкажіть ваш файл std.vcf, і все запрацює. Перетворення цього файла не знищить дані вашої старої адресної книги. Ви можете продовжити користуватися нею, хоча втратите всі переваги, які колись зможе надати вам Akonadi. Крім того, ви можете користуватися одночасно адресною книгою Akonadi та вашою адресною книгою протягом перехідного періоду, якщо це надасть вам почуття безпеки.
Моя нова адресна книга не показує жодних додаткових даних записів
У поточній версії причину такої поведінки ще не вдалося виявити, але впоратися з цим дуже просто. Закрийте вікно Kontact і запустіть KAddressBook як окрему програму. Після закриття вікна адресної книги ви зможете користуватися нею і у Kontact. Здається, під час запуску Kontact не виконується якась додаткова дія, будемо сподіватися, що це буде виправлено найближчим часом (проблемною є версія 4.4.0).
Після натискання кнопки «Вибрати» записи контактів KMail не з’являються
Перейдіть на сторінку «Системних параметрів» . Переконайтеся, що Akonadi керує вказаними там адресними книгами, додайте потрібні адресні книги. Якщо хочете, створіть основну адресну книгу Akonadi, яка називається, зазвичай, «Особисті контакти», і зробіть її типовою. Докладніше про налаштування можна дізнатися зі сторінки тут.
Як відновити мою адресну книгу для групової роботи?
Можливі два вирішення: користуватися попередньою версією комплекту або перейти на нову.
Працездатний комплект. У консолі Akonadi додайте «Адресну книгу KDE (традиційну)». Вибір цього пункту означає, що для роботи у Akonadi буде налаштовано старі ресурси. У налаштуваннях пункту «Адресна книга KDE (традиційна)», ви можете вказати ресурс «IMAP через KMail» (у KMail має бути увімкнено можливості групової роботи). Подібні налаштування мають працювати для Kolab, eGroupware і подібних адресних книг, — вам слід уважно вивчити варіанти, щоб переконатися у правильності вибору.
Новий комплект (не перевірялося для серверів, відмінних від Kolab). У модулі налаштувань Akonadi додайте ресурс Сервер електронної пошти IMAP, вкажіть назву сервера, ім’я користувача і пароль, а потім натисніть кнопку «Автовиявлення». Вікно модуля налаштування можна відкрити командою:
kcmshell4 kcm_akonadi
Додайте ресурс Kolab. Дочекайтеся завершення синхронізації ресурсу imap, яка може тривати досить довго. Повідомлення про завершення можна буде бачити у модулі налаштувань Akonadi. Якщо нічого не станеться, спробуйте перезапустити akonadiserver. Якщо все вийде, адресні книги Kolab мають з’явитися у списку KAddressBook.
Під час надсилання пошти виникають тривалі затримки
Затримки супроводжуються зависаннями KMail на час до завершення обробки пошти.
У системі перевірки адрес Nepomuk виявлено вади, які спричиняють величезні затримки. Вади виправлено у KDE 4.4.1. Якщо ви не оновили систему до версії 4.4.1, можете скористатися тимчасовим вирішенням:
Закрийте вікно Kontact або вікна KMail і KAddressbook, якщо було запущено окремі програми. Вимкніть Strigi у Системних параметрах». Завершіть роботу Nepomuk, вилучіть базу даних і перезапустіть nepomukserver. Для цього слід виконати команди (від імені звичайного користувача):
qdbus org.kde.NepomukServer /nepomukserver org.kde.NepomukServer.quit rm -r ~/.kde/share/apps/nepomuk rm -r ~/.kde4/share/apps/nepomuk nepomukserver
Після цього базу даних, звичайно ж, буде знищено, зокрема буде знищено всі додані вами мітки. Теоретично, можна виконати вибіркове вилучення бази даних. Настанови можна знайти на цій сторінці
Програма повідомляє про те, що ресурс IMAP постійно працює у автономному режимі
Хоча у системі встановлено з’єднання з Інтернетом, ресурс IMAP відмовляється виходити з автономного режиму.
Хоча систему з’єднано з інтернетом, ресурс IMAP не перемикається у стан «у мережі».
Цю ваду спричинено помилковими налаштуваннями NetworkManager у вашій системі. Віддайте команду таку команду:
qdbus --system org.freedesktop.NetworkManager /org/freedesktop/NetworkManager org.freedesktop.NetworkManager.state
У відповідь може бути отримане одне з таких значень:
- 20 (у попередніх версіях 4), від’єднано. Якщо ви маєте доступ до інтернету, ваші налаштування NetworkManager є помилковими.
- 70 (у попередніх версіях 3), з’єднано. Маємо проблеми у чомусь іншому.
- Можливо, один або декілька мережевих інтерфейсів не керуються NetworkManager. Якщо це так, надайте змогу NetworkManager керувати цими інтерфейсами. Для цього може бути достатньо вилучити записи цих інтерфейсів з текстового файла (наприклад, /etc/network/interfaces). Докладнішу інформацію можна отримати з довідкових ресурсів вашого дистрибутива.
Неможливо прочитати подробиці щодо деяких повідомлень або під час читання виникають значні затримки
Якщо ви не можете прочитати частину повідомлень або бачите повідомлення програми «Будь ласка, зачекайте…», вам варто вийти з сеансу KDE і знову увійти до нього, щоб перезапустити всі процеси, — це може допомогти.
Технічні проблеми
Nepomuk
Починаючи з KDE 4.4, для належної роботи Akonadi потрібен Nepomuk. Akonadi перевірятиме запуск сервера Nepomuk і відкриватиме діалогове вікно з повідомленням про помилку, якщо сервер не запущено.
Nepomuk може працювати лише з сервером Virtuoso. Перевірити, чи працює Nepomuk з належним сервером можна за допомогою діалогового вікна автоматичного тестування Akonadi, спосіб відкриття якого описано вище.
Хоча для роботи Akonadi потрібен Nepomuk, ви можете вимкнути індексування файлів Strigi і позбутися найвибагливішої до ресурсів частини Nepomuk.
Apparmor
У деяких дистрибутивах (майже винятково, побудованих на Ubuntu) використовується Apparmor. Цю систему може бути налаштовано таким чином, що вона не дає Akonadi запустити вбудованих сервер бази даних. Це може призвести до різних повідомлень про помилки, зокрема таких:
unknown error 255 when running akonadictl
"DB error: 'Could not open required defaults file: /home/$username/.local/share/akonadi/mysql.conf"
Виправити ситуацію можна командою
aa-complain mysqld
У Kubuntu команди будуть такими:
sudo aa-complain mysqld
sudo /etc/init.d/apparmor reload
Зауважте, що у системі може бути використано Apparmor, навіть якщо ви не бачите відповідного пункту у списку процесів.
Крім того, вам варто знати, що деякі дистрибутиви постачаються з додатковим виконуваним файлом mysqld з назвою mysqld-akonadi. За допомогою цього файла можна належним чином налаштувати AppArmor. Якщо такий файл є у вашій системі, але його використання не допомагає у вирішенні проблеми, причин може бути дві:
- Akonadi використовує mysqld, а не mysqld-akonadi. Змінити налаштування Akonadi можна на сторінці налаштувань .
- mysqld-akonadi не вдалося налаштувати AppArmor. Спробуйте виконати команду aa-complain, наведену вище, з використанням mysqld-akonadi замість mysqld.
---
Крім того, подібна проблема може виникати, якщо ви працюєте з зашифрованим encryptfs домашнім каталогом у поєднанні з AppArmor, оскільки профіль apparmor Akonadi не може у поточній версії працювати з шифрованими домашніми теками (типово для користувачів Ubuntu Jaunty). Повідомлення про помилки:
- dmesg:
ecryptfs_do_create: Failure to create dentry in lower fs; rc = [-13]
ecryptfs_create: Failed to create file inlower filesystem
- Akonadi показує такі повідомлення:
Akonadi server process not registered at D-Bus
Щоб виправити помилку, внесіть зміни до файла "/etc/apparmor.d/usr.sbin.mysqld-akonadi". Під рядком:
@{HOME}/.local/share/akonadi/** rwk,
Додайте новий рядок:
@{HOME}/.Private/** rwk,
Перезапустіть apparmor і akonadi.
Необхідні пакунки
Щоб користуватися Akonadi, вам слід встановити такі пакунки (назви можуть бути різними):
- Сервер MySQL (у openSUSE називається mysql)
- Додаток MySQL до Qt4 (у openSUSE називається libqt4-sql-mysql)
Якщо ви збираєте Qt4 власноруч, переконайтеся, що скрипту configure було передано параметр збирання додатка,
-plugin-sql-mysql
Якщо configure не вдається виявити потрібні файли коду клієнта MySQL (тобто скрипт повідомляє, що "MySQL support cannot be enabled due to functionality tests"), переконайтеся, що встановлено відповідний пакунок (типово називається [lib]mysql[client]-dev[el]). Крім того, залежно від місця встановлення файлів заголовків MySQL, можливо доведеться передати configure додаткові параметри (наприклад, -I /usr/include/mysql у openSUSE).
Якщо ви користуєтеся Qt4, звантаженим безпосередньо з сайта Nokia, наприклад, qt-sdk-linux-x86_64-opensource-2009.05.bin, у відповідь на команду "akonadictl start" ви побачити повдіомлення про помилку у Тесті 1:
Database driver not found.
Details: The QtSQL driver 'QMYSQL' is required by your current Akonadi server configuration.
The following drivers are installed: QSQLITE.
Make sure the required driver is installed.
Вам потрібен драйвер libqsqlmysql.so
На жаль, цього драйвера немає у відповідному пакунку (станом на січень 2010 року). Вам потрібно зібрати драйвер з початкових кодів. Звантажте відповідний файл, наприклад:
qt-everywhere-opensource-src-4.6.0.tar.bz
Виконайте скрипти configure і make. Команда make install не скопіює драйвер, вам потрібно зробити це власноруч:
cp <qt-src-dir>/qt-everywhere-opensource-src-4.6.0/plugins/sqldrivers/libqsqlmysql.so /usr/local/bin/sqldrivers/
Але у випуску 4.6.1, зокрема qt-sdk-linux-x86_64-opensource-2010.xx.bin, потрібний вам драйвер є. Ймовірно, якщо libmysqlclient.so було замінено новішою версією, доведеться повторно виконати прив’язку до libqsqlmysql.so.
Налаштування оточення
Сервер Akonadi шукатиме допоміжні програми Akonadi та ресурси за шляхами, визначеними за допомогою змінної середовища XDG_DATA_DIRS. Якщо Akonadi скаржиться на те, що не може знайти допоміжні програми (агенти) ао ресурси, перевірте, чи встановлено належним чином цю змінну. Крім того, пам’ятайте, що, навіть якщо цю змінну встановлено протягом поточного сеансу у консолі, на час запуску сервера її може бути не встановлено. Запуск сервера вручну за допомогою поточного сеансу надасть змогу вирішити проблему.
mysqld: unknown variable 'innodb_file_per_table=1'
Якщо у журналі сервера MySQL містяться наведені нижче повідомлення про помилки, ваш сервер MySQL було зібрано без підтримки InnoDB, яка потрібна для роботи Akonadi, або слід завантажити InnoDB за допомогою файла mysql.conf.
[ERROR] /usr/libexec/mysqld: unknown variable 'innodb_file_per_table=1'
[ERROR] Aborting
Спробуйте додати:
#sql_mode=strict_trans_tables <- Add underneath this line
#plugins
plugin_dir=usr/lib/mysql/plugin < - This may be a different path
plugin-load=ha_innodb.so
Не існує таблиці «mysql. servers» (Table 'mysql. servers' doesn't exist)
Якщо у журналі сервера MySQL містяться наведені нижче повідомлення про помилку, найімовірніше, файл налаштувань сервера MySQL розташовано у неналежному місці.
[ERROR] Can't open and lock privilege tables: Table 'mysql.servers' doesn't exist
[ERROR] Cannot open mysql.db
[ERROR] Cannot open mysql.user
[ERROR] Cannot open mysql.event
Скопіюйте цей файл з /usr/share/config/akonadi/mysql-global.conf до ~/.config/akonadi/mysql-local.conf. (У користувачів debian і openSUSE цей файл розташовано за адресою /etc/akonadi/mysql-global.conf). Відкрийте цей файл у редакторі в зніміть позначку коментаря з sql_mode=strict_trans_tables. Якщо після цього ви побачите такі повідомлення про помики:
[ERROR] Plugin 'InnoDB' init function returned error.
[ERROR] Plugin 'InnoDB' registration as a STORAGE ENGINE failed.
[ERROR] Unknown/unsupported table type: innodb
[ERROR] Aborting
Якщо це так, у тому самому файлі знайдіть рядок, що починається подібно до попереднього (того, коментування якого ви вже зняли), але містить додаткові параметри, відокремлені комами (щось схоже на sql_mode=strict_trans_tables,strict_all_tables, ...etc). Додайте позначку коментування до коротшого рядка з sql_mode=... і зніміть цю позначку з довшого.
У openSUSE 11.2 проблему допоможе вирішити команда
mysql_install_db --datadir=$HOME/.local/share/akonadi/db_data/
У Archlinux:
mysql_install_db --datadir=$HOME/.local/share/akonadi/db_data/ --basedir=/usr
Оновлення Kubuntu до версії 10.04
Будь ласка, не користуйтеся цією ненадійною системою. Тут наведено відомості для тих сміливців, які оновили версію Kubuntu 9.10 до 10.0004 і які користувалися особистими архівами пакунків (PPA) для виправлення вад у версії пакунків KDE 4.3.
Встановіть потрібні залежності. Вилучіть попередній кеш akonadi. Запустіть службу akonadi. Встановіть базу даних. Оновіть базу даних. Зупиніть і перезапустіть службу akonadi.
sudo apt-get install virtuoso-server mysql-server-5.1
rm -r $HOME/.local/share/akonadi
akonadictl start
mysql_install_db --datadir=$HOME/.local/share/akonadi/db_data/
mysql_upgrade --socket=$HOME/.local/share/akonadi/db_misc/mysql.socket
akonadictl stop
akonadictl start
У відповідь на наведену вище команду mysql_install_db може бути виведено такі повідомлення, які ви можете безпечно проігнорувати:
Installing MySQL system tables...
100501 18:04:30 [Warning] Can't create test file
/home/[userid]/.local/share/akonadi/db_data/[hostname].lower-test
Посилання: forum.kde.org Akonadi 1.2.1 — декілька вад
Оновлення KAddressBook
Окрім вад у Kubuntu 10.04, наведених нижче, може виникнути проблема з додаванням каталогу Vcard, яка може вимагати виконання наведеної нижче команди після завершення роботи Akonadi.
rm -rf $HOME/.config/akonadi
Не вдалося ініціалізувати набір символів latin1
Якщо під час запуску Akonadi було показано показано наведені нижче повідомлення про помилки, ймовірно, у системі встановлено сервер MySQL версії >5.1.42.
Character set 'latin1' is not a compiled character set and is not specified in the '/usr/share/mysql/charsets/Index.xml' file
Nepomuk QueryServer interface not available!
Connecting to deprecated signal
QDBusConnectionInterface::serviceOwnerChanged(QString,QString,QString)
DataStore::unhideAllPimItems()
Character set 'latin1' is not a compiled character set and is not specified in
the '/usr/share/mysql/charsets/Index.xml' file
Database error: Cannot open database.
Last driver error: "QMYSQL: Unable to connect"
Last database error: "Can't initialize character set latin1 (path:
/usr/share/mysql/charsets/)"
Database error: Cannot open database.
Last driver error: "QMYSQL: Unable to connect"
Last database error: "Can't initialize character set latin1 (path:
/usr/share/mysql/charsets/)"
У MySQL 5.1.43 і 5.1.44 внесено вади, які на дають MySQL запуститися.
Докладніші відомості можна знайти у цьому звіті щодо вади.
Перезапуск після попередньої помилки
Якщо у вас виникають проблеми з Akonadi і ви намагаєтеся вирішити їх (зокрема встановити потрібні пакунки або змінити налаштування Apparmor) у один з описаних вище способів, перед повторним запуском сервера Akonadi переконайтеся, що роботу попереднього екземпляра сервера було повністю завершено. Для цього виконайте команду
akonadictl stop
Підтвердити те, що роботу сервера повністю завершено, вам допоможе команда
akonadictl status
За певних обставин сервер Akonadi може зациклитися у частково запущеному стані після помилки. Такий напівзапущений сервер зашкодить наступним спробам запуску сервера. Якщо ви зіткнулися з подібною проблемою, будь ласка, надішліть авторам програми повідомлення про ваду з докладним звітом автоматичного тестування щодо початкової проблеми.
Так званий "Gentoo-Assert"
Це особливо неприємна проблема, яка стосується передусім користувачів дистрибутивів, зібраних безпосередньо з вихідних кодів. Основним дистрибутивом такого типу є Gentoo. Проблема отримала свою назву від формального синтаксичного виразу MySQL (assertion), подібного до наведеного у прикладі нижче. Найімовірніше причиною є невідповідність протоколів MySQL сервера MySQL і клієнтської бібліотеки або драйвера MySQL Qt.
akonadiserver: libmysql.c:4301: setup_one_fetch_function: Assertion
`param->buffer_length != 0' failed.
Дуже важко виявити причину помилки, оскільки повідомлення про неї з’являється за певних нез’ясованих обставин. Замість повідомлення про помилку ви можете зіштовхнутися з широким діапазоном дивних симптомів:
- Тільки-но у журналах протоколу з’являться повідомлення про успішне вилучення об’єктів, які б мали припинити своє існування, як у наступних командах відбувається спроба отримати доступ до цих об’єктів.
- У журналах протоколу SQL можна побачити повідомлення про успішне виконання команд INSERT або UPDATE зі значеннями, які не збігаються з типами відповідних стовпчиків таблиці.
- У журналах протоколу SQL можна побачити записи великих ідентифікаторів (закономірність назв яких важко вловити), які програма вважає коректними.
Посилання:
- http://forum.kde.org/viewtopic.php?f=20&t=61738
- http://bugs.gentoo.org/show_bug.cgi?id=267513
- https://bugs.kde.org/202623 (містить можливе вирішення)
- http://bbs.archlinux.org/viewtopic.php?id=78358
Можливе вирішення: перезберіть драйвер MySQL Qt після оновлення MySQL (він є основним підозрюваним у виникненні проблем).
Відновлення початкових налаштувань nepomuk та системи akonadi у KMail 2
Не варто виконувати всі ці дії, якщо у вас немає резервної копії важливих для вас даних.
Після впровадження KMail 2 до kdepim, з версії KDE 4.6.x, для пошуку у повідомленнях електронної пошти і адресних книгах слід позначити пункт у програмі , також позначте пункт .
Якщо virtuoso-t використовує майже 100% ресурсів процесора, а система майже непрацездатна, варто відновити початкові параметри роботи Nepomuk.
Для виконання загального відновлення початкового стану вам слід виконати описані нижче дії.

akonadictl stop
rm -rf  ~/.local/share/akonadi/db_data/*
akonadictl start
# слід спорожнити теки тимчасових даних KDE перед запуском KMail
rm -rf /var/tmp/kdecache-$USER /tmp/ksocket-$USER /tmp/kde-$USER
Далі, слід перевірити, чи правильно встановлено теку «Надіслані» на сторінці . Іноді можливі помилки.
Перевірте, чи правильно вказано теку «Вхідні» на сторінці . Можливі помилки.
Перевірте, чи правильно вказано фільтри до отримання нових повідомлень. Варто вимкнути всі фільтри, оскільки можливі помилки з теками, що призведуть до помилкової обробки або втрати пошти.
Також, якщо у системі є тека застарілої пошти, варто перевірити всі теки, щоб теку отримання пошти було встановлено належним чином. Якщо позначено пункт , ви можете втратити важливі повідомлення, оскільки архівування працюватиме з помилковою текою.
За допомогою сторінки перевірте, чи правильно вказано профіль, оскільки профіль може бути змінено або втрачено.
Після цього можна спорожняти сховище даних Nepomuk перед вмиканням семантичної стільниці Nepomuk.
Після вилучення пошкоджених даних, якщо ви все ще не можете прочитати вашу пошту, вам слід вийти з сеансу KDE і увійти до нього знову, щоб повторно ініціалізувати усі процеси.
- Akonadi 4.4/Troubleshooting/2/uk
- Akonadi 4.4/Troubleshooting/3/uk
- Akonadi 4.4/Troubleshooting/4/uk
- Akonadi 4.4/Troubleshooting/5/uk
- Akonadi 4.4/Troubleshooting/6/uk
- Akonadi 4.4/Troubleshooting/7/uk
- Akonadi 4.4/Troubleshooting/8/uk
- Akonadi 4.4/Troubleshooting/9/uk
- Akonadi 4.4/Troubleshooting/10/uk
- Akonadi 4.4/Troubleshooting/11/uk
- Akonadi/9/de
- Akonadi 4.4/Troubleshooting/12/uk
- Akonadi 4.4/Troubleshooting/13/uk
- Akonadi 4.4/Troubleshooting/14/uk
- Akonadi 4.4/Troubleshooting/15/uk
- Akonadi 4.4/Troubleshooting/16/uk
- Akonadi 4.4/Troubleshooting/17/uk
- Akonadi 4.4/Troubleshooting/19/uk
- Akonadi 4.4/Troubleshooting/20/uk
- Akonadi 4.4/Troubleshooting/21/uk
- Akonadi 4.4/Troubleshooting/22/uk
- Akonadi 4.4/Troubleshooting/23/uk
- Akonadi 4.4/Troubleshooting/24/uk
- Akonadi 4.4/Troubleshooting/25/uk
- Akonadi 4.4/Troubleshooting/26/uk
- Akonadi 4.4/Troubleshooting/27/uk
- Akonadi 4.4/Troubleshooting/28/uk
- Akonadi 4.4/Troubleshooting/29/uk
- Akonadi 4.4/Troubleshooting/30/uk
- Akonadi 4.4/Troubleshooting/31/uk
- Akonadi 4.4/Troubleshooting/32/uk
- Akonadi 4.4/Troubleshooting/33/uk
- Akonadi 4.4/Troubleshooting/34/uk
- Akonadi 4.4/Troubleshooting/35/uk
- Akonadi 4.4/Troubleshooting/36/uk
- Akonadi 4.4/Troubleshooting/37/uk
- Akonadi 4.4/Troubleshooting/38/uk
- Akonadi 4.4/Troubleshooting/39/uk
- Akonadi 4.4/Troubleshooting/40/uk
- Akonadi 4.4/Troubleshooting/41/uk
- Akonadi 4.4/Troubleshooting/42/uk
- Akonadi 4.4/Troubleshooting/43/uk
- Akonadi 4.4/Troubleshooting/44/uk
- Akonadi 4.4/Troubleshooting/45/uk
- Akonadi 4.4/Troubleshooting/46/uk
- Akonadi 4.4/Troubleshooting/47/uk
- Akonadi 4.4/Troubleshooting/48/uk
- Akonadi 4.4/Troubleshooting/49/uk
- Akonadi 4.4/Troubleshooting/50/uk
- Akonadi 4.4/Troubleshooting/51/uk
- Akonadi 4.4/Troubleshooting/52/uk
- Akonadi 4.4/Troubleshooting/53/uk
The pages in the translation containing a category statement (K):60906
| KTimeTracker is a todo management and time tracking application. |
Overview
KTimeTracker tracks time spent on various tasks.
- Challenge
- You are a software consultant with several customers and many project assignments. When billing your customers, you are required to report how much time you spend on what task.
- Solution
- Use KTimeTracker to hold a list of projects and tasks. Whenever you switch your activity, double-click on the respective task and see how its time gets tracked. At the end of the day (or month) you can obtain a journal how much time you spent on what task.
Get it
You can install KTimeTracker either
- by means of your Linux distribution, or
- by compiling from source code (stable releases, Git repository), or
- with pre-built installers/packages for Windows and macOS for stable releases and nightly snapshots.
Features
The current stable version of KTimeTracker (5.0.1) can:
- Organize tasks into subtasks:
- KTimeTracker allows you to organize your work like a todo-list. You can group your work by tasks and subtask. Every subtask can still have a subtask below it, up to some 1000 levels.
- Track your time:
- Whenever you start working on a new task, just double-click the corresponding task in your todo-list. You will see a clock appearing next to this task indicating its time is now recorded.
- Edit task history and comments:
- KTimeTracker allows you to edit your task's history and to put a comment for every work-event:
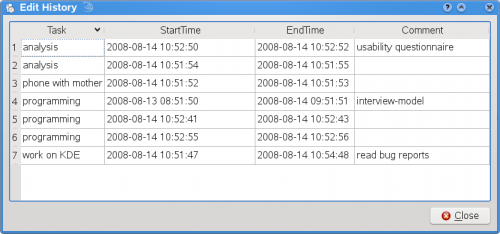
- Pause detection:
- When going for lunch, it may happen that you forget to stop timetracking before. No problem: the idle time detector in KTimeTracker will pop up after a configurable amount of time giving you the possibility to revert (as if you said, "I was not working during this time.") or continue timing (as if you said "I was working during this time.").
Options
KTimeTracker 5 has not more and not less than the following options:
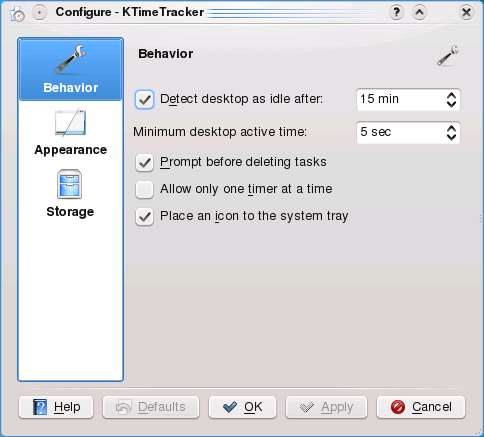
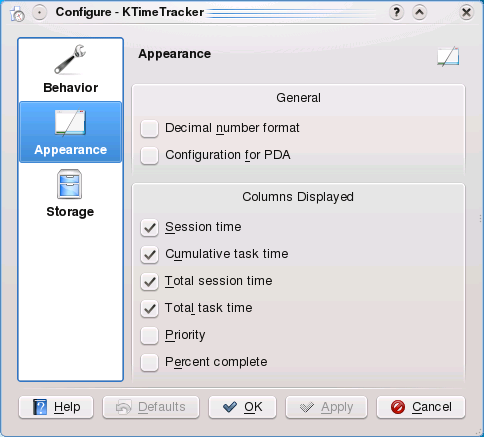
Configuration for PDA: Removes the search-bar to gain screen real estate. Assumes a touch-screen and pops up a context menu on every mouse click, even with the left button.
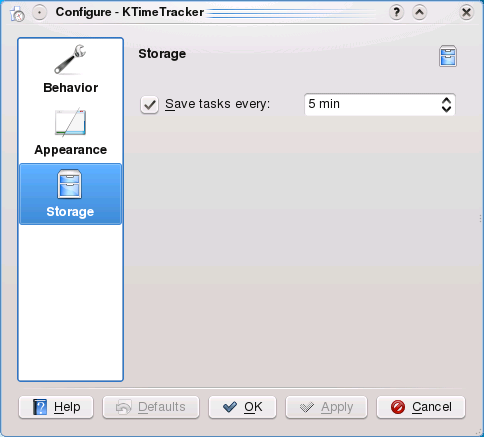
Compatibility
There have been 3 file format changes in the over 10-year-history of KTimeTracker:
| KDE SC version | KTimeTracker file |
|---|---|
| -3.1 | flat files |
| 3.2-3.5 | iCal files with X-KDE-karm fields, import possibility for flat files |
| 4.x, 5.0 | iCal files with X-KDE-KTimeTracker fields, automated import for iCal files with X-KDE-karm fields |
Because of the iCal file format, KTimeTracker is compatible with korganizer. You can even work synchroneously on one file with korganizer and KTimeTracker. If one program changes the file, the updates will be propagated to the other application automatically.
Does it scale?
KTimeTracker scales well and it regularly tested with a 1.2 MB file (download it) available from (KDE Bug report 110523). A KTimeTracker benchmark is available here.
Support
As you explore KTimeTracker you'll find questions that need answering.
- Chat with us, the KDE users, on IRC, the KDE users' channel.
- Forum under Kontact & PIM https://forum.kde.org/viewforum.php?f=215
Videos
Video demos are here:
See also
 |
KOrganizer is the calendar and scheduling component of Kontact, the integrated personal information manager from KDE. |
Feature Highlights
- Support for multiple calendars and todo lists. Korganizer can transparently merge calendar data from different files or other calendar data sources for example calendars on the web. They can conveniently be activated, deactivated, added and removed from the graphical user interface.
- Kontact integration. KOrganizer is fully integrated with Kontact, the complete personal information management application. Within Kontact some additional features are available like conversion of mails to events or todos by drag and drop.
- Storage model. KOrganizer has a persistant calendar. The user doesn't have to take care of loading or saving the calendar. Changes are immediately saved to disk. If the calendar is changed externally it is automatically loaded and updated in the view. A locking mechanism handles concurrent access to the calendar.
- Undo and Redo. KOrganizer supports unlimited undo and redo.
- Todo integration with agenda view. Todos are shown in the week and day views. Todos can be converted to events by dragging from the todo list and dropping on the agenda view.
- Attachments for events and todos. References to web pages, local files or mails can be attached to events and todos. The attached data can easily be accessed by a single click from the event and todo views as well as the summary view or the editors.
- Quick todo entry. A special input field allows to quickly create a todo without needing to open an editor. This is especially handy for creating multiple todos in a row.
- Quick event entry. There are several ways to create events from the agenda view: Per type-ahead events can be created by selecting a time range and then simply starting to type. An editor will be opened and the type text will be go into the title. Optionally the event editor can be opened when the time selection is finished and in addition to the usual menu and toolbar entries there are key bindings and a context menu to start the editor dialog.
- Plugin for Jewish calendar dates. When enabled this plugin shows the Jewish calendar dates for each day in the calendar view.
- Print support. Calendars can be printed using various different styles. Printing also supports colors and overlapping events.
- KMail directly supports transfer of invitations and other calendar attachments to KOrganizer.
KOrganizer provides management of events and tasks, alarm notification, web export, network transparent handling of data, group scheduling, import and export of calendar files and more. It is able to work together with a wide variety of groupware servers, for example Kolab, Open-Xchange, Citadel or OpenGroupware.org.
KOrganizer is fully customizable to your needs and is an integral part of the KDE-PIM suite, which aims to be a complete solution for organizing your personal data. KOrganizer supports the two dominant standards for storing and exchanging calendar data, vCalendar and iCalendar.
More Features
- Appointments
- Alarm Notification
- To-Do List
- Web Export
- Calendar Handling
- Customizability
- Journal
- The Future
Other Pages
Troubleshooting
The time of my recurring appointment changes next week - how do I handle that?
While many things about an appointment can be changed, the time is the one thing that can't change for the remainder of a series of appointments (single exceptions are possible). KOrganizer uses the time field as a basic reference, so it would be difficult if not impossible to allow this change to happen.
Instead, then, create an entry for the start of the changed appointment, duplicating the information from the first entry apart from the new time.
A fuller explanation of the problem can be found here
Tutorials
- How to blog from KOrganizer (outdated)
Download
KOrganizer is available in all major Linux distribution repositories, as tarballs, and soon a Flatpak version will also be available. Ancient versions were compatible with Windows, the Kontact team is looking for help to improve Windows support. For more information look at the Kontact download page.

More Information
- The KOrganizer Handbook is available on the KDE Documentation site.
- Website
- Kde-pim mailing list
- #kontact and #akonadi IRC channels on Libera Chat
- KonsoleKalendar
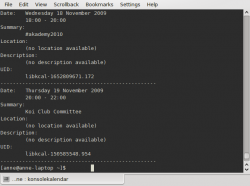 |
Use your calendar when you can't use a graphical user interface |
konsolekalendar is an application to administer a calendar without a graphical user interface. It normally works with the calendar that is marked "Default", if you use KOrganizer. However, it is possible to create a calendar if you don't have one already.
As it is strictly a command-line application, konsolekalendar's syntax must be learned first.
Here is a short introduction to using konsolekalendar:
- If you do not already have a calendar set up, you first need to create one
konsolekalendar --create --file ~/.kde/share/apps/korganizer/vacation.ics
(This location will enable it to be used either in konsolekalendar or in korganizer.)
- Add a calendar entry
konsolekalendar --add --date 2009-06-06 --summary "My Birthday" \
--description "Party Time"
adds your birthday to your default calendar.
- Add a vacation
konsolekalendar --add --file vacation.ics --date 2009-08-01 \
--end-date 2009-08-07 --summary "Vacation" --description "Nobody will ever find me!"
- Show all calendar entries
konsolekalendar --all 2>errorlog
You probably don't want to do this, if you have been using your calendar for long. However, you can specify date ranges:
konsolekalendar --view --date 2009-08-17 --end-date 2009-08-21
shows that particular work-week.
- Maybe you only wanted to see the next entry?
konsolekalendar --next
- Or for the week ahead?
konsolekalendar --show-next 7
- Show your calendar file
konsolekalendar --view 2>&1 | grep resource | grep konsolekalendar
- Edit an entry
konsolekalendar --change --uid libkcal-1652809671.172 --summary "Get my head examined" --description "I must be crazy!!"
- Before you can delete an entry, you first need to list it:
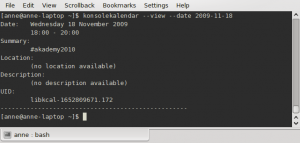
There at the bottom is the UID of the entry.
Now you are ready to delete it -
konsolekalendar --delete --uid libkcal-1652809671.172

- Export a calendar
It is possible to export to several formats, including CSV and html.
konsolekalendar --export-type CVS current.ics
- Import a calendar
konsolekalendar --import another.ics --file current.ics
In this case, all the entries from another.ics will be merged into current.ics.
Overview
Homepage of Application https://kmymoney.org Authors and Developers Members List Downloads Download Pages
Screenshots
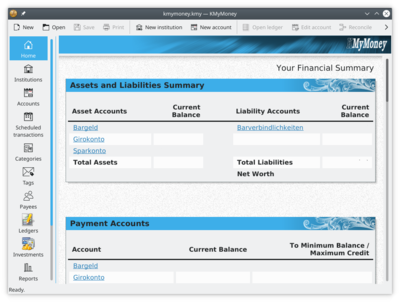
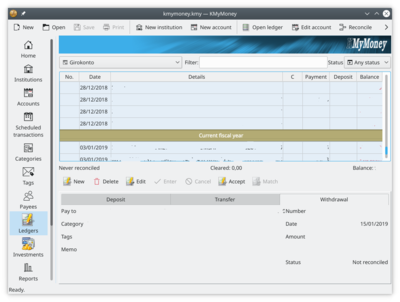
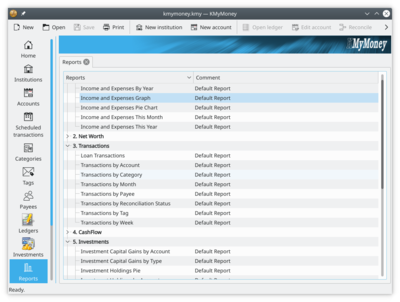
Bugs
Here you can browse and submit bug reports
Obtaining help
Please refer to https://kmymoney.org/support.html
FAQs
Documentation
Read the online manual here.
Development
Information and resources for developers
Related Links
Media coverage:
- 2018:
 https://linuxinsider.com/story/free-personal-finance-apps-you-can-take-to-the-bank-85693.html
 https://www.thewindowsclub.com/kmymoney-personal-finance-manager
- 2014
 https://www.linux.com/news/3-personal-finance-managers-linux-comparing-wxbanker-kmymoney-and-gnucash/
 http://bratgrrl.com/gnucash-vs-kmymoney-vs-moneydance/
- 2005
 https://lwn.net/Articles/149383/
 https://lwn.net/Articles/153043/
 https://web.archive.org/web/20081011005610/http://www.downloadsquad.com/2005/08/09/a-brief-chat-with-the-kmymoney-team/
 https://web.archive.org/web/20070622052120/http://gnuman.com/software/kmymoney.html
 https://www.linux.com/articles/49400 (offline)
Some nice things users have said about KMyMoney:
Copyright and Licence
Copyright (c) Thomas Baumgart, 2005 Licensed under GNU Free Documentation License
Donations
The project currently has no costs, and therefore has not setup a unified way to collect donations. Each individual developer provides a way to receive donations, which will be used project-related or for leisure (which, in turn, helps the project. After all, a happy developer writes better code, right?).
Thomas Baumgart
Amazon wishlists (in different countries):
- Germany http://www.amazon.de/exec/obidos/registry/1T19RN6RY4ABL/ref=wl_s_3/028-8003588-2510945
- US https://www.amazon.com/gp/registry/wishlist/16YBVTHXIEQTA/
- UK http://www.amazon.co.uk/gp/registry/20HV5VJTTY5H0
- France http://www.amazon.fr/gp/registry/3C6RM5PN3X2KS
Alvaro Soliverez
Fernando Vilas
Cristian Oneț
- Donate through PayPal to onet.cristian@gmail.com
Tony Bloomfield
| The flexible and extendable multiple protocol instant messaging system. |

Description
The goals of Kopete are to provide users with a standard and easy to use interface between all of their instant messaging systems, but at the same time also providing developers with the ease of writing plugins to support a new protocol.
All protocols are plugins and allow modular installation, configuration, and usage without the main application knowing anything about the plugin being loaded.
Screenshots
Setup
Protocols support
- Supported Protocols Overview
- Jabber (like Google Talk)
- MSN Messenger
- AIM
- Gadu-Gadu
- Novell GroupWise
- ICQ
- Meanwhile
- SMS
- Yahoo
- Winpopup
- IRC
- Skype Plugin
Plugins
Customize !
Related Links
Misc
Resources
- Mailing list - talk to the developers
- The KDE Forum
- Matrix and IRC (there are no official Kopete chat channels)
Documentation
Bugs
- Browse bug reports or submit a new bug report.
 |
Kompare is comparison program for KDE |
Kompare is a free software graphical computer application which helps the user to compare two different text files or two directories.
Kompare does not actually compute the differences between the compared files itself, but is merely a graphical front end to the command line interface diff utility. However, the colour coding of changed lines makes them very easy to spot.
Features include:
- comparison of files or directories via a graphical interface
- bezier-based connection widget lets you see both source and destination as they really appear
- graphical viewing of patch files in normal, context, unified and diff formats
- interactive application of differences
- full network transparency
- ability to view plain-text diff output in the embedded viewer
- easy navigation of multiple-file diffs with the dockable navigation tree
- graphical interface to commonly used diff command line options
- switch source and destination with one command
Kompare was previously known as kdiff.
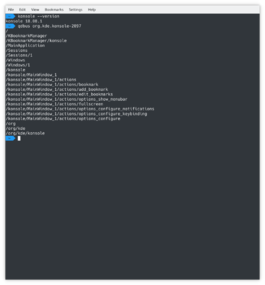 |
Konsole is the terminal emulator for the KDE platform |
Feature Overview
- X Terminal emulator
- Makes using the command line easier
- Use different profiles for different tasks
- Set scrollback limit and save contents to file
- Right-click on links to open in user's default web browser
- Open current path in user's file manager
- Translucent background available when desktop effects are enabled
- The unique value of the environmental variable
SHELL_SESSION_IDpersists across all desktop sessions
Konsole is an X terminal emulator for the KDE platform, allowing users to have a convenient way to use the command line. Aside from providing a way to use a powerful shell, Konsole also offers features that make it easier or more pleasurable to work in the command line, such as profile management, scrollback, and color schemes, including translucency for effects.
Konsole also provides an embedded KPart terminal which is used by apps such as Yakuake, Dolphin, and Kate, giving users a consistent and familiar interface when working in the command line.
Tutorials and Tips
Language
With Konsole you can change the language to plain English (to see bugs info for example) by command:
export LANG=en_US.UTF-8
Shortcuts
- Switch tab: Shift + Left, Shift + Right (not like X-Chat, Firefox, Quanta, Kdevelop).
- New tab: Shift + Ctrl + T.
Label your Tabs
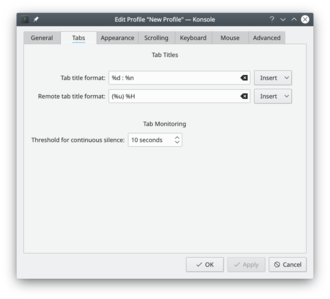
If you regularly use a lot of tabs, you'll sometimes find it convenient to label them. Just double-click on the tab and you'll get a re-name dialogue.
Profile Management
- To add a new profile go to
- On the tab, enter the new profile name and change the icon if desired.
- If this is to be a root konsole, enter the command
/bin/su -

sudo suor just prepend all your commands that requires superuser privileges with sudo.
- Font size can also be changed on the tab.
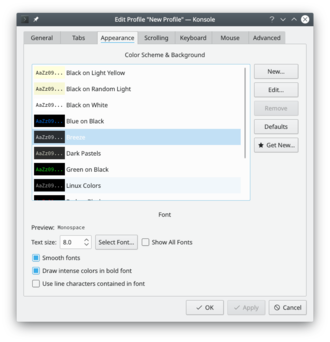
- On the screen you can add or remove a star, which controls whether that profile is to be offered on the File menu.
Padding
You can change the padding between the border and the contents of Konsole (the "margin" or "gutters" between window border and text) by editing your profile file in .local/share/konsole/[name of profile] and adding:
TerminalMargin=7
The number after "TerminalMargin" can be edited to whatever size you prefer. After that you need to log out and then log in to show the changes.
Per Konsole tab Bash history
If you want each Konsole tab to remember its own individual bash history, and restore it with the session after a reboot or log out/in, add the following line in your ~/.bashrc:
HISTFILE="$HOME/.bash_history.${KONSOLE_DBUS_SESSION##*/}"
Related Sites
Help with Development
If you are interested in helping with Konsole's development, check out how to help the Konsole team.
Keywords
Terminal emulator, command line, CLI, shell
Home » Applications » Education » Test
 |
KStars is a powerful and intuitive desktop planetarium program for KDE. It shows an accurate graphical representation of the night sky, as seen from any location on Earth, at any time. Come explore the nightsky!
KStars is part of the KDE Edutainment Project. |
Homepage
Authors and Developers
- Jason Harris <kstars AT 30doradus DOT org> (original author and current maintainer)
- Jasem Mutlaq
- Pablo de Vicente
- Heiko Evermann
- Thomas Kabelmann
- Mark Hollomon
- Carsten Niehaus
- Akarsh Simha
Downloads
KStars is included in all official KDE releases, in the edu.kde.org Science module.
You can also download the latest KStars tarball, or take the plunge and try compiling from SVN.
Screenshots
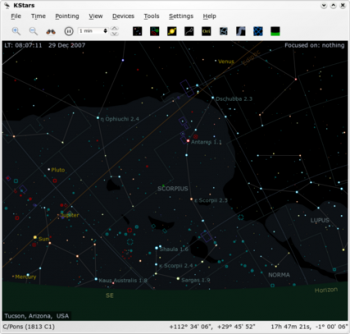
Bugs
Resources
- KStars Community Forums
- kstars-devel mailing list
- AstroInfo project
- Telescope Control with KStars
- CCD Control with KStars
- Instrument Neutral Distributed Interface wiki page
FAQs
Documentation
Development
KStars is under continuous development by a small group of dedicated hobbyists. Here's our current TODO list.
Join Us
We are always looking for new members of the KStars team! Come help us make KStars the best desktop planetarium it can be. You can subscribe to our mailinglist to get involved. There's plenty to do for all skill levels and interests.
Related Links
Other *nix Astronomy programs you may be interested in:
Copyright and Licence
copyright © The KStars team, 2004-2009
KStars is distributed under the terms of the GNU General Public License (GPL), Version 2.

KPDF - View and Print PDF files
KPDF was written for KDE 3 and was one of the earliest Free, Open Source Applications to successfully view and print PDF files.
Features Highlights
- Thumbnail panel for ease of navigation
- View in Fit-to-screen or Fit-to-width modes, changed with a single click
- Multi-mode searching - the usual facility to search from the Find dialog is there of course, but you can also use the filter box above the thumbnails to find pages containing that text. Typing "/" then some text will start type-ahead searching
- Auto-scrolling - activate by the default keys (Shift+Up and Shift+Down) or by shortcut keys to your taste.
-
Images with alpha
-
With Accessibility colors
-
Metalised theme
Development continued for KDE 4, resulting in Okular which adds even more functionality.
All this information and much more can be found on the project's Home Pages at kpdf.kde.org
- Kpdf vitruvian.png
- Kpdf04.recolor.png
- Kpdf04.styled.png
- Kpdf05.alpha.png
- Kstars.png
- Kopete Jabber Jingle

About Jingle support in Kopete Jabber plugin.
![]() Jingle support under KDE SC 4 was added in version 4.2. It was, however, exerimental, and the bugs in sound were found to be too great for it to be useful. The developers therefore decided to remove it again in 4.3, pending further work.
Jingle support under KDE SC 4 was added in version 4.2. It was, however, exerimental, and the bugs in sound were found to be too great for it to be useful. The developers therefore decided to remove it again in 4.3, pending further work.
Much of that work is now done, at least on the sound side, and problems connecting through firewalls and routers have been addressed. There are still areas under development, notably Rtp and webcams can be configured but not used in Kopete. The adventurous can see the latest snapshot at svn://anonsvn.kde.org/home/kde/branches/work/kopete/new_jingle
Kopete in KDE 4.4 does contain Jingle support using libjingle, so it's Google Talk compatible. It won't work with standard-compatible clients however.
This information is correct at the time of writing (4th February 2010). For the latest information you should check the project site at kopete.kde.org
Kopete Jabber Jingle under KDE3
Current status
Voice calls between two Kopete clients or between a Kopete client and a Psi client are possible. Voice calls between a Kopete client and Google's gtalk are also possible.
Anyway, the support is experimental, and can lead to crash if something goes wrong. This is why it is not enabled by default in the stable release.
Please note that the development is currently on hold.
Download
This is included in the Kopete 0.12 releases. get it from http://kopete.kde.org/releases.php You need to add the --enable-jingle flag to the compilation to enable it.
Required Dependencies
Introduction of libjingle require new dependencies to Kopete. Here the list:
- oRTP 0.7.1 Any version other than0.7.1 will not work!
- expat
- glib-2.0 (if you don't have it already for MSN webcam)
- speex (>=1.1.6 or 1.0.5 (the versions that have speex_encode_int ))
Optional Dependencies
Unofficial packages and other build tips
Unofficial and unstable Fedora Core 4 packages of oRTP and speex can be found here. Unofficial builds of kde-network for Fedora Core 4 with this branch of kopete can be foundhere.
On Mandriva 2006, you could have problems with oRTP : ./configure will not find the library. If you are using bash, you must enter :
PKG_CONFIG_PATH=/usr/local/lib/pkgconfig export PKG_CONFIG_PATH
before ./configure
Concerning SUSE (10.0): glib-2.0 might be in a different location as well (e.g. /opt/gnome/lib). Add this path to PKG_CONFIG_PATH as well.
Todo list
- Make libjingle compile in Kopete source
- Finish configure checks.
- Fix crashing when asking for a voice conversation. (It doesn't reject the call anymore, but a crash can still happen)
- Trying a voice conversation using imported Psi classes.
- Implement Entities Capabilities support JEP-0115
- Remove imported Psi classes and use our own.
- Starting to replace some components of libjingle.
- Port to libiris native tasks
- Etc....
Future: For KDE4
- Evaluate if Phonon is suitable for our needs.
Developers
- Michaël Larouche (IRC: DarkShock, Jabber: darkshock@myjabber.net, Email: michael.larouche at kdemail.net), Olivier Goffart (IRC: Gof)
Home » Applications » Graphics » KPhotoAlbum
 |
KPhotoAlbum is a tool which you can use to easily sort your images. It provides many capabilities to make sorting and viewing images easy. |
History
The development of KPhotoAlbum started in 2003 with the name KimDaBa (for K image Data Base) by Jesper Pedersen[1]. KiPi support was added in 2004[2]. In 2006, Tuomas Suutari a sponsored [google summer of code student], implemented a new sql based database.
In July 2007, KPhotoAlbum started to being ported to KDE 4[3]. The porting finished in May 2009[4]
In 2014, an android version was released[5]. A video of the android version is available in youtube.
In 2016, KPhotoAlbum was ported to qt5/kf5[6].
Stable releases are always announced on our news page.
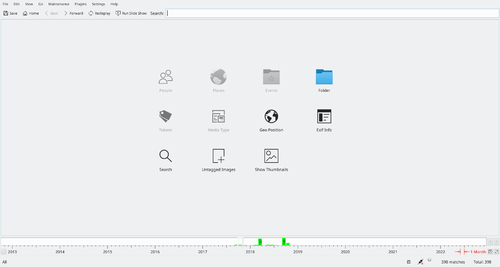
Getting started
For an introduction, take the 3 minute KPhotoAlbum tour or see the Videos at KPhotoAlbum's Homepage. To learn more and view some screenshots read the FAQ.
KPhotoAlbum supports all the normal image formats including raw formats produced by most digital cameras and scanners (using dcraw to do the decoding). It is also possible to use the thumbnails embedded in raw images (that are usually of decent size and quality) for fast viewing so there is no need to decode the whole raw image.
Using KPhotoAlbum
There is a 3-minute Tour and a set of How-To videos on the project site. A KPhotoAlbum handbook is also available as a PDF and on-line version.
Getting KPhotoAlbum
Source packages, binaries for various distros, and snapshots are available from the project Download page.

KPhotoAlbum on Live systems
KPhotoAlbum is available in Neon:
- User Edition has the latest release
- Developer Edition (stable branch) has the 5.x branch.
Most of the time, this should be the same as unstable, but when new features are developed they only arrive in stable after the roughest edges have been smoothed out. - Developer Edition (unstable branch) has the master branch of kphotoalbum.
Extending KPhotoAlbum
- Patches and features awaiting approval or implementation - Please use bugs.kde.org for that.
- Some useful scripts are shipped with KPhotoAlbum in the contrib directory.
Help develop KPhotoAlbum
If you are interested in helping the KPhotoAlbum development or related projects, please look at this project page. Or, if you have an idea for a feature, please see the Feature Requests section, below.
Known Bugs and feature requests
See the list of Known Bugs and workarounds in KPhotoAlbum.
Please use bugs.kde.org marking the report as a "Wish".
New Ideas for Future Versions
If you have a new idea for KPhotoAlbum and think that bugs.kde.org is not the right place for it, use one of the communication channels listed on the pages.
More Information
- KDE official documentation
- KPhotoAlbum homepage
- KPhotoAlbum news
- Wikipedia article
- KPhotoAlbum phabricator project
- KPhotoAlbum git repository
References
Can I organize my movies as well? Are thumbnails generated? Is the movie playable from within the application?
Yes, you should be able to organize and view the videos within the application if you are using a recent release. Videos will be played from within the application.
How can I show the comments in a tooltip when I go over a picture?
Hit Ctrl + T. The tooltip contains a bigger preview too.
How do I delete a keyword?
Edit an image, select the keyword, then right-click and select delete in the menu.
Can I organize my images in multiple directories?
As long as all your image directories have a common root, then that is fine. In other words, you are allowed to have a directory tree with your images. At the moment KPhotoAlbum does not have full support for multiple image roots. However, you can use a command line switch -c to instruct what image
root you want to use. E.g.
kphotoalbum -c Pictures/index.xml
The default image root is stored on configuration file under home directory ~/.config/kphotoalbumrc. The default image root is
stated in this file e.g. imageDBFile=/home/<user>/Pictures/index.xml.
Can I move my images around on disk?
Yes, since version 1.1 KimDaBa/KPhotoAlbum stores check sums for each image. Before moving images around, you might want to invoke - this should, however, only be needed if you have modified your images (removed red eyes for example) (contributed by: Jesper Pedersen)
When I select multiple images, I can not go back and forth in the list of images with the PageUp and PageDown keys, I just see the first picture. How can I use PgUp and PgDn to move between pictures?
You should not press Enter in the thumbnails view to view multiple images; instead, use or Ctrl + I. Also, you need to select all the images you want to view before viewing images.
You can reassign the Enter key to do the same thing as Ctrl + I in . Because Enter is already used for , you should choose a new key for entering fullscreen mode. For example, you can configure the F key to toggle fullscreen mode (so it behaves like mplayer). Just remember to type Ctrl + A before Enter if you want to scroll through ALL pictures.
How can I copy pictures into another directory?
Just select the pictures you are interested in, and drag and drop them into Konqueror or Dolphin.
Is there a feature to export filenames for a list of images?
Just select the pictures you are interested in, and drag and drop the images into your terminal window (for example, Konsole or gnome-terminal).
You can also use the menu item
Remember that some editors do not support drag and drop properly
What should I put in the Keywords field ?
Keywords are a way to tag images with relevant words, so you can search for them later. It is up to you what keywords should be applied to your pictures. Here are some tips to help you decide what keywords to add to your pictures:
- Don´t be too specific. A keyword that is too specialized will only be used on a small number of pictures, is seldom useful, and will require a bit of extra time to apply to some images. Generalized keywords are more useful than they might seem at first, because if you have many images with the same keyword, you can further restrict the search (e.g. : search for both keywords "Funny" & "Jesper"). It´s more likely that you will remember to set your keywords (and want to do it) if there are not too many, and they are generally high-level and memorable (examples : Funny, Family, Comes From Internet, Beautiful landscape, ...)
- Ask yourself what you intend to do with your pictures, and set keywords in this spirit. For example "wallpaper" if you like to change your wallpaper often, or "Gimp"; if you think you will have to retouch this picture someday. Another example : put "+++" on pictures you find really beautiful. This way, when a friend comes, you can show an impressive slideshow with only those pictures and you will want. To put pictures from your trip in the USA on your website (but not all the 1000 you have!), just search "+++" & "USA" and that´s it!
How do I sort images by filename or folder instead of by date?
The current version of KPhotoAlbum doesn't have this functionality. However, you can search for images by filename or folder name.
When I am tagging multiple images at once, I only want to change one or two tags, and not have all the checkboxes apply to all the images.
The check boxes in KPhotoAlbum 3 are tri-state, so that you can unmark a keyword for all images, leave a keyword unchanged for others, or mark all images with a keyword. Some KDE themes don't show the middle state as being different from the checked state, so you may need to choose a different theme.
I want to include a folder full of images, without copying them into the KPhotoalbum directory tree.
While future versions of KPhotoAlbum will allow more than one root folder to be added, you might need this ability right now -- and you might not want to copy 10,000 images to the KPhotoAlbum folder. If you're comfortable with the command line, use the first example. If you like Konqueror, use the second.
- On the command line, change to the KPhotoAlbum image root folder. Type
ln -s TARGET_FOLDER ./
TARGET FOLDER is where you substitute the path of the folder you want to include. This will create a link to that folder without copying the files
- In Konqueror, open a window in the KPhotoAlbum image root folder and another above the folder you want to include. Hold down Ctrl + Shift, and drag the folder you want into a BLANK area in the KPhotoAlbum root folder (you don't want to drop the link into a new folder). If you don't hold down Ctrl + Shift, you will get a menu that lets you choose to copy, move or link the folder. Choose .
I want to remove from Kphotoalbum database the removed images
In case you remove any of the images present in the KPhotoAlbum database from an external program you will see an icon in KPhotoAlbum until you remove the picture from the database.
The easiest way to remove those photos is going to , then you will see all the photos that can't be found in the location KPhotoAlbum expects them. You can then remove those from the database.
![]() Whenever I carry some of my photos on CDs to friends of mine, I wish I could use KPhotoAlbum to pick specific photos. Unfortunately most of my friends use Windows, so KPhotoAlbum won't be available to me.
Whenever I carry some of my photos on CDs to friends of mine, I wish I could use KPhotoAlbum to pick specific photos. Unfortunately most of my friends use Windows, so KPhotoAlbum won't be available to me.
While Linux Live-CDs (like Knoppix) make it possible to boot Linux from CD/DVD, I know of no version containing KPhotoAlbum.
This Wiki page describes a way to have KPhotoAlbum available using Knoppix and how to create it yourself, to adapt it to other live-CD/DVD systems.
Basis of the image
Newer Knoppix versions have a feature to create a image file (e.g. on memory stick) and mount this "on top" of the CD/DVD image. (UnionFS) This makes it possible to add additional software to the packages coming with the CD/DVD. (Without the need to install anything on the computer Knoppix runs on)
Do-it-yourself
How to look "inside" the image file
(Assuming here, /tmpmnt is a directory)
sudo mount -o loop -t ext2 knoppix.img /tmpmnt
This will mount the image on /tmpmnt. You now can look inside the image. You will find dirs like /etc/network/if-up.d/ (and many more) beside the obvious KPhotoAlbum files. These result from activities of Knoppix, which changed these files, so they ended up in the image too. I tried to get rid of these, but this always destroyed the image. (Tips here also welcome)
Creating your own image file from scratch
I installed mostly from source, because I already had those available. The alternative would be to download most things as installable package, e.g. .deb for Knoppix.
Get the needed files
Get the files and save them on a partition later available on Knoppix. What you need may differ, depending on the version you are using and if you are using a CD or DVD version. I assume that you are familiar with the usual way to compile and install configure-based open source SW.
For the following see the KPhotoAlbum homepage
- exiv2
- libkexif
- libkexiv2
- libkipi
- kipi-plugins
- kphotoalbum
Create an image file
(The exact steps depend on your Knoppix version. My description here is based on Knoppix 5.2. The titles are back-translated from my German version)
- Boot the Knoppix CD/DVD
- On the KDE desktop click the penguin icon on the KDE bar (second left after the K-icon)
- Choose
- Confirm message
- Choose the partition, the image will be created on
- Answer the question for encryption with "No".
- Enter size for the image (you'll need approximately something between 60 and 70 Mbyte; so 70 MByte seems good) Note: The image now gets created, but not mounted, until the next reboot.
Installing KPhotoAlbum in the image file
- Reboot the Knoppix CD/DVD and confirm the mounting of the image file.
- Compile and install sqlite
- Install libqt3-mt-sqlite_3.3.7-4_i386.deb using
dpkg -i libqt3-mt-sqlite_3.3.7-4_i386.deb
- Install the remaining packages in the order
- exiv2
- libkexif
- libkexiv2
- libkipi
- kipi-plugins
- kphotoalbum
Now KPhotoAlbum should be working and installed in the image. (You might need additional packages, depending on your version) Next time just the image file is needed, as described above.
KPhotoAlbum has support for categorizing videos along with its usual support for categorizing images. Getting KPhotoAlbum to show thumbnails for videos and actually showing the videos can be tricky. This page will give you some hints. For sound, KPhotoAlbum uses Phonon. It is possible to change the Phonon backend, but it is usually better to stick with the backend that your distro has configured.
Building Thumbnail Support
KDE has packages for generating the thumbnails for videos. If the correct packages are installed then you should see the thumbnails. KPhotoAlbum uses mplayerthumbs, so you must have this package installed.
Below is a list of packages required for different distributions:
Kubuntu/Ubuntu:
In Ubuntu 10.04 the package phonon-backend-xine along with
libxine1-all-plugins appears to be working.
With Ubuntu 10.10 it is worth trying phonon-backend-gstreamer if the video is not good.
Naturally appropriate codecs must also be installed.
Debian:
Required:
- libarts1-xine
- kmplayer-plugin
Showing Videos
KPhotoAlbum will show the videos in the viewer if the right support packages are installed (Again KPhotoAlbum doesn't do the real work of showing the videos, but relies on the KDE subsystem to do so). Below you can see which package are needed for your system:
(K)Ubuntu
See Setting up Restricted formats
Still Doesn't Play Videos?
If you believe you have all the right packages installed, and it still doesn't play videos, then it is time to check your KDE configuration.
Open up Konqueror, choose . Open up the branch, and choose the item you can't get working (e.g mpeg). The screen now shows a tab widget for configuring that item. First check that the extension you have in mind is listed in the Filename Patterns.
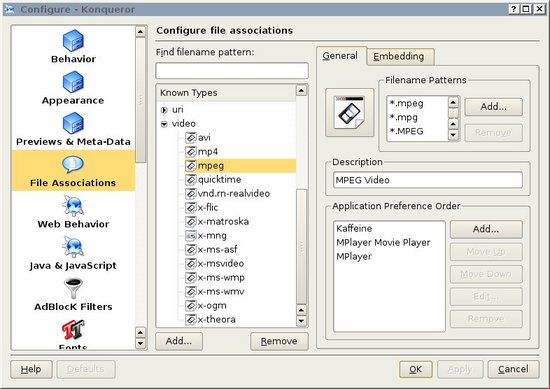
Next choose the , and check that it shows any services in the "Service Preference Order" listbox.
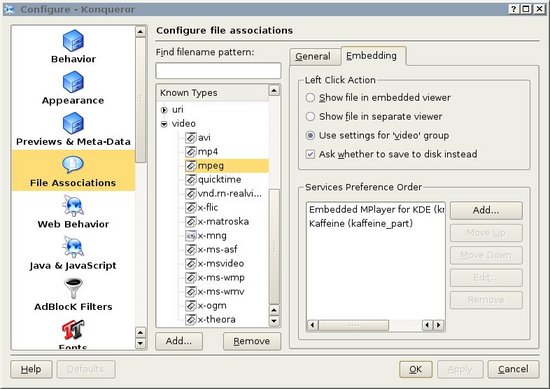
What Do the Errors Really Mean?
One way to get to this page is from trying to play a video, with the result that KPhotoAlbum shows you an error box with the different actions it tried before failing. Here is a list of the possible failures:
- Finding mime type
- Getting a KPart for the mime type
- Getting a library for the part
- Instantiating Part
- Fetching Widget from part
If any of these fails it is very likely that you need to go back up and look carefully at the settings in the previous section. If you see one of these fail, and fix it. Please add a bit of description above to help other users.
- Kdegameslogo.png
- Krita-logo.png
- Krita-screenshot.jpg
- Kblogger.png
- KopeteIcon.png
- Kde.png
- Kwin-wobbly.png
- KDE-is-ours.png
- KrunnerIcon.png
- KDE SVN
The KDE SVN is an online archive that stores the source code for KDE. It is possible for anyone to browse the SVN by visiting the web SVN. The name "SVN" comes from the software that the archive uses, which is called Subversion.
The archive contains not only the version of KDE that is under development but also the current stable release and the history of changes to KDE.
If someone refers to a new feature as being "in the SVN" it usually means that it is not available yet but that a working version has been created and will probably be available in the next release.
 |
KNode is your usenet mail reader. |
Features
This straight forward, full-featured news reader is provided by KNode, the default news reader from KDE. It is equipped with all features you would expect:
- GNKSA compliant
- supports multiple news servers
- signing emails and newsarticles
- reading and composing of MIME multipart messages
- inline display of attachments (text and images)
- supports all international character sets
- powerful search and filter functions
- spell checking
- supports full scoring
- drag 'n' drop between groups and archive folders
- and much more
- A Tutorial is available, KNode for Mailing Lists
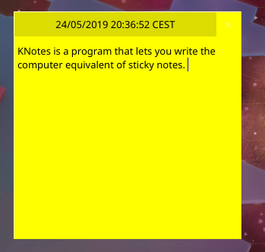 |
KNotes is the non-sticky sticky notes application. See them on your desktop even when Kontact is closed |
Features
- Write notes in your choice of font and background color
- Use drag and drop to email your notes
- Can be dragged into Calendar to book a time-slot
- Notes can be printed
The Notes component is provided by KNotes.
More Information
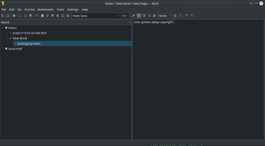 |
KJots organises all of your notes into separate books |
Features
- Multiple books handled
- Each book has many named pages
- Books and pages can be rearranged by drag-and-drop
- Keyboard shortcuts are available for many functions
- Automatic saving means your notes are safe from loss
A short handbook is available from here
Hints and Tips
- Recover your accidentally deleted KJots books
- If you used KNowIt under KDE 3 import your data into KJots
- KpilotInfo.png
- KPilot
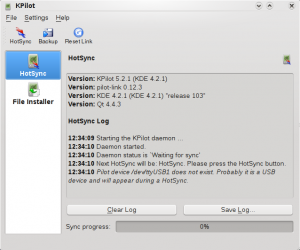 |
KPilot synchronises data between your PC and many types of handheld devices |
Features
KPilot is a replacement for the Palm Desktop software from PalmSource Inc., which makes your PalmOS powered handheld (e.g., a Palm Zire 31) capable of exchanging information with your KDE workspace. KPilot doesn't replace the Palm Desktop all by itself. It connects and integrates a number of fine KDE 3.x and 4.x applications such as Kontact into a package that can do everything the Palm Desktop can, and more.
FAQs, Hints and Tips
General advice and information can be found on the project home pages. While there is no guarantee that KPilot will work with any particular handheld, there is a list of models reported as working.
The project's FAQ page gives information about Device Connection issues and HotSync issues. It also answers a number of technical questions.
In January 2010 it was announced that there would be no further development of KPilot, as the developers no longer use Palm devices, and in fact the devices are slowly disappearing from the market. Should anyone be interested in reviving development they should contact the Kontact developers.
- Knewsticker.png
- Kwin.png
- Konqueror.png
- Kwrite.png
- Konversation.png
- Kget.png
- Ktorrent.png
- Knode.png
- Kmldonkey.png
- Knetworkmanager.png
- Kppp.png
- Kwlanmain.png
- Krdc.png
- Krfb.png
- KmymoneyIcon.png
- Kftpgrabber.png
- Ktimetracker-icon.png
- Kword.png
- Kexi.png
- Kplato.png
- Kchart.png
- Kuickshow.png
- Ksnapshot.png
- Kcolorchooser.png
- Kolourpaint.png
- Kruler.png
- Kipi.png
- Kphotoalbum.png
- Kfax.png
- Kiconedit.png
- Kpovmodeler.png
- Kanagram.png
- Khangman.png
- Kiten.png
- Klettres.png
- Kwordquiz.png
- Kalgebra.png
- Kbruch.png
- Kig.png
- Kmplot.png
- Kpercentage.png
- Kalzium.png
- Kstars-icon.png
- Kgeography.png
- Ktouch.png
- Kturtle.png
- Keduca.png
- Kverbos.png
- Kile.png
- Katomic.png
- Kbounce.png
- Kdiamond.png
- Kgoldrunner.png
- Klines.png
- Kolf.png
- Ksame.png
- Kspaceduel.png
- Kollision.png
- Kbattleship.png
- Kfourinline.png
- Kmahjongg.png
- Kreversi.png
- Kshisen.png
- Kpat.png
- Kiriki.png
- Kjumpingcube.png
- Ktuberling.png
- Konquest.png
- Ksirk.png
- Kblackbox.png
- Kmines.png
- Knetwalk.png
- Ksquares.png
- Ksudoku.png
- Kmplayer.png
- Kaffeine.png
- K3b.png
- Kmix.png
- Kteatime.png
- Ktux.png
- Kweather.png
- Kdevelop.png
- Kmid.png
- Kaudiocreator.png
- Kate.png
- Kompozer.png
- KompareIcon.png
- Kdf.png
- Kfloppy.png
- Kdiff3.png
- Kerry.png
- Kgpg.png
- Kwalletmanager.png
- Kpager.png
- Klipper.png
- Kcalc.png
- Ktimer.png
- Keurocalc.png
- Krecipes.png
- Kword+images.png
- Kword preview.png
- Kword-r-to-l.png
- KWord
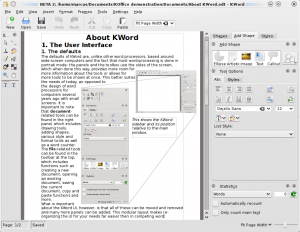 |
KWord brings the power of frame-based editing to all your documents |

KWord is a word processor. Naturally it has all the features you'd expect - paragraph styles, indenting, bullets, tab stops, page breaks and full control of your fonts. There are templates for common requirements. Naturally. So where is KWord different?
KWord is different in that it is frame based, so you have absolute control of your document. You may choose to work in columns like a news-sheet, or have a free layout as in a photo-album. Need captions on your pictures? No problem. The choice is entirely yours. Frames may be linked,in which case text will flow seamlessly, making professional-looking layout without the use of a fully-fledged desktop publishing package.
Longer documents sometimes need pages rearranging - the preview mode gives you that freedom. Of course page numbering and other details can be in headers and footers. Chapter numbering is taken care of, and there is an auto-generator for Table of Contents. Footnotes and Endnotes are supported.
Maybe you need to produce your document in several languages? No problem. Select the font for your chosen language. KWord has full support for right-to-left script languages.
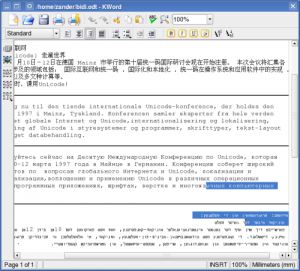
So what are you waiting for? It's time to get creative in your writing!
Hints, Tips and Tutorials
- Basic Layout a tutorial that creates a leaflet with various images and explaining text using KWord's frames technology. Several text frames and image frames will be created and positioned on the page.
- A Second Layout experiments with placing, grouping and moving images within a text area
- A Third Layout creates a photo album page to examine text run-around and text-flow.
- Using the Artistic Text Shape is a tutorial that shows how to get started with the artistic text shape that all KOffice applications provide.
- KWord Manual Tutorial on basic concepts of working in a frame-based environment, and detailed guides for all your WP needs.
Problem: You have lost your toolbox
If you have an early 2.0 release you may have the bug that causes this. Simply delete ~/.kde/share/config/kwordrc and it will be re-created. Your toolbox will have been restored.
 |
From simple calculation to complex formulae |
KCells was a multi-sheet spreadsheet application. This project was a part of the KOffice office suite and is since 2012 not maintained anymore. User are encouraged to switch to Sheets, the Calligra fork.
History
KCells was previously known as KSpread, following the split of the KOffice and the Calligra communities, this project was renamed to KCells. The development of KCells began in 1998 by Torben Weis[7], one year after the beginning of the development of KOffice. In 2012, KOffice and KCells were no longer maintained.
Historical Screenshots
More Information
References
- Kdenlive.png
- Kdat.png
- Kpackage.png
- Kpresenter embed.png
- Ksysv.png
- Kpresenter features.png
- Kpresenter grad.png
- Kpresenter main.png
- Kiosktool.png
- Kexi find.png
- Kexi form.png
- Kexi objects.png
- Kexi images.png
- Kexi properties.png
- Kexi
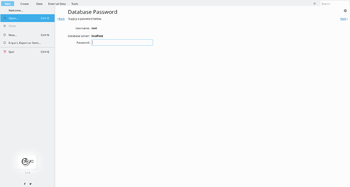 |
Rapid Application Development |
KEXI is a visual database applications creator. It can be used for designing database applications, inserting and editing data, performing queries, and processing data. Forms can be created to provide a custom interface to your data. All database objects – tables, queries, forms, reports – are stored in the database, making it easy to share data and design.
Features
- Full visual designers for tables, queries, forms and reports
- Running queries, support for parametrized queries
- Supports SQLite, MySQL, PostgreSQL and MS SQL Server databases
- The only multiplatform graphical tool importing data from MS Access databases
- Supports query design in dedicated SQL view
- Designing and displaying relational data using combo boxes (lookup columns)
- Direct data entry or import using CSV format
- Locked down User Mode, allowing you to switch off all commands related to editing your project's design
- Scripting using JavaScript, Python or Ruby programming languages (experimental)
- Many more features
Development wiki is at https://community.kde.org/Kexi and home page is at http://www.kexi-project.org.
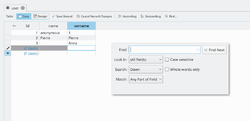 |
 |
 |
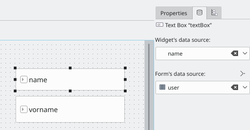 |
Documentation, Tutorials and Samples
- Tutorials
- Documentation
- The KEXI Handbook for KEXI 2
- This Handbook is also found on docs.kde.org.
KEXI Cheat Sheet(planned)- Note: scripting is undocumented and experimental, please read [1] for more information
- Samples
- YouTube Videos (KEXI Channel)
- Follow the project on Twitter or facebook.
Presentations
- KEXI - Data(base) Environment, Universal Data Layer for KDE (Akademy 2006)
- KEXI: Introduction for KDE Contributors (2nd Calligra Sprint, 2011)
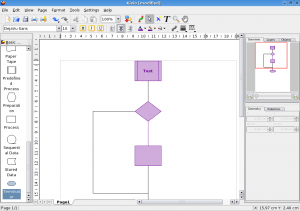 |
Your application for creating diagrams and flowcharts |
Features
- Create network diagrams, organisation charts, flowcharts and more
- Scriptable stencil creation using Python
- Support for Dia stencils.
- Plugin framework for adding more functionality.
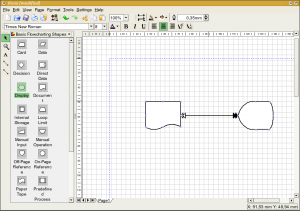 |
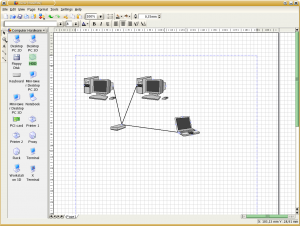 |
Troubleshooting, Hints and Tips
You can't export to image formats
If you find that you can only export to or , it's likely that you don't have koffice-filters installed. Installing this package allows you to export to PNG, JPEG or BMP Image formats. It is best to install both at the same time using "yum install koffice-kivio koffice-filters" or a similar command, suited to your distro.
Hints, Tips and Tutorials
- Using the Artistic Text Shape is a tutorial that shows how to get started with the artistic text shape that all KOffice applications provide.
- Kfilereplace.png
- Kimagemapeditor.png
- Klinkstatus.png
- Kommander.png
- Kxsldbg.png
- Karbon clipart.png
- Karbon grad.png
- Karbon screen.png
- Kapptemplate.png
- Karbon
 |
Karbon is a vector graphics application for Calligra |
Karbon is a vector drawing application with an user interface that is easy to use, highly customizable and extensible. That makes Karbon a great application for users starting to explore the world of vector graphics as well as for artists wanting to create breathtaking vector art.
Features
- Loading support for ODG, SVG, WPG, WMF, EPS/PS
- Writing support for ODG, SVG, PNG, PDF, WMF
- Customizable user interface with freely placable toolbars and dockers
- Layer docker for easy handling of complex documents including preview thumbnails, support for grouping shapes via drag and drop, controlling visibility of shapes or locking
- Advanced path editing tool with great on-canvas editing capabilities
- Various drawing tools for creating path shapes including a draw path tool, a pencil tool as well as a calligraphy drawing tool
- Gradient and pattern tools for easy on-canvas editing of gradient and pattern styles
- Top notch snapping facilities for guided drawing and editing (e.g. snapping to grid, guide lines, path nodes, bounding boxes, orthogonal positions, intersections of path shapes or extensions of lines and paths)
- Includes many predefined shapes including basic shapes like stars, circle/ellipse, rectangle, and image
- Artistic text shape with support for following path outlines (i.e. text on path)
- Complex path operations and effects like boolean set operations, path flattening, rounding and refining as well as whirl/pinch effects
- Extensible by writing plugins for new tools, shapes and dockers
Get it
There is normally no need to download Karbon, install it by means of your distribution. For example with openSUSE 12.2, open a console and enter
zypper in calligra-karbon
Screenshots
 |
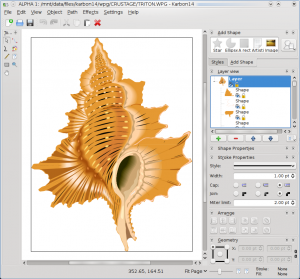 |
See more screenshots here.
Hints, Tips and Tutorials
- Using the Artistic Text Shape is a tutorial that shows how to get started with the artistic text shape that is available in all KOffice applications.
- Kbugbuster.png
- Kcachegrind.png
- Kuiviewer.png
- Kplato accounts.png
- Kplato gantt.png
- Kplato resource.png
- Kplato tasks.png
- KPlato
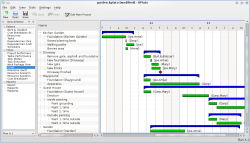 |
Manage every detail of your project |

Features
- Multiple views
- Gantt Charts,
- Resource View
- Accounts View
- Uses standard structures
- Work breakdown structure (WBS)
- Resource breakdown structure (RBS)
- Cost breakdown structure (CBS)
- Configurable level of detail on Gantt Chart
- Supports Summarytasks, Tasks, and milestones
- Configurable Scheduling Constraints
- and much more.
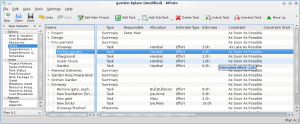 |
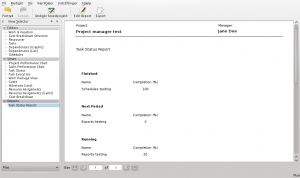 |
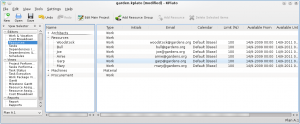 |
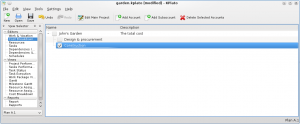 |
Hints, Tips and Tutorials
Engineering To Order project tutorial is a step-by-step walk-through setting up and executing a project using KPlato.
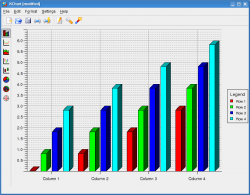 |
Prepare charts to embed in your documents and slideshows |
History
KChart was the charting tool from KOffice and is still the charting tool from Calligra. In older version, KChart was a standalone application, now it's a part with KGantt of the KDiagram library used by other KDE applications (e.g. Calligra and KMyMoney)[8].
Features
Features include:
- Ease of use
- Default values for all parameters are relative to window size
- All parameters may be edited after drawing the chart
- Choice of legend placement
- Header and footer have font settings defined separately from other fonts
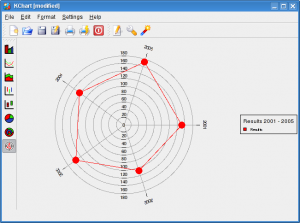
- Multiple Chart types
- Bar: normal | stacked | percent, 2D | 3D-Look
- Line: normal | stacked | percent, line markers
- Area: normal | stacked | percent
- HiLo: normal | open-close
- Box & Whiskers
- Pie: normal | exploded, 2D | 3D
- Ring
- Polar: normal | stacked | percent
References

 |
Create complex formulae for embedding into your documents |
Some features:
- Easy Greek letter insertion
- Intelligent cursor movement
- Advanced syntax highlighting
- Multi-level undo support
- LaTeX export (copy and paste into a text editor)
- MathML import
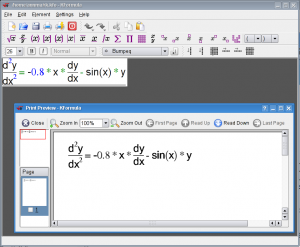 |
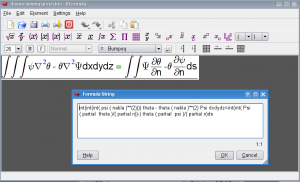 |
Hints, Tips and Tutorials
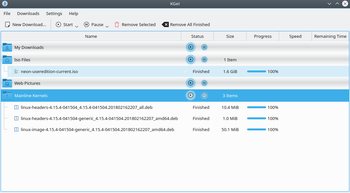 |
KGet is the Download-Manager from KDE. |
Features
- Downloading files from FTP and HTTP(S) sources, including pages and individual hyperlinks.
- Pausing and resuming of downloading files, as well as the ability to restart a download.
- Tells lots of information about current and pending downloads.
- Embedding into system tray.
- Integration with the Konqueror web browser.
- Metalink support which contain multiple URLs for downloads, along with checksums and other information.
Using KGet
There are a number of ways to start-up and use KGet. You can do it manually from the application menu (Search for KGet or find it under the Internet category). You can also set it as the default download manager for Konqueror, which will start it automatically when you wish to download a file.
There are a number of other ways to use KGet to download a file from the internet as well:
- clicking a Download link for a file will automatically start it
- right-clicking on any web-page element and navigating to will initiate a download of that element with KGet (this also works for files and folders on remote storage devices)
- showing the drop-target and click-dragging a link or file to it will automatically start a download
- and click-dragging a link or file to the main window will automatically start a download.
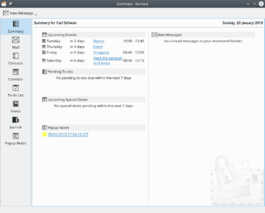 |
Kontact is the integrated Personal Information Manager of KDE, but can be used with other systems as well.
It supports email, address books, calendars, tasks, news feeds and much more. |
The Kontact suite is the powerful PIM solution of KDE that handles your email, agenda, contacts and other 'personal' data together in one place. Kontact delivers innovations to help you manage your communications more easily, organize your work faster and work together more closely, resulting in more productivity and efficiency in digital collaboration.
Components
KDE Kontact supports various groupware servers. When using these servers your workgroup has access to features like shared email folders, group task lists, calendar sharing, central address books and meeting scheduling.
Kontact consists of the Kontact PIM back end and the graphical applications connecting to the back end. Special 'agents' (say a facebook agent) are employed to get new data in and merge it in the existing data set (for example contacts, news). Due to the clean infrastructure new agents are easy to develop.
These programs together form Kontact:
- Akregator - Read your favorite feeds
- KAddressBook - Manage your contacts
- KMail - Mail client
- KNotes - Sticky notes for your Desktop
- KOrganizer - Calendar and scheduling, Journal
- Summary - Summary screen in Kontact
- KJots - Your ideas organized in a Notebook
Where to get help
Documentation for Kontact is available here.
The KDE community forum is here.
There is a mailing list at
- kdepim-users - for users of the KDE PIM applications (Kontact, KAddressBook, KMail, KOrganizer, ...) subscribe to kdepim-users archive of kdepim-users. A team of developers and users aim to give answers as quickly as possible
and for urgent help, an IRC channel on Libera Chat
- for users and developers of Kontact - #kontact
Download
Kontact is available in all major Linux distribution repositories, as tarballs, and soon a Flatpak version will also be available. Ancient versions were compatible with Windows, the Kontact team is looking for help to improve Windows support. For more information look at the Kontact download page.

More Information
- Kontact website
- All the manuals for KDE PIM
- KAddressBookIcon.png
- Konqueror-welcomepage-kde4.png
- Konqueror-filesystembrowsing-kde4.png
- Konqueror-as-a-webbrowser.png
- Konqueror
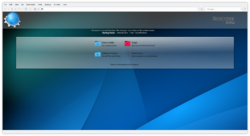 |
The multi-talented file manager and browser |
General features
Many of Konqueror's features can be used regardless of what you are viewing: for example, multiple tabs, the sidebar, window frames and bookmarks. This makes it not only a powerful web-browser, but also a powerful general-purpose application.
Features
- Powerful and flexible file manager
- Standards-compliant KHTML browser engine
- Embedded viewing of files thanks to KParts
- Multiple split views and tabs
- Sidebars and extensions to provide additional functionality
- Integration with other KDE applications like KGet Download Manager and Akregator Feed Reader
- Remote and pseudo-filesystem file management through KIO
Tabs
Using tabs in Konqueror is similar to using tabs in many other KDE applications. You can create a new tab by going to the, menu. You can find ways to interact with tabs by right-clicking any tab you currently have open. You can also move tabs by clicking with the middle mouse button and dragging them across the tab bar.
Bookmarks
Bookmarks allow you to save URLs so you can easily load them later, from Konqueror or even from an external application like Krunner.
In order to save a web page in your bookmarks, navigate to it and then click in (default shotcut is Ctrl+B). Next time we click on we'll see the new bookmark in the list.
To rename bookmarks and group them in folders, go to .
Sessions
Sessions are saved Konqueror status. You can i.e. save a Konqueror session when you have certain web pages opened in Konqueror (in any combination of tabs or windows), and you will be able to open then whenever you want from the sessions list, and they will be opened the same way you had them when saving the session.
To save a session, make sure the only opened Konqueror instances are those you want to save, and then go to and choose a name for the session. Then, you will have the session listed in . You can later manage your different sessions from .
Frames
Frames allow you to view multiple locations, documents or websites in a single window under a single tab by splitting the window. This can be used e.g. to view multiple web pages at once, to copy files from one location to another (either from one folder to another or from a remote location like an FTP site or a shared network folder), view or compare two documents at the same time and for many other possibilities. To use frames, either go to the menu or right-click on the status bar at the bottom of the window and select either or . You can also create or remove frames using the short-cuts displayed in the menu for each action. You can control each view by clicking on it and interacting with it as usual.
Konqueror as a web browser
Konqueror is the built-in web browser. It has fast, standards-compliant HTML and JavaScript rendering engines, KHTML and KJS respectively, which are most noted for being Apple's choice for developing the popular Webkit rendering engine, chosen for its speed and standards-compliance. It also has support for various Firefox-compatible plug-ins, Java, several image formats, Secure Socket Layer (SSL) connections and more. To see all of Konqueror's supported standards, navigate to, in a Konqueror window.
KHTML vs. Webkit
Since Nokia ported Webkit into their toolkit in Qt 4.5, there has been a lot of discussion about replacing KHTML with Webkit in Konqueror. The KDE developers have written a WebKit component (KPart) which can replace KHTML which is still the default rendering engine. At some point in the future that default might change, but for now the WebKit KPart is an optional component you will have to install if you want to use it. Besides Konqueror, there are a few other KDE browsers in development which make use of WebKit by default, (Arora and Rekonq, for example.)
Konqueror as a file manager
Konqueror uses the Dolphin KPart for file management, giving it all the abilities of Dolphin. It includes many configuration options under the configuration dialogue. Changes applied here will affect Dolphin and vice versa. For all of Konqueror's file-management capabilities, check Dolphin's page.
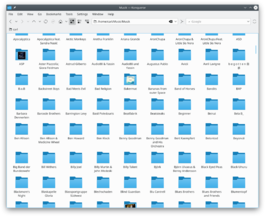 |
Konqueror is also a universal viewing application, thanks to its ability to embed audio, video and document viewers.
Tutorials
Using Mousegestures
I'd like Konqueror to be my default file manager
Starting from KDE Software Compilation 4.2, you can change the default file manager through
Konqueror's WebKit view mode
Since KDE Software Compilation 4.5, Konqueror can use Webkit engine to browse webpages via KParts technology. , search html type, then click tab and move Webkit(kwebkitpart) up.
Using GMail's Web Interface in Konqueror
This forum page deals with improving the display of GMail within Konqueror
Hints and Tips
Look up a Wikipedia entry
Can you look up words in Wikipedia in record-speed? Imagine a colleague comes in and talks about ISCSI. Don't you know what it is? No problem, just type
wp:ISCSI
in your Konqueror browser and ENTER. You will be shown the Wikipedia (wp) article on iscsi.
Format a man page for easy reading
Type in
man:rsync
to get the whole information about using rsync, in a form that's easy on the eye and better for printing, too.
Find other capabilities on Konqueror
For more shortcuts, have a look at .
You can also add your own. See Web Shortcuts for details.
Keywords
File manager, File browser, File management, web browser, Internet, file viewer, embedded preview, KPart, KIO
| A utility to rename multiple files |
Description
KRename is a tool to rename files easily.
Features
- Rename large numbers of files
- Rename files, by simply adding a sequence of numbers or changing case
- Plugins can be used to rename files using metadata from images, movies, music and more
Usage
- Starting in the Files tab, Add the files to be renamed.
- If a file is not wanted, click Remove
- Click Remove All to start over
- In the Destination tab, choose the action to be performed on the files
- Rename the files, leaving them in the original folder
- Copy the files to another folder, renaming them. The original files are left untouched
- Move the files to another folder, renaming them
- Create symbolic links in another folder. The links use the naming method requested, the original files untouched
- The plugins tab lists the plugins available
- Available plugins are listed in the box on the left. Choosing a plugin displays the tags that are available when renaming files
- Filename
- Choose the naming scheme to use when renaming files
- For Prefix and Suffix, choose Number or Date to add each to the beginning or end of the filename. A custom string may be entered in the box next to the drop-down list
- Choose an option for the Filename or Extension. Using Custom allows the use of the tags provided by plugins
- If using numbers, choose a starting and ending range
- The box at the bottom is a preview of the renamed file
- Choose the naming scheme to use when renaming files
- Click Finish to perform the renaming operation
Authors
- Original author: Dominik Seichter <domseichter AT web.de>
- Current maintainer: Heiko Becker <heirecka at exherbo dot org>
More Information
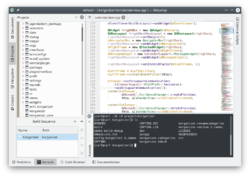 |
An Integrated Development Environment (IDE) for Linux, Mac OS X and MS Windows |
History (inspired by Wikipedia)
The KDevelop project started in 1998 at the University of Potsdam (Germany). The first released 0.1 was released the same year[9].
KDevelop has experienced several rewrites. The first time was with version 3.x by Bernd Gehrmann in 2001[10] and the second time was with version 4.x with a more object-oriented architecture in 2009[11].
The development of KDevelop 5 started in August 2014 as a port of the KDevelop 4 codebase for qt5 and kf5[12]. The custom c++ parser was abandoned in favor of clang and the CMake interpreter was also replaced in favor of using the JSON metadata given by CMake. KDevelop 5 was released in August 2016[13].
Features[14]
- Support C, C#, C++, CUDO, OpenCL, Qt QML, Javascript, Python and PHP
- Support multiple version control systems Git, Bazaar, Subversion, CVS, Mercurial (hg), Perforce
- Support multiple build system CMake, QMake, Makefile, Meson[15], ...
- Quick Code Navigation (Jump to declaration/definition)
- Code comprehension (Syntax highlighting, semantic code completion)
- Documentation integration
- Integration support for multiple static analyzers: Clang-tidy, Clazy and the Cppcheck
Tips
More Information
References

If you have experience SMS'ing with KDE 4 please tell us about it
How to send SMS using Kontact
Create an account at smsjoker (or something similar). Prices are ok and writing SMS at your PC just rocks.
Load script “smsjoker-script” from kde-apps.org. Open Konsole and with root permissions. Copy script to /usr/local/bin and make it executable:
# cp smsjoker-script /usr/local/bin/
# chmod a+x /usr/local/bin/smsjoker-script
Call up program as the regular user once.
$ smsjoker-script
Now you will find a hidden file called “.smsjoker-script” in your home directory. Open this file with e.g. Kate and change the parameters and . Use values you have used when creating your account.
Last step has to be done in Kontact. Open addressbook and select .
Look for and enter the following string:
smsjoker-script "%N" "%F"
Screenshot:
 |
How to use this?
Select a contact in your which includes mobile phone number and click on .
Screenshot:
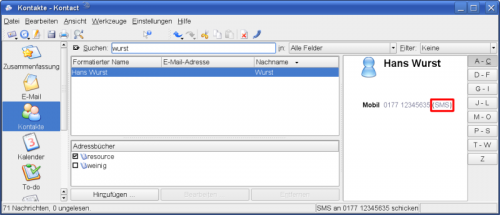 |
A small window appears. Please enter your message.
Screenshot:
 |
After clicking on your SMS is sent.
Another small passive window appears and informs you about the delivery status and account balance.
This is a template which adds a KDE 3 button and puts the article in the "KDE3" category. To use, just put {{KDE3}} where you'd like the button to appear.
This is how it will look:
This is a template which adds a KDE 4 button and puts the article in the "KDE 4" category. To use, just put {{KDE4}} where you'd like the button to appear.
This is how it will look:
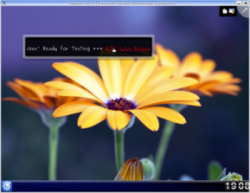 |
KNewsTicker accepts RSS feeds and displays them on your desktop or on your panel |
![]() KNewsTicker is a kicker applet for KDE3.
KNewsTicker is a kicker applet for KDE3.
A port to KDE SC 4 was started, as you can see from the image above. Unfortunately, KNewsTicker was discontinued for KDE SC 4. However, there are alternatives available, such as Akregator, which can be used stand-alone or within Kontact.
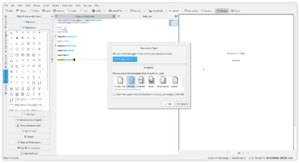 |
Kile is a user-friendly TeX/LaTeX editor |
Features include
- Auto-completion of (La)TeX commands
- Templates and wizards
- Easy insertion of standard tags
- User-defined tags
- Easy insertion of citations and references
- Compile, convert and view your document with one click
and many more features.
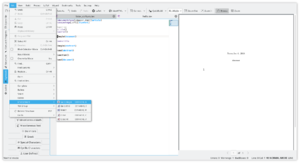 |
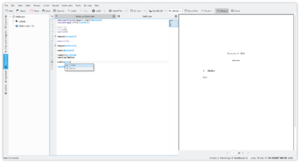 |
Visit the project's home page
![]() Support for this application can be found from the project's home page
Support for this application can be found from the project's home page
 |
KOffice provides standards-compliant office and productivity applications, as well as other useful tools |
Discontinuation
KOffice is not maintained since 2014, but the fork named Calligra carries on the torch. Other office software are available in Linux, for example LibreOffice, where some work was done for a better integration with Plasma.
KDiskFree

KDiskFree is a simple tool which gives a graphical view the disks available to a system.
- The display lists the size, type, and full capacity and free space of all mounted disks - local and remote
- A simple graph gives you a quick overview
- The position of your mounts is clearly seen
The home page for the project offers handbooks for recent releases.
| kdesvn is a subversion client for KDE platforms |
It tries to setup a look and feel like the standard filemanager on KDE workspaces and is integrated into it via KPart.
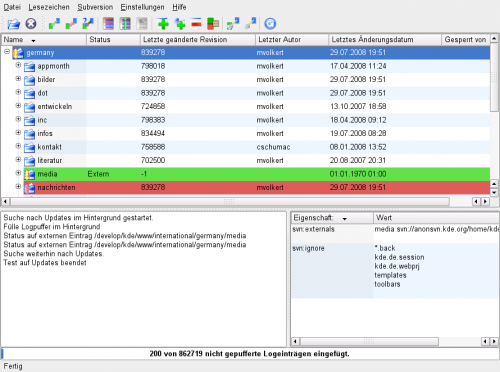
Links
![]() KDirStat is a graphical disk usage utility, very much like the Unix "du" command. In addition to that, it comes with some cleanup facilities to reclaim disk space.
KDirStat is a graphical disk usage utility, very much like the Unix "du" command. In addition to that, it comes with some cleanup facilities to reclaim disk space.
KDirStat is not a KDE Project anymore, but it's maintained under QDirStat.

External links
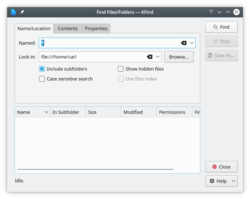 |
Find files by name, type or content |
KFind can be used as a standalone file search tool, launched by KRunner or from your menu. It is also integrated into Konqueror and Dolphin as in the menu. Being equipped with a graphical user interface, it is often handier than the command line tool named find which requires advanced skills in instruction syntax formulation.
A search is configured in a 3-tab window.
The tab
- Specify a file name
- use wildcards * and ? in the name
- Specify a starting directory
- Decide whether you want to also search sub-directories
- Specify whether the search should be case-sensitive
- Specify whether hidden files to be shown as well
The tab
- Select the file type to be search
- Specify the search term
- it can be useful to have '*' set in the file name field in the Name/Location tab
- Select case sensitivity
- Should binary files be searched?
The tab
- Find files by creation date
- Limit the criteria by age - e.g. "during the previous 2 hours"
- Find files by size - e.g. "At Least 2 MB"
- Limit the result to files owned by a specific user or group
All criteria set will be honoured in your search - you are not limited to the specifications in one tab, so you could search for any file in the directory /home or any directory below that, containing the word "Silkstone" which must be capitalized, and is owned by the group "Accounts".
 |
Let KNetworkManager handle your open and encrypted connections. |
KNetworkManager is a KDE client for the back end NetworkManager software. KNetworkManager communicates with NetworkManager via DBus (a type of message passing software).
One typical usage is to connect to a wireless network with credentials known to the user. The user will setup a connection and KNetworkManager will store the settings wherever the user's configurations are stored. The configuration will include things like the name (ESSID) and passphrase used to associate with a particular wireless network. KNetworkManager can then use this information by packaging it into a DBus request to connect to a particular network. The Network Manager back end then does the low level operations required to actually setup the support software (e.g. pushing ESSID and key to wpa-supplicant) and bring up the network device with the appropriate settings.
Along with the advantage of allowing normal users to control the configuration the network it also allows one consistent interface for network configuration on KDE, and other desktops (e.g. GNOME) can use the network manager back end without each having to implement the logic to handle network configuration.
- The Project Page gives an overview of features, some screenshots, and links to packages for several distros.
- More screenshots show its use on different desktop environments.
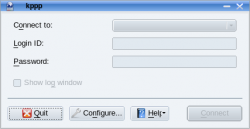 |
Use a dial-up modem |
This software is used to setup PPP (Point-to-Point Protocol) connections. This is most useful for connecting with a cell phone "modem" card these days. It is also use to configure real modem connections. The NetworkManager suite intends implementing PPP functionality that will probably, in time, make KPPP obsolete.
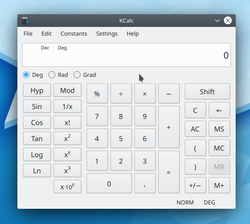 |
A scientific calculator - and more |
KCalc has everything you would expect from a scientific calculator, plus:
- , and
- A results stack which enables convenient of previous calculation results
- is user-definable
- The display allows of numbers
- The display and are configurable, aiding usability
- The use of make it easy to use without a pointing device
- A detailed manual is available on-line.
FAQs, Hints and Tips
- Press and hold the Ctrl key to see the key bindings for every button.
- Kcharselect-arabic.png
- Kcharselect-euro.png
- KCharSelect
 |
Characters from any alphabet inserted easily into your document |
Select the , select the , select the . Individual characters can be , and whole words can be assembled on the bar before copying to the clipboard.
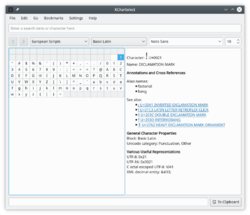
In addition to Unicode representation, there are , and a list of (with clickable links).
African and Asian scripts are also supported:
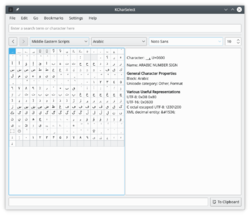
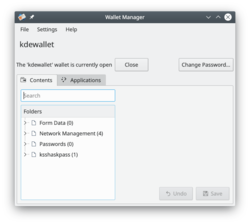 |
KWalletManager manages some of your passwords in an encrypted file - but Kgpg does not use Kwallet, neither does firefox. |
KWalletManager is an optional tool which can greatly assist your work-flow while maintaining security.
- Wallets are encrypted against your chosen passphrase
- Wallets are, by default, closed. Your passphrase is required to open a wallet
- Wallets can be configured to close when unused
- You control which applications may use the wallet - everything else will have to ask you for a password.
A right-click, context menu on the wallet in kwalletmanager offers maintenance options:
- To create a new wallet
- To open and examine the selected wallet
- To change the passphrase for that wallet
- To disconnect an application currently using that wallet
- To close or delete the wallet
Clicking (or in some versions, double-clicking) on a wallet allows you to examine the contents of a wallet. From here you can remove any entries that you do not wish to be further controlled by the wallet. A further advantage is that it is possible to examine the passwords for individual entries - particularly useful if you have mis-typed a password and stored it. These activities remain secure, since they are only available after you have given the passphrase.

Some apps, e.g. octopi, offer multiple options for password entry, e.g. gksu besides kdesu. gksu then offers to store a password, say the root password, in the gnome-keyring to save you the bother of repeated entering of the password in short intervals of time. That gnome keyring is a "wallet" separate from the KDE-wallet. Another separate "wallet" is the file /etc/passwd for login passwords into Gnu/Linux.
Hints and Tips
How to make an application start using KDE Wallet Manager
Open KDE Wallet Manager, and go to , and there adjust application settings. Useful if you mistakenly told an application not to use KDE Wallet Manager.
Use KDE-wallet with Python in a CLI: CLI.
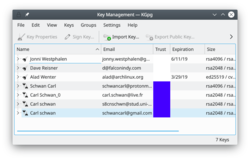 |
KGpg provides a graphical interface to gpg's commands |
GnuPG encrypts and decrypts your mail and selected files. There are many command-line options to achieve this. With KGpg the anxiety is removed - you don't have to remember any commands. KGpg can help you set up and manage your keys, import and export keys, view key signatures, trust status and expiry dates. In fact just about everything you need to do is covered by KGpg. A wizard is provided to help you set up your keys.
KGpg is integrated into Konqueror and Dolphin, where a context menu allows you to choose to encrypt a file, with or without signing.
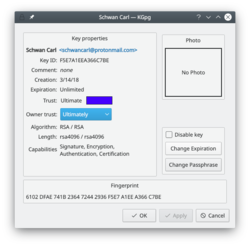 |
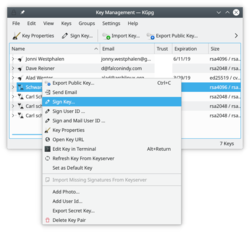 |
Extending the life of your keys
As you can see in the image above, you can extend the life of your keys using the button. Simply choose the new date from the popup calendar. To do this, however, you must have access to the private key and its pass-phrase. Without them you can do nothing.
Change your passphrase
Should you suspect your passphrase is compromised, you can change this also from the Key Properties dialogue. The button is below .
Revoking a key
If you lose your private key or think it has been compromised in some way you need to revoke it. To reliably render a key unusable you need to revoke it. Revoking is done by adding a special revocation signature to the key.
The revocation signature can be created together with the key. In this case it is stored in a separate file. This file can later be imported into the keyring and is then attached to the key rendering it unusable.

If you have not created such a detached revocation on key creation you can
create such a revocation signature at any time choosing , optionally importing it to your keyring immediately.


A full illustrated manual helps you through some details.
If you are not in a position to physically verify the identity of your contacts you should especially read the key-signing section which explains the benefits of local-signing.
Tutorials
- Verify GPG signatures with KGpg inside Dolphin (Source Peertube instance: peertube.mastodon.host)
More Information
| KAlarm is a personal alarm message, audio, command and email scheduler |
You can schedule alarm messages which pop up on the screen (with sound if desired), or you can schedule audio files to play, commands to be executed or emails to be sent.
When configuring an alarm, you can:
- For alarm messages, choose whether to type in your , display the , or .
- Configure the alarm to recur on , , , or basis, or set it to trigger . You can also specify a repetition within a repetition. Alarms can be constrained to occur only , or .
- Specify that a should be displayed in advance of, or after, the main alarm time(s).
- Choose a and for displaying the alarm message.
- Specify an or a to play when the message is displayed, or specify that the .
- Choose whether or not the alarm should be cancelled if it can't be triggered at its scheduled time. An alarm can only be triggered while you are logged in and running a graphical environment. If you choose not to , it will be triggered when you eventually log in.
- and more ...
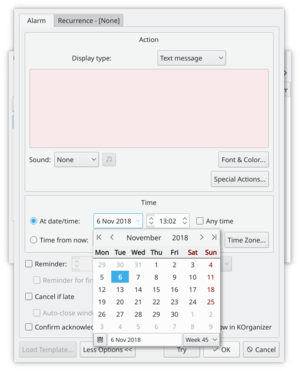
It is possible to use , which for example enables you to share alarms between a laptop and desktop computer.
Alarms may also be scheduled from the command line, or via D-Bus/DCOP calls from other programs.
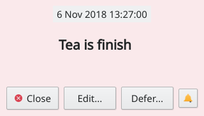
More Information
- Homepage
- KDE official documentation
- Klipper2.png
- Klipper-actions.png
- Klipper-conf.png
- Klipper-shortcuts.png
- Klipper
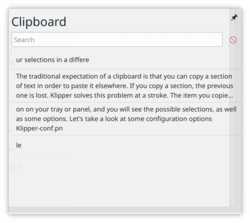 |
Klipper is your clipboard on steroids |
The traditional expectation of a clipboard is that you can copy a section of text in order to paste it elsewhere. If you copy a section, the previous one is lost. Klipper solves this problem at a stroke. The item you copied last will still be the default one to be pasted, but others will have been stored in a buffer, so you can choose to paste your selections in a different order. Even the number of items stored in the buffer can be configured! Click on the icon on your tray or panel, and you will see the possible selections, as well as some options. Let's take a look at some configuration options.
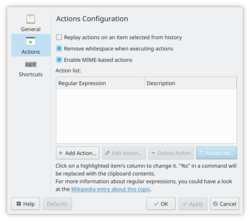 |
If you write scripts or work in programming this section is for you. Actions based on regular expressions can be set here. |
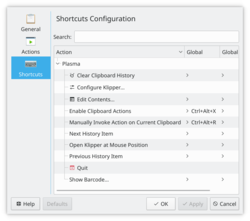 |
Here you can customise existing shortcuts. It is not possible at the moment to make additional ones |
The Handbook is available from the button at the bottom of the settings dialog.
Tutorial
More Information
Klipper can be accessed from the command line using xclip . To copy to the ctl+C/V buffer use xclip -selection clipboard
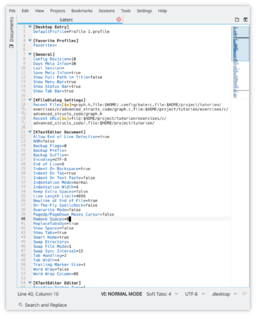 |
A straightforward text editor with some very useful features |
Feature Overview
- Line numbers, syntax highlighting, and code folding
- User-definable indentations and tabulation
- Line-wrap can be dynamic or user-defined static
- Excellent search and replace functionality, including reverse searching
- Spell-checking
KWrite is the little cousin of the text-editing duo. It is, none-the-less, a very powerful text editor and capable of use as a programming editor.
If you need a more complex editor, take a look at Kate.
More Information
- Kate and KWrite Website
- KWrite Handbook
- KWrite Wikipedia article
- Kate-screen.png
- Kate-editing-html.png
- Kate-ed-latex.png
- Kate-modified.png
- Kate
Kate
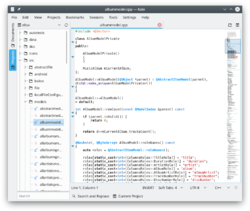 |
Kate (KDE Advanced Text Editor), the big sister of text editing applications |
Kate has all the features of KWrite, and much more. It is a multi-document or multi-view editor, which means that you can have several documents open at the same time, or you can have several views of the same document.
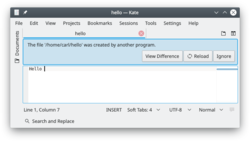 |
Document modification monitoring gives you ample warning of danger. |
History
The development of Kate started in fall 2001 by Christoph Cullmann. The first release was as part of the KDE Software Compilation 2.2. By July 2014 Kate started being ported to KF5.
Features
Kate's many features include
- Multi-Document Interface
- Window tabbing and window splitting
- Character encoding support and conversion
- Syntax highlighting and bracket matching
- Code and text folding
- Auto-indentation
- Auto-completing
- Block selection
- Regular Expression find and replace
- Scriptable using JavaScript
- Project support documented here
and much more!
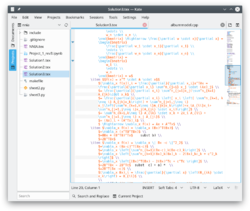 |
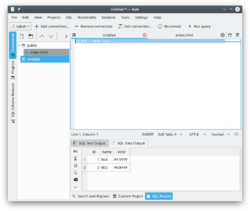 |
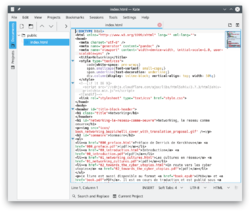 |
Visit the project pages for more information
FAQ
- Where did Kate go?
- It is often thought that Kate is missing, as it is usually not listed in distribution repositories. In fact, it is now part of a larger development package, so you must install kdesdk.
- How can I print out with Line Numbers?
- In the dialog click on the button, choose the tab and tick the box.
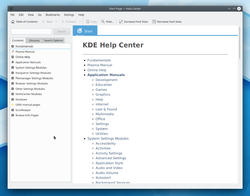 |
Search the documentation for all your KDE applications |
 |
To get the best out of KHelpCenter you must first create the searchable index files. This can take a minute or two, and it's worth opening the 'Details' so that you can watch it build the indexes. |
You are most likely to use KHelpCenter from a KDE application, where the manual for the application you were using will open in the main window. The left-hand panel has three tabs. The first tab, , gives you links to a great deal of general information. If you are new to KDE Plasma 5 you will particularly want to take a look at the and the .
The tab lists terms alphabetically or by topic.
The final tab, , offers the choice of searching UNIX manual pages, application page, or both. You can select 'AND' or 'OR' search on terms.
- Krunner-madness.png
- Kcalc-2.3-screenie.jpg
- Kcharselect-1.3-screenie.jpg
- Kalarm.png
- Krulerview.png
- KRuler
| KRuler tells you precisely where your objects are in relation to each other |
KRuler displays on screen a ruler measuring pixels. Position the 0 to your starting point (simple drag it), and read off the precise pixel count to your cursor. To change the length of the ruler just drag the sides.
The context menu allows you to
- and change the of the ruler
- Adjust the
- Bring up the configuration dialog by selecting
In the configuration dialog you can configure the color and font of the ruler. In the group you can also decide, if the ruler should be .
For more information you can read the manual.
- KWord
- Krita
- Kget-screenshot1.png
- Kcron-screenshot-de.png
- KPhotoAlbum Video Support
- Kphotoalbum embedding.jpg
- Krecipes-main.png
- KNode/KNode for mailing lists

Mailing lists are widely used for communication among Free Software projects and interest groups. By sending an email to a special email address, tens, hundreds or thousands of people will receive the message for discussion. It can be useful to separate this mailing-list email traffic you receive from regular email really meant for you. This way, you can casually read a mailing list without worrying about receiving too much mail you might not be interested in.

The Kontact project provides the Knode application, which can be used to read mailing lists completely separately to your regular mail.
Reading mail with KNode
You can find KNode by searching for it in your application launcher. You may need to install it from your distribution packages first if you don't already have it installed. If you have Kontact installed you will find KNode from the navigation menu on the left.
When KNode starts, configure it by using the tab and clicking to add a new Newsgroup Server.
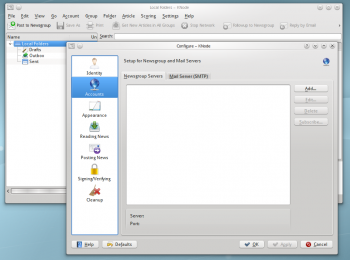
KNode is really a usenet news reader. Usenet news is one of the earliest forms of communication on the Internet. Gmane is a website which provides a service of subscribing to hundreds of public mailing lists, and making the result available to anyone who wants to use it. By using KNode with Gmane, we can read and reply to any mailing list on the Gmane network. Configure KNode to use the server news.gmane.org and port 119. It is also important that you set your name and email address in the identity tab. By entering your email address Gmane will allow you to send mail through their servers.
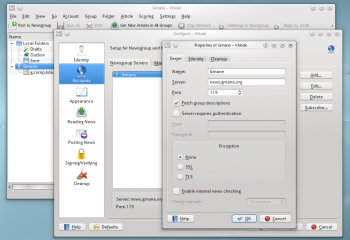
Next, select the new Gmane item in KNode and select . Allow it to fetch a list of Groups from Gmane. Groups are the Usenet equivalent of mailing lists.
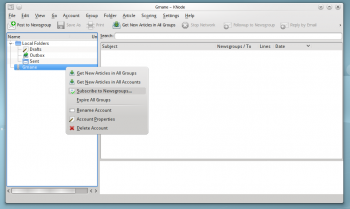
You can now search for and subscribe to hundreds of mailing lists on Gmane, including lists related to KDE software, GNOME, numerous distributions, as well as non-technical lists like backpacking and cycling.
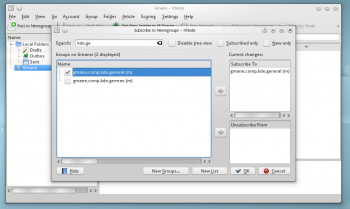 |
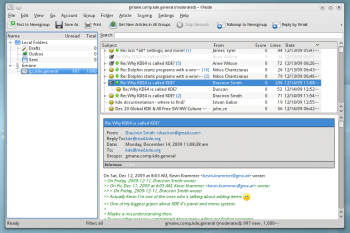 |
Replying to mail with KNode
So far, we have only configured KNode for reading mailing lists. To reply to messages, and create our own email threads, we need to configure out-going mail.
Go to the tab again, and this time select and click . Enter your outgoing email information. If you have already configured KMail for outgoing mail, this should contain the same details. Many people use a separate email address for mailing list traffic to cut down on spam.
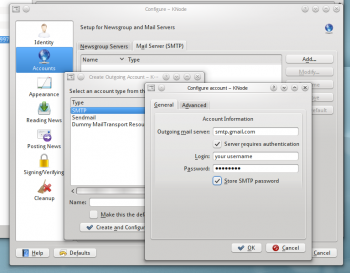
Subscribing to mailing lists
Before sending a message to the mailing list, you may need to subscribe to the list. Many mailing lists block emails from email addresses which are not subscribed to the list. For example, to subscribe to the kde-users mailing list (kde@mail.kde.org), find the listinfo page on the KDE software users' mailing list page. After you subscribe to the list and reply to the confirmation email, you're nearly ready to start posting to the mailing list. Go to your options page for the mailing list and turn off mail delivery (look for a link on emails that contain the word "mailman", which is the most common list server - you need to scroll right down the page to find the button "Unsubscribe or edit options".). As you are reading the mailing list through KNode+Gmane, you don't need to have the mail also delivered to your email account.
When you first send a message to a mailing list through KNode, you will recieve a confirmation request email from Gmane. You only have to reply to that once. All subsequent messages sent through KNode will be sent immediately for a complete mailing list experience. If you do not receive an email from Gmane the first time you send a message to a list, make sure you have correctly set your email address in the identity tab when configuring KNode to use Gmane.
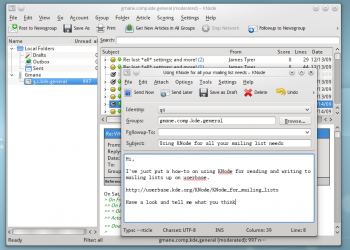
Other tips
If you want to use KNode with lists that are not covered by Gmane, you can ask Gmane to subscribe to the list here.
If you are subscribed to private mailing lists, but still want to use KNode to read and write to them, it is possible to install a local leafnode server for that purpose.
Developers, take note
If you are a developer interested in Qt, you may find that Gmane does not offer qt mailing lists like qt-interest. Instead a separate server is accessible at nntp.trolltech.com and port 119.
Writing to the list through the nntp server requires activation. See http://qt.nokia.com/newsapply for more.
- Knode1.png
- Krecipes-adv-srch-multi.png
- Knode3.png
- Knode4.png
- Knode12.png
- Knode6.png
- Krecipes-recipe-description-tab.png
- Knode7.png
- Knode9.png
- Knode14.png
- Krecipes-print-preview.png
- Krecipes-diet-help.png
- Krecipes-volume-convert.png
- Krecipes-ingredient-match.png
- Krecipes
 |
Krecipes is a program that lets you to manage your recipes, create shopping lists, choose a recipe based on available ingredients and plan your menu/diet in advance. | 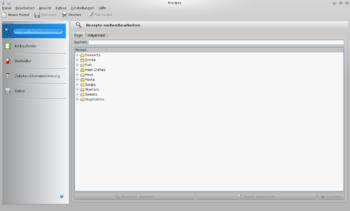 |
Overview
The goal of this project was creating a KDE Recipe Tool that:
- Can manage a recipe database with an easy to use interface
- Allows creation/removal of new ingredients and units
- Helps with diets, calculating amount of calories, vitamines, carbohydrates... per recipe
- Creates shopping lists, and daily suggestions for a given diet type
- Based on SQL, supporting various database types (currently it supports SQLite, MySQL and PostgreSQL).
- Should be as flexible as possible to have the possibility to extend it in future.
Main features
Recipes Search
- Creates a recipe database, using SQLite, MySQL or PostgreSQL, using a comfortable interface
- Recipes can be searched by name or by ingredients included or to be omitted. Simply type in a part of a recipe name and all those recipes are instantly available to view, edit, or print. If you'd like to fine-tune your search, the advanced search also allows you to search by title as well as any combination of categories, ingredients, preparation time, authors, servings, or instruction text.
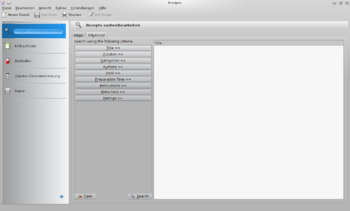
- It's also possible to search on source, yield, preparation time, and several other criteria
- Recipes are entered an edited on a similar screen. Entry is speeded by the use of drop-down menus using text prediction
Edit Recipes
Using the three input tabs, you will fill in the details of your recipes. On the first tab is the title, authors, categories, preparation time, and yield. On the next you may input ingredients, and on the last is the instructions.
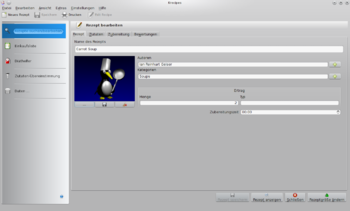
- Ingredients and instructions can be pasted in if a text file already exists
- Recipes can be printed for inclusion in scrapbooks, etc.
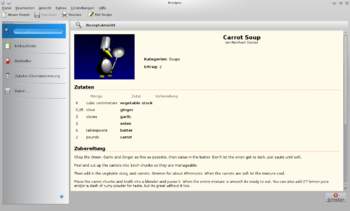
- Files can be imported from an existing Krecipes database
- As well as from "MasterCook" 4, 5 or 6, "Meal-Master", "RecipeML", "Rezconf" or “Now You're Cooking”
- It is also possible to export to many formats
- Backup and Restore of database is fully supported.
- Add recipes to your shopping list. When you are done, Krecipes will list all the ingredients necessary, combining units for you automatically, and give you a list ready to print.
- Nutrient values can be used to help you plan any diet
Diet Helper
- You can search for recipes based on what you have in your store cupboard. Plan out your meals for a day, a few days, or even weeks. Give Krecipes information on what you'd like each of your meals to contain, limit the amount of particular nutrient property (fat, energy, etc.), and Krecipes will do the rest.
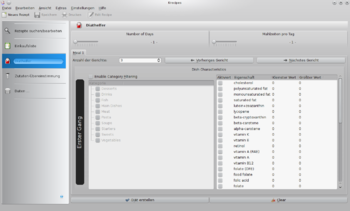
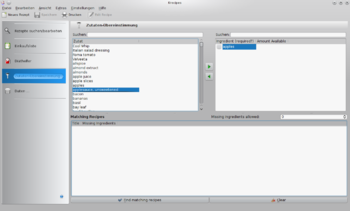
- Conversion tables help you move between Americal measure and metric
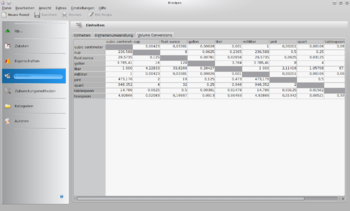
Advanced Database Management
Krecipes takes full advantage of the power of relational databases. Categories, ingredients, units, etc. are stored as separate identities which are linked to recipes when used. You can rename one of these in one place, and all recipes using that element are automatically updated.
When importing recipes from an external source, you may find many misspellings and strange capitalization. Simply rename these elements in the "Data" panel to correct all your recipes. For example, you may have the categories "Vegtables" and "Vegatables". Rename "Vegtables" to "Vegatables" and the merge feature will put all the recipes under these two categories into the right category.
This is only a very sketchy overview. There are many more features to be explored in the Handbook. The Project Page has links to Help and Discussion forums
Contribute
Coding
We welcome anyone with knowledge of C++ to contribute code, but even if you're not a programmer, here's some other ways you can help, see below
Unless specified elsewhere, you should send contributions to the Krecipes group in KDE Review Board
Reporting bugs
You can use the KDE Bug Tracking System to report bugs.
Translating
- If you want to translate Krecipes you should work inside your local KDE translation team. If you are keen you may want to lurk here. Check the current state of Krecipe's translations for your language and, if you feel brave, ask to join a translation team

- User interface: We could always use help translating into as many languages as possible. Note that the current 2.0 branch is not on string freeze, however some translation teams are working in Krecipes anyway, so feel free to join your local translation team and work.
- Handbook: Currently the handbook in english is very outdated, please wait for instructions.
- Sample recipes: We are figuring out a technical solution and proper workflow to do this, please wait for instructions.
Giving Feedback
Give us your feedback in the Forums or in #krecipes IRC channel at Libera Chat.
Handbook
The handbook is being updated for the KDE 4 port of Krecipes and unfortunately it's not finished yet, you can check it here.
Download
Downloading And Compiling The Latest (2.0-beta2) Release
You can download the latest release or see other releases in the "files" section of the sourceforge page. You can see main changes in this version in the ChangeLog page.
Building The Latest Release
Just untar the package first:
tar -zxf krecipes-[VERSION_NUMBER].tar.gz
And compile
cmake .
make
make install
Downloading, Building And Installing The Latest Development Version With Git
The project is being developed under extragear/utils in KDE's servers.
To download the source code, do:
git clone git://anongit.kde.org/krecipes
To update the source code, do:
cd krecipes
git pull
To build and install it in the default prefix (usually /usr/local):
mkdir build && cd build
cmake ..
make
make install
To build and install it in other prefix, for instance ~/.kde/:
mkdir build && cd build
cmake .. -DCMAKE_INSTALL_PREFIX=~/.kde/
make
make install
Also if you install it in ~/.kde/ you may want to set the following variables in your .bashrc (or wherever it's appropiate for you):
export PATH=~/.kde/bin:${PATH}
export MANPATH=~/.kde/man:$(manpath)
export KDEDIRS=~/.kde:/usr
export XDG_DATA_DIRS=~/.kde/share:${XDG_DATA_DIRS}
export LD_LIBRARY_PATH=~/.kde/lib
To uninstall it:
cd build && make uninstall
Contact
- Krecipes devel mailing list
- Krecipes IRC channel; named #krecipes, located at Libera Chat
Authors
The Old Krecipes Crew
- Jason Kivlighn
- Unai Garro
- Cyril Bosselut
- Colleen Beamer (who wrote the handbook)
People who worked actively in the KDE 4 port but who are not working in the project at the moment
- Daniel Sauvé
- Laurent Montel
The current developers
- José Manuel Santamaría Lema
- Martin Engelmann
- Konqueror
- KSystemLog
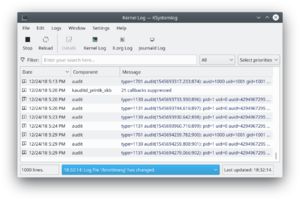 |
KSystemLog is a system log viewer from KDE |
This program is developed for beginner users, who don't know how to find information about their Linux system and don't know where log files are.
KSystemLog has the following features :
- Show all logs of your system, grouped by General (Default system log, Authentication, Kernel, X.org...), and optional Services. (Apache, Cups,...)
- Colorize log lines depending on their severities
- Tabbed view to allow displaying several logs at the same time
- Auto display new lines logged
- Fast parsing and reading (more than 10000 lines each 5 seconds)
- Detailed information for each log lines
- Quick filter
- Able to send a log message manually to the system.
- Save, copy to clipboard and printing are of course available.
- It can parse the following log files of your system: Acpid, apache, authentification, cron, cups, daemon, journald, samba, postfix, system, xorg, x session logs.
More Information
- Project homepage (archive.org)
- Git repo
- Bug reports
- Ksystemlog-groupby-loglevel.png
- Klipper/How to search in phone books using Klipper
Klipper can search for a highlighted phone no. in telephone books in the world-wide-web, to look up the name of a given number in a convenient workflow, e.g:
+49 30-2023 7305-0
step 1 : mark above phone number and copy it to the Klipper clipboard of KDE.
step 2 : in Klipper, click the action we prepare below to see who owns that phone number.
step 3 : realize that it the result is sort of disappointing. need bugfix.
You can also highlight (mark with the mouse) any phone number in any application, e.g. on a web site.
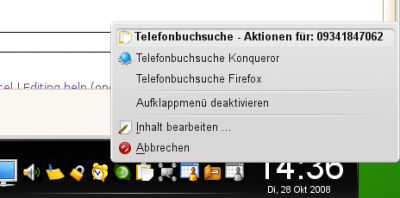
How is it done?
Klipper offers "actions" for it.
As precondition Klipper needs to be active and must be visible as a tray icon in the panel.
Call up the dialog and add action:
Regular expression for action:
^[\s]*[0+][\d]{2,2}[-/\d\s]{4,16}[\s]*
Now you need to add two commands for added action:
Command 1 (all on one line):
kfmclient openURL "http://www.dastelefonbuch.de/?pid=OpenSearch&cmd=search&kw=%s&le=de"
Description for command 1:
Phonebook search, Konqueror
Command 2 (all on one line):
ps x|grep -q '[f]irefox' && firefox -remote openURL\("http://www.dastelefonbuch.de/?pid=OpenSearch&cmd=search&kw=%s&le=de", new-window\) || firefox "http://www.dastelefonbuch.de/?pid=OpenSearch&cmd=search&kw=%s&le=de"Description for command 2:
Phonebook search, Firefox
After that it should look like this:
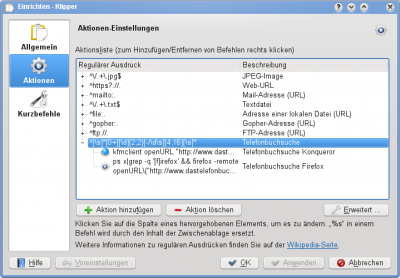
After highlighting a phone number on a web site a small window appears and you will be prompted to select an action. See screenshot at beginning of page.
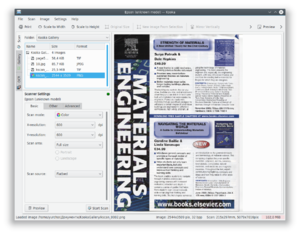 |
Kooka is a raster image scan program |
Kooka is an intuitive, easy to use open source GNU/Linux scan program. It is the scan application of choice for the KDE platform and thus it is an official part of the KDE Graphics Package.
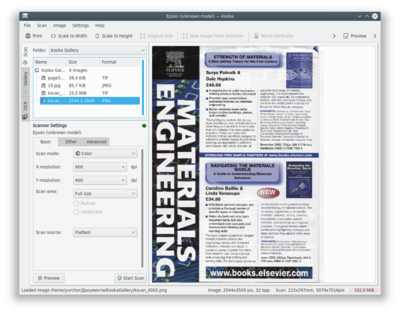

Features
- Scanning
- Scanner support using the SANE library.
- Handling of the important scanner options like resolution, mode, threshold etc. in a user-friendly dialog.
- Preview- and final scanning
- Interactive and automatic scan area selection on a preview pane.
- Image Storage
- The save assistant helps you to find the correct image format for your purpose and creates a filename for you automatically.
- Images are stored in the gallery - no need to find a folder to save for every test scan.
- The Image Gallery
- A treeview organized place where your images are stored.
- Create and remove folders to organize your image collections.
- Intelligent zooming for best viewing comfort.
- Basic image manipulation functions like rotating, cropping and more.
- Image printing in original and custom size.
- Correct handling of picky tiff images like multipage tiffs.
- Drag and drop with other KDE applications.
- OCR
- Kooka supports GOCR, an open source ocr project.
- Kooka works with KADMOS, a commercial OCR/ICR toolbox.
- Kooka interfaces Ocrad, a Free Software OCR program.
- KDE Scan Service
- The libkscan provides a user-friendly scan service to all other KDE applications which want to use it.
- Knowitimport1.png
- Knowitimport2.png
- Knowitimport3.png
- Knowitimport4.png
- KJots/Import KNowIt Into KJots

The KNowIt application is used for simple note taking tasks. It was available during the KDE3 releases as a third party application, but is no longer maintained or supported. KDE Software Compilation has a simple note taking tool in the official modules, and starting with KDE SC 4.2, KJots has the ability to import your old KNowIt notes.
The screenshots below show how to import KNowIt notes into KJots. The import has the following features:
- KNowIt notes are imported as KJots pages.
- KNowIt notes which have child notes are imported as KJots books.
- If a KNowIt note has child notes, the content of that note is imported as an additional page in KJots.
- Links created in KNowIt notes appear as a list in a KJots page. These links may be edited in KJots.
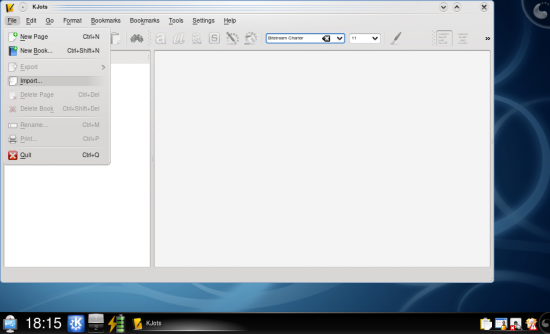
Select the KNowIt file type
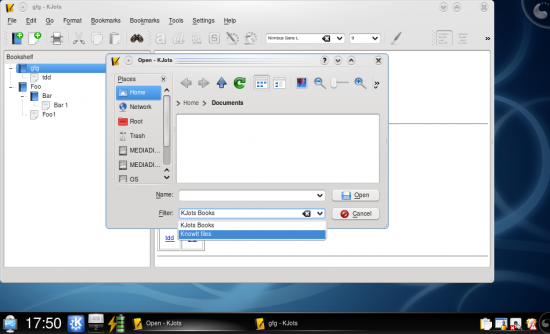
Select your KnowIt file, and click open
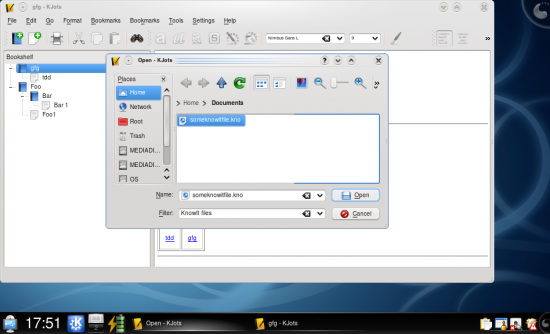
Success!
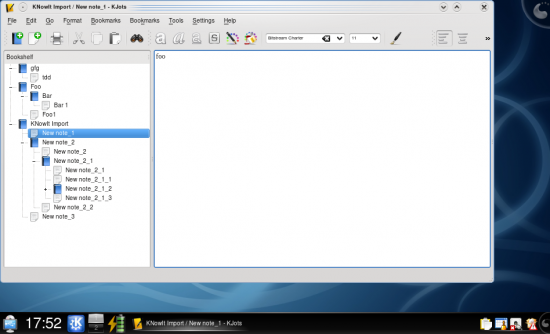
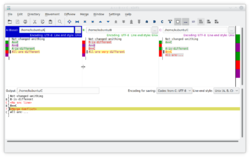 |
A tool to check, edit and merge differences between 2 or 3 files |
Features
- compares and merges two or three text input files or directories,
- shows the differences line by line and character by character(!),
- provides an automatic merge-facility,
- has an editor for comfortable solving of merge-conflicts,
- provides networktransparency via KIO,
- has options to highlight or hide changes in white-space or comments,
- supports Unicode, UTF-8 and other file encodings,
- prints differences,
- supports version control keyword and history merging.
The KDiff3 Handbook gives a detailed description of activities, in html form.
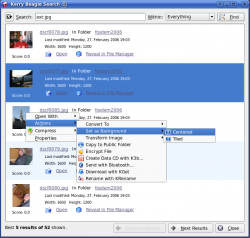 |
The whole of your data at your fingertips |
Features
Kerry is a front-end for Beagle, the search tool that indexes all your data, making the data inside documents as easy to find as file names.
- You decide which directories you want indexed
- Indexing can be done in the background
- After initial indexing, it is almost unnoticeable
- Indexing can be paused while cpu-intensive tasks need the resources
- Searching is case-insensitive
- OR can be used for option searches
- Phrases can be used, within quotes, e.g. "There be dragons"
- Words or phrases can be excluded by using a minus, e.g. -cats
- You can search by extension, using, for instance, ext:jpg
Visit the project's home page for more information.
The screenshot gallery gives a useful overview.
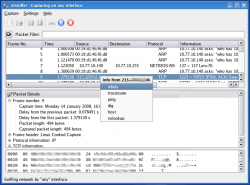 |
Capture packets from Internet interfaces and devices |
Features
- Capture packets from enabled Internet interfaces (eth0 etc.)
- Get protocol Information
- Display a summary packet information for ARP, TCP/IP, UDP, ICMP protocol
- Examine the raw bytes of a packet
- Can pause and resume capture
- Integrates popular Internet utilities - whois, traceroute, and others
For a full list of features, visit the project's home pages
See also these screenshots
A Graphical Tool for formatting floppy disks
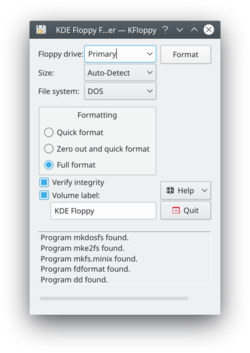
Features
- Quick or full format
- Bad sector checking (via Verify Integrity)
- Can label disk
- Supports command line options
- Supports DOS, ext2, UFS and Minix file systems
Usage
- Select the floppy drive which contains the media to be formatted
- Select the size of the floppy to be used. In most cases it is safe to leave this as "Auto-Detect", and should be changed only when encountering size related issues during formatting
- Select a filesystem to be used
- If the desired filesystem is not listed, check the box at the bottom of the window, it may provide a reason
- Not all supported filesystems are usable on floppy disks
- Select the type of format to perform
- Quick Format is as the name implies, the fastest process. It does check for bad blocks or other errors
- Zero out and quick format will overwrite each sector with zeroes. This should not be relied on for securely erasing a disk, only a quick method of destroying data
- Full format will format the media, and check for bad blocks and other filesystem defects if possible
- Check Verify Integrity if KFloppy is to check if the format was successful
- Provide a name for the floppy, if desired
- Click Format to format the media
More Information
Read about the full capabilities in the application's Handbook
 |
KPager gives instant access to all your desktops |
KPager allows you to switch between virtual X11 desktop. It typically resides in the taskbar and can be accessed by this icon
Features
- One-click access to each desktop
- Icons indicate placement of applications on the various desktops
- Applications can be moved between desktops by dragging
- Forms a standard part of every KDE taskbar or panel
- Keurocalc2.png
- Keurocalc-settings.png
- KEuroCalc
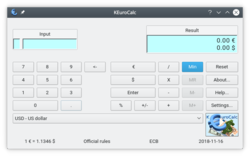 |
Instant conversions between many currencies |
Features
- can be Euro or US$
- downloaded for accuracy
- Can work with , if no Internet access available.
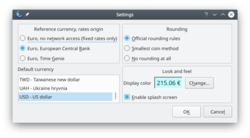
- Select your known, - e.g. GBP - and enter the amount.
- Hit the button with your starting currency label
- You are presented with the start amount in your own currency and its value in €
- Select a , and the equivalent amount in that currency
will be displayed.
- If a known Euro value is to be converted, enter the value and select the € button. Its value will be displayed in your chosen currency
This package is not normally installed by a distribution. Packages can be downloaded from the project's home page
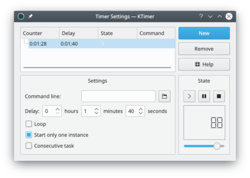 |
Start your tasks on time! |
A tiny application with a single purpose -
- Set the in seconds
- Enter the to be run
- Hit the button
- Go back to what you were doing, and wait for the prompt to start the new task.
Click on the thumbnail above to see the details.
See the project pages for contact information
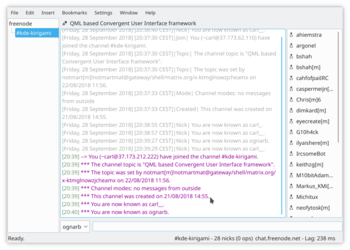 |
Konversation is a user-friendly Internet Relay Chat (IRC) client. |
Introduction
If you are new to IRC (Internet Relay Chat), you need an application that's easy to set up. If you have used IRC before, you may well need power features. Konversation is the perfect answer to both these problems.
Konversation for the new IRC user
Start Konversation from your menu and you are immediately presented with the Server List screen.
- It is possible to list many servers here, but the default, Freenode, is already set up -
- Consequently you can ignore the buttons for adding or editing channels.
- Click and you will see your connection being set up.
The first time you use Konversation you will be invited to edit your identity.
All that remains is for you to join the channel of your choice. The format is simple - for a distro channel, /join #mageia-kde, for a country channel /join #kde-fi, or maybe you want help with an application? /join #konversation
A list of useful channels is on the IRC channel page.
That's everything that's necessary. There are, however, a few things that are a real convenience, so worth considering now.
Conveniences
Konversation offers to place user-defined buttons into the chat window, so there is no need to memorize all those IRC instructions, as is often the case with inferior IRC clients employing a CLI or frugal TUI.
Auto-join channels
Most people use a few channels regularly, so it's worth while setting them to load whenever you start Konversation. For each channel that you find useful on a regular basis, right-click on the channel's tab and select
Play a sound when someone wants your attention
On the same right-click menu on tabs, . Then, go to . There is quite a long list of actions that can trigger a notification. You may wish to add a flag (which blinks the tab when the event occurs) for less important events, but I would recommend setting a sound notification for the following events:
- Query - someone wants a private conversation with you.
- Private Message - you have received a private message.
- Nickname written - if your name is being used in a conversation you probably need to be part of the conversation.
That's it! Join a few channels and get to know people. When you want to get to know Konversation better, will introduce you to the many other features.
Konversation for the more experienced user
Tight integration with KDE, including support for connecting users in chat rooms to KDE Addressbook entries, makes for the best possible IRC experience for KDE workspace users.
Konversation is one of KDE's independently released applications, and its homepage is found here.
Features Overview
- Easy management of multiple IRC user identities.
- Multiple server connections.
- SSL support.
- Per-channel encoding settings for international users.
- File transfer (DCC) support.
- Auto-away support.
- Bookmarking support.
- On Screen Display for notifications.
- KDE Addressbook integration.
- Collaborative drawing (think "multiplayer KolourPaint").
- URL logger.
- Auto-replace in incoming and outgoing messages.
- Various bundled scripts, e.g. a "now playing" one.
- Configurable theming.
- Flood protection.
- Blowfish encryption support.
Get Konversation
- All releases in source form
- Retrieve and build the latest development code
- Distribution package information
Usage information
- The Konversation Handbook
- Frequently Asked Questions
- Tips and Tricks
- Web browsers and Konversation
- Configuring SASL authentication
Advanced usage
Links
- Get in touch: konversation-devel Mailing List, #konversation on Libera Chat
- Browse the source: Repository
- The Future Konversation (under stalled development).
Keywords
Internet Relay Chat, IRC client, chat, communication, extragear
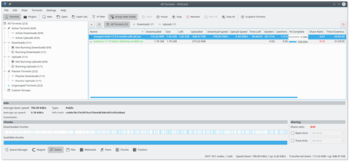 |
A highly-configurable feature-rich front-end for torrent downloads |
Features
- Upload and download speed management, including scheduling
- Supports UDP Trackers
- Can detect and import partially or fully downloaded files
- Can use IPV6
- Has a lot of plugins which extends its funtionality.
and many more. A longer list of features is available from Wikipedia.
Plug-ins
Search
You can search for torrents directly from KTorrent, instead of using a web browser. It has some engines already configured, and you can add more through .
See Also
A full description can be found on the application page. There is also an IRC Channel on Libra Chat (#ktorrent) as well the KDE forum for any help.
More Information
Sometimes a user can accidentally delete a KJots book. This is an inconvenience, but now the data can be recovered.
KJots automatically saves backup files of your books each time it is closed down. When you delete a book, the backup files remain. Note that old backup files will be removed 7 days after the original book is deleted.
KJots data files and backup files are stored in your local kde data directory. Usually this is
~/.kde4/share/apps/kjots
Open that directory in Dolphin.
dolphin `kde-config --localprefix`/share/apps/kjotsfrom the command line.
Use the menu to open the find files dialog, and switch to the Content tab. Enter a phrase you know to be in the deleted book, and several backups of that book should be found. The name of the file is not relevant, but you can find the most up to date backup by looking at the last modified time of the files.
Simply copy the backup file to your home directory and open KJots. Use the file menu to import the backup book back into KJots.
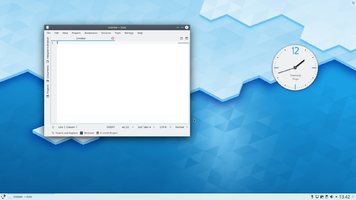 |
The reliable and flexible window manager for KDE Plasma Desktops, now with effects! |
Feature Overview
- Stable and reliable
- Compositing, 3D effects
- Easy configuration
- Improved efficiency
KWin (pronounced "kay-win") is the window manager for the KDE Plasma Desktop. It gives you complete control over your windows, making sure they're not in the way but aid you in your task. It paints the window decoration, the bar on top of every window with (configurable) buttons like close, maximize and minimize. It also handles placing of windows and switching between them.
KWin supports compositing, which means using 3D effects for handling your windows. This can make window management smoother, easier, more efficient and more natural. It’s hardware requirements are very modest and pretty much every reasonably modern system since 2002 supports it.
Practical Features
Click with your right mouse button on a window decoration or use System Settings to access the new and easier configuration of KWin. Here you can enable effects to more efficiently manage your windows. You can for example use the Present Windows as the effect for window switching. Instead of showing you icons or very small previews of your applications, it arranges them in a grid so you can quickly choose the right one. Just use the Alt-Tab keysequence and keep the Alt key pressed. You can now use tab to switch through the windows or just activate the right one using the mouse. Hitting Alt-Tab keys quickly will show you the next window in the queue, just like it used to.
If your X server already supports compositing, switching it on is as easy as opening System Settings, opening the module, choosing and enabling the checkbox . More advanced compositing settings (such as Use VSync, Scale method, Compositing type) are available through the dialog. Customising the behaviour of the KWin effects means opening the tab, and choosing the plugins you want to use. Please note that only a subset of the plugins works with XRender-based compositing. For the full experience, you need to use OpenGL mode.
Employing motion physics, KWin provides your windows with a more natural feel. New desktop effects like the Cube desktop switcher and Magic Lamp minimize animation have been added. Improvements in the existing effects make window management smoother than ever. KWin has seen many performance improvements to enable these effects even on low-end hardware. Elaborate checks have been build in to ensure users with low-end hardware are not presented with an unusable setup. KWin detects the capabilities of the hardware and if needed gracefully scales its effects down. You can take control and disable these checks or change settings like the global animation speed to fine-tune your experience. When your computer is under heavy load, KWin will automatically disable the compositing temporarily to keep things running smoothly. It will notify you if it does so, and you can re-enable compositing by pressing Shift+Alt+F12. Finally, support for multiple screen handling has been improved in KWin using the new Kephal library. You can move maximized windows between Xinerama screens and the addition of external screens is handled correctly.
More information about what was introduced in KDE SC 4.9 can be found at the following link:
Tutorials
You want an application to launch in a specific size and position every time
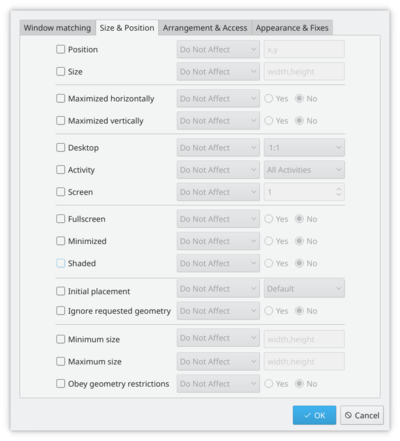
Sometimes the screen position of an application is vital to your comfort, so use the flexibility of KWin to make sure it's always where you want it.
Position the window where you want it to open, then right-click on the title-bar, choosing . This will open a settings window, with appropriate entries already made. All you need to do now is select the tab and check and . OK - you are finished!
Customise the position of titlebar buttons
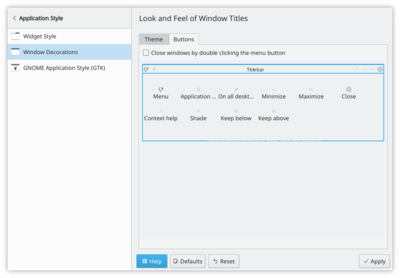
Take a look at tab. The options open to you may depend on your distribution or theme, and it's clear that there is more to come.
To simply move things around you work with the specimen titlebar. Drag icons there to where you want to see them.
You may find that you have other icons available to you. A circle indicates that the button will set that window on all desktops. Another icon that you may find useful is Shade - a toggle between rolled up (titlebar only visible) and normal view. These icons are added by dragging from the text description window onto the speciman title bar - just position them as you want to use them.
If you prefer a Classic, KDE3-style Desktop
|
| Change to traditional desktop |
Right-click on your desktop - select (or , in some distros). Change the from to . The whole desktop is now a folderview, and another right-click on the desktop will allow you to select . Set the folderview to the directory you want to use as your desktop.
Open applications directly into a different desktop
Use commands like
kstart5 --desktop 4 kate
Using with small screens (eg Netbooks)
Make the window decorations smaller
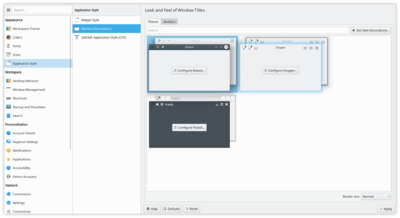
tab. Two good options there:
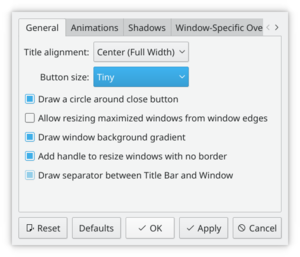
- Using the default style (Breeze), select and set to or .
- Using an other style, with smaller windows decorations.
Both routes will give you slim and functional window titles and borders.
Change the base fonts
On many netbooks the screen is very clear, so that reading fonts much smaller than you expect is feasible. On Acer Aspire One I find that 8 point is a good base settings.
KMail's Aggregation options take up too much space
See this FAQ to change it.
KMail's Folder-List Tooltips hide too many folder names
See this FAQ to change their behaviour
Gallery
The Gallery holds many screenshots of past and present desktops and effects.
Troubleshoot Graphics Problems
Curing graphics problems depends on knowing the correct drivers for your graphics card. Learn more about this on the Desktop Effects Performance page.
Defining Window Rules
There is a tutorial on defining your own rules for the behaviour of specific windows on the KWin Rules pages.
More Information
- Wikipedia
- Window manager (Arch Linux Wiki)
- Using Other Window Managers with Plasma
- KDE 3
- KJots2.png
- Kjots.png
- KMail/FAQs Hints and Tips
Is my problem already known?
Symptom: You have a problem with KDE-PIM and would like to know whether others have reported and solved the problem. You wonder how to read the archives of the kdepim-users mailing list.
Solution: This is a good habit to cultivate. Try the MARC archives at https://lists.kde.org/?l=kdepim-users&r=1&w=2
Configuration
Store sent mails in a special folder
Symptom: You want to store mails in a special folder. Maybe you are using an IMAP server and want to store your mails on the server, not in the client.
Solution: In Kmail, choose
Store trash mails in a special folder
Symptom: You want to store mails in a special folder. Maybe you are using an IMAP server and want Trashed mails to be stored on the server, not in the client.
Solution: In Kmail, choose
In some versions you will need (or Wastebin folder, depending on your distro)
Store encrypted mails as unencrypted
Symptom: You exchange encrypted mail with a friend, but would like to store it unencrypted, once you have opened the message.
Solution: To store emails that have been decrypted once in unencrypted format henceforth, add this to your kmail2rc configuration file, in the [Reader] section:
store-displayed-messages-unencrypted=true
This may only work with SMIME but implementation for OpenPgP is being worked on.
Spam filtering on an IMAP server
Symptom: You intend moving on to reading your mail from an IMAP server, and wonder how filtering and spam handling will occur?
Solution: The machine that already has your mail can become your imap server. You will need to configure a server application. Dovecot is one such, and the guidance on the project web pages make it easy to set up. That still leaves you with the problem of filtering, as it makes sense to do it on the server (when you point kmail at the server you will see the folders that you have created on the server). Again there are options, but one of the best known is procmail. Again there is plenty of information on the Internet on how to set this up. You give it a set of "recipes" - here's an example:
:0
 * (^To|^CC|^List-ID): .*kde-linux
 ${MAILDIR}.INBOX.KDE-Lists.kde-users/
If you have maildir folders, each recipe must end with a "/". If your folders are mbox, just omit the "/"
If you have been using bogofilter with kmail you will already have a wordlist. This can be used at server level, too, so you won't have to start training from scratch. The trick is to set this before the procmail recipes:
:0fw
 | bogofilter -e -p

:0e
 { EXITCODE=75 HOST }

:0:
 * ^X-Bogosity: Spam, tests=bogofilter
 ${MAILDIR}.INBOX.a-Spam/

:0e
 { EXITCODE=75 HOST }

:0:
 * ^X-Bogosity: Unsure, tests=bogofilter
 ${MAILDIR}.INBOX.a-Unsure/

:0e
 { EXITCODE=75 HOST }
Note that it is going to use a mailbox for spam and one for unsure - I add a 'a-' to the name to ensure that they are easily seen, at the top of the list.
Finally, to improve performance, run the following command occasionally on saved spam and Unsures:
/usr/share/bogofilter/contrib/trainbogo.sh -c -H /home/user/Maildir /.INBOX.bogotrain_ham/cur/ -S /home/user/Maildir/.INBOX.bogotrain_spam/cur/
(don't forget to check the path.)
This is not a complete guide to setting up a server, but notes on how to set up the server to work as you expect in KMail.
Get more screen space in KMail
Symptom: You are using KMail under KDE 4.2 or later on a netbook, and find that the new Aggregation display leaves you little screen space
Solution: In 4.2 you have a new set of icons next to the quick search bar. You can use these to choose a different theme and a different aggregation. If you want to change the look so that a mail uses a single row instead of two rows, go to ![]() - the tooltip says - and change the theme to . If you want to disable grouping by date, change the aggregation
- the tooltip says - and change the theme to . If you want to disable grouping by date, change the aggregation ![]() to . Now your KMail will look exactly like it did in earlier versions.
to . Now your KMail will look exactly like it did in earlier versions.
In 4.4 and 4.5 these settings were moved to the main menu, and
Get more screen space in KMail - reduce font size
Symptom: You still lack screen space, and would prefer more visible lines at the expense of font size, but your attempts only partially work.
Solution: In you can select and change the setting for each component in the list. This is when you discover that your folder list and the message bodies do use the fonts you want, but the message list still has too large a font.
Now you have to look at that set of new icons at the top right, close to the search box, for ![]() - the tooltip says . Choose , then tab. There is a list of , and below that a mockup of column headers. Each one of those column headers needs to be clicked on, and your new Custom font set. At the end of this the message list will display in the same font as the rest of your layout.
- the tooltip says . Choose , then tab. There is a list of , and below that a mockup of column headers. Each one of those column headers needs to be clicked on, and your new Custom font set. At the end of this the message list will display in the same font as the rest of your layout.
In later versions that don't have those icons you can make the changes by right-clicking on the Message List headers, and selecting Again, you need to work with the header of each column.
Un-configure KMail folder tool tips
Symptom: You are using KMail under KDE 4.2 or later on a netbook, and find that the tooltips over folders hide too many folder names
Solution: Right-clicking on the header of the now brings up several more configuration options. One section is headed , and the choices are , , . is handy for folders that have long names, so that only part of the name is displayed. Folders where you can see the full name won't pop up the tooltip.
Un-configure KMail message list tool tips
In KMail, uncheck
Remove Alternate Line colourings
In , for each color set except (which doesn't have it), change the to be the same as the .
Mandriva and Mageia don't use the name System Settings. As in KControl, the KDE 3 control centre, they name it "Configure your Desktop" to distinguish it from "Configure your Computer", a.k.a. the Mandriva (or Mageia) Control Center (MCC). Other than this name change, the method is as described above.
Store messages from separate email accounts in separate inbox folders
For POP create folders in ~/.kde/share/apps/kmail/mail/ (copy and rename the default folder). These then appear in the drop down list in .
Create other folders in the same location for sent mail. These can be set in .
This recipe may not be applicable to KMail 2 due to move to Akonadi-based mail storage. ---
Configure GMail without OAuth
Solution: In KMail, change option from Gmail to PLAIN.
For some personal reasons Google does not consider usual IMAP authentication methods as "secure", so you will need explicitly allow it.
Go to the Less secure apps section of your Google Account and turn on Allow less secure apps. Details: https://support.google.com/accounts/answer/6010255
Migration
Transfer mail and settings to another computer (or another user account on the same machine)
Solution: The messages are typically in ~/.kde/share/apps/kmail/. For very old installations of KMail, the messages can also be in ~/Mail. Note that KMail uses hidden sub-directories inside that directory, so you need to make sure to copy hidden directories as well.
For settings you will need to copy the following files:
- ~/.kde/share/config/kmailrc,
- ~/.kde/share/config/mailtransports, (since KDE 4.0)
- ~/.kde/share/config/emaildefaults and
- ~/.kde/share/config/emailidentities .
Your address book is usually stored in ~/.kde/share/apps/kabc/. Calendar data is in ~/.kde/share/apps/korganizer
Be aware that some distributions use ~/.kde4 instead of ~/.kde/ for their KDE configuration data. Look at the output of the command kde4-config --localprefix if in doubt.
From version 4.4 you may have some Akonadi-controlled entries that also need to be kept. Add to the above list -
- Everything under ~/.local/share/
- Everything under ~/.config/akonadi/.
- ~/.kde/share/config/nepomukserverrc
- Everything under ~/.kde/share/apps/nepomuk/ (KAddressBook stores contact groups in Nepomuk.)
If you plan to use an USB stick as transport medium for your data, be sure to read section "Cannot copy mail to a USB stick" below.
Problem: Cannot copy mail to a USB stick
Symptom: You are setting up a new computer and want to transfer all your mail. You decide to copy everything to a usb stick. The job starts, then you start to get failure message,
Unable to copy ............Invalid argument
Solution: Your usb stick is (V)FAT formatted, and thus can't handle maildir folder names (nor can it handle permissions, which can cause many other problems). You have two choices. Either format your usb stick as ext2 (in which case you should be aware it can't be read on Windows OSes without installing additional software there) or create a tar file of all your mail, copy that to the stick and extract it to your new host.
Troubleshooting
Problem: You are losing mail
Symptom: You are losing mail. One message in your Inbox had an empty subject line and the date 1st January 1970. When you clicked on it, it was empty. When you clicked on the next message that changes to the same state.
Solution: This happens where there is corruption in your index files. First thing then, do notclick on any more messages.
- With the KMail 1.10 shipped with KDE 4.1 or newer, right click on the folder and select (you can do the same from the menu).
- With earlier KMail versions the process is slightly more complicated. Close KMail. In Dolphin, navigate to where your mail is stored (typically in ~/.kde/share/apps/kmail/) and look for index files associated with the affected mailbox. There will be two or three, and be easy to spot. them. They will be recreated when you re-start KMail. You will have lost the mails that had disappeared, but the rest of the mail should be visible again.
You have empty 'ghost-mails' in your inbox (or other folder)
Symptom: For some reason, certain messages aren't accessible in KMail. They show up in the message list window but selecting them there results in a blank message window. I can't open them or reply to them, etc.
Solution: This problem is most likely due to corrupted index files, see issue "You are losing mail" above. So just follow the advice given there.
You get the error "Unable to fetch item from backend" when entering IMAP folder
There are a number of possible reasons for this and it's something the KMail team hopes to tackle in time. Meanwhile, there are some work-arounds:
Work-around 1
- edit ~/.local/share/akonadi/mysql.conf
- Under the [mysql] section, add:
binlog_format=row
If this doesn't work, try work-around 2 (below).
Work-around 2
This one is mostly a matter of restarting so KMail can fetch those pesky items... Some possible steps:
Use Alt + F2 or Konsole to type: kquitapp kmail, then wait a minute, then akonadictl stop, wait a minute, type akonadictl start, wait a minute, type kmail. This stops KMail (closing all windows), stops the KMail backend, starts the KMail backend, starts KMail. Having a working internet connection increases the chances of success. Sometimes, you can also just do kquitapp kmail, wait a minute, and start KMail again. Often, a few restarts seem to be needed. It is unclear what is the reason for this, but on bad network connections it is more likely to happen.
See also the below item for how akonadiconsole can be helpful.
Your mails are not being sent, without error messages
If KMail does not send mail without saying anything, the 'agent' responsible for 'dispatching' the mails can be stuck. Of course, you need to ensure you have proper network connectivity for mail to be send!
To remedy this, it might help to abort the current action and re-start it. First, quit KMail by using KRunner (Alt + F2) or Konsole and typing: kquitapp kmail. Note that a normal Alt + F4 or does not do the trick! Wait a minute, then start KMail again. Now start akonadiconsole using KRunner (Alt + F2) or Konsole. Go to the , do a right-click and abort the current action. You will most likely get some error messages popping up. Go back to KMail and choose . Now it might work. If not, instead of aborting the current action, try toggling the offline/offline status of the Mail Dispatcher Agent or restarting things like mentioned in the workaround 2 of the problem above this one.
Problem: Wrong address autocompletion
Symptom: You sent an email to a friend and mis-typed his address. Now that address keeps popping up as a suggestion, every time you try to send to the correct address. You can't find it in your addressbook.
Solution: Recent addresses are actually stored in ~/.kde/share/config/kmailrc, but rather than risk making a mistake in a manual edit, go to KMail's and you will see a button
Problem: Cannot follow a link in a mail
Symptom: You have set Firefox as your default browser, but when you click a URL in KMail it loads a local temporary version of the page with broken relative links.
Solution: You should add "%u" or "%U" to the Firefox executable in the settings. If that is not present KDE assumes that the application is not capable of handling remote urls (http) and hence creates a local copy first.
Problem: You get an authentication error message
Authentication support is not compiled into kio_smtp. The message will stay in the 'outbox' folder until you either fix
the problem (e.g. a broken address) or remove the message from the 'outbox' folder.
Solution: Install the sasl-devel-package and recompile kdepimlibs. E.g. for SUSE the package is named cyrus-sasl-devel and you install it with the command
yast -i cyrus-sasl-devel
When running cmake to compile kdepimlibs, you will see:
-- The following external packages were located on your system.
 -- This installation will have the extra features provided by these packages.
 [...]
 + cyrus-sasl
This usually only affects self-build distros.
Problem: You can't find your Distribution Lists
Solution: See KAddressbook
Your correspondents complain about your bottom-posting
Symptom: Your correspondents use mail agents that routinely top-post, and they complain that they have to scroll down to read your replies. You, on the other hand, post to mailing lists, where it is a requirement that you bottom post to maintain the natural order of reading.
Solution: Highlight the portion of your received message to which you want to reply, before hitting the icon or keyboard shortcut. The composer window that opens will quote only the section that you highlighted and your correspondents will be able to see your reply without unnecessary scrolling.
KMail spellchecking doesn't work with the Deutsch dictionary
Symptom: Your default dictionary is set to "Deutsch", but when typing in German, the spell-checker doesn't alert you to mis-spelled words.
Solution: Change your default dictionary to "Deutsch (Deutschland)". It's worth remembering, too, that you can associate different dictionaries to each Identity, and also by using the menu on a Compose screen, you can choose to have the dictionary used displayed while composing a message, and change dictionaries, using that, when desired.
Error: Could Not Determine Resource Status
Symptom: When fetching mail, you get an error message reading like:
Error while getting folder information.
 Could Not Determine Resource Status
 An attempt to determine information about the status of the resource
 Unable to get information about folder INBOX.customflags.
 The server replied: Mailbox does not exist, or must be subscribed to.,
 such as the resource name, type, size, etc., was unsuccessful.
 Technical reason: Could Not Stat Resource
Reason: You are using Courier IMAP as your mail server.
Solution: If you are your own mail server administrator, set up a different mail service, for example cyrus. Here is a description how to do it.
Problem: Kmail is slow
Symptom: Kmail is really slow to get your mails.
Solution: It might be that the spam tool you're using is slowing down Kmail. If you used Kmail tools menu to add a spam tool and added Spam Assassin (for example) then try another one. I noticed that bogofilter is much quicker. You'll need to remove the 1st one and add the 2nd. You'll then need to train the spam tool you just added (bogofilter): KMail Anti-Spam Tools
Symptom: You just copied your mail folders from an earlier version (see "Migration" above) and now Kmail is really slow to respond shortly after it starts up, for at least several seconds with Kontact burning 100% cpu.
Solution: Work through all your saved message folders and , from either the menu or right-click on the folder in the tree view side panel.
Symptom: You experience very long delays when sending messages, and KMail is frozen while you wait.
Solution: There was a bug in the various Release Candidates for KDE SC 4.4 which caused KMail to do lengthy searches for matching addresses. Updating to the full 4.4 should cure the problem.
Symptom: When you type in the composer window, characters appear very slowly.
Possible Solutions: This is a known bug. Some have reported that disabling then re-enabling desktop effects may help. Others have reported that switching to a desktop theme, other then Oxygen, works.
Symptom: When saving your SMTP password in the KMail SMTP configuration dialog you get a "kwallet is unavailable" message.
Solution: You need to reset the KWallet configuration for KMail.
- Stop KMail
- Start KDE Wallet Manager
- Open
- Delete the Kontact and KMail entries (Kontact or KMail entry may not be there)
- Save and close KDE Wallet Manager
- Start KMail
- Enter the SMTP password in the Configure Account dialog
- Save - answer yes to the KWallet dialog
KMail with other desktops or applications
Problem: KMail does not start up.
Symptom: You want to start KMail from a minimal desktop environment like fvwm2. It does not start.
Reason: You are missing the dbus functionality.
Solution: Start KMail using dbus-launch like this:
dbus-launch kmail
Tell Firefox to use KMail for mailto: addresses
Firefox 3 - In the Firefox menu, select , choose the tab, then typemailtoin the search box. Choose
Set Firefox as your default browser
Symptom: You want to click on a link in KMail and have it opened in Firefox. At the moment, another browser is used. You want to change this.
Solution: This solution will affect all of KDE, not just KMail. Start .
If you are an administrator and want to set this setting automatically for your users, it is
- for SUSE Linux
in your user directory in .kde4/share/config/kdeglobals add the line
BrowserApplication[$e]=!firefox
under category
- for all other Linux distributions:
in your user directory in .kde/share/config/kdeglobals add the line
BrowserApplication[$e]=!firefox
under category If General category doesn't exist you should add it.
You can also use the script in Tutorials/Modify_KDE_Software_Defaults
Control your Roaming profile's connection
Symptom: You set up a Roaming profile to access your home server while you are on the road, but it keeps trying to connect even when you are at home. Auto-connection is disabled in the setup screens.
Solution: , uncheck . This will exclude the profile when you hit the download icon, but the profile will still be available from the drop-down list, making it easy to get your mail while away from home.
KMail2 Issues
KMail2 doesn't send mail
Some users find that mail does not go out, and it appears that smtp is missing, even though the Settings page looks correct. It has been reported that this is cured by opening akonadiconsole and adding Mail Dispatcher Agent.
If the computer was suddenly turned off in suspend mode (e.g. by a power cut) sometimes e-mails simply stay in the outbox without being sent, but no error message is generated either. This may be due to the fact that the Mail Dispatcher Agent is set to "offline" in the configuration file during suspend and is not changed back due to the "crash". Edit the following file:
~/.config/akonadi/agent_config_akonadi_maildispatcher_agent
and change
[Agent]
Online=false
to
[Agent]
Online=true
Clean start after a failed migration
In case migration from KMail 1 to KMail 2 fails or you have weird problems after it, you can try to do a clean import of your data, instead of migrating the existing settings. Be warned, that needs more manual setup, so do only if you are confident with setting up again your KMail accounts, and it can generate a large amount of network traffic for IMAP resources.
1. Stop Akonadi and related applications - quit KMail/Kontact/KOrganzier, and issue this command:
akonadictl stop
Make sure no Akonadi or MySQL process is running:
ps ux | grep mysql
ps ux | grep akonadi
They should not show anything else but the grep process itself.
2. Remove old Akonadi database and config - delete the following folders
~/.local/share/akonadi
~/.config/akonadi
You might want to also delete also the files starting with akonadi from
~/.config
but it's actually quite convenient not to do that: then recreating the resources (in the same order as before) will auto-fill all your settings automatically again.
3. Restart Akonadi server
akonadictl start
4. Add back the accounts
Now it is time to add back your account. You can use KMail (Kontact) for it, or you can use the akonadiconsole tool.
In KMail: and use .
If you use IMAP, add a new . If you want disconnected mode (so you can read the mails offline), enable it on the tab. Be sure to check that you are subscribed to all your important folders.
You might already see a resource. This points to a local maildir folder. You can either modify this to point to your existing maildir folders or you can add a new resource for local mails.
When adding a maildir resource you can choose between or . Unless you have a mixed folder containing both maildir folders and mbox files, you should choose . For independent mbox files, like the one in the /var/spool/mail, you can set up a new MBox folder.
Add the POP3 accounts as well. In case you have multiple Local Folders set up, choose on the tab the destination folder where the newly downloaded mails are put.
For all accounts, configure the mail check interval. For Local folders disable interval checking and also disable in the .
Add the sending (SMTP) accounts.
5. Fix your filters, identities and favourite folders
If you have client side filtering (common with POP3 mails), go to and fix the destination folder for the filters, they most probably are wrong. Otherwise mails will end up in folders you don't expect.
Spam filter (at least in version 4.7.3 and earlier) does not work as expected in that the rule that the wizard creates does not send spam to the folder you have defined.
The workaround for this is to change the "spam" and "spam unsure" (if the spam filter you use support that) from looking at Status-fields in the header X-Spam-Status to look "Anywhere in headers" for X-"yourspamfilter"-Classification: SPAM or unsure. Look at the filters the wizard creates and copy the "contains" part. Example for Spambayes: X-Spambayes-Classification: spam and X-Spambayes-Classification: unsure
You also need to verify the identity settings and set the sent-mail, drafts and templates folders to point to the right folders. To do that go to , modify the identity, go to the tab and modify the above mentioned folder settings.
Check also that your Favourite Folders are the ones you have chosen before.
6. Initiate a mail check
Start a mail check for your accounts. I suggest doing it per account
First do for IMAP, if you have.
Next is to check (import) your local mails. One solution is to do a full check in one go and select the local account, the other is to click one by one on the folders, that should initiate the check for that folder (alternatively right click on the folder name and select ).
The initial import might be slow and could use a lot of memory, especially in case you have folders with a large amount of mail. In that case per-folder check is preferred. In case the check (complete or for one folder) is finished and the memory usage is still high, you could restart the Akonadi server - as seen above - or just the maildir agent, if you use akonadiconsole. Don't worry, this high memory usage is only for initial import.
Initiate a check mail for POP3 resources.
Hopefully after these steps, you will have a much nicer KMail experience.
Local Folders is added over and over
In some cases you might end up with a maildir account pointing to a certain place (like $HOME/Mail), but you still see a Local Folders folder in the folder list with Inbox/Outbox/Trash/Drafts/etc. subfolders and KMail keeps putting mails there, especially sent mails. The problem is that certain folders are marked as special folders (system folders) and if you don't have them, KMail cannot operate correctly. That is the reason why it keeps re-creating that folder. A this time there is no easy way to change this in the UI for all types of special folders. Here are what you can do:
- The Sent-Mail, Drafts and Templates folder is configurable for each identity. Go to , select your identity, click on , go to the tab and set the folders to point to the right place.
- The default Inbox is configurable for each POP3 account. Go to , select your POP3 account, click on go to the tab and set the .
- For IMAP accounts you can configure the Trash folder. Do like above. The setting name is Trash folder.
- The most problematic part is the Outbox. First, locate specialmailcollectionsrc in your KDE configuration directory ($HOME/.kde4/share/config or similar). It contains something like this:
[SpecialCollections]
DefaultResourceId=akonadi_maildir_resource_0
Now start akonadiconsole, on the tab, locate your local account in which you want to have your Outbox folder, click on it and note the identifier that appears in the lower part ( akonadi_maildir_resource_XXX or similar). Put this identifier in the above shown specialmailcollectionsrc, by replacing the existing one.
After that restart akonadi (you can do from the akonadiconsole, or from command line with
akonadictl restart
Now remove the Local Folder that you don't want to use anymore.
If it keeps reappearing and the Mail Dispatcher Agent still crashes, you need to do one more thing in akonadiconsole. Go to the tab, find the outbox you want to use, right click on it, , tab, enter SpecialCollectionAttribute then , double click on the near the SpecialCollectionAttribute and enter outbox. Add also another attribute, the attribute name has to be ENTITYDISPLAY and the value ("outbox" "mail-folder-outbox" "" ()) (just copy paste from here). Restart akonadi and now you should be able to remove completely the unneeded local folder account.
If you "lost" your Trash folder and want to set a new folder to act as Trash, you can use the same approach described above, but for the SpecialCollectionAttribute value enter trash .
Hints and Tips
Add a Tag to aid searching
You must first define your tags, which is done in . Now you will find that the (right-click) context menu, under , offers you the choice of your defined tags.
Watch threads
If you want to follow a thread, right click and choose .
From this point on all messages on the thread that starts in this message will be marked as Watched.
Watch your own threads:
This is useful in case you are registered to a mailing list such as kdepim-users@kde.org and want to filter out the threads you participate in.
Create a filter to mark all your incoming messages to a mailing list as "Watched"
To create a filter go to:
- select
- Add the conditions:
- yourmail@maildomain [1]
- listID [2]
[1]replace yourmail@maildomain with your outgoing mail address
[2]replace listID with a specific mailing list id e.g (<kdepim-users.kde.org>) or just a '.' to include outgoing mail to all mailing list with '.' in their id (basically all).
- Under choose .
In the tab
- Uncheck .
so that other filters such as sorting the incoming messages from the mailing list to sub-folders would execute.
- Place that filter before other filters that may stop the filtering process,
or simply put it first. (changing the filters order is done using the two arrows up and down, under the )
Create a search on mailing list messages
Go to the folder where your mailing list messages are stored e.g (Local Folders/KDE-PIM-USERS) and hit S key or in the menu .
- Select [3]
- Add the condition:
- Give the search an informative name (Search folder name) like KDE-PIM-USERS-Watched
- Make the search. After it is done you can close the search window.
Now whenever you start a thread or participate in one, it is Watched.
[3] Pay attention to the .
E-Mail Translation
Symptom: you receive mail messages in different languages and want to translate them without doing lots of copy and paste.
Solution: using an external program to translate your E-Mail and display it.
Step by step implementation

- Prerequisites, make sure you have those before starting
- libtranslate
- perl
- perl module Email::MIME
- kmail
- Setting up a pipe filter
- In Kmail go to
- create a new filter and name it Translate
- add a Filter Criteria that would be always true (e.g )
- add a Filter Action
~/bin/mail_translate.pl
- open the Advanced tab and un-check everything except for , you can also set a shortcut and an icon here.
- In Kmail go to
- Putting the script in place and configuring it
- save the following script to a file named mail_translate.pl and put it in your ~/bin directory.
#!/usr/bin/perl

use Email::MIME;

my $from_language = 'en';
my $to_language = 'he';
my $translation_command = "translate ";
my $languages_pair = "-f $from_language -t $to_language";
my $line;
my $message='';

while ($line=<>)
{
    $message.=$line;
}

my $email = Email::MIME->new($message);
my @parts = $email->parts;
my $separator = `echo "translation" | $translation_command -f en -t "$to_language" -`;
chop $separator;
rec_parts ($email,@parts);

sub rec_parts
{
    my $parent = $_[0];
    my @parts = $_[1];
    for $part(@parts)
    {
	my @sub_parts = $part->parts;
	if (@sub_parts > 1)
	{
	    rec_parts ($part,@sub_parts);
	}
	my $type=$part->content_type;
	if (( $part->content_type =~ m[text/plain]gi )||( $part->content_type eq ''))
	{
	    my $body = $part->body;

	    $body=~s/['"`]*//g;
	    my $translation_body=`echo "$body" | $translation_command $languages_pair -`;
	    $translation_body=~s/['"`]*//g;
	    my $msg=$body."\n\n---"."$separator"."---\n\n".$translation_body;
	    `kdialog --title "$separator" --msgbox "$msg"`;
	}
    }
}
print $email->as_string;
- Make the script executable using
$chmod a+x ~/bin/mail_translate.pl
- Configuring the script to suit your needs.
- Currently the script will translate from English (en) to Hebrew (he), you probably need another type of translation. To change that settings look inside the script for the phrase $from_language = 'en' and $to_language = 'he' and replace the 'en' and 'he' parts with the combination you need, if you are not sure, a full list of language codes is available from the ISO 639-2 list.
- Testing
- before charging innocent E-Mails and translating them first try that on something you don't mind to lose, look in your trash or spam folder. Right click on any translatable item A dialog box should pop-up with the original message followed by it's translation.
- Troubleshooting
- If the script is not working you can test it outside of KMail to narrow down the responsible component. Save a mail message as 1.mbox file and run in the terminal
$~/bin/mail_translate.pl < 1.mbox > 2.mbox
- If the script is not working you can test it outside of KMail to narrow down the responsible component. Save a mail message as 1.mbox file and run in the terminal
- Testing
If the output file 2.mbox is not the same as 1.mbox then there is a problem in the script and it shouldn't be used.
Edit and save messages without changing message parameters
Get rid of that long mail trail in top-poster replies. You can edit a message and remove unwanted parts by saving it to disk (), editing it separately in a text editor, and then import it again. Just delete the original. This method also works to detach encapsulated messages and keep them as separate messages.
Easily archive all e-mails
Create a filter that matches all messages and copies them to a folder, and then create a shortcut to manually apply this filter. It can be done following these steps:
- In KMail go to
- Click the
 button on the left and give your filter a name (this will appear on the shortcut also, I simply used "Archive")
 - Under Filter Criteria, choose
- Under Filter Actions, choose and select the folder you want to archive to.
- In the tab, uncheck
- Then check , and .
- Click the button with the
 icon to select a shortcut (I used q because it didn't conflict with anything else)
 - Choose an Icon for the shortcut menu
- Click or and you are Done!
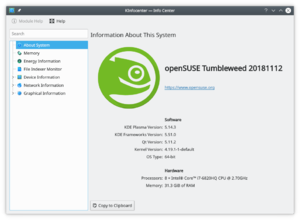 |
KInfocenter gives you a host of information about your hardware and its capabilities |
Features
Areas of particular interest might be
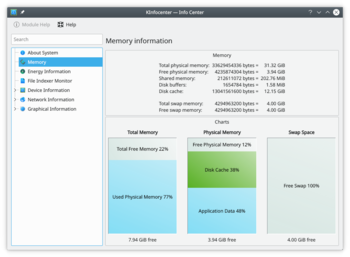
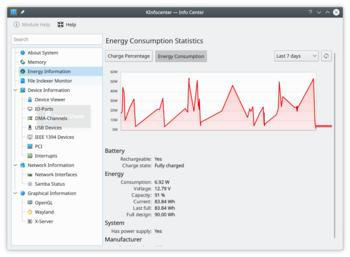
as well as
- The status of any Samba shares
- Processor information
- Sound capabilities
- Your X-server and video capabilities
and much, much more
You can see its manual here
Hints and Tips
If you have problems expanding the tree display, this is because KInfoCenter uses the following methods:
Left Arrow: Collapse
Right Arrow: Expand
Up: Up
Down: Down
Enter: Select ( non expandable item )
![]() You can use kmail and gpg to send encrypted or digitally signed mail. To do this, there are the buttons "sign" and "encrypt" in the kmail compose window. It appears if you click on .
You can use kmail and gpg to send encrypted or digitally signed mail. To do this, there are the buttons "sign" and "encrypt" in the kmail compose window. It appears if you click on .

Overview: GPG
A web of trust comprises a group of persons who trust each other. To show their trust, they have signed each other's keys. gpg allows you to do this.
The web of trust is extended in key signing parties that go like this:
- you (me@home.org) meet John Foo (foo@bar.org) who is already a member of the web of trust
- you install gpg
- you have a private/public key pair or generate one with
gpg --gen-key
Your private key is stored in "secring.gpg", your public one is stored in "pubring.gpg". You keep your private key secure, and are free to distribute your public key.
- you find out your key's fingerprint (name)
gpg --list-keys
 /home/me/.gnupg/pubring.gpg
 ----------------------------------
 pub   1024D/45E377BB 2008-02-03
 [...]
- you upload your public key to your key server
gpg --send-key
- John downloads your key from the key server
gpg --search-key me@home
- John checks your passport and signs your key
gpg --sign-key 45E377BB
- John uploads your key again
gpg --send-key 45E377BB
- You are now part of the web of trust and your public key is on the key server.
How to...
Import a saved keyring
If you have a keyring saved to your disk, reload ("import") it like this:cat secring.skr | gpg --import
Then call kgpg and set your trust on your private key to "ultimate."
TroubleShooting
Whatever problems arise, first make sure your gpg is properly set up:
- List your keys
gpg --list-keys
- Has to deliver something like a sensible list of keys.
- Check the output of
gpg --update-trustdb
- In case of a problem look at the below.
No ultimately trusted keys found
Ifgpg --update-trustdb
delivers
gpg: no ultimately trusted keys found
Call kgpg and set the trust of your private key to "ultimate'"
"Gpg does not seem to be running..."
You get an error message like this whenever you start up? You need scripts to make it start and stop cleanly. You can get scripts here:
Copy them into your ~/.kde/env and ~/.kde/shutdown folders, check permissions, and make sure they are executable.
Still not working?
Check which pinentry packages you have installed. You may find you are missing pinentry-qt4.
Other Key Considerations
From time to time you need to do some maintenance work on your keys. KGpg was written to make this easier. There you will be able to extend the life of your keys, refresh them if they have already expired, change your passphrase, or revoke a compromised key.
Home » Applications » Graphics » KuickShow
 |
A fast and convenient image viewer |
What is KuickShow?
KuickShow displays images using all the available space, without being wasted in bars or menus. It also has a smart automatic zooming that scales images according to its size. You can use the integrated file browser to choose images, or navigate through a folder with the mousewheel or the keyboard. It also has fullscreen view and slideshow, and supports a wide range of image formats.
Features
- Fast loading of big images.
- Powerful keyboard and mouse navigation.
- Easy zooming, mirroring, rotation, and adjustment of brightness, contrast and gamma.
- Full screen and slideshow views.
- Support for jpg, gif, tiff, png, bmp, psd, xpm, xbm, pbm and eim files.
- Kbarcode
 |
KBarCode is a program that allows you to generate a barcode from a number/character sequence you can determine. |
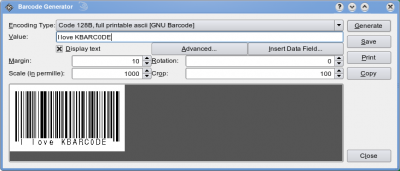
First-time use
When you use it for the first time, first make sure you have mysql and kbarcode installed and started. E.g. with openSUSE Linux you do this in a Konsole:
yast -i mysql kbarcode
 /etc/init.d/mysql start
 kbarcode
Author
Dominik Seichter <domseichter AT web.de>
See also
- Applications/Graphics
- Homepage
- Mailinglist (english and german)
- http://en.wikipedia.org/wiki/Barcode
- Kbarcode.png
- Kbarcode
- Kbarcode-Screenshot.png
- Konq3bookmarks.png
- Kaffeine
Home » Applications » Multimedia » Kaffeine
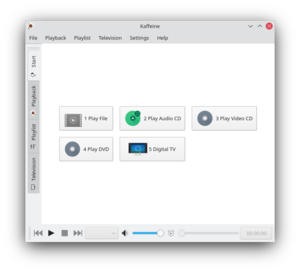 |
Kaffeine - a full featured media player that can fulfil all the basic multimedia tasks. |

Capabilities
With Kaffeine you can:
- Play:
- Audio files
- Video files
- VCDs
- DVDs
- Watch Digital TV
If you have a working dvb-t card in your system, Kaffeine knows about it and shows a button on the start tab "Digital TV". It shows as well a new configure option on top "Television".
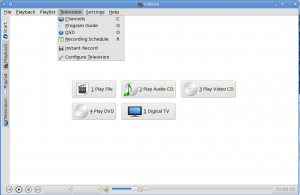
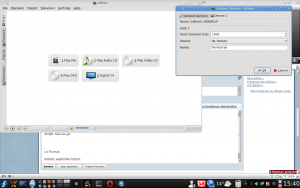
All you have to do, after you select your source, "hessen-de" in my
case, is to click the button.
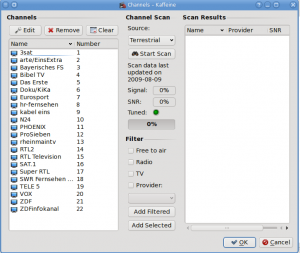
Add then the found/selected channels to the left (as in the screenshot already done) and you're ready to watch TV.
The next screenshot shows the video and channel select window:
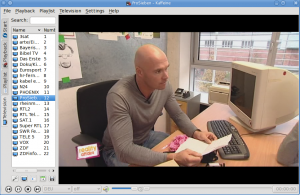
Recording is as simple as well:
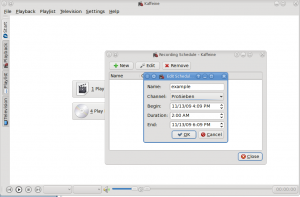
There's even a program guide:
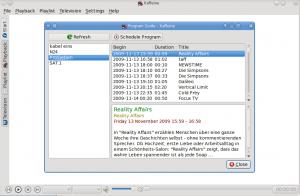
This helpful tutorial gives another view of how to set up and use Kaffeine to watch digital TV.
Features
- File browsing with Drag&drop support
- Full subtitle support: automatic and manual subtitle loading
You will find the Project website here and you can ask questions on the IRC #kaffeine channel on irc.freenode.net
| Network manager supporting profiles for dial-up, wired and wireless networks |
Features
- Supports multiple profiles
- Connects to open and encrypted networks
- Uses all wpa_supplicant types - wep, wpa, wpa2 etc
- Can show statistics per interface in systray icon
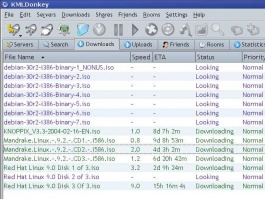 | KMLDonkey is a cross-platform graphical user interface for Mldonkey, a cross-platform peer-to-peer downloader. |
Features
- Runs wherever KDE software runs.
- Can handle multiple threads simultaneously
- Integrates with several browsers
- Can be used with traffic-shaping tools
- Can handle several security options
Download
- KMLDonkey 2.x (current version is 2.0.7) is released together with KDE4.x within the extragear-tarball.
- You can also build KMLDonkey from svn for the last development version
Authors
- Eduard Huguet
- Sebastian Sauer
- Gioacchino Mazzurco
- Petter E. Stokke (No current email address available)
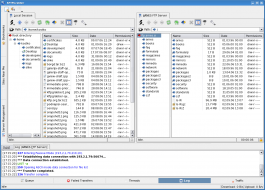 |
Powerful graphical FTP client |
This application is not maintained anymore. But you can use Dolphin instead. Dolphin can with the help from KIO access and explores a ftp server, like any other file system. You can also use the split view feature from Dolphin to view your local and remote file in the same windows.
Features
- Multiple simultaneous FTP sessions in separate tabs
- A tree-oriented transfer queue
- Site bookmarks with many options configurable per-site
- Bookmark import plugins from other FTP clients
- Ability to limit upload and download speed
- Direct viewing/editing of remote files
- One-time password (OTP) support using S/KEY, MD5, RMD160 or SHA1
- Traffic graph available
and much more.
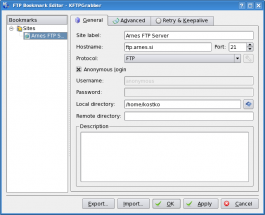
Get more details from the Project Page
Home » Applications » Graphics » KGraphviewer
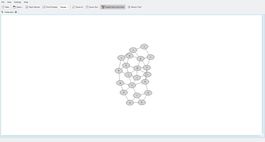 |
A Graphviz dot graph file viewer |
Features
- Perfect drawing of all graphviz example graphs
- Full-featured printing
- Zooming
- Threaded loading of several graphs in tabs
- Automatically choose dot for directed graphs and neato for undirected
- Arbitrary layout also possible, as soon as it produces xdot format
- Open new instances as new tabs in the old one (configurable)
and much more.
This new version of KGraphviewer, written for KDE SC 4.x, includes a brand new application, KGrapheditor, an experimental dot graphs editor. KGraphviewer is part of the Extragear graphics package.
Get more information from the Project Page
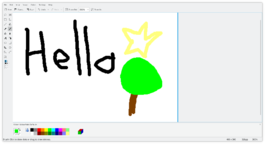 |
The easy-to-use paint application from KDE. |
KolourPaint aims to be a painting application for the user that has "average" needs. It keeps a simple and clean interface, with all the tools expected.
Features
- Full set of tools for line, brush and spray painting, shape creation and text addition.
- Range of selection tools.
- Choice between Opaque and Transparent selections.
- Undo, Redo and Clipboard support
- Colour Similarity support - fill those dithered areas
- Draw transparent icons and logos on a checkerboard background
- All tools can draw in the Transparent Colour
- Support for alpha channel drawing
- Autocrop support
- Many image effects including Balance, Scaling, and Rotation.
- Various color filters such as Greyscale, Black and White, Saturation and Coloring
- Open and save many image formats, including PCX (with preview)
- Can control your scanner - scan directly into canvas.
and much more.
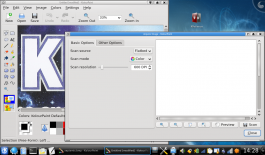
The features are fully explained in the Project Handbook. The Project's home page is at http://www.kolourpaint.org/
| All the tools you need to create a custom icon |
KIconEdit is an application with just one purpose - to create custom icons.
Features
- Rectangle, circle and elipse tools, outline and filled
- Rectangular and circular selection
- Line and Freehand drawing
- Colour picker, flood fill and eraser.
- Can create template size or custom size icons
- Reads and saves a wide range of bitmap formats
- Rapid conversion to greyscale
- Resize of icon is possible
- Undo and redo on many functions.
Get it
You should first try installing by means of your distribution. If your distribution does not contain KIconEdit, here is how you can install it. This description is based on SUSE Linux 11.4:
- make sure all supporting software is installed
yast -i libkde4-devel cmake subversion make gcc-c++
- get the source code
svn co svn://anonsvn.kde.org/home/kde/trunk/extragear/graphics
- compile it
cd graphics
cmake . && make -j8 && su -c "make install/strip"
- as a test, start it
kiconedit
- Basic Layout a tutorial that creates a leaflet with various images and explaining text using KWord's frames technology. Several text frames and image frames will be created and positioned on the page.
- A Second Layout experiments with placing, grouping and moving images within a text area
- A Third Layout creates a photo album page to examine text run-around and text-flow.
- Using the Artistic Text Shape is a tutorial that shows how to get started with the artistic text shape that all KOffice applications provide.
- KWord Manual Tutorial on basic concepts of working in a frame-based environment, and detailed guides for all your WP needs.
- Kexi/Tutorials
Contact Jarosław Staniek (staniek @ kde.org) to coordinate our effort.
- Drilling Down on Facebook Data
- This is an excellent article from Adam Pigg, showcasing just how powerfull Kexi can be. It describes how you can import, process, manipulate and present data from facebook coming from a mbox file. It covers creating a model database to hold the data, importing via script, presenting with a report and chart and exporting collected data.
- Parameter queries
- (for 1.1 but still valid, at kexi-project.org)
- Importing SQLite database into Kexi
- This article shows how to turn a native standard SQLite3 file into a database project that can be used with Kexi.
TODO
- Designing one-to-many relationships in Table designer
- Using combo boxes in table and form views
- Relationships (feature not available)
- Subforms (feature not available)
- Kivio/Tutorials
- Karbon/Tutorials
- KPlato/Tutorials
- KChart/Tutorials
- KFormula/Tutorials
- Kugar/Tutorials
- KWord/Manual
The KWord Handbook

An Introduction to KWord
- An Introduction to Frame-Oriented Word Processing
- Introducing KWord's Graphical User Interface
- KWord Tutorials
- Kword 1frame.png
- Kword 2frame.png
- Kword frameWrap.png
- Kword ChooseTempDia.png
- Kword Tut1.png
- Kword Tut2.png
- Kword Tut3.png
- Kword Tut4.png
- Kword Tut7.png
- Kword Tut8.png
- Kword Tut11a.png
- Kword Tut11b.png
- Kword Tut13.png
- Kword Tut13a.png
- Kword Tut14.png
- Kword Tut14a.png
- Kword Tut15.png
- Kword Tut14b.png
- Kword Tut15b.png
- Kword Tut16.png
- Kword Tut19.png
- Karbon14 (es)
- Kword Tut21.png
- Kword Tut22.png
- Kword screen.png
- Kword ruler.png
- Kword filenew2.png
- Kword filefloppy.png
- Kword saved1.png
- Kword saved2.png
- Kword savedlg.png
- Kword opendlg.png
- Kword fileopen.png
- Kword pntdlg.png
- Kword pntdlg1.png
- Kword selectedText.png
- Kword viewsize.png
- Kword undo.png
- Kword redo.png
- Kword editcopy.png
- Kword editcut.png
- Kword editpaste.png
- Kword find.png
- Kword finddlg.png
- Kword finddlg2.png
- Kword repldlg.png
- Kword spell.png
- Kword spelldlg.png
- Kword thesaurus.png
- Kword auto1.png
- Kword auto2.png
- Kword auto3.png
- Kword auto4.png
- Kword autocompdlg.png
- Kword wpfmtpg3.png
- Kword wpfmtpg1.png
- Kword dtpfmtpg1.png
- KWORD tfcreatebut.png
- Kword formframe3.png
- Kword framers.png
- Kword formframe1.png
- Kword formframe2.png
- Kword formframe4.png
- Kword formframe6.png
- Kword formframe5.png
- Kword framestylist.png
- Kword framewrap.png
- Kword styleimport.png
- Kword alignBlock.png
- Kword alignCenter.png
- Kword alignLeft.png
- Kword alignRight.png
- Kword fpara1.png
- Kword fpara2.png
- Kword fpara3.png
- Kword fpara4.png
- Kword fpara5.png
- Kword leftborder.png
- Kword rightborder.png
- Kword topborder.png
- Kword bottomborder.png
- Kword tabstopL.png
- Kword tabstopR.png
- Kword tabstopC.png
- Kword tabstopDec.png
- Kword tabstopCt.png
- Kword tabstopDect.png
- Kword tabstopLt.png
- Kword tabstopRt.png
- Kword chsizebut.png
- Kword chfontbut.png
- Kword bold.png
- Kword ital.png
- Kword undl.png
- Kword stkout.png
- Kword subscbut.png
- Kword supscbut.png
- Kword chcolorbut.png
- Kword fchardlg.png
- Kword fchardlg2.png
- Kword fchardlg3.png
- Kword fchardlg4.png
- Kword fchardlg5.png
- Kword exst.png
- Kword exul.png
- Kword wbw.png
- Kword chcase.png
- Kword exoffset.png
- Kword chstylebut.png
- Kword textstyex.png
The pages in the translation containing a category statement (L-Z):48631
The home for KDE users and enthusiasts.
An introduction to KDE

Learn more about the KDE community and its software and find information to help you get started. Also, discover what UserBase is and how it can help you.
Tutorials

How-Tos, Tips & Tricks that can help make your KDE software experience more enjoyable and productive.
Getting Help
Applications

Discover the wide variety of applications from the KDE Community, and find out what program suits your needs and preferences.
Websites
If you are willing to contribute, please read Tasks and Tools before starting. If you already contribute, check out Stats to see the top 10 contributors for the week, the most popular pages and most discussed pages.
- ThorstenStaerk
- Sidebar# mw internal links
- Navigation
- Special:MyLanguage/Welcome to KDE UserBase|ub-home
- Special:myLanguage/Quick_Start|ub-start-contributing
- recentchanges-url|recentchanges
- ub-contributors
- Special:MyLanguage/Tasks and Tools| ub-helpfiles
- ub-helpfiles-modify-url | ub-helpfiles-modify
- ub-helpfiles-new-content-url | ub-helpfiles-new-content
- Special:myLanguage/PageLayout| ub-helpfiles-page-elements
- Special:myLanguage/Typographical_Guidelines | ub-helpfiles-typographical-guidelines
- Special:myLanguage/Toolbox| ub-helpfiles-markup
- ub-translators
- Special:MyLanguage/Translator_Account| ub-get-trans-account
- Special:myLanguage/Special:SupportedLanguages| ub-languages-represented
- ub-helpfiles-languages-url | ub-helpfiles-languages
- Special:MyLanguage/Special:LanguageStats | ub-trans-tool
- ReadyForTranslation | ub-release-request
- Troubleshooting

Finding Your Feet
|
Sooner or later you will find that something is not working properly, so here are some general hints on troubleshooting, after which there are some links to more specific problems.
General Troubleshooting techniques
There are a few basic steps that can help in troubleshooting problems with KDE software. You should try these steps before asking on #kde or the kde general mailing list, since you'll probably be told to try them anyway ![]()
- Try creating a new user and running your KDE software with that user. If the problem doesn't occur with the new user, there's probably a problem with a file in your ~/.kde directory (with every reference to this directory, bear in mind that some distros call it ~/.kde4). You should then try:
- Rename the file causing the problem. To find an appropriate file, look in ~/.kde/share/apps/application-name or in ~/.kde/share/config/application-namerc where application-name is the name of the application you are having problems with. The config file is the most likely problem.
- Log out, then log in afresh. New default files will replace your renamed ones.
- Clean out /tmp and /var/tmp. KDE stores some temporary files which can sometimes cause problems. You will need to be root to do this. You might also like to try removing the following files. Make sure you exit KDE first though! (The easiest safe way is to choose Failsafe at bootup.):
- ~/.dbus
- ~/.kde/tmp-hostname which is normally a symlink to the next file:
- /tmp/tmp-kde-USER
- ~/.kde/socket-hostname which is also normally a symlink to:
- /tmp/ksocket-USER
- If you're running an old release from KDE, try updating to the latest version - many bugs are fixed with each new version, so your problem might already be fixed.
- Try searching the Bugzilla. Many common problems have been reported and discussed there.
- If your problem is more general than just one KDE application (e.g., "sound stops working when I start my KDE desktop"), try starting X with a different window manager. Even if you haven't installed another WM, 'twm' will be available, as it ships by default with X.
- If you start X with the 'startx' command, just put the appropriate command in the file .xinitrc in your home directory. (If it doesn't exist, create it)
- If you start your desktop from kdm, this will not work.
Some specific problems
Sound Problems
| |
Troubleshooting Peripherals Problems
| |
Graphics Card Performance
| |
Network Management
|
- Solutions you can try if your PC boots to an empty black screen
| Back to Getting Help |
- Welcome to KDE UserBase
- Sm-reports.png
- Sm-ledgers.png
- Sm-home.png
- Sm-home1.png
- Scorpius rising.png
- Okular.png
- Okular-annotations.png
- Okular
Home » Applications » Graphics » Okular
What is Okular?
Okular is a universal document viewer developed by KDE. Okular works on multiple platforms, including but not limited to Linux, Windows, Mac OS X, *BSD, etc.
You can watch for development at the project Home Page.
Background
Its development began as part of Google's Summer of Code program. The description of the project can be found at KDE Developer's Corner.
Okular combines the excellent functionalities of KPDF with the versatility of supporting different kinds of documents, like PDF, Postscript, DjVu, CHM, and others.
The document format handlers page has a chart describing in more detail the supported formats and the features supported in each of them.
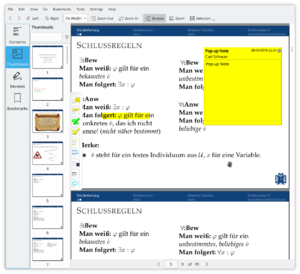
As well as supporting many formats, Okular offers such features as text selection, annotation, extraction of files embedded within a document, and many other surprises. Screenshots of Okular in action can be seen here.
You can talk to developers and other users on IRC, irc.freenode.org, channel #okular.
If you are interested in contributing to Okular, please contact the team. Programmers and non-coders are welcome all the same.
Mobile Version
Okular has a mobile version since version 0.16 release in February 2013 [16]. The first version was based on the active framework. The mobile viewer was then ported to Kirigami in 2016 by Marco Martin[17] and finally to Kirigami2 in 2017[18].
The mobile version doesn't support all features from the desktop version, but provide better touch support and a mobile interface.
You can test the mobile version in your PC by enteringokularkirigamiin your terminal. A nightly android version is also available at the KDE binary factory.
Hints and Tips
Reviewing Documents / Annotations
Double-clicking on either one of the Review tools (F6) allows you to make multiple annotations without having to reactivate the tool after the first time.
How to keep the annotations you made to the PDF file:
By default, Okular saves annotations in the local data directory for each user. Since KDE 4.9, it's optionally possible to store them directly in a PDF file by choosing , so they can be seen in other PDF viewers. Note that this feature requires Poppler 0.20 or newer for regular PDF documents. If the PDF document you are annotating is encrypted, this feature requires Poppler 0.22 or newer.
DRM
By default, Okular follows the PDF specification and don't allow copying text from DRM protected files. However, there is an option in the settings to disable DRM limitations in
There was a small controversy in the Debian bug tracker a long time ago, about the default choice to Obey DRM limitations[19][20]. The choice was then explained by an Okular/KPdf developer[21].
PDF Signature and certificate
Okular can verify if a PDF certificate is valid. But you can not yet create a new signature. See the release note for more information.
More Information
References
A Live CD allows you to test-drive the usually latest stable version of KDE SC without the need to install Linux or to change your existing Linux installation. These distributions boot and run completely from the CD and don't modify your hard disks. They can therefore be tried on a Windows computer without risk. All listed CDs are freely available for download.
KDE Neon
KDE Neon is a KDE project that provides the latest versions of KDE software on top of the latest LTS version of Ubuntu. There are two versions of KDE Neon: the User Edition that comes with the latest released versions of KDE software, and the Developer Edition based on pre-release versions. With the Developer edition you have the choice between using the stable or the unstable branch.
Kubuntu
A live CD version of Kubuntu. Kubuntu is a community distribution based on Ubuntu. There is even a own section dedicated for Kubuntu here on Userbase.
openSUSE
openSUSE no longer offers a live cd of its regular distribution. However, there are live cd's based on the regular distributions but giving you the very latest development versions of KDE software:
openSUSE Argon is based on openSuse Leap (the stable distribution) while openSuse Krypton is based on openSUSE Tumbleweed (the rolling distribution).
Fedora
A fast paced distro targeting users who want the latest and greatest available in the world of FOSS. Fedora KDE usually has the latest stable version of KDE in the repositories, and beta versions are usually shipped via supported extra repositories.
Fedora Kinoite
Fedora Kinoite is an immutable desktop operating system aimed at good support for container-focused workflows.
Mageia
Mageia is a community based distribution. It is a fork of Mandriva.
Netrunner
Netrunner is based on Kubuntu with it main focus on KDE, and aims to be complete operating system for both beginners and experts.
KaOS
KaOS is a "rolling release" distribution focused on KDE.
PCLinuxOS
Based on Mandrake (now known as Mandriva).
SuperX
An Indian project, SuperX is based on Ubuntu. From the project site: SuperX uses a tweaked version of KDE and is aimed towards beginners, casual users and business looking for a well supported user-friendly Linux OS.
ROSA
ROSA, a Russian company, offers their enterprise solution ROSA Marathon 2012 for download. The new ROSA Desktop.Fresh edition is aimed at regular desktop users.
Pisi Linux
Pisi Linux is Turkish project building on the original Pardus project. Pisi Linux is a community project.
OpenMandriva Lx
OpenMandriva Lx aims to be easy to get started with but also cater to the advanced user. OpenMandriva is a community project.
Porteus
Designed to run from a USB flash drive, Porteus is small and fast. Porteus is a community project based on Slackware.
Neptune
Another KDE-only distribution based on Debian.
MX Linux
Starting with release 19.2, which was released on August 15, 2020 MX Linux is also available with KDE Plasma. MX Linux is a cooperative venture between the antiX and former MEPIS communities using best tools and talents from each distro. It is a midweight OS designed to combine an elegant and efficient desktop with simple configuration, high stability, solid performance and medium-sized footprint. On MX Linux systemd is not used by default. However it can be enabled, if you prefer to use it.[22]
Nitrux
Based on Debian, Nitrux offers an up-to-date Plasma desktop, showcases the Maui apps, and emphasizes AppImages to manage end-user software. Nitrux is also available in a version based on the Linux Libre kernel.
New Live CDs and DVDs are becoming available all the time. If you've heard of a distro and think you'd like to try it, do an Internet search for it. You may well find that a Live CD is available.
There are KDE Mailing Lists for almost every interest. Here are some of them.
General Help Lists
- kde-announce - announcements of new KDE SC releases, security announcements, and notification of new KDE applications (very low traffic). It is highly recommended that you subscribe to this list in addition to your choice of help lists. [subscribe to kde-announce] [archive of kde-announce]
- kde-cvs-announce - a read-only, low-traffic list for announcing KDE SC milestones, tagging and release reminders. All people with a KDE commit account are automatically subscribed to this list and there is no way to unsubscribe without also giving up your KDE commit account. Unsubscribe requests may be silently ignored.
- kde - for users with questions strictly about KDE software. [subscribe to kde] [archive of kde]
- kde-linux - for users with questions about KDE software and/or Linux. [subscribe to kde-linux] [archive of kde-linux]
- kde-solaris - for users with questions about running KDE software on Sun Solaris [subscribe to kde-solaris] [archive of kde-solaris]
- kde-freebsd - for KDE users with questions about running KDE software on FreeBSD [subscribe to kde-freebsd] [archive of kde-freebsd]
- kde-windows - for KDE users with questions about running KDE software on Windows [subscribe to kde-windows] [archive of kde-windows]
- kde-nonlinux - for users with questions about running KDE software on other non-Linux systems such as *BSD, AIX, and Tru64. [subscribe to kde-nonlinux] [archive of kde-nonlinux]
Lists Dedicated to Applications
We list kdepim-users first because many KDE users depend on KMail to communicate with Mailing Lists. Apart from that, applications are listed alphabetically. You should also check pages dedicated to applications, where more addresses may be found.
- kdepim-users - for users of the KDE PIM applications (Kontact, KAddressBook, KMail, KOrganizer, KNode, ...) [subscribe to kdepim-users] [archive of kdepim-users]
- amarok - for users and developers interested in Amarok [subscribe to amarok] [archive of amarok]
- digiKam-users - digiKam - Digital Photo Management for the masses [subscribe to digiKam-users] [archive of digiKam-users]
- kexi - users interested in the Kexi database application [subscribe to kexi] [archive of kexi]
- koffice- for users of the koffice suite (kword, karbon, krita, kivio etc...) [subscribe to koffice] [archive of koffice]
- quanta - for users interested in the Quanta web development application [subscribe to quanta] [archive of quanta]
To Subscribe: Either use the above links and use the mailman interface, or send a mail to list-name-request@kde.org with subscribe your-email-address in the subject of the message. Please write your real email address instead of the plain your-email-address words, and the name of the list instead of the list-name words. Leave the body of the message empty. Do not include a signature or other stuff which might confuse the mail server which processes your request.
To Unsubscribe: Either use the above links and use the mailman interface, or send a mail to list-name-request@kde.org with unsubscribe your-email-address in the subject of the message. Please replace your-email-address with the email address you did use for the subscription, and list-name with the name of the list you subscribed to. Leave the body of the message empty. Do not include a signature or other stuff which might confuse the mail server which processes your request.
Notes: Please do not use HTML to send your request because it makes it difficult for our mail server to process your request. If the subscription address is identical to the address you are posting from you may omit the address in the subject line.
Contact addresses for developers can be found in the documentation of their individual applications.
Disclaimer
The KDE Community consists of a loose affiliation of developers, writers, translators, artists and other contributors from around the world. Views expressed on the mailing lists are, unless explicitly stated otherwise, the views of the poster only, do not reflect the views of the KDE Community and may or may not reflect the views of other KDE contributors.
This list is only a partial list of all the mailing lists for KDE software. A complete list can be found on the mailman server.
Understanding sound
In order to understand KDE sound, you have to understand Linux sound (this chapter assumes you are running your KDE on Linux). There are two types of sound systems that run on Linux: ALSA and OSS. Both provide their own sound card drivers. ALSA only runs on Linux, OSS runs on many UNIX systems. ALSA allows several applications to access the sound card at the same time, OSS does not. OSS provides a device for sound output. This device can only be accessed by one application at a time. To decrease confusion, ALSA emulates OSS and also provides a device as interface to the sound card. As well ALSA as OSS calls the device for the sound card /dev/dsp usually. PulseAudio, in some distros, provides another layer above these. Its job is to handle multiple streams, so that, for instance, you can receive a message notification at the same time as listening to music.
Usual sound problems are
- You cannot play sound because you are using an application that tries to access the sound device /dev/dsp, but this device is already in use by another application.
- You cannot use the system-wide mixer kmix to adjust the volume of an application using the sound device /dev/dsp.
- Different applications play sound using different devices.
Solutions: There is no silver bullet solving all your sound problems. The solution depends on the application you use to play sound. As an example, you can use mplayer with ALSA and OSS. For more info, see mplayer's documentation by calling
mplayer -ao help
Here are some specific issues that you may meet.
KDE 4 uses the wrong sound device.
That is not an error, but a configuration issue. To tell KDE 4 which soundcard to use (or prefer if available), open and go to in the tab.
Devices from /etc/asound.conf or ~/.asoundrc are not listed.
Phonon uses a function introduced in ALSA 1.0.14 to find those devices. To make this function list your entry you need to add a name hint. E.g.
hint {
     show on
     description "Name to display for the device"
 }
Here is a complete example that adds a new volume control named Phonon to your mixer:
pcm.softvolPhonon {
     type softvol
     slave.pcm "default:CARD=0"
     control {
         name "Phonon"
         card 0
     }
     min_dB -51.0
     max_dB 0.0
     resolution 100
     hint {
         show on
         description "My Soundcard with extra Volume Control"
     }
 }
After an update, PulseAudio gives you very low volume
PulseAudio has a 'normaliser' function which can cause this. To turn it off, set flat-volumes = no in /etc/pulse/daemon.conf
Low maximum volume with PulseAudio on KDE or pavucontrol shows more than 100% of volume, but KMix goes only up to 100%
Entering the following command
kwriteconfig -file kmixrc -group Global -key VolumeOverdrive -type bool true
and restart KMix, KMix goes to 153% of volume .
This is the same of edit $HOME/.kde/share/config/kmixrc and add:
[Global]
    VolumeOverdrive=true
References: bug #297959, bug #309597, RHB#704839.
Can't mute event (system) sounds and other KMix strange problems
When KMix show strange bars, etc. or events sound bar doesn't work .
Now with KDE 4.10+, PulseAudio is enabled by user session and we can check that with the following command
ps -ef | grep pulseau
Example of output:
sergio 1880 1 0 12:15 ? 00:04:01 /usr/bin/pulseaudio --start --log-target=syslog
Entering the following commands
killall kmix
rm -rf .pulse/
rm -rf .pulse-cookie
rm -rf .config/pulse/
kmix
fixed this issue. Old configurations of PulseAudio, can make this issue, if we create a new user, we won't have this issue .
You are using KDE 3 and you keep losing sound. Sometimes it works, sometimes it doesn't.
KDE 3.x uses the aRts sound system. In earlier versions there were a number of problems, but in recent years the only problem remaining seems to be that aRts hangs on to the sound system when it has finished with it. To cure this, use . Towards the bottom of the tab there is a setting for Set this to 1 second.
You have multimedia keys but KDE doesn't recognise them
This link has a clear description of what one user did to make his Volume-up and Volume-down keys work.
You tried all of the above but it still doesn't work (Ubuntu variants only)
Try replacing your sound card. If you still don't hear sound, check out this Ubuntu Community page
You want to use an External Sound Card
See the External Sound Card page
If you are a system administrator who is rolling out new or managing existing KDE deployments in their organization, you should definitely look at the KDE System Administration section.
Getting Started
| Some common tasks explained | |
|
The Jargon File explains some of the words that you may be unfamiliar with. | |
| Creating keyboard shortcuts | |
| Open a console | |
| Access another computer's display | |
| Mouse pointer settings for large displays |
Localization Settings
| Change the language and the numeric, currency and time formats used by Plasma | |
| Entering "special characters" - characters that are not on your normal keyboard | |
| Input Method Panel Build a plasmoid for controlling input methods |
Plasma
| Plasma Tips & Tricks | |
| KRunner is an amazingly useful utility, launched either by Alt + F2, or by a right-click on the desktop, and selecting 'Run Command'. Now learn some of its uses | |
| Learn how to configure the Plasma panel | |
| Learn how to Create a look and feel package | |
| Using with small screens (eg. Netbooks) Discusses several issues where screen space is at a premium. | |
| Enabling Color Management in KWin. | |
| How to configure keyboard actions for specific keys. | |
| Learn how to Use Other Window Managers with Plasma. | |
| How to manually enable Transparency And Blur. |
File Management
Web Browsers
| Create mouse gestures for use with any browser | |
| Browser configuration for Firefox. Learn how to make Firefox use the standard Open and Save dialog. |
Kontact
KOffice
These tutorials are obsolete and need to be updated for calligra. If you know about how to use calligra, please help.
| Basic Layout is a tutorial that creates a leaflet with various images and explaining text using KWord's frames technology. Several text frames and image frames will be created and positioned on the page. | |
| A Second Layout experiments with placing, grouping and moving images within a text area. | |
| A third Layout builds a page for a photo album. | |
| Using the Artistic Text Shape is a tutorial that shows how to get started with the artistic text shape that all KOffice applications provide. | |
| KWord Manual Tutorial on basic concepts of working in a frame-based environment, and detailed guides for all your WP needs. |
Multimedia
| How to work with MIDI synthesizing on Linux | |
| How to burn an audio cd using K3b |
Graphics
|
Photo Tutorial 1-1: Levels adjust This tutorial explains how to use Levels Adjust tool to quickly adjust brightness in your pictures using digiKam. | |
|
Photo Tutorial 1-2: Curves adjust This tutorial explains how to use the Curves Adjust tool to quickly fix differences in brightness in your pictures using digiKam. | |
|
Photo Tutorial 1-3: White Balance This tutorial explains how to use the White Balance tool to quickly fix levels of white in ambient lighting using digiKam. | |
|
Photo Tutorial 1-4: Brightness/Contrast/Gamma + Hue/Saturation/Lightness This tutorial explains how to adjust several aspects of your picture more thoroughly using digiKam. | |
|
Photo KDE Tutorial 1-5: Perspective Adjustment This tutorial explains how to correct the position and perspective of your pictures using digiKam. | |
|
An impressive amount of digiKam tutorials are hosted in userbase. |
Klipper
| How to search in phone books using Klipper |
Marble
KDEConnect
| Compilation of useful commands for KDE Connect |
Development
|
Build your first KDE C++ Application with KDevelop on Kubuntu | |
Advanced
| Modify your system defaults | |
| Using a single database for KDE programs | |
| Create your own mouse cursor theme |
Plasma is one of the key technologies of KDE 4 (also known as the "Pillars of KDE"), and one of the most visible to users. As Plasma treats the user interface differently than a traditional desktop, there may be confusion as to what Plasma is, what it does, and how to perform common tasks.
This document attempts to address these problems by providing answers to the most common questions.

General Questions
What does Plasma do?
Plasma provides the desktop interface for KDE 4, including the application launcher (start menu), the desktop and the desktop panel (often referred to simply as the task bar). However Plasma is more than just this familiar collection of utilities, it is a common framework for creating integrated interfaces. It is flexible enough to provide interfaces for mobile devices, media centres and desktop computers; to support the traditional desktop metaphor as well as well as designs that haven't yet been imagined.
What is wrong with the current desktop technology?
Today's desktops are static. Typically they are tied to a folder in which one can find icons (application launchers), or user-placed documents and folders. Along with pictures and images as backgrounds, the current desktop doesn't go any further, or work for the user. Plasma takes a different approach, engaging the user by creating a dynamic and highly customizable environment.
I don't think it's such a good idea...
With Plasma, you can let your desktop (and accompanying support elements) act like it always did. You can have a task bar, a background image, shortcuts, etc. If you want to, however, you can use tools provided by Plasma to take your experience further, letting your desktop take shape based on what you want and need.
How does Plasma work?
Plasma's components are widgets called Plasmoids. Plasmoids can take on a variety of functions, ranging from displaying your desktop and associated wallpaper, showing your laptop's battery level, displaying your plugged in devices, and drawing the taskbar: basically, they are small applications that live on the desktop. Plasmoids can be grouped together in "containers" called containments. On a default desktop, there are two main elements: the Panel and the desktop itself. Both are containments in the Plasma sense.
It doesn't sound too new... other operating systems have done that.
The key difference here is that plasmoids can interact together. You want a better view of your laptop battery in order to find out when you are running low? You just drag it away from the taskbar and put it on the desktop. Also, applets can be resized and rotated at will, thanks to the use of Scalable Vector Graphics (SVGs). As you can see, the desktop not only interacts with you, as the user, but also with itself in new and interesting ways. You are now able to control how your workspace behaves and what it displays, in a visually pleasing and user-friendly manner. Since Plasma is the sum of its plasmoids, every element, even the desktop itself, is a widget. This allows you to move your desktop anywhere with respect to the windows (back and forward). It is no longer rooted behind everything and becomes instead another element of real interaction.
Kicker and Kdesktop were working fine in KDE 3! Why did you have to change that?
Especially regarding kicker, there was the important issue of maintainability. The code was in place since the KDE 2 days, and it was difficult to add new features without breaking others. In the end, to proceed forward the only viable option was to start anew from scratch.
I can't find my favorite <insert feature here>!
Don't forget that Plasma is still in heavy development and that KDE 3 was an extremely polished codebase: it took seven years to get to that, while Plasma is much younger. With time, the Plasma developers plan on reintroducing features that are missing and fix regressions. As KDE progresses through the KDE4 cycle, Plasma will improve with it.
Why on earth did you decide to change the way the desktop operates?
The idea of a Desktop folder is fundamentally a broken concept. It assumes that everything you will access there resides on a single physical directory on your disk. It may be convenient, but at the same time it greatly limits what you can do. For example, you can't use custom layouts for different desktops, as everything would be read from the directory. Also, quite often a desktop structured like that becomes a dumping ground for files and folders, without any other function.
I heard there are no more icons on the desktop in KDE 4.1...
That is not entirely correct. You can have icons and launchers (shortcuts) by dragging them from Dolphin or the K-menu. What has changed is that the desktop will no longer display the contents of the Desktop folder. However, you can show an arbitrary number of folders (local or remote) on your desktop view, instead of being forced to display only the contents of the "Desktop" folder. To do so, a new applet has been introduced, the Folder View applet.
What is the Folder View applet?
The Folder View applet, like its name says, is used to display items (folders, files) from a directory. Such a directory can be either a local one residing on your computer, but also a remote FTP, SSH, or SMB share. In the future, it will even contain results from Nepomuk searches and tagging.
You can choose to view either all files, or filter for specific patterns using regular expressions (there is discussion on using filters based on file types for future versions of KDE).
This applet also supports basic file management properties (moving, copying, cutting and pasting for example), and you can have as many as you want on your desktop.
In KDE 4.2 you will be also able to use the Folder View as your desktop, replicating the "old style" paradigm.
During the development of KDE 4.0, different approaches for a K menu (application launcher) were tried. Some projects, like Raptor, were ambitious but there was no way they could be completed on time. At the time, one developer ported SUSE Linux's application launcher (Kickoff) to the new KDE architecture. As it was the most ready and feature complete (not to mention the product of usability testing) it was chosen to be the default menu. If you don't like it, the traditional K-menu is available as well - right-click onto the K Menu to find an option "traditional style". Also, some alternative menu systems have been announced (Lancelot, Raptor), but at the time of writing they're still in development.
What is KRunner?
KRunner is the versatile mini-command line you can activate by pushing "Alt-F2" or by selecting "Run Command" from the desktop contextual menu. It can search for applications, bookmarks, even sessions basing on your input, show system activity and even do simple arithmetic calculations.
KRunner's functionality can be extended through the use of plugins ("runners").
What are the "cashews"?
What is commonly referred as "cashew" is the Plasma logo you can find on the default desktop, in the upper right corner, and on right hand side of the panel. By clicking on them, you can access other configuration options, such as panel configuration and the Zooming User Interface (ZUI). Some of these, like the panel cashew, only appear if the widgets aren't locked (see below).
Please provide an option to disable the upper right cashew.
Although putting an option to disable the cashew for desktops sounds reasonable, from a coding point of view it would introduce unnecessary complexity and would break the design. What has been suggested is, since the desktop itself (a containment) is handled by plugins, to write a plugin that would draw the desktop without the cashew itself. Currently some work ("blank desktop" plugin) is already present in KDE SVN. With containment type switching expected by KDE 4.2, it is not unreasonable to see alternative desktop types developed by then.
What is the Zooming User Interface (ZUI)?
The Zooming User Interface, or ZUI, is another component of Plasma. It enables the user to group different groups of plasmoids together, and to quickly switch between one and another using a zoom-and-pan approach. Notice that at the time, although significant improvements have been made in KDE 4.1, this feature is still under heavy development and may be fully functional only with later KDE 4.x releases.
How does the ZUI work?
Suppose you have three groups of plasmoids (such as widgets, application launchers, etc.) which you want arranged in specific combinations depending on what you want to do. You first group them according to your tastes, then you can switch between them by zooming out (getting a preview of all the groups) and then back in on the specific group you want to use. Notice that it is different from traditional X11 virtual desktop switching, as there is a higher degree of flexibility by using this approach, as the groups can be totally different from each other.
A very good example of this behavior is shown by this image courtesy of Half-Left from #kde on freenode.
Why can't I use the ZUI from Dashboard view?
That feature is a work-in-progress. We're looking into it, but can't yet say how and when it will be finished.
On multi screen setups, the ZUI operates on all screens, the Dashboard just on one. Why is that?
The workflows are different. When zooming out, the user wants to get an overview, therefore activities on all screens are zoomed out. Whereas when using the Dashboard, the user usually wants to access specific functionality and might not want to interrupt his or her workflow on other activities.
Configuration
Can I place icons on the desktop?
Of course you can. Dragging an icon from Dolphin or Konqueror to the desktop will work. Notice that dragging on the desktop will not actually create a file there, just a link to it.
To display the contents of your Desktop folder, or any other folder, use the Folder View applet. Just drag a folder on the desktop and choose to create a Folder View.
I am using two screens, and I used to have kicker over the two displays. Can I do that with Plasma?
No. The reason is that having a panel over two displays adds a great deal of complexity, especially when the two displays have different resolution. As a result of this added complexity, this feature would not be guaranteed to work in all cases. As a result it was not implemented.
How can I add applets to the panel?
Method 1: Open the Add Widgets dialog in the Plasma cashew (upper right corner of the screen) then select the widget of your liking and drag it directly (don't double click or use the Add Widget button) to the panel.
Method 2: Drag an applet from the desktop to the panel. This is also shown briefly on a video on Lydia Pintscher's blog.
Can I move the applets on the panel?
Just before KDE 4.1 RC1, a change has been introduced in Plasma to allow movement of the applets on the panel. To do so, open up the panel controller (by clicking on the cashew or by right clicking on the panel and selecting "Panel Settings") and hover the mouse cursor over the applets. Its shape will turn into four arrows, and you'll be able to rearrange the applets as you wish.
Lydia Pintscher's blog has a video showing movement in action. Another one is available on Aikurn's blog. Aikurn has also made an annotated video.
How do I move, rotate or resize an applet on the desktop?
First of all, hover over the applet you want to resize. The applet handle will appear.
The applet handle takes care of resize, rotate and move.
- To move an applet: Click on the handle, then drag the applet around.
- To rotate an applet: Click on the curved arrow then drag to rotate
- To resize an applet: Click on the square icon and then drag to resize the applet. You can constrain the resize operation to the applet's aspect ratio by holding down the Ctrl key.
How can I change the height and the size of the panel?
Click on the panel cashew (the small icon on the right side of the panel), then click and drag, adjusting panel size and position to your choosing. Click again on the cashew (or on the red X) to close the panel configuration interface.
This video shows how to configure and move a panel.
How can I remove a panel?
Click on the panel cashew and select "Remove this Panel". Alternatively you can right click on the panel itself and choose "Remove this Panel".
I heard that you can use OS X's widgets with Plasma. Is this true?
Yes, Plasma can use OS X's widgets, but only the HTML ones.
You can bring all the widgets to the front by pushing Ctrl-F12, which will bring the Plasma Dashboard to the front.
How can I lock the positions of the widgets?
Method 1: Right click on an empty area of the desktop and select "Lock Widgets" from the contextual menu. If you want to reverse that, right click again and select "Unlock Widgets". The same option is available if you right-click on the panel.
Method 2: Select "Lock Widgets" from the Plasma cashew on the upper right corner or from the panel controller.
How do I remove widgets?
If they're on the panel, right click on the widget and select "Remove this...". If the widgets are on the desktop, you have different options:
- If you hover over them, clicking the red X on the applet handle will remove them;
- If you use the Add Widget dialog, you can click on the minus symbol icon next to the widget name to remove it.
Right click on the menu icon and select "Switch to Classic Menu Style" (if using Kickoff) or "Switch to Kickoff Menu Style" (if using the classic menu). Alternatively, you can add either type of menu using the Add Applets dialog.
Aikurn has a video showing how to switch between the different styles.
How can I add/remove an activity?
Adding an activity: Zoom out from your current desktop view by clicking on the desktop view cashew (the icon in the top right corner) and selecting Zoom out. Clicking again on the cashew will show a new button, "Add Activity". Click on it to create a new desktop view.
Note: The "Add Activity", "Zoom in", and "Zoom Out" buttons are a little buggy in 4.1.0 and may disappear in certain situations. restarting plasma will bring them back.
This video shows how to add activities and move between them.
Removing an activity: Zoom out from your current desktop view, make sure it's not the current activity (otherwise select another one), then right-click on the activity you want to remove and choose the appropriate option.
Note: You must Unlock Widgets (Ctrl+L) before you can remove any activities.
Are there any keyboard shortcuts for Plasma?
In addition to the mouse, there is a number of shortcuts available:
- Add widgets: Ctrl-A
- Lock widgets: Ctrl-L
- Zoom out: Ctrl- -
- Zoom in: Ctrl- = or Ctrl-+
- Next applet: Ctrl-N
- Previous applet: Ctrl-P
- Add activity: Shift-Ctrl-A
- Next activity: Shift-Ctrl-N
- Previous activity: Shift-Ctrl-P
- Applet settings: Ctrl-S
- Containment settings: Shift-Ctrl-S
- Remove applet: Ctrl-R
Unfortunately, changing these shortcuts is not possible in KDE 4.1, but it is planned for KDE 4.2.
Can the Dashboard show widgets other than those on my desktop?
As of KDE 4.1.0 it can, but currently (as of 4.2) there is no user interface available to configure this feature. An explanation of how to configure this manually can be found here.
Theming
I don't like the default look of the panel and other Plasma components. Can I change that?
Yes, the ability to change the look of Plasma was planned since the beginning. Plasma can use "themes", which are essentially a number of SVG images and files specifying the colors, to change its appearance. Some themes have already appeared on popular sites like kde-look.org.
Is there a GUI option available to change the theme?
Yes. Right click on your current desktop, select "Desktop Settings" and you will find an option to change the theme in the dialog that will appear. You can also download new themes directly from there.
Step by step instructions (including screenshots) are available on Aikurn's blog.
Troubleshooting
My panel is gone, how do I get it back?
kquitapp plasma; rm $KDEHOME/share/config/plasma-appletsrc; plasma
This deletes your plasma settings, so you'll get the default configuration back. The panel-vanishing-on-crash issue was fixed just after 4.0.0's release. If running all the 3 commands at once doesn't work, try typing them in manually and wait a few seconds before running the next command.
(Note that the $KDEHOME environment variable may not be set. Try ~/.kde (Fedora, Kubuntu Intrepid, Debian, upstream default) or ~/.kde4 (OpenSUSE, Kubuntu Hardy and several others).)
Some GTK+ applications show wrong system tray icon sizes.
That is unfortunately a problem in the Freedesktop.org system tray specification, which does not define the sizes for system tray icons properly.
I experience extreme slowness when using Plasma with the NVIDIA binary driver.
This is NVIDIA's fault entirely, due to their driver not supporting correctly the XRender X11 extension, and it also affects other parts of KDE such as Konsole. See this blog entry on how to report issues upstream to NVIDIA. This page contains a few suggestions on how to improve performance until an updated driver is released.
NVIDIA has recently released a beta driver (version 177.xx) that may improve performance with Plasma and KDE4 in general.
Folder View and other plasmoids look badly rendered with an ATI video card and the open source radeon driver.
To work around this issue, you have to change the 2D acceleration method from XAA (X Acceleration Architecture) to the newer EXA. As this involves editing your xorg.conf file, bear in mind that such a modification may damage your system. Do it at your own risk.
To make the switch, edit your xorg.conf file (make a backup just in case) and locate the Device section for your graphics card. Add the line
Option "AccelMethod" "EXA"
before the "EndSection" line. If there is already a line with AccelMethod, change it from XAA to EXA. Save the file and restart the X server.
Notice that EXA is still marked as unstable, and that some other applications such as some KDE3 programs may render incorrectly.
Hints & Tips
Some alternatives for those who like a sparse desktop -
1 - you can remove the panel entirely. Open applications would be available using the ALT+TAB cycling.
2 - Remove the panel and add a short one at the top of the screen, to hold only the task manager
3 - Create a panel containing the task manager and use autohide.
Glossary
See the Glossary page.
Thanks
- Daniel Laidig & Simon St.James - thanks for the umeet IRC logs!
- Marco Martin - thanks for the information on panels!
- Sebas - thanks for letting me use information from your blog entries!
- Half-Left - great example of ZUI usage!
- Aikurn - Excellent videos!
- Marcelo Magno T. Sales - for giving panel Tips on a mailing list
Contributors
- Luca Beltrame - current mantainer
- Joseph M. Gaffney
- Chani
- Dipesh
- Maninalift
- All the anyonymous contributors
| Back to the Introduction page |
Note: the information presented here covers Plasma in the KDE 4.0.x versions.
Introduction
Plasma is one of the key technologies of KDE 4 (also known as the "Pillars of KDE"), and one of the most visible to users. As Plasma treats the user interface differently than a traditional desktop, there may be confusion on what Plasma is, what it does, and how to perform common tasks.
This document attempts to address these problems by providing answers to the most common questions.
General Questions
What does Plasma do?
Plasma is the component that is "in charge" of the desktop interface; the desktop, panel (often referred simply as the task bar), and related elements. However, Plasma goes a bit further than these common pieces to the interface puzzle. The "Desktop" has not changed much since originally conceived; it typically consists of shortcuts, a panel, and icons for currently running applications. Plasma aims to change that, incorporating semantic application elements, and bringing cooperating technologies to the user's fingertips in a way that is visually appealing while easing work flow.
What is wrong with the current desktop technology?
Today's desktops are static. Typically they are tied to a folder in which one can find icons (application launchers), or user-placed documents and folders. Along with pictures and images as backgrounds, the current desktop doesn't go any further, or work for the user. Plasma takes a different approach, engaging the user by creating a dynamic and highly customizable environment.
I don't think it's such a good idea...
With Plasma, you can let your desktop (and accompanying support elements) act like it always did. You can have a task bar, a background image, shortcuts, etc. If you want to, however, you can use tools provided by Plasma to take your experience further, letting your desktop take shape based on what you want and need.
How does Plasma work?
Plasma's components are widgets called Plasmoids. Plasmoids can take on a variety of functions, ranging from displaying your desktop and associated wallpaper, showing your laptop's battery level, displaying your plugged in devices, and drawing the taskbar. Widgets can be grouped together in "containers" called containments.
It doesn't sound too new... other operating systems have done that.
The key difference here is that plasmoids can interact together. You want a better view of your laptop battery in order to find out when you are running low? You just drag it away from the taskbar and put it on the desktop. Also, applets can be resized and rotated at will, thanks to the use of Scalable Vector Graphics (SVGs). As you can see, the desktop not only interacts with you, as the user, but also with itself in new and interesting ways. You are now able to control how your workspace behaves and what it displays, in a visually pleasing and user-friendly manner. Since Plasma is the sum of its plasmoids, every element, even the desktop itself, is a widget. This allows you to move your desktop anywhere with respect to the windows (back and forward). It is no longer rooted behind everything and becomes instead another element of real interaction.
Kicker and Kdesktop were working fine in KDE 3! Why did you have to change that?
Especially regarding kicker, there was the important issue of maintainability. The code was in place since the KDE 2 days, and it was difficult to add new features without breaking others. In the end, to proceed forward the only viable option was to start anew from scratch.
I can't find my favorite <insert feature here>!
Don't forget that Plasma is still in its infancy (it's brand new, after all) and that KDE 3 was an extremely polished codebase: it took seven years to get to that, while Plasma had about 18 months to get to its current status. With time, the Plasma developers plan on reintroducing features that are missing and fix regressions. As KDE progresses through the KDE4 cycle, Plasma will improve with it.
Why on earth did you decide to change the way the desktop operates?
The idea of a Desktop folder is fundamentally a broken concept. It assumes that everything you will access there resides on a single physical directory on your disk. It may be convenient, but at the same time it greatly limits what you can do. For example, you can't use custom layouts for different desktops, as everything would be read from the directory. Also, quite often a desktop structured like that becomes a dumping ground for files and folders, without any other function. That said, you can have icons on the desktop in Plasma.
During the development of KDE 4.0, different approaches for a K menu (application launcher) were tried. Some projects, like Raptor, were ambitious but there was no way they could be completed on time. At the time, one developer ported SUSE Linux's application launcher (Kickoff) to the new KDE architecture. As it was the most ready and feature complete (not to mention the product of usability testing) it was chosen to be the default menu in KDE 4.0. However, this does not mean that there aren't alternatives: projects such as the aforementioned Raptor or Lancelot are being actively developed. There is also a "traditional" K-menu available.
What is the Zooming User Interface (ZUI)?
The Zooming User Interface, or ZUI, is another component of Plasma. It enables the user to group different groups of plasmoids together, and to quickly switch between one and another using a zoom-and-pan approach. Notice that at the time of writing this feature is still under heavy development and may be fully functional only with later KDE 4.x releases.
How does the ZUI work?
Suppose you have three groups of plasmoids (such as widgets, application launchers, etc.) which you want arranged in specific combinations depending on what you want to do. You first group them according to your tastes, then you can switch between them by zooming out (getting a preview of all the groups) and then back in on the specific group you want to use. Notice that it is different from traditional X11 virtual desktop switching, as there is a higher degree of flexibility by using this approach, as the groups can be totally different from each other.
Configuration
Can I place icons on the desktop?
Of course you can. Dragging an icon from Dolphin or Konqueror to the desktop will work. There is also legacy support for the existing Desktop folders, which means that the contents of your existing Desktop folder will be automatically displayed.
I am using two screens, and I used to have kicker over the two displays. Can I do that with Plasma?
No. The reason is that having a panel over two displays adds a great deal of complexity, especially when the two displays have different resolution. As a result of this added complexity, this feature would not be guaranteed to work in all cases. As a result it was not implemented.
How can I add applets to the panel?
Open the Add Widgets dialog in the Plasma toolbox (upper right corner of the screen) then select the widget of your liking and drag it directly (don't double click or use the Add Widget button) to the panel. It should embed gracefully. If it doesn't, there is probably some bug in the widget itself.
I heard that you can use OS X's widgets with Plasma. Is this true?
There is some code in place already, however as widgets rely on WebKit, it won't be available until Qt 4.4 (which incorporates it), and therefore unlikely before KDE 4.1.
You can bring all the widgets to the front by pushing Ctrl-F12, which will bring the Plasma Dashboard to the front.
How can I lock the positions of the widgets?
Right click on an empty area of the desktop and select "Lock Widgets" from the contextual menu. If you want to reverse that, right click again and select "Unlock Widgets".
How do I remove widgets?
If they're on the panel, right click on the widget and select "Remove this...". If the widgets are on the desktop, you have different options:
- If you hover over them, clicking the red X will remove them;
- If you use the Add Widget dialog, you can click on the minus symbol icon next to the widget name to remove it.
How can I change the height of the panel?
From KDE 4.0.3 onwards, you just need to right-click on the Panel, select "Panel Settings" and then choose whatever size you would like to have.
Theming
I don't like the default look of the panel and other Plasma components. Can I change that?
Yes, the ability to change the look of Plasma was planned since the beginning. Plasma can use "themes", which are essentially a number of SVG images and files specifying the colors, to change its appearance. Some themes have already appeared on popular sites like kde-look.org.
Is there a GUI option available to change the theme?
Not yet, but it is planned for the future.
I still want to change the theme! What do I do?
First of all, obtain a theme (kde-look.org is a good place to look). The second, important point is that Plasma must not be running when you make the modifications or they will be overwritten. So you must quit it before with:
kquitapp plasma
Notice that doing so will also kill the desktop until Plasma is restarted, so keep a terminal window (for example Konsole) open while you do the editing in order to restart Plasma after you're done. Then, create the $KDEHOME/share/apps/desktoptheme (where $KDEHOME is the name of your .kde or .kde4 directory, depending on your installation) directory and unpack the theme there. After that is done, edit $KDEHOME/share/config/plasmarc (make a backup copy just in case) and locate the section named "[Theme]". Change "default" to the name of your downloaded theme (see instructions from the theme's author) and then start Plasma:
plasma
Troubleshooting
My panel is gone, how do I get it back?
kquitapp plasma; rm $KDEHOME/share/config/plasma-appletsrc; plasma
This deletes your plasma settings, so you'll get the default configuration back. The panel-vanishing-on-crash issue was fixed just after 4.0.0's release. If running all the 3 commands at once doesn't work, try typing them in manually and wait a few seconds before running the next command.
(Note that the $KDEHOME environment variable may not be set. Try ~/.kde (Fedora, Kubuntu Intrepid, Debian, upstream default) or ~/.kde4 (OpenSUSE, Kubuntu Hardy and several others).)
Some GTK+ applications (such as the IM client Pidgin) do not behave well in Plasma.
That is unfortunately a bug in the GTK+ graphics toolkit which is exposed by the way Plasma operates. A bug report has been opened in the GTK+ bug tracker. Recently, a patch for Plasma (KDE 4.0.0) has been posted in KDE bug tracker and it has also been incorporated in the 4.0.x branch.
I use the NVIDIA binary driver on Linux and scrolling is really slow! Is it a fault of Plasma?
No, it is a bug in the NVIDIA binary driver. Update the driver to version 169.07 or newer and the problem should be solved.
Glossary
- Containment: A container for different plasmoids. The desktop and the panel are examples of containments.
- Panel: The place where the K-menu, taskbar, system tray and other componenents reside. Often called taskbar.
- Plasmoid: A component of Plasma. Often referred as widget, or applet.
Thanks
Daniel Laidig & Simon St.James - thanks for the umeet IRC logs!
Contributors
- Luca Beltrame
- Joseph M. Gaffney
- Chani
- Dipesh
- All the anyonymous contributors
- Tools
Applications to make your life easier
Viewing documents
When you need a Command Line Interface
What are the differences between those two files?
- Kompare
- Pradeeptobhattacharya
- Preferences-system-power-management.png
- Plasmagik.png
- Start-here.png
- System-help.png
- What is KDE

Greetings stranger! Welcome to the wonderful world of KDE. KDE is a worldwide project dedicated to bring the best software to you - for free. Read on and find out what we can offer you and what you can do for us.
An International Community
KDE is more than just software. It is a community made up of programmers, translators, contributors, artists, writers, distributors, and users from all over the world. Our international team is committed to creating the best free software for the desktop and mobile. And not only contributors, but users and fans of KDE software can be found throughout the entire globe, giving help to other users, spreading the news, or just simply enjoying the experience.
A New, Shiny Workspace
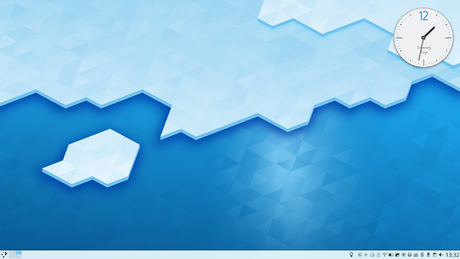
KDE started life as a desktop environment over 20 years ago. As activities have grown, KDE is now an international team that creates Free and Open Source Software.
What this means in practice is that the many programs from the KDE community work together to give you the best possible computing experience. Does that mean you can't use a KDE application if you don't use the KDE desktop? Not at all. With the help of one or two extra libraries the applications can be used on almost any Linux desktop. What's more, increasingly that software runs on a variety of other platforms. You can now find many KDE applications running under Windows and Mac OS or other devices such as smartphones and tablets.
There are a variety of programs to suit any user's needs, from simple yet powerful text editors, to rocking audio and video players, to the most sophisticated integrated development environment. Plus, KDE applications follow a consistent look and feel across the desktop, giving you a comfortable and familiar experience when using any KDE program.
KDE software has several other features that makes it a top-class working environment, such as:
- A beautiful and modern desktop
- A flexible and configurable system, letting you customize applications without too much editing of text files
- Network transparency allows you to easily access files on other networks and computers as if they were on your own computer
- A software ecosystem of hundreds, even thousands, of programs
- Availability in over 60 languages
Tons of Free Software
KDE software isn't just any software. It is Free Software. As a user, this is an important fact, even without getting deep into technical or legal considerations. Why? Because as free software, you are free to use KDE wherever you want and in whatever manner you want, no activation keys and no installation limits. And you're free to share it with others as well! So not only do you have in your hands great and powerful software, but you can also give your family and friends the opportunity to enjoy it, too.

Components
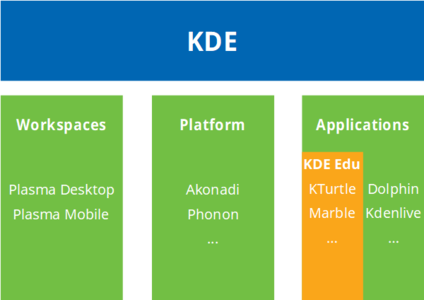
KDE is a huge community of people who create software. We all have in common that we're building upon an infrastructure we have developed over the years: the KDE Platform.
- the Plasma workspace - the user interface element, customized for different devices such as PCs, notebooks, or mobile devices
- the KDE Frameworks - most KDE applications are built with the help of a unified framework. Do you also want to write a killer app? The KDE Frameworks can help you with that!
- KDE Applications - software programs that are written to utilize the platform
More information can be found on KDE TechBase
Getting KDE Software

If you are using Windows or Mac OS, a growing number of KDE apps such as Krita or Kdenlive are available for you to download and install. You'll find installers on their pages.
As of right now, some KDE software is for various reasons only on Linux, a free operating system that you can try right now. The community produces KDE neon, a downloadable Ubuntu Linux-based operating system which includes the newest version of KDE.
Helping KDE
KDE can only exist because thousands of dedicated contributors from around the world have given their time. You can help too! There is a task for everybody, and we are looking forward to see how you are going to make KDE better.
| Back to the Introduction page |
KRunner (launched with Alt-F2 or Alt-SPACE) is the launcher built into the Plasma desktop. While its basic function is to launch programs from a sort of mini-command-line, its functionality can be extended by "runners" to assist the user to accomplish a lot of tasks.
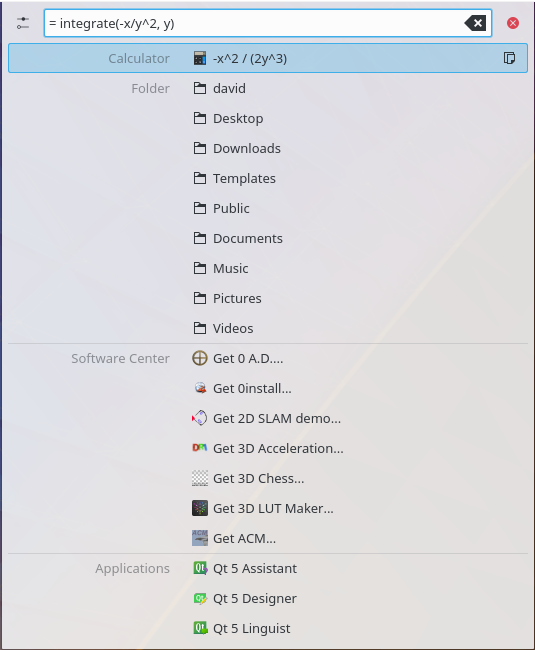
Features
This woefully incomplete list attempts to present some basic examples of KRunner use. Discover more by clicking on the '?' icon in KRunner.
Start and stop applications
(builtin plugin: Applications)
You can launch programs by simply typing the name of the application you want to launch - or even simpler: press the down-arrow key for list of most recently used programs you typed in beforehand.
You may type a single character and KRunner will start finding matches. Matches will be found to applications from your easily customizable applications menu (for that, right-click in menu).
Examples:
| Input | Output |
gwe |
(starts Gwenview) |

You can use KRunner to kill applications, too (builtin plugin: Terminate Applications) Type in the keyword kill followed by a process name and KRunner will provide options to close the application (SIGTERM) or forcibly quit it (SIGKILL). KRunner will match partial process names to running processes.
Note that the keyword kill can be changed in the "Terminate Applications" runner to avoid confusion with the shell command kill which accepts process IDs.
Direct installation
(builtin plugin: Software Center)
In case that you look for an application that has not been installed yet, KRunner will suggest a set of applications that match your search. In specific, since KRunner has been integrated with Plasma Software Center, Discover, will present you a list of applications, enabling you to proceed to direct installation.
Issue (shell) commands
(builtin plugin: Command Line)
In addition to applications listed in the applications menu, KRunner can also be used to run shell commands, including launching binaries. Note that when entering shell commands, KRunner will not accept partial commands or offer command auto completion.
Running a command like this brings up a wrench icon which offers additional options. You can choose to spawn a terminal and run the command there (this can be useful if your command produces text output that you want to read), or choose to run the program as a different user (by providing the username and password of that user).
Examples:
| Input | Output |
ls ~/Documents |
lists contents of ~/Documents (preferably in a terminal) |
cp ~/Documents/myFile ~/myFile |
copies myFile from ~/Documents to ~/ |
mplayer myMovie.mkv |
plays myMovie.mkv in mplayer |
Incidentally, if the command line is your thing, you may appreciate the built in integration to man pages. Simply type a command name preceded by a # or man:/ to open the man page formatted for easy readability in your browser.
Examples:
| Input | Output |
#ls |
opens the manual for ls in a browser |
man:/grep |
opens the manual for grep in a browser |
Browse websites
(builtin plugins: Bookmarks, Locations, Web Search Keywords)
You can simply start typing the URL of a website to open it in your default browser. You may even type in the name of a browser bookmark and KRunner will open it for you. If you have visited the website in the past, KRunner can fetch you results from your browser's history, too.
Examples:
| Input | Output |
myBookmark |
opens the bookmark in a browser |
kde.org |
opens the KDE homepage in a browser |
http://userbase.kde.org/ |
opens Userbase in a browser |
KRunner already knows your Web Shortcuts, found in Plasma System Settings, so you can directly start using them.
Examples:
| Input | Output |
gg:KDE |
searches Google for KDE |
wp:krunner |
searches Wikipedia for krunner |
KRunner also provides options to download files from the web using KGet by providing their URL.
Additional runners exist for fast searching on Wikipedia, Wikitravel and KDE Techbase.
Open files, folders and devices
(builtin plugin: Locations)
KRunner can also open files and directories on your local machine for you. If you want to browse remote machines, you can do that, too. Notice how KRunner uses kioslaves for ssh (fish:) and samba (smb:).
Examples:
| Input | Output |
file:/home/ |
opens file:///home/ (the Home directory) in Dolphin |
file:myMovie.mkv |
opens /home/myMovie.mkv |
fish:you@server.com |
opens fish:/you@server.com/ via fish (file over ssh) protocol |
smb:myWindowsBox |
opens smb:/myWindowsBox via Samba |
If you don't know the path to a file, simply type the name of the file. If the file is a recently opened document, KRunner will list it for you. If you have enabled "File Search" provided by Baloo daemon, you can also search your computer for the file by its indexed contents. KRunner will also open folders you've bookmarked in Dolphin (in your Places sidebar) if you type their name in. What's more, if you want to access devices on your system (both mounted and unmounted), you can do that, too. KRunner will even provide device-specific options.
Examples:
| Input | Output |
Home |
opens the Home directory in Dolphin |
myFlashDrive |
shows options to mount or open the contents of myFlashDrive |
Multitask with sessions, windows, desktops and activities
Several KDE applications allow you to save and load sessions. KRunner allows you to launch these sessions. You can either type in the name of the application or directly type in the name of the session. Runners exist for opening sessions saved in Kate, Konqueror, Konsole, etc.
KRunner is a multitasker's dream. If you have too many windows open, just type in the title of the window and switch directly to it. You can similarly type in the name of a virtual desktop and switch directly to it. If you roll with activities, switch activities by typing their name in. KRunner will find a match as soon as you type three characters in.
KRunner will even switch desktop sessions for you. Type in the keyword switch or new session to start a separate X session. You can switch back and forth between sessions by using the switch keyword.
Examples:
| Input | Output |
Desktop 1 |
switches the virtual desktop to Desktop 1 |
myWorkActivity |
switches the activity to myWorkActivity |
switch |
shows options to switch to an existing session or start a new one |
new session |
starts a new session |
Several plasma widgets can be launched as windowed applications. You can simply type the name of a widget and KRunner will launch a window for you.
Talk to people
Type in the name of a contact in your KAddressBook to get a list of options to contact them. Typing in an email address into KRunner will open a KMail composer window. You can also search through contacts in your Kopete contact list.
The addressbook and kopete runners don't seem to be working in SC 4.8.
Examples:
| Input | Output |
kde@mail.kde.org |
compose a mail to the KDE mailing list |
myContact |
show options to contact myContact |
Listen to some music
You can control any modern audio player such as Amarok using KRunner. You can use several keywords (all configurable) to play, pause or skip songs. Typing in the name of an artist, album or song that is in Amarok's library will let you either play immediately, play next (queue) or play at the end (append) of the current playlist. You can use keywords to increase or decrease the volume of the player, or even to mute or quit it.
Examples:
| Input | Output |
play song search |
plays a song immediately |
pause |
pauses Amarok or your designated music player |
next |
plays next song in playlist |
Be on time
You can get the current date or time by typing in the keywords date or time. Selecting the result will copy it to your clipboard so you can paste it elsewhere. The format of the date and time respects your system settings.
Examples:
| Input | Output |
date |
Today's date is ... |
time |
The current time is ... |

You can even get the date and time at another location by specifying the time zone or the city listed in the TZ database.
Examples:
| Input | Output |
time UTC |
The current time in UTC is ... |
time oslo |
The current time in Europe/Oslo is ... |
time kolkata |
The current time in Asia/Kolkata is ... |
There is a runner for interfacing with Korganizer and fetching events, but it doesn't seem to be working in SC 4.8.
Calculator
KRunner features a very versatile calculator that can be called by starting or ending a calculation with an = sign. In addition to basic arithmetic, you can call scientific functions like sqrt(), sin(), log(), etc. A list of the supported functions is here. Note that trigonometric functions like sin(), cos(), etc expect the angle in radians. KRunner understands pi in expressions.
Examples:
| Input | Output |
32*12 = |
384 |
= sqrt(4) + 32*sin(30*pi/180) |
18 |

KRunner also supports combinatorics functions, like perm() or comb().
Examples:
| Input | Output |
= perm(10,5) |
30240 |
= comb(10,5) |
252 |
KRunner can also handle symbolic mathematics and perform integration and differentiation on expressions
Examples:
| Input | Output |
= integrate( -x/y^2, y ) |
-x/y |
diff( log(x) ) = |
1/x |
You can also use KRunner to solve polynomial functions to find its roots.
Examples:
| Input | Output |
= solve( x^2 + 4*x - 21 = 0 ) |
[3, -7] |
KRunner intelligently handles units as part of the calculations. Try the following examples to see how.
Examples:
| Input | Output |
= 2.5 kg * 10 m/s^2 |
25 N |
220 V / 10 A = |
22 ohms |
Since KRunner understands most units, you can use it to convert them very quickly. Note that unit conversions don't require an = sign.
Examples:
| Input | Output |
30 F |
-1.11111 degrees C (°C), 273.039 K, ... |
27.8 km |
1.09449e+06 inches (in), 17.2742 miles (mi), ... |
5 gallons in liters |
18.9271 liters (l) |
KRunner knows currencies, too. Conversions between currencies is done by fetching the exchange rate from the European Central Bank website.
Examples:
| Input | Output |
1 dollar |
0.657002 pounds sterling (GBP), 0.742501 euros (EUR), ... |
125 euros |
110.606 pounds sterling (GBP), 15,785 yen (JPY), ... |
30 JPY in RUB |
9.40731 rubles (RUB) |
Go places
If you have bookmarked locations in the Marble (in OpenStreetMap), KRunner can open the map directly.
Spell checking and special characters
KRunner can tell you whether your spelling is correct and/or suggest corrections. The default keyword to start the spellchecker is spell and can be configured.
Examples:
| Input | Output |
spell linux |
Suggested words: Linux, lynx, ... |
KRunner can also allow you to pick special characters if you can specify the hexadecimal unicode for the character, preceded by a # sign.
Examples:
| Input | Output |
#03b2 |
β |
#00b1 |
± |
Manage your computer
You can directly open system settings control modules from KRunner. Often, if you want to change something, just type associated terms and KRunner will find the control module with the settings you want.
Examples:
| Input | Output |
keyboard |
opens the Keyboard settings control module |
fonts |
opens the fonts settings control module |
password |
opens the Password & User account control module |
KRunner can also be used to adjust the screen brightness by using the keywords "screen brightness". You can specify a percentage or just turn the brightness halfway or fully down. Additionally, keywords exist to suspend, logout, shutdown or restart your machine.
Examples:
| Input | Output |
screen brightness 100 |
increases screen brightness to 100% |
sleep |
suspends computer to RAM |
lock |
locks the screen |
restart |
restarts computer |
shutdown |
shutdowns computer |
Usage
Open KRunner
The easiest way to open KRunner is to trigger its global shortcut (Alt+Space or Alt+F2, by default). In some activities (e.g. Desktop), you can simply click on the desktop and start typing. In others (e.g. Search and Launch), KRunner may be built into the activity itself.
You can also right-click on your plasma workspace and select or just simply launch it from the commandline by typing krunner.
Use KRunner
Use Tab/Ctrl+j or Shift+Tab/Ctrl+k to navigate up and down results. Use arrow keys to move between options (if any) in a result. Use Enter (or left click) to select a result.
Discover KRunner
Click on the wrench icon to bring up configuration options where you can enable/disable/configure runners that will process your searches. Additional options are available to change the position on the screen where krunner appears. You can even change the style to a task-oriented interface, if you like.
Clicking on the '?' icon opens a scrollable list that explains the syntax of all the available runners. This is a good way to discover new functionality!
Tips, Tricks and FAQs
You can use KRunner in a special "single runner" mode. While in this mode, KRunner will only have one active runner to process your searches. This feature isn't supported by all runners, but quite a few already do. Open the global keyboard shortcuts control module directly from KRunner and choose the "Run Command Interface" to see what's available. Set a global shortcut for the mode you want and launch KRunner in that mode. You can have as many modes as you can find shortcuts for. ![]()
This blog covers some of the advanced usage of the calculator runner.
There are alternative "start menu" style Plasma application launchers in the KDE platform, including:
Application Launcher
| |
Application Dashboard
| |
Application Menu
| |
Excalibur
| |
Tiled Menu
| |
KRunner
|
The KDE 4 application menus Lancelot[23] and Homerun[24] are now outdated. However, Lancelot can be replaced by the similar style Excalibur and Homerun can be replaced by the similar style Application Dashboard.
How to change the application launcher
To change the application launcher, right click on your current launcher and select
Next, choose the launcher you want to use.

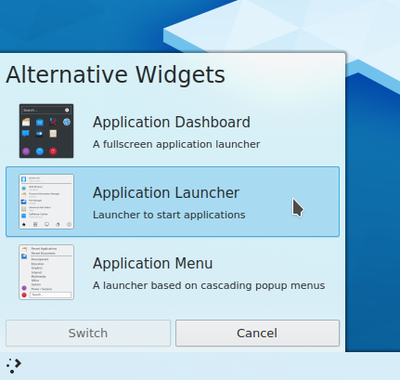
In case the desired application launcher is not in the list, you need to install it first. You may do that by using Discover or search for your launcher on the KDE Store. At the KDE Store you will also find several other application launchers to be tested.
How do I change which key opens the application launcher?
It's possible to do that in two ways: you may right click on your current launcher and select , selecting the tab , clicking on the button and then typing the combination you want to use as keyboard shortcut.
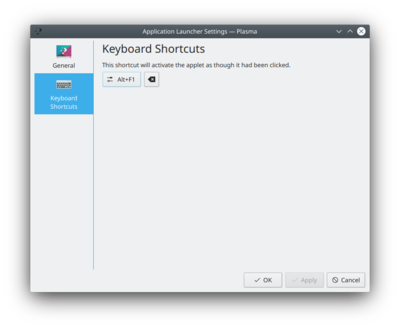
You can also use → → → → .
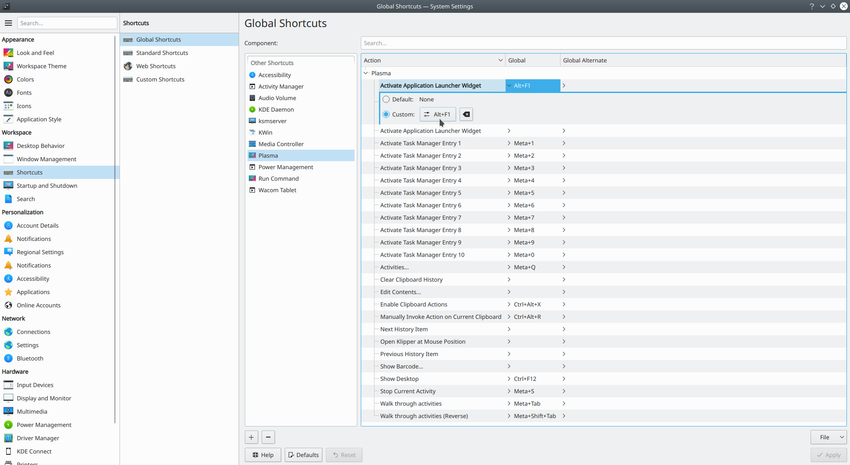
And if you ever want to restore the default Meta key, you can use the combination Alt+F1, which serves this exact purpose.
I can't bind the Meta key to open the Application Launcher anymore!
This issue may occur because of the way KWin binds keys. Please refer to this section.
References
- ↑ First commit
- ↑ Commit add KiPi support
- ↑ https://www.kphotoalbum.org/2008/09/03/0052/ KDE 4 porting started of KPhotoAlbum
- ↑ https://www.kphotoalbum.org/2009/06/12/0062/
- ↑ https://www.kphotoalbum.org/2015/03/18/0087/
- ↑ https://www.kphotoalbum.org/2016/11/05/0092/
- ↑ First commit
- ↑ KChart is part of KDiagram
- ↑ KDevelop 0.1 announcement
- ↑ A new IDE for a new millennium :-) by Bernd Gehrmann
- ↑ KDevelop4 moved
- ↑ KDevelop master now depends on KDE Frameworks 5!
- ↑ KDevelop 5.0.0 release
- ↑ KDevelop feature
- ↑ Meson support bug report
- ↑ Release information
- ↑ Commit port mobile version from plasma-framework to kirigami
- ↑ Commit port mobile version from kirigami to kirigami2
- ↑ DRM and Okular in Debian bug tracker
- ↑ DRM and Okular in LWM
- ↑ Okular, PDF and file permissions
- ↑ For details check the following entry on MX Linux wiki
- ↑ Lancelot removed from plasmaaddons
- ↑ Homerun source code not updated since 2014
Raptor menu is an application launcher for KDE 4 designed by Nuno Pinheiro. It is a radical departure from the traditional start menu, designed to be both efficient and uncluttered. More information can be found at the Raptor menu homepage.
Editor's note:
Development appears to have stalled without reaching release.
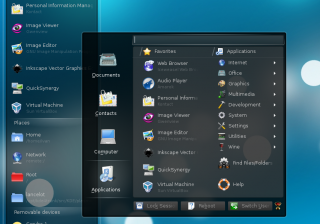 |
Next-generation application launcher |
Lancelot is a powerful application launcher for KDE SC 4, developed by Ivan Čukić.
Feature Overview
- Optional no-click interface
- Focus on usability
- Powerful search capabilities (based on KRunner)
- Smart layout of items
- High level of integration with the rest of Plasma
- Use Shelf applet to add parts of the menu directly to the desktop or a panel. See below.
- Breadcrumb bar for easier navigation
- Keyboard navigation
Tutorials
A screencast demonstrating the usage of the Shelf applet is available here:
http://blip.tv/file/4285613
More information can be found at Ivan Čukić's blog and the Lancelot web page.

Displays an information box. Parameters
- Text of the main body
- (optional) Title of the box (default: Warning)
Example: {{Warning|This is a warning}} gives

- Preferences-system.png
- Plasma application launchers
- Sound Problems
- View-pim-mail.png
- View-pim-calendar.png
- View-pim-contacts.png
- View-pim-news.png
- View-pim-notes.png
- View-pim-summary.png
- View-pim-tasks.png
- View-pim-kjots.png
- Messages.png
- NewsFeeds.png
- Notes.png
- ToDo.png
- Summary
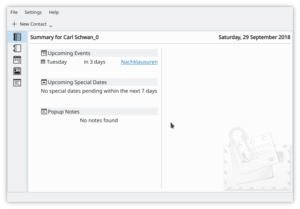 |
Summary allow you to have a quick overview of all important component of kontact. |
- The Calendar section will pick up and display all your appointments, and you can select one day or a month as the period to be displayed, or you can choose the number of days yourself.

- Your ToDo entries can also be displayed. This time you have the option of displaying all ToDo entries or only those related to today.

- The Special Dates Overview screen allows you to set the display of birthdays, anniversaries, holidays and other special events.
- You may well not need all your Email accounts listed on the summary page, but you can choose to have the ones most likely to have urgent messages. The display will give you the mailbox name and the number of unread/total messages.

- Finally, your KNotes can also be displayed on your Summary page.


Displays an information box. Parameters
- Text of the main body
- (optional) Title of the box (default: Note)
Example: {{Note|This is a note}} gives
- Utilities-terminal.png
- Plasma.png
- System-file-manager.png
- Oxygen.png
- Nepomuk.png
- Strigi.png
- Preferences-system-bluetooth.png
- Utilities-system-monitor.png
- Yakuake.png
- Parley.png
- Marble.png
- Step.png
- Lskat.png
- Quanta+.png
- System-search.png
- Trash-empty.png
- Okteta.png
- Printer.png
- Superkaramba.png
- Rsibreak.png
- Utilities-log-viewer.png
- System-users.png
- Showcase
 |
Presentations for screening or printing, Open Document Format, of course |
- Use rich text, with bullet points, indentation, spacing, colors, fonts, etc.
- Set your background with color, gradients, pictures, clip-art, etc.
- Set many object properties such as background, gradients, pen, shadow, rotation, object specific settings, etc.
- Use multiple master slides and switch between them during the presentation
- Advanced undo/redo
- Assign effects for animating objects and define effects for changing slides
- Embed images and clip-art
- Organise your presentation with the Slides Overview facility
- Play your presentation with effects
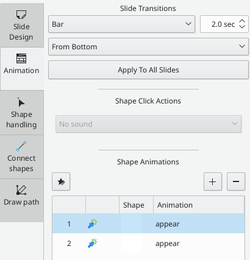
- Print to Postscript
- Many more features. [Read more]
Hints, Tips and Tutorials
- Using the Artistic Text Shape is a tutorial that shows how to get started with the artistic text shape that all KOffice applications provide.
- Quanta.png
- Lokalize.png
- Umbrello.png
- Lokalize48.png
- Mainpage
- System-diagnosis.png
- Plasma desktop resized.png
- PIMSuiteIcon.png
- Quanta
| Full web development with one-click previews |
Quanta Plus was a web development tool.
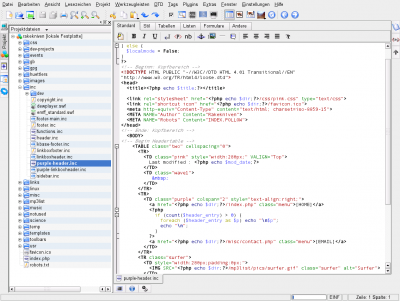
Tips
Adding Encoding inside Quanta Toolbars
- Open Quanta Plus
- Go to the menu
- Select Toolbar
- Add to the right side in clicking on left arrow
- Choose a beautiful icon if you want
- Click on
How to use kdesvn (SVN) within Quanta
- Make sure kdesvn is installed and working
- Open Quanta Plus
- Select
- Select
- Fill in values: -> kdesvnpart;
- Select an icon if desired;
- (I prefer this);
- -> kde3/libkdesvnpart.la;
- -> Project Folder
- Click
- If loading fails, you can try to set a tick at
- Now kdesvnpart should be listed
- Close window and switch back to main window
- Select and you will see kdesvn integrated in Quanta. Cool!
If you wish to have a toolbar icon to call kdesvnpart you have to modify your toolbar
- Select
- Select toolbar
- Select on the left and move it to the right
- Click on and choose the kdesvn program icon
- Click on and the new icon appears right now.
Links
- Archived project homepage of defunct
quanta.kdewebdev.orgweb site
- Archived project homepage of defunct
- Mark Ziegler
- Tutorials/Mail/Integrating Spamassassin
- Opera-kde4.png
- Tutorials/Mail
- Tools
- Tutorials/KDE3 to KDE SC 4
SC 4? What's that? The KDE community ships a large number of applications in core packages. They are known as the Software Compilation. For convenience, we shorten it to SC 4.
At first sight it looks as though a number of features that were valued in KDE3 are missing in KDE SC 4. In fact most of those features are available, but may well be approached differently. Imagine a "Road Closed" sign - you simply choose an alternative route. This is what has happened to several things, for a variety of reasons.
A particular case is of "missing features" from kcontrol to systemsettings. Some of the kcontrol settings related to specific applications. Those settings have therefore been moved to the application in question, rather than being in a general control panel.
Old friends, new ways
kcontrol no longer exists
KControl no longer exists. System Settings, which has the crossed tools icon, replaces it. By default it uses an icon view, arranged in groups. You may prefer to use the option (see the spanner/wrench icon) to change it to .
Creating icons on the desktop
Using a Classic Desktop
In KDE SC 4 there are two modes of desktop, either of which may be the default in your distribution. You can change between them by right-clicking on the desktop, choosing (some distros call it ) and choosing the (for those who like a clean, sparse desktop) or (which behaves much more like the KDE3 desktop).
A Different Approach
For functionality on a cleaner desktop, try using Desktop type, with a small folderview in the corner of your screen (it does scroll) to your data directories. A nice touch is that if you hover over a folder it does descend the directory tree, so you can open a file without needing to go through a file manager.
Also, instead of using the menu to launch applications, try typing in the name (or part of the name or function) into krunner (either from alt+F2 or from the right-click (context) menu on the desktop). Krunner does fuzzy searching, so if you type in 'write' it will offer you the relevant applications you have installed, maybe kwrite, openoffice-writer, kword, or googledocs, and any related bookmarks, so you don't need to remember too accurately.
Or Drag'n'Drop?
You can drag an icon onto the desktop in Desktop type, as well as in Folderview type. You will be presented with options suited to the type of file. For instance, if you drop an image onto the desktop you are offered Previewer (which opens the file, giving you icons for the options to open it in a relevant application, or delete the file - move to trash), open in a PhotoFrame, or place an icon for it on the desktop. If you don't see the Previewer option you may need to install kdeplasma-addons.
Another function of drag-n-drop from Dolphin is to drag a folder to create a folderview. Remember that you can scale it to suit yourself, as you will have a scroll-bar. You can even descend through the tree of a folder just by hovering, so opening a single file is much quicker than opening a file manager to find it.
Automounting of USB devices
In KDE 3 you could choose to have usb devices mounted automatically upon plugin. In KDE SC 4 this is not the norm. You mount manually, either from the device notifier, by choosing an action, or by clicking on the device icon in Dolphin. From KDE SC 4.2 it has been possible to use an alternative device notifier plasmoid that does support automount functionality. You can read about it here
Alternative approach:
Advanced users may prefer to study the creation of usb device rules. Documentation can be found in the writing udev rules guide.
Auto-hide Panels
To achieve this click on the plasma configurations icon (yellow curvy thing at the right hand side of the panel) and select . Then under enable "autohide". Manual hiding, as in KDE3, is currently not possible.
Move applets on the panel
In KDE SC 4 you have to bring up panel control (use the plasma toolbox icon, the yellow curvy thing at the right hand end of the panel). If you lock your widgets (or your distro does by default) you will first need to unlock widgets. This can be done from the right-click menu on the desktop. When your cursor moves over a widget (or plasmoid) it changes to a diamond shape. Use that cursor to drag each widget to its new place.
Finish by clicking on the X in a red circle on the configuration panel, and lock your widgets again if you wish, (right click menu, as before).
KDE3 used to let you configure whether you wanted to see the application name (e.g. amarok) or the description (e.g. media player). KDE SC 4 always shows only the description and this makes it very hard to find applications.
If you use 'Kickoff Menu Style', you can easily find an application by typing the first few letters of its name in the "Search" line of the Application Launcher. Once you have found it you can choose to add it to Favorites or to add a launcher icon into the panel or on the desktop.
If you dislike the 'click on everything' style of Kickoff you may like to try Lancelot which has most of the advantages of Kickoff and some nice tricks of its own.
If you prefer the old K menu, then right click the K menu icon and choose . Now you can configure how to show applications in the menu: Right click on the . Check the option, click . Done.

Bluetooth
BlueDevil integrates your Bluetooth phones and tablets into your Plasma workspace
Introduction
The compose key is used to enter characters on the keyboard that are usually not available on the key caps. Such letters could be an "umlaut", a "macron" or accents on letters:
Further information may be found in the Links and Further Information section below.
The modifications will work with (almost) all applications, including the desktop environment, browsers, LibreOffice, as well as many console/text only applications.
The following instructions will configure a compose key, which will be mapped to the right logo key (on most keyboards this logo is the Windows logo).
Plasma Workspace
- Start System Settings
- Select then
- Click the tab
- Click the box next to to enable changing keyboard options
- Click the
 icon next to Position of Compose key
- Click the box next to the desired key to enable it
Console Configuration
̣
To do this properly I'm trying to go the "holistic way" starting with the console:
- Reconfigure the console for the used keyboard, and the character encoding. Do this in a text terminal or the console.
$ sudo dpkg-reconfigure console-setup
- Follow these steps in the configuration:
- Choose your keyboard (here a default 104 US keyboard)
- If you want the !AltGr key replacement, choose one
- Choose which key you would like your compose key to be mapped to. I use the right logo key.
I'd much rather like to use the left logo key, but that's not available in the console setting. But in the graphical window environment (KDE Plasma) that is possible.
- Choose the console's encoding, set it to UTF-8
- Choose what character set should be available on the console. I use Combined - Latin; Slavic Cyrillic; Hebrew; basic Arabic
I guess that selection should give me the wanted characters.
- Choose what type of console output you'd like (do whatever you like, to be safe you can go with the given current defaults)
- A new initial RAM disk for the next boot will be created now.
Configuration for GTK Applications (Gnome, Firefox, etc.)
GTK (such as also Firefox) and Gnome applications use (on an Ubuntu system) usually SCIM as the input method, not XIM (X Input Method) that relies on the configurations from (X)Compose. Therefore, you will often find that the "a" and "o" macron characters can yield the female/male ordinals "ª" and "º". To still make it work, GTK applications need to be "told" to use XIM instead.
"One Off" Configuration
For a single application you can do it by just setting the environment variable GTK_IM_MODULE for the application to be launched to xim:
$ GTK_IM_MODULE=xim firefox
More permanently that can be done for a single shell session like this:
$ export GTK_IM_MODULE=xim
This can, of course, also be persisted for a single user in your ~/.bash_profile, or for all users in /etc/environment. This is, however, the less elegant way, the more elegant way follows below.
Persistent Configuration
- Copy the setup file /etc/X11/xinit/xinput.d/default to /etc/X11/xinit/xinput.d/xim
$ sudo cp /etc/X11/xinit/xinput.d/default /etc/X11/xinit/xinput.d/xim
- Edit the file /etc/X11/xinit/xinput.d/xim and set the input method for GNOME and KDE to xim
...
 GTK_IM_MODULE=xim
 QT_IM_MODULE=xim
 ...
- Create a link for the locale all_ALL (or the desired locale only):
$ sudo ln -sf /etc/X11/xinit/xinput.d/xim /etc/X11/xinit/xinput.d/all_ALL
If you are using a Debian-derived distribution use following instead
$ sudo update-alternatives --verbose --install /etc/X11/xinit/xinput.d/all_ALL xinput-all_ALL /etc/X11/xinit/xinput.d/xim 20
- After a restart of the X server everything should work.
Optional Tweaking of XCompose Map
Now that you're using XIM, you can further tweak the XCompose input map for further characters, or for characters in more convenient locations, etc.
To do that follow these steps:
- Create a ~/.XCompose file, and put the following lines into it:
# ~/.XCompose
 # This file defines custom Compose sequences for Unicode characters

# Import default rules from the system Compose file:
 include "/usr/share/X11/locale/en_US.UTF-8/Compose"

# To put some stuff onto compose key strokes:
 <Multi_key> <minus> <greater> : "→" U2192 # Compose - >
 <Multi_key> <colon> <parenright> : "☺" U263A   # Compose : )
 <Multi_key> <h> <n> <k> : "hugs and kisses" # Compose h n k
 <Multi_key> <less> < p> : "< p>" # Compose < p
- Just log out and in again (no restart necessary), and you can use your new "multi key short strokes" using the compose key to your desire. As you see this even works for creating longer character sequences.
Typing Macrons, Umlauts, Accents, ...
The compose key will be now whatever you have configured it to be, e. g. right logo.
- Macrons
compose + shift + hyphen then <vowel >or compose + underscore then <vowel >
→ āēīōū ĀĒĪŌŪ
- Umlauts
compose + shift + <single quote> then <vowel >or compose + <double quotes> then <vowel >
→ äëïöü ÄËÏÖÜ
- The German Ess-Zet ligature
compose then s and s (twice the "s")→
ß
- More bindings can be found in /usr/share/X11/locale/en_US.UTF-8/Compose
Troubleshooting
Compose key does not work in GTK applications
In .xinputrc, delete the line with the following content: run_im ibus. Then reboot your computer, or restart the X server.
More Information
- http://cyberborean.wordpress.com/2008/01/06/compose-key-magic/
- http://ubuntuforums.org/showthread.php?t=209115
- http://www.seedwiki.com/wiki/takomapark/compose2
- http://wiki.linuxquestions.org/wiki/Accented_Characters
- http://people.uleth.ca/~daniel.odonnell/Blog/custom-keyboard-in-linuxx11
- http://hdante.blogspot.com/2007/05/kiel-oni-skribas-typing-esperanto.html
- Shortcuts.png
- Mark Ziegler
- Smihael
- SMPlayer.png
- Plasma/Krunner
- Table of equivalent applications
This is a table of applications that are approximately equivalent. It is not by any means exhaustive, but tries to help a new user of KDE software to find packages that might suit. The section headings are links to take you to pages with more software in that group.
Desktop |
| Description | Windows | Mac OS X | KDE Software |
|---|---|---|---|
| File manager | Windows Explorer | Finder | Dolphin, Konqueror, Krusader |
| Control Center | Control Panel | System Preferences | System Settings |
| Command Line Interpreter | Command Prompt | Terminal | Konsole, Yakuake, KRunner |
Internet and Networking | ||
| Description | Windows | Mac OS X | KDE Software |
|---|---|---|---|
| Blogging client | Windows Live Writer | Echo, MarsEdit | Blogilo |
| BitTorrent Client | BitTorrent | utorrent, Transmission | KTorrent, KMLDonkey, KGet |
| Download Manager | FlashGet | jDownloader, pyLoad | KGet |
| eDonkey Client | eMule | aMule | KMLDonkey |
| E-mail Client | Outlook Express, Windows Live Mail | Apple Mail, Unibox | KMail |
| Feed Aggregator | Reeder, Vienna | Akregator | |
| Personal Information Manager | Outlook | Outlook, Together | Kontact |
| Web Browser | Internet Explorer | Safari | Konqueror, rekonq, Falkon |
| Instant Messaging Client | Windows Live Messenger | iChat, Adium | Kopete, KMess |
| IRC Client | mIRC | Colloquy | Konversation, Quassel |
Graphics and Imaging | ||
| Description | Windows | Mac OS X | KDE Software |
|---|---|---|---|
| Image Editor | Paint.NET, Adobe Photoshop | Adobe Photoshop, Pixelmator | Krita, KolourPaint |
| Image Viewer | ACDSee | iPhoto, Quicklook | Gwenview, KuickShow, digiKam, KPhotoAlbum |
| Photo Management | ACDSee | iPhoto, Aperture | digiKam, KPhotoAlbum, Gwenview |
| PDF Viewer | Adobe Reader | Preview, Adobe Reader | Okular |
| Vectorial Drawing | Adobe Illustrator | Adobe Illustrator, Sketch | Karbon |
Multimedia | ||
| Description | Windows | Mac OS X | KDE Software |
|---|---|---|---|
| Audio Player | Windows Media Player, Winamp | iTunes | Amarok, Juk, KsCD, Kaffeine |
| Video Player | Windows Media Player | QuickTime Player, MPlayer, VLC | Bangarang, Dragon Player, KPlayer, KMPlayer, Kaffeine |
| CD and DVD Authoring | Nero Burning ROM | iDVD, Toast | K3b, K9Copy |
| Disk image emulator | Daemon Tools | Silicon | |
| Non-linear Video Editor | Windows Movie Maker | iMovie | Kdenlive |
Office and Productivity | ||
| Description | Windows | Mac OS X | KDE Software |
|---|---|---|---|
| Office Package | Microsoft Office | iWork | Calligra |
| Word Processor | Microsoft Word | Pages | Words, KWord |
| Spreadsheet | Microsoft Excel | Numbers | Sheets, KCells |
| Presentation | Microsoft PowerPoint | Keynote | Stage, Showcase |
| Desktop Database Creation | Microsoft Access | FileMaker | Kexi |
| Diagram, Flowcharting and Mind Mapping | Microsoft Visio | OmniGraffle | Flow, Kivio, Semantik |
| Project Management | Microsoft Project | iTaskX, Merlin | Plan, KPlato |
| Personal Information Manager | Microsoft Outlook | Address Book, iCal | Kontact |
| Personal Finance Manager | Quicken | Outbank, Pecunia | KMyMoney, Skrooge |
| Notetaking | Microsoft OneNote | MacJournal, Evernote | BasKet |
Education | ||
| Description | Windows | Mac OS X | KDE Software |
|---|---|---|---|
| Touch-typing trainer | TypingMaster, Stamina | KTouch |
System Administration | ||
| Description | Windows | Mac OS X | KDE Software |
|---|---|---|---|
| Partition Editor | Logical Disk Manager | Disk Utility | KDE Partition Manager |
| System Monitor | Windows Task Manager | Activity Monitor | KSysGuard |
| System Information | EVEREST | Systeminformation | KInfoCenter |
Utilities and Tools | ||
| Description | Windows | Mac OS X | KDE Software |
|---|---|---|---|
| File archiver | WinRAR | The Unarchiver | Ark |
| Text Editor | Notepad | TextEdit | KWrite, Kate |
Development and Programming | ||
| Description | Windows | Mac OS X | KDE Software |
|---|---|---|---|
| IDE | Visual Studio | Xcode | KDevelop, Quanta |
| Computer-aided translation system | Poedit, Virtaal | Poedit, LocFactory | Lokalize |
| UML tool | Enterprise Architect | Astah | Umbrello, Kivio |

General Information
Task Scheduler is a graphical front end to the standard "cron" utility. With it, commands (or "tasks") can be run at specific times, on a certain day or date, or at specific intervals (time between execution).
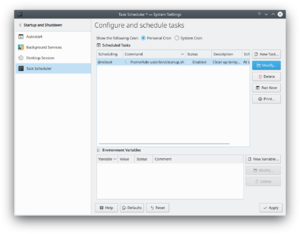
Usage
Task Scheduler can be started by starting the System Settings application. Select follwed by .
Adding and Modifying tasks
- Click to add a new task, or "Modify" to modify an existing task. The Add or modify existing task page will be displayed.
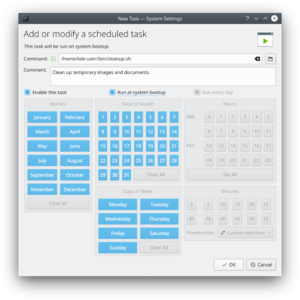
- Enter the command to be run. Click the folder icon to choose it from a dialog.
- Enter a comment (optional). This should be descriptive, explaining what the task will do as the command may not always be obvious.
- Click Enable this task to enable the task to run.
- Click Run at system bootup to enable the script to run each time the system is booted.
- Click Run every day to enable the script to run every day. This will automatically select the appropriate options.
- Using the buttons, choose when the command should be run. Not all parameters are required, those not needed may be left blank.
- Hours and Minutes are the time of day to run the task, not an interval.
- When done, click . The task will be added and scheduled if enabled.

Removing a task
To completely remove a task, select the task from the list and click the Delete button. This will permanently remove the task.
Environment Variables
Sometimes a task or multiple tasks need a specific variable set, it must be added in the Environment Variables section. The cron utility uses its own environment, system-wide and user-specific variables are not used. Click New Variable to add a new variable definition, or Modify to change an existing variable.
- Enter the name of the variable to use. This name:
- Must consist of letters, digits, and underscore ('_') only
- Must start with a letter
- Should not be a reserved or commonly used system variable. See https://pubs.opengroup.org/onlinepubs/000095399/basedefs/xbd_chap08.html for more information
- The value the variable will contain. This can be a number or string.
- Enter a brief description of the variable.
Hints
- All the files that are modified are located in the /etc/cron directory where there are numerous files to look at.
- The command-line tool that allows you to have a look at the currently installed cron-jobs is
crontab -l
(that's the letter L).
More Information
- KDE official documentation
- Cron (Wikipedia)
- Cron (Arch Linux wiki)
- UserBase/Guidelines
Ready to write some cool howto's or content for UserBase? Don't worry, using MediaWiki is easy. But before you get started, please take a few moments to read these guidelines that will help everyone have a great UserBase experience.
1. Take note of our license. All content that you put into KDE UserBase is licensed under the GNU Free Documentation License and the Creative Commons Attribution-Share Alike license. This basically means that you are free to use content in UserBase, distribute it and modify it, provided that you follow the attribution indicated by the original author(s) and that you distribute the modified work under this same license.
2. Respect content from outside sources. When you are using content from other websites, whether it be text, screenshots, or images, please make sure that you have their permission and that you acknowledge their work and probably link to their site. If you have doubts, the Community Working Group can assist in contacting the appropriate parties.
3. Respect the work of others. Particularly if some previous content already exists. Try to follow the pattern if one exists, like in the Applications pages. If you need to make some major changes, please leave a note in the Discussion tab of the page before you make the changes and wait for a reply within a considerable timeframe. You can use the Discussion pages to talk with other contributors. A wiki is designed for collaborative editing, so feel free to talk with each other.
4. Leave short but meaningful Summary when you save changes. This makes it a lot easier to see at a glance what was done. This is specially helpful for those who are monitoring the Recent changes. Of course, we presume that what you write in the Summary actually describes the changes that you did. We all work on the basis of trust and cooperation, so it's best to keep that in mind.
5. Register and login. This is a mandatory requirement, as it makes it possible for the administrators to contact you if there is a problem, and also enables us to protect your pages against spamming and vandalism.
6. Remember the purpose of UserBase. UserBase is not the correct place to make feature requests or bug reports for KDE software. We have a dedicated bug tracker for that and a BugSquad that helps take care of it (you might be interested in helping out, too). Your wishes or bugs will get heard better there. Be aware of putting in information or steps that apply to specific distributions only. Please put a note that the information applies to that particular distribution. When in doubt, it's best to note it anyway.
7. Be consistent in style. A good template for a new article is PageLayout and code snippets to help you achieve it can be copied from Toolbox. Guidelines for most common tasks are available from Tasks and Tools.
8. Last, but definitely not the least, please be guided by the Code of Conduct. The KDE community is built on a culture of collaboration, mutual respect, and trust. These values allow the community to work together in a pleasing and inspiring atmosphere. The Code expresses these values in concrete words. Be sure to give it a good read and keep it mind, whether contributing to UserBase or any area relating to the KDE community.
We look forward to your help in building up KDE's knowledge base for users and we hope that you will enjoy the experience of being an active part in this international family, the KDE Community.
 |
Sweeper protects your privacy on a shared computer |
Sweeper offers you two big advantages
- It can regain disk space
- It can remove evidence of your activities on a computer that is shared
To do this it removes, with your agreement
- Saved clipboard contents
- Recent Documents
- Recent Applications
- Run command history
- Your thumbnail cache
It also cleans up your web activity, removing, if required
- Cookies and cookie policy
- Web history and cache
- "Favourite" Icons
- Form completion entries
You can elect to remove any or all of these. You decide the balance between convenience and privacy.
- Ottenere aiuto
- UserBase
- Stats== Top 10 contributors of the last week ==
Last 7 days (Top 10) |
|||||
|
Top 20 contributors of last 10 years
Last 3,700 days (Top 20) |
|||||||||||||||||||||||||||||||||||||||||||||||||||||||||||||||||||||||||||||||||||||||||||||||||||||||||
|
Graphs
Edits over the past 4 days:
Daily Edits, for the past month:
Daily Edits, for the last 3 months:
Active translators:
New registrations, by month, over 1 year:
 |
RSIBreak takes care of your health and regularly breaks your work to avoid repetitive strain injury (RSI) |
Whether it's the health of your wrist or your eyes that concerns you, you need to take short breaks and it's all too easy to forget when you are busy.
Repetitive Strain Injury can occur as a result of working with a mouse and keyboard. RSIBreak can be used to remind you to take a break now and then. It displays a random picture from a collection at specified intervals for defined durations. You can configure the pictures to show and lengths of time to show them. You might use the breaks reminders to do some stretching exercises, for example, or as a reminder to walk away from the computer for a while.
Features
- Automatic start with desktop (can be disabled)
- Two kind of breaks: big and tiny
- Configurable option to postpone the break
- Configurable break lengths
- Configurable effects during the breaks
- Configurable notifications about actions
- Full statistics about usage that can be reset
Manual
The Handbook is available from here
Download
Source code: http://download.kde.org/stable/rsibreak/
Packaging status for various distributions
System Settings
KDE system manager for hardware, software, and workspaces.
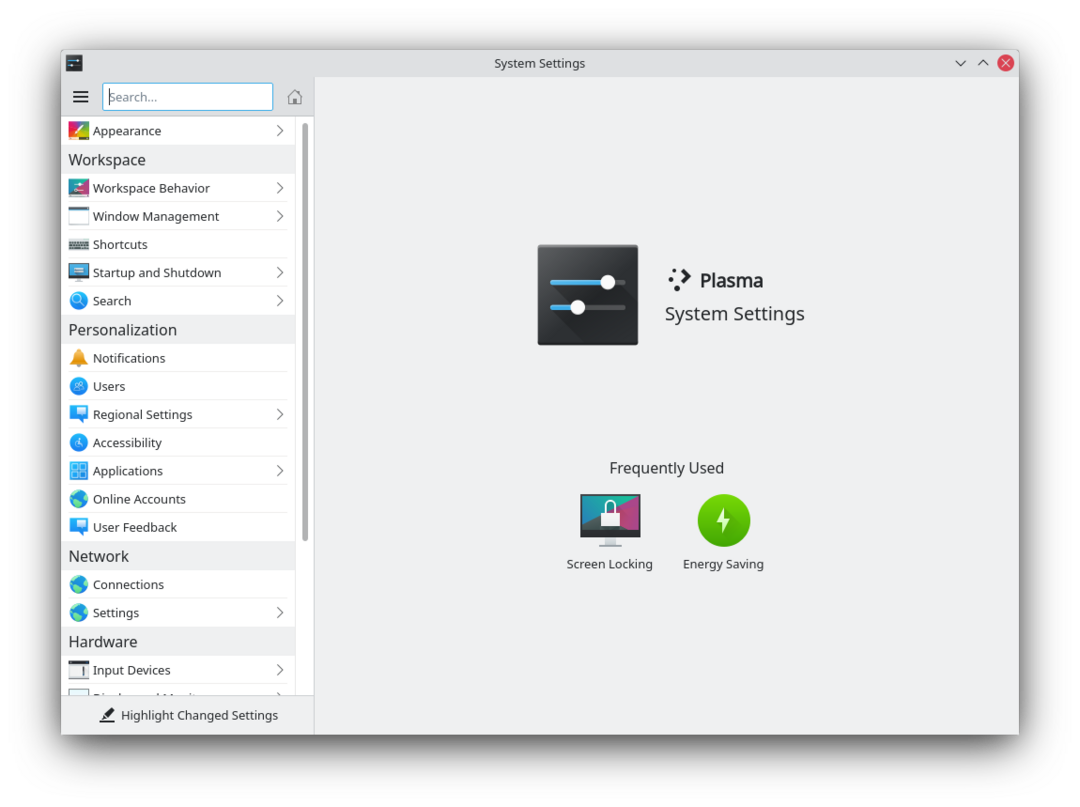
Features
- System manager for global KDE platform settings
- Customize and manage your desktop in one convenient location
- Search function helps narrow down probable settings
- Pointing at an icon displays a tooltip with more information about it
Search
When the keyboard focus is in the icon window, you can type the first few letters of any module name to select it.
System Settings has a search function to help in hunting down a setting. Simply type in a keyword in the Search field in the toolbar and System Settings will display modules that contain the keyword and hide those that don't.
You can also search for and open System Settings modules in KRunner.
Categories
Appearance
Look and Feel

Customize Plasma in one click. Workspace Theme

Customize your plasma theme, cursor theme, and splash theme all from here. Color

Here you can choose which color scheme to use on the desktop and in applications. You can also tweak the settings for individual elements. Font

Configure which fonts you want to use in window bars, menus, and elsewhere. Icons

Here you can choose which icon theme to use for your workspace, and how large you want them to be. Application Style

Customize your systems widget style (button themes), window decorations (how your titlebars look), and how GNOME (GTK) applications look..
Workspace
Desktop Behavior

Configure desktop effects such as window animations, transparency, or the desktop cube. Windows Management

Configure Kwin the KDE windows manager. Shortcuts

Configure keyboard shortcuts. Startup and Shutdown

Configure your system behavior when starting up or shutting down. Search

Settings for the desktop search engine and the file indexer.
Personalization
Acccount Details

Manage users and configure password manager. Regional Settings

Configure language, time formats, date and more Notifications

Configure notifications. Applications

Configure default applications, file associations, and more. Accessibility

Settings to help users who have difficulty hearing audible cues, or who have difficulty using a keyboard. Online Accounts

Add your google, ownCloud or Twitter account, for a better integration.
Network
Connections

Preferences for your network connections. Settings

Additional settings about your connection, Konqueror and SMB shares Bluetooth

Preference about Bluetooth.
Hardware
Input Devices

Configure your keyboard, mouse and joystick. Display and Monitor

Configuration of your monitor(s) and screensaver settings. Multimedia

Configure the handling of audio CDs Power Management

Global settings for the power manager. Printers

Configure your printers to work with plasma. Removable Storage

Configure automatic handling of removable storage media and which actions are available when a new device is connected to your machine.
 |
Skanlite is an image scanning application, for KDE SC 4.x |
Skanlite is a simple image scanning application that does nothing more than scan and save images. Skanlite can open a save dialog for every image scanned or save the images immediately in a specified directory with auto-generated names and format. The user can also choose to show the scanned image before saving.
Skanlite can save images in the following formats:
- jpeg, jpg
- png
- bmp
- ppm
- xbm
- xpm
As well as the usual USB scanners, it also works with networked scanners.
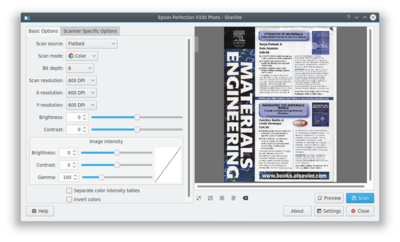
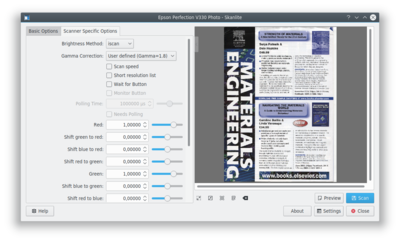
Skanlite is based on libksane, an interface provided by KDE for SANE libraries to control flat scanners. It also works with networked scanners.
![]() For scanning on KDE 3 see Kooka.
For scanning on KDE 3 see Kooka.
External links
- Search SANE project to find out if your scanner is supported
- Handbook
- Notafish
- Notafish/Taming KDE4
- Plasma/4.2Plasma is one of the key technologies of KDE 4 (also known as the "Pillars of KDE"), and one of the most visible to users. As Plasma treats the user interface differently than a traditional desktop, there may be confusion as to what Plasma is, what it does, and how to perform common tasks.
This document attempts to address these problems by providing answers to the most common questions.

General Questions
What does Plasma do?
Plasma provides the desktop interface for KDE 4, including the application launcher (start menu), the desktop and the desktop panel (often referred to simply as the task bar). However Plasma is more than just this familiar collection of utilities, it is a common framework for creating integrated interfaces. It is flexible enough to provide interfaces for mobile devices, media centres and desktop computers; to support the traditional desktop metaphor as well as well as designs that haven't yet been imagined.
What is wrong with the current desktop technology?
Today's desktops are static. Typically they are tied to a folder in which one can find icons (application launchers), or user-placed documents and folders. Along with pictures and images as backgrounds, the current desktop doesn't go any further, or work for the user. Plasma takes a different approach, engaging the user by creating a dynamic and highly customizable environment.
I don't think it's such a good idea...
With Plasma, you can let your desktop (and accompanying support elements) act like it always did. You can have a task bar, a background image, shortcuts, etc. If you want to, however, you can use tools provided by Plasma to take your experience further, letting your desktop take shape based on what you want and need.
How does Plasma work?
Plasma's components are widgets called Plasmoids. Plasmoids can take on a variety of functions, ranging from displaying your desktop and associated wallpaper, showing your laptop's battery level, displaying your plugged in devices, and drawing the taskbar: basically, they are small applications that live on the desktop. Plasmoids can be grouped together in "containers" called containments. On a default desktop, there are two main elements: the Panel and the desktop itself. Both are containments in the Plasma sense.
It doesn't sound too new... other operating systems have done that.
The key difference here is that plasmoids can interact together. You want a better view of your laptop battery in order to find out when you are running low? You just drag it away from the taskbar and put it on the desktop. Also, applets can be resized and rotated at will, thanks to the use of Scalable Vector Graphics (SVGs). As you can see, the desktop not only interacts with you, as the user, but also with itself in new and interesting ways. You are now able to control how your workspace behaves and what it displays, in a visually pleasing and user-friendly manner. Since Plasma is the sum of its plasmoids, every element, even the desktop itself, is a widget. This allows you to move your desktop anywhere with respect to the windows (back and forward). It is no longer rooted behind everything and becomes instead another element of real interaction.
Kicker and Kdesktop were working fine in KDE 3. Why did you have to change that?
Especially regarding kicker, there was the important issue of maintainability. The code was in place since the KDE 2 days, and it was difficult to add new features without breaking others. In the end, to proceed forward the only viable option was to start anew from scratch.
I can't find my favorite <insert feature here>!
Don't forget that Plasma is still in heavy development and that KDE 3 was an extremely polished codebase: it took seven years to get to that, while Plasma is much younger. With time, the Plasma developers plan on reintroducing features that are missing and fix regressions. As KDE progresses through the KDE4 cycle, Plasma will improve with it.
Why was the way the desktop operates changed?
The idea of a Desktop folder is fundamentally a broken concept. It assumes that everything you will access there resides on a single physical directory on your disk. It may be convenient, but at the same time it greatly limits what you can do. For example, you can't use custom layouts for different desktops, as everything would be read from the directory. Also, quite often a desktop structured like that becomes a dumping ground for files and folders, without any other function.
I heard there are no more icons on the desktop...
That is not entirely correct. You can have icons and launchers (shortcuts) by dragging them from Dolphin or the K-menu. What has changed is that the desktop will no longer display the contents of the Desktop folder. However, you can show an arbitrary number of folders (local or remote) on your desktop view, instead of being forced to display only the contents of the "Desktop" folder. To do so, the Folder View applet comes into play.
Also, should you wish, you can replicate the "icons on desktop" paradigm with minimal effort.
What is the Folder View applet?
The Folder View applet, like its name says, is used to display items (folders, files) from a directory. Such a directory can be either a local one residing on your computer, but also a remote FTP, SSH, or SMB share. In the future, it will even contain results from Nepomuk searches and tagging.
You can choose to view either all files, or filter either by specific regular expressions (e.g., all files with a certain extension) or by file type (for example, just images).
This applet also supports basic file management properties (moving, copying, cutting and pasting for example), and you can have as many as you want on your desktop.
Lastly, you can use one Folder View as the whole desktop, effectively replicating the "old style" paradigm.
What's the deal with Kickoff (the new K Menu) ?
During the development of KDE 4.0, different approaches for a K menu (application launcher) were tried. Some projects, like Raptor, were ambitious but there was no way they could be completed on time. At the time, one developer ported SUSE Linux's application launcher (Kickoff) to the new KDE architecture. As it was the most ready and feature complete (not to mention the product of usability testing) it was chosen to be the default menu. If you don't like it, the traditional K-menu is available as well - right-click onto the K Menu to find an option "traditional style". Also, some alternative menu systems have been announced (Lancelot, Raptor), and some, such as Lancelot, are ready for daily usage.
What is KRunner?
KRunner is the versatile mini-command line you can activate by pushing "Alt-F2" or by selecting "Run Command" from the desktop contextual menu. It can search for applications, bookmarks, even sessions basing on your input, show system activity and even do simple arithmetic calculations.
KRunner's functionality can be extended through the use of plugins ("runners").
What are the "cashews"?
What is commonly referred as "cashew" is the Plasma logo you can find on the default desktop, on the upper right corner, and on the panel, on the right hand side (left hand side if you use a Right-To-Left language). By clicking on them, you can access other configuration options, such as panel configuration and the Zooming User Interface (ZUI). Some of these, like the panel cashew, only appear if the widgets aren't locked (see below).
Please provide an option to disable the upper right cashew.
Although putting an option to disable the cashew for desktops sounds reasonable, from a coding point of view it would introduce unnecessary complexity and would break the design. What has been suggested is, since the destkop itself (a containment) is handled by plugins, to write a plugin that would draw the desktop without the cashew itself. As a matter of fact, some distributions ship already a "Desktop without cashew" plugin.
What is the Zooming User Interface (ZUI)?
The Zooming User Interface, or ZUI, is another component of Plasma. It enables the user to group different groups of plasmoids together, and to quickly switch between one and another using a zoom-and-pan approach. Notice that at the time, although significant improvements have been made, this feature is still under heavy development and may be fully functional only with later KDE 4.x releases.
How does the ZUI work?
Suppose you have three groups of plasmoids (such as widgets, application launchers, etc.) which you want arranged in specific combinations depending on what you want to do. You first group them according to your tastes, then you can switch between them by zooming out (getting a preview of all the groups) and then back in on the specific group you want to use. Notice that it is different from traditional X11 virtual desktop switching, as there is a higher degree of flexibility by using this approach, as the groups can be totally different from each other.
A very good example of this behavior is shown by this image courtesy of Half-Left from #kde on freenode.
That said, you can tie virtual desktops to ZUI activities, although it is an experimental feature (see below).
Why can't I use the ZUI from Dashboard view?
That feature is a work-in-progress. We're looking into it, but can't yet say how and when it will be finished.
On multi screen setups, the ZUI operates on all screens, the Dashboard just on one. Why is that?
The workflows are different. When zooming out, the user wants to get an overview, therefore activities on all screens are zoomed out. Whereas when using the Dashboard, the user usually wants to access specific functionality and might not want to interrupt his or her workflow on other activities.
Configuration
Can I place icons on the desktop?
Of course you can. Dragging an icon from Dolphin or Konqueror to the desktop will work. Notice that dragging on the desktop will not actually create a file there, just a link to it.
To display the contents of your Desktop folder, or any other folder, use the Folder View applet.
Alternatively, right-click on an empty area of the desktop, select "Appearance settings" and in the dialog that will pop up locate the "Desktop Activity" text. Click on the "type" combo box and select "Folder View". Click OK and you will have a Folder View applet as desktop (showing the contents of the Desktop folder by default), like the "old style" paradigm.
There is a screencast made by KDE Forums user Primoz available, which shows all the desktop-related settings.
I am using two screens, and I used to have kicker over the two displays. Can I do that with Plasma?
No. The reason is that having a panel over two displays adds a great deal of complexity, especially when the two displays have different resolution. As a result of this added complexity, this feature would not be guaranteed to work in all cases, hence it was not implemented.
How can I add applets to the panel?
Method 1: Open the Add Widgets dialog in the Plasma cashew (upper right corner of the screen) then select the widget of your liking and drag it directly (don't double click or use the Add Widget button) to the panel.
Method 2: Drag an applet from the desktop to the panel.
Method 3: Click on the cashew on the panel, and select "Add widgets". Once you have selected the applet, it will be automatically added to the panel.
Can I move the applets on the panel?
To do so, open up the panel controller (by clicking on the cashew or by right clicking on the panel and selecting "Panel Settings") and hover the mouse cursor over the applets. Its shape will turn into four arrows, and you'll be able to rearrange the applets as you wish.
Lydia Pintscher's blog has a video showing movement in action. Another one is available on Aikurn's blog. Aikurn has also made an annotated video.
How do I move, rotate or resize an applet on the desktop?
First of all, hover over the applet you want to resize. The applet handle will appear.
The applet handle takes care of resize, rotate and move.
- To move an applet: Click on the handle, then drag the applet around.
- To rotate an applet: Click on the curved arrow then drag to rotate
- To resize an applet: Click on the square icon and then drag to resize the applet. You can constrain the resize operation to the applet's aspect ratio by holding down the Ctrl key.
How can I change the height and the size of the panel?
Click on the panel cashew (the small icon on the right side of the panel) to open the panel configuration interface. By clicking on "Screen Edge", you can position the panel on any of the edges of the screen. Clicking on height and dragging increases or decreases the size of the panel.
The arrows on the sides of the panel define its size: there are two, which define "minimum" and "maximum" sizes. The maximum size is the size at which the panel can expand when items are added, while the minimum size is the minimum size the panel can have. If they are set differently, the panel will readjust its size depending on the contents.
Under "More Options" there are additional options to align the panel and configure its behavior.
KDE Forums user TeaAge has made a screencast which explores the various panel configuration options.
Can I auto-hide the panel?
Open the panel controller, select "More Options", then click on the relevant option.
How can I remove a panel?
Click on the panel cashew and select "Remove this Panel". Alternatively you can right click on the panel itself and choose "Remove this Panel".
I heard that you can use OS X's widgets with Plasma. Is this true?
Yes, Plasma can use OS X's widgets. Work has been done to implement also Javascript-based widgets (reverse engineered due to Apple's licence).
You can bring all the widgets to the front by pushing Ctrl-F12, which will bring the Plasma Dashboard to the front. When you are done, you can either push the Esc key or select the "Hide Dashboard" option from the cashew.
How can I lock the positions of the widgets?
Method 1: Right click on an empty area of the desktop and select "Lock Widgets" from the contextual menu. If you want to reverse that, right click again and select "Unlock Widgets". The same option is available if you right-click on the panel.
Method 2: Select "Lock Widgets" from the Plasma cashew on the upper right corner or from the panel controller.
How do I remove widgets?
If they're on the panel, right click on the widget and select "Remove this...". If the widgets are on the desktop, you have different options:
- If you hover over them, clicking the X on the applet handle will remove them;
- If you use the Add Widget dialog, you can click on the minus symbol icon next to the widget name to remove it.
Right click on the menu icon and select "Switch to Classic Menu Style" (if using Kickoff) or "Switch to Kickoff Menu Style" (if using the classic menu). Alternatively, you can add either type of menu using the Add Applets dialog.
Aikurn has a video showing how to switch between the different styles.
How can I add/remove an activity?
Adding an activity: Zoom out from your current desktop view by clicking on the desktop view cashew (the icon in the top right corner) and selecting Zoom out. You see a toolbar under your current desktop. Click on "Add Activity" to create a new desktop view.
Removing an activity: Zoom out from your current desktop view and select the red cross from the toolbar that will appear to remove the activity.
KDE Forums user Fengshaun has made a screencast showing ZUI usage.
Are there any keyboard shortcuts for Plasma?
In addition to the mouse, there is a number of shortcuts available:
- Lock widgets: Ctrl-L
- Zoom out: Ctrl- -
- Zoom in: Ctrl- = or Ctrl-+
- Next applet: Ctrl-N
- Previous applet: Ctrl-P
- Add activity: Shift-Ctrl-A
- Next activity: Shift-Ctrl-N
- Previous activity: Shift-Ctrl-P
- Applet settings: Ctrl-S
- Remove applet: Ctrl-R
Unfortunately, changing these shortcuts is not possible yet.
How can I associate a keyboard shortcut with an applet?
Simply select an applet's settings (the wrench icon on the applet handle) and then click on "Kyeboard Shortcut". You will then be able to define a keyboard shortcut for your applet. Notice that some applets do not offer this feature (generally the ones that have no configuration).
Can the Dashboard show widgets other than those on my desktop?
As of KDE 4.1.0 it can, but currently (as of 4.2) there is no user interface available to configure this feature. An explanation of how to configure this manually can be found here.
How can I use virtual desktops as activities ?
Notice: This feature is experimental and has no GUI option for it. It involves editing configuration files, so you may want to make backups before screwing your Plasma configuration.
That said, ensure that Plasma is not running: if you are in KDE, this can be accomplished by opening a terminal and writing
kquitapp plasma
That will shut Plasma down nicely, and of course your desktop will disappear (but the terminal will still be open)
Then, edit the file $KDEHOME/share/config/plasmarc ($KDEHOME is either .kde or .kde4, depending on your distribution). Inside, locate the [General] section (or create it if it doesn't exist). There, write
perVirtualDesktopViews=true
ave the file and restart Plasma.
Theming
I don't like the default look of the panel and other Plasma components. Can I change that?
Yes, the ability to change the look of Plasma was planned since the beginning. Plasma can use "themes", which are essentially a number of SVG images and files specifying the colors, to change its appearance. A number of themes is already available on kde-look.org.
How can I change my Plasma theme?
Right click on your current desktop, select "Appearance Settings" (alternatively, you can select the same option from the desktop cashew) and you will find an option to change the theme in the dialog that will appear. You can also download new themes directly from there, using Get Hot New Stuff (GHNS).
Step by step instructions, although made for KDE 4.1, (including screenshots) are available on Aikurn's blog.
Troubleshooting
My panel is gone, how do I get it back?
kquitapp plasma; rm $KDEHOME/share/config/plasma-appletsrc; plasma
This deletes your plasma settings, so you'll get the default configuration back. If running all the 3 commands at once doesn't work, try typing them in manually and wait a few seconds before running the next command.
(Note that the $KDEHOME environment variable may not be set. Try ~/.kde (Fedora, Kubuntu Intrepid, Debian, upstream default) or ~/.kde4 (OpenSUSE, Kubuntu Hardy and several others).)
Some GTK+ applications show wrong system tray icon sizes.
That is unfortunately a problem in the Freedesktop.org system tray specification, which does not define the sizes for system tray icons properly.
I experience extreme slowness when using Plasma with the NVIDIA binary driver.
This is NVIDIA's fault entirely, due to their driver not supporting correctly the XRender X11 extension, and it also affects other parts of KDE such as Konsole. See this blog entry on how to report issues upstream to NVIDIA. This page contains a few suggestions on how to improve performance until an updated driver is released.
NVIDIA has recently released a beta driver (version 180.xx) that may improve performance with Plasma and KDE4 in general. However, there have been reports of large memory leaks when using these drivers.
Folder View and other plasmoids look badly rendered with an ATI video card and the open source radeon driver.
To work around this issue, you have to change the 2D acceleration method from XAA (X Acceleration Architecture) to the newer EXA. As this involves editing your xorg.conf file, bear in mind that such a modification may damage your system. Do it at your own risk.
To make the switch, edit your xorg.conf file (make a backup just in case) and locate the Device section for your graphics card. Add the line
Option "AccelMethod" "EXA"
before the "EndSection" line. If there is already a line with AccelMethod, change it from XAA to EXA. Save the file and restart the X server.
Notice that EXA is still marked as unstable, and that some other applications such as some KDE3 programs may render incorrectly.
Hints & Tips
Turning off the new job notification system
Plasma uses a different way (as opposed to the past releases of KDE to show job progress (for example, a download). For those who do not like it, there is a configuration file option to revert to the old behavior (KDE 4.1 or earlier). Make sure plasma is not running and edit $KDEHOME/share/config/plasma-appletsrc and add the following lines:
[AppletGlobals][plasma_applet_systemtray]
ShowJobs=false
ShowNotifications=false
Restart Plasma to see the changes in action.
Disabling ARGB visuals
For many of its effects, Plasma makes use of the so-called "ARGB visuals". For older video cards, this can mean a severe performance hit. To disable ARGB visuals and increase performance, you need to set the KDE_SKIP_ARGB_VISUALS environment variable to 1 (KDE_SKIP_ARGB_VISUALS=1) before Plasma starts. You can do so by putting a line setting this variable in /etc/profile or in ~/.profile.
Right-click the panel when your task bar is full
To make some changes to the panel you need to right-click on it - and if you have open applications that may not be easy, The workaround for this problem is to use the panel cashew to bring up the panel settings, then you can right-click anywhere on the panel, including on application tabs, and the command will go to the panel, not the application.
Re-arrange the application tabs on your task bar
Right-click on an empty part of the task bar (or use the method described above) and select Task Manager Settings. In the 'Sorting' combo-box, select 'Manual'. 'OK' to close it. Now you can re-arrange your task icons by holding down Alt and dragging the tabs to their new order. (If you use this alt-drag while the panel config panel is open the whole group of application tabs will move as one.)
Miscellaneous tips
Some alternatives for those who like a sparse desktop:
1 - you can remove the panel entirely. Open applications would be available using the ALT+TAB cycling.
2 - Remove the panel and add a short one at the top of the screen, to hold only the task manager
3 - Create a panel containing the task manager and use autohide.
Glossary
See the Glossary page.
Thanks
- Daniel Laidig & Simon St.James - thanks for the umeet IRC logs!
- Marco Martin - thanks for the information on panels!
- Sebas - thanks for letting me use information from your blog entries!
- Half-Left - great example of ZUI usage!
- Aikurn - Excellent videos!
- Marcelo Magno T. Sales - for giving panel Tips on a mailing list
Contributors
- Luca Beltrame - current maintainer
- Joseph M. Gaffney
- Chani
- Dipesh
- Maninalift
- All the anyonymous contributors
| Back to the Introduction page |
- Lancelot screen silicon.png
- Userbase Technical Issues
- TemplateThese pages provide templates.

 |
Lokalize is the localization tool for KDE and other open source software |
Lokalize is also a general computer-aided translation system (CAT) with which you can translate OpenDocument files (*.odt). Translate-Toolkit is used internally to extract text for translation from .odt to .xliff files and to merge translation back into .odt file.
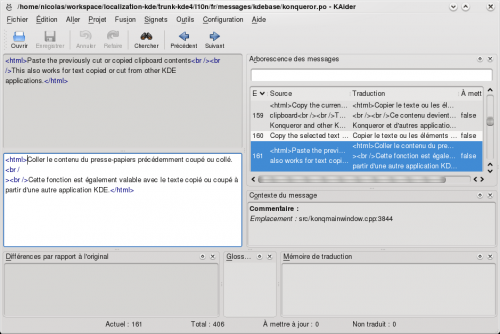
Compiling Lokalize from KDE trunk
Install libkf5i18n-dev, libkf5completion-dev, libkf5itemviews-dev, libkf5sonnet-dev, kross-dev headers packages and libhunspell-dev. Then:
git clone git://anongit.kde.org/lokalizeor
git clone git@git.kde.org:lokalize
and
cd lokalize
 mkdir build
 cd build
 cmake -DCMAKE_BUILD_TYPE=RelWithDebInfo ..
 make -j2
 ./src/lokalize
Downloading Lokalize binaries for Windows
The latest release build of Lokalize for Windows is available on the KDE Binary Factory
The latest nightly build of Lokalize for Windows is also available on the KDE Binary Factory
Tips and tricks
Search in files
Translation Memory (TM) now keeps track of where each translation pair came from. So when you want to for string in the files on disk, you just drag the directory with those files onto tab (F7) to update TM, wait a minute or two, then type your string into right field of , then press Enter.
Then you click on one of results and this opens appropriate file, on the appropriate entry. When you want to do another search during the same day, you skip the updating step and just type what you're searching for. You can filter TM search results by filename using the field left side of the F7 panel ().
Author
Nick Shaforostoff Facebook page
External links
- Handbook
- KDE SC 5 API Reference
- Report a bug
- Lokalize
- Lokalize-scr-1.png
- Steveire
- Sheedy
- TechbaseLink
How to use this template
If the techbase page has the same name as the userbase page, simply put {{TechbaseLink}} in the source of the page.
- Tictric
- View-pim-ktimetracker.png
- Snapshot-ktimetracker-options-appearance.png
- Snapshot-ktimetracker-options-storage.png
- Snapshot-ktimetracker-options-behavior.png
- OhReally
- Stats (fa)
- Plasma/FAQ/4.2Home >> Applications >> Desktop >> Plasma/FAQ/4.2
Plasma is one of the key technologies of KDE 4 (also known as the "Pillars of KDE"), and one of the most visible to users. As Plasma treats the user interface differently than a traditional desktop, there may be confusion as to what Plasma is, what it does, and how to perform common tasks.
This document attempts to address these problems by providing answers to the most common questions.

General Questions
What does Plasma do?
Plasma provides the desktop interface for KDE 4, including the application launcher (start menu), the desktop and the desktop panel (often referred to simply as the task bar). However Plasma is more than just this familiar collection of utilities, it is a common framework for creating integrated interfaces. It is flexible enough to provide interfaces for mobile devices, media centres and desktop computers; to support the traditional desktop metaphor as well as well as designs that haven't yet been imagined.
What is wrong with the current desktop technology?
Today's desktops are static. Typically they are tied to a folder in which one can find icons (application launchers), or user-placed documents and folders. Along with pictures and images as backgrounds, the current desktop doesn't go any further, or work for the user. Plasma takes a different approach, engaging the user by creating a dynamic and highly customizable environment.
I don't think it's such a good idea...
With Plasma, you can let your desktop (and accompanying support elements) act like it always did. You can have a task bar, a background image, shortcuts, etc. If you want to, however, you can use tools provided by Plasma to take your experience further, letting your desktop take shape based on what you want and need.
How does Plasma work?
Plasma's components are widgets called Plasmoids. Plasmoids can take on a variety of functions, ranging from displaying your desktop and associated wallpaper, showing your laptop's battery level, displaying your plugged in devices, and drawing the taskbar: basically, they are small applications that live on the desktop. Plasmoids can be grouped together in "containers" called containments. On a default desktop, there are two main elements: the Panel and the desktop itself. Both are containments in the Plasma sense.
It doesn't sound too new... other operating systems have done that.
The key difference here is that plasmoids can interact together. You want a better view of your laptop battery in order to find out when you are running low? You just drag it away from the taskbar and put it on the desktop. Also, applets can be resized and rotated at will, thanks to the use of Scalable Vector Graphics (SVGs). As you can see, the desktop not only interacts with you, as the user, but also with itself in new and interesting ways. You are now able to control how your workspace behaves and what it displays, in a visually pleasing and user-friendly manner. Since Plasma is the sum of its plasmoids, every element, even the desktop itself, is a widget. This allows you to move your desktop anywhere with respect to the windows (back and forward). It is no longer rooted behind everything and becomes instead another element of real interaction.
Kicker and Kdesktop were working fine in KDE 3. Why did you have to change that?
Especially regarding kicker, there was the important issue of maintainability. The code was in place since the KDE 2 days, and it was difficult to add new features without breaking others. In the end, to proceed forward the only viable option was to start anew from scratch.
I can't find my favorite <insert feature here>!
Don't forget that Plasma is still in heavy development and that KDE 3 was an extremely polished codebase: it took seven years to get to that, while Plasma is much younger. With time, the Plasma developers plan on reintroducing features that are missing and fix regressions. As KDE progresses through the KDE4 cycle, Plasma will improve with it.
Why was the way the desktop operates changed?
The idea of a Desktop folder is fundamentally a broken concept. It assumes that everything you will access there resides on a single physical directory on your disk. It may be convenient, but at the same time it greatly limits what you can do. For example, you can't use custom layouts for different desktops, as everything would be read from the directory. Also, quite often a desktop structured like that becomes a dumping ground for files and folders, without any other function.
I heard there are no more icons on the desktop...
That is not entirely correct. You can have icons and launchers (shortcuts) by dragging them from Dolphin or the K-menu. What has changed is that the desktop will no longer display the contents of the Desktop folder. However, you can show an arbitrary number of folders (local or remote) on your desktop view, instead of being forced to display only the contents of the "Desktop" folder. To do so, the Folder View applet comes into play.
Also, should you wish, you can replicate the "icons on desktop" paradigm with minimal effort.
What is the Folder View applet?
The Folder View applet, like its name says, is used to display items (folders, files) from a directory. Such a directory can be either a local one residing on your computer, but also a remote FTP, SSH, or SMB share. In the future, it will even contain results from Nepomuk searches and tagging.
You can choose to view either all files, or filter either by specific regular expressions (e.g., all files with a certain extension) or by file type (for example, just images).
This applet also supports basic file management properties (moving, copying, cutting and pasting for example), and you can have as many as you want on your desktop.
Lastly, you can use one Folder View as the whole desktop, effectively replicating the "old style" paradigm.
What's the deal with Kickoff (the new K Menu) ?
During the development of KDE 4.0, different approaches for a K menu (application launcher) were tried. Some projects, like Raptor, were ambitious but there was no way they could be completed on time. At the time, one developer ported SUSE Linux's application launcher (Kickoff) to the new KDE architecture. As it was the most ready and feature complete (not to mention the product of usability testing) it was chosen to be the default menu. If you don't like it, the traditional K-menu is available as well - right-click onto the K Menu to find an option "traditional style". Also, some alternative menu systems have been announced (Lancelot, Raptor), and some, such as Lancelot, are ready for daily usage.
What is KRunner?
KRunner is the versatile mini-command line you can activate by pushing "Alt-F2" or by selecting "Run Command" from the desktop contextual menu. It can search for applications, bookmarks, even sessions basing on your input, show system activity and even do simple arithmetic calculations.
KRunner's functionality can be extended through the use of plugins ("runners").
What are the "cashews"?
What is commonly referred as "cashew" is the Plasma logo you can find on the default desktop, on the upper right corner, and on the panel, on the right hand side (left hand side if you use a Right-To-Left language). By clicking on them, you can access other configuration options, such as panel configuration and the Zooming User Interface (ZUI). Some of these, like the panel cashew, only appear if the widgets aren't locked (see below).
Please provide an option to disable the upper right cashew.
Although putting an option to disable the cashew for desktops sounds reasonable, from a coding point of view it would introduce unnecessary complexity and would break the design. What has been suggested is, since the destkop itself (a containment) is handled by plugins, to write a plugin that would draw the desktop without the cashew itself. As a matter of fact, some distributions ship already a "Desktop without cashew" plugin.
What is the Zooming User Interface (ZUI)?
The Zooming User Interface, or ZUI, is another component of Plasma. It enables the user to group different groups of plasmoids together, and to quickly switch between one and another using a zoom-and-pan approach. Notice that at the time, although significant improvements have been made, this feature is still under heavy development and may be fully functional only with later KDE 4.x releases.
How does the ZUI work?
Suppose you have three groups of plasmoids (such as widgets, application launchers, etc.) which you want arranged in specific combinations depending on what you want to do. You first group them according to your tastes, then you can switch between them by zooming out (getting a preview of all the groups) and then back in on the specific group you want to use. Notice that it is different from traditional X11 virtual desktop switching, as there is a higher degree of flexibility by using this approach, as the groups can be totally different from each other.
A very good example of this behavior is shown by this image courtesy of Half-Left from #kde on freenode.
That said, you can tie virtual desktops to ZUI activities, although it is an experimental feature (see below).
Why can't I use the ZUI from Dashboard view?
That feature is a work-in-progress. We're looking into it, but can't yet say how and when it will be finished.
On multi screen setups, the ZUI operates on all screens, the Dashboard just on one. Why is that?
The workflows are different. When zooming out, the user wants to get an overview, therefore activities on all screens are zoomed out. Whereas when using the Dashboard, the user usually wants to access specific functionality and might not want to interrupt his or her workflow on other activities.
Configuration
Can I place icons on the desktop?
Of course you can. Dragging an icon from Dolphin or Konqueror to the desktop will work. Notice that dragging on the desktop will not actually create a file there, just a link to it.
To display the contents of your Desktop folder, or any other folder, use the Folder View applet.
Alternatively, right-click on an empty area of the desktop, select "Appearance settings" and in the dialog that will pop up locate the "Desktop Activity" text. Click on the "type" combo box and select "Folder View". Click OK and you will have a Folder View applet as desktop (showing the contents of the Desktop folder by default), like the "old style" paradigm.
There is a screencast made by KDE Forums user Primoz available, which shows all the desktop-related settings.
I am using two screens, and I used to have kicker over the two displays. Can I do that with Plasma?
No. The reason is that having a panel over two displays adds a great deal of complexity, especially when the two displays have different resolution. As a result of this added complexity, this feature would not be guaranteed to work in all cases, hence it was not implemented.
How can I add applets to the panel?
Method 1: Open the Add Widgets dialog in the Plasma cashew (upper right corner of the screen) then select the widget of your liking and drag it directly (don't double click or use the Add Widget button) to the panel.
Method 2: Drag an applet from the desktop to the panel.
Method 3: Click on the cashew on the panel, and select "Add widgets". Once you have selected the applet, it will be automatically added to the panel.
Can I move the applets on the panel?
To do so, open up the panel controller (by clicking on the cashew or by right clicking on the panel and selecting "Panel Settings") and hover the mouse cursor over the applets. Its shape will turn into four arrows, and you'll be able to rearrange the applets as you wish.
Lydia Pintscher's blog has a video showing movement in action. Another one is available on Aikurn's blog. Aikurn has also made an annotated video.
How do I move, rotate or resize an applet on the desktop?
First of all, hover over the applet you want to resize. The applet handle will appear.
The applet handle takes care of resize, rotate and move.
- To move an applet: Click on the handle, then drag the applet around.
- To rotate an applet: Click on the curved arrow then drag to rotate
- To resize an applet: Click on the square icon and then drag to resize the applet. You can constrain the resize operation to the applet's aspect ratio by holding down the Ctrl key.
How can I change the height and the size of the panel?
Click on the panel cashew (the small icon on the right side of the panel) to open the panel configuration interface. By clicking on "Screen Edge", you can position the panel on any of the edges of the screen. Clicking on height and dragging increases or decreases the size of the panel.
The arrows on the sides of the panel define its size: there are two, which define "minimum" and "maximum" sizes. The maximum size is the size at which the panel can expand when items are added, while the minimum size is the minimum size the panel can have. If they are set differently, the panel will readjust its size depending on the contents.
Under "More Options" there are additional options to align the panel and configure its behavior.
KDE Forums user TeaAge has made a screencast which explores the various panel configuration options.
Can I auto-hide the panel?
Open the panel controller, select "More Options", then click on the relevant option.
How can I remove a panel?
Click on the panel cashew and select "Remove this Panel". Alternatively you can right click on the panel itself and choose "Remove this Panel".
General Panel Configuration Help
This forum page gives an illustrated guide to configuring the panel.
I heard that you can use OS X's widgets with Plasma. Is this true?
Yes, Plasma can use OS X's widgets. Work has been done to implement also Javascript-based widgets (reverse engineered due to Apple's license).
You can bring all the widgets to the front by pushing Ctrl-F12, which will bring the Plasma Dashboard to the front. When you are done, you can either push the Esc key or select the "Hide Dashboard" option from the cashew.
How can I lock the positions of the widgets?
Method 1: Right click on an empty area of the desktop and select "Lock Widgets" from the contextual menu. If you want to reverse that, right click again and select "Unlock Widgets". The same option is available if you right-click on the panel.
Method 2: Select "Lock Widgets" from the Plasma cashew on the upper right corner or from the panel controller.
How do I remove widgets?
If they're on the panel, right click on the widget and select "Remove this...". If the widgets are on the desktop, you have different options:
- If you hover over them, clicking the X on the applet handle will remove them;
- If you use the Add Widget dialog, you can click on the minus symbol icon next to the widget name to remove it.
Right click on the menu icon and select "Switch to Classic Menu Style" (if using Kickoff) or "Switch to Kickoff Menu Style" (if using the classic menu). Alternatively, you can add either type of menu using the Add Applets dialog.
Aikurn has a video showing how to switch between the different styles.
How can I add/remove an activity?
Adding an activity: Zoom out from your current desktop view by clicking on the desktop view cashew (the icon in the top right corner) and selecting Zoom out. You see a toolbar under your current desktop. Click on "Add Activity" to create a new desktop view.
Removing an activity: Zoom out from your current desktop view and select the red cross from the toolbar that will appear to remove the activity.
Note: You must Unlock Widgets (Ctrl+L) before you can remove any activities.
KDE Forums user Fengshaun has made a screencast showing ZUI usage.
How can I quickly move between Activities?
The ZUI method is rather slow, so a better way is to use an Activity Bar. A short how-to here explains exactly what you need to do.
Are there any keyboard shortcuts for Plasma?
In addition to the mouse, there is a number of shortcuts available:
- Lock widgets: Ctrl-L
- Zoom out: Ctrl- -
- Zoom in: Ctrl- = or Ctrl-+
- Next applet: Ctrl-N
- Previous applet: Ctrl-P
- Add activity: Shift-Ctrl-A
- Next activity: Shift-Ctrl-N
- Previous activity: Shift-Ctrl-P
- Applet settings: Ctrl-S
- Remove applet: Ctrl-R
Unfortunately, changing these shortcuts is not possible yet.
How can I associate a keyboard shortcut with an applet?
Simply select an applet's settings (the wrench icon on the applet handle) and then click on "Kyeboard Shortcut". You will then be able to define a keyboard shortcut for your applet. Notice that some applets do not offer this feature (generally the ones that have no configuration).
Can the Dashboard show widgets other than those on my desktop?
As of KDE 4.1.0 it can, but currently (as of 4.2) there is no user interface available to configure this feature. An explanation of how to configure this manually can be found here.
How can I use virtual desktops as activities ?
Notice: This feature is experimental and has no GUI option for it. It involves editing configuration files, so you may want to make backups before screwing your Plasma configuration.
That said, ensure that Plasma is not running: if you are in KDE, this can be accomplished by opening a terminal and writing
kquitapp plasma
That will shut Plasma down nicely, and of course your desktop will disappear (but the terminal will still be open)
Then, edit the file $KDEHOME/share/config/plasmarc ($KDEHOME is either .kde or .kde4, depending on your distribution). Inside, locate the [General] section (or create it if it doesn't exist). There, write
perVirtualDesktopViews=true
save the file and restart Plasma.
Notifications take up too much screen - can I get rid of them?
First, stop plasma with
kquitapp plasma
Then open up `kde4-config --localprefix`/share/config/plasma-appletsrc and put this somewhere in there:
[AppletGlobals][plasma_applet_systemtray]
ShowJobs=false
ShowNotifications=false
Start Plasma again and voila.
Theming
I don't like the default look of the panel and other Plasma components. Can I change that?
Yes, the ability to change the look of Plasma was planned since the beginning. Plasma can use "themes", which are essentially a number of SVG images and files specifying the colors, to change its appearance. A number of themes is already available on kde-look.org.
How can I change my Plasma theme?
Right click on your current desktop, select "Appearance Settings" (alternatively, you can select the same option from the desktop cashew) and you will find an option to change the theme in the dialog that will appear. You can also download new themes directly from there, using Get Hot New Stuff (GHNS).
Step by step instructions, although made for KDE 4.1, (including screenshots) are available on Aikurn's blog.
Is there support for advanced visual effects (transparency, etc.) without using compositing?
In an effort to keep the codebase clean of workarounds (if not even hacks), the Plasma developers have decided that features that require compositing to work will not have a composite-less version. The main reasoning is that in the past (KDE 3.5.x), such approaches were one of the causes of the unmaintainability of the code, and also because supporting those features is actually pushing graphics card developers to write better graphics drivers.
Troubleshooting
Plasma crashed, how can I bring my desktop back?
Normally Plasma automatically restarts in the event of a crash. Should this not happen, open KRunner by pushing Alt-F2 (it should be still running) and write "plasma". Plasma will be restarted.
My panel is gone, how do I get it back?
kquitapp plasma; rm $KDEHOME/share/config/plasma-appletsrc; plasma
This deletes your plasma settings, so you'll get the default configuration back. If running all the 3 commands at once doesn't work, try typing them in manually and wait a few seconds before running the next command.
(Note that the $KDEHOME environment variable may not be set. Try ~/.kde (Fedora, Kubuntu Intrepid, Debian, upstream default) or ~/.kde4 (OpenSUSE, Kubuntu Hardy and several others).)
Some GTK+ applications show wrong system tray icon sizes.
That is unfortunately a problem in the Freedesktop.org system tray specification, which does not define the sizes for system tray icons properly.
I experience extreme slowness when using Plasma with the NVIDIA binary driver.
This is NVIDIA's fault entirely, due to their driver not supporting correctly the XRender X11 extension, and it also affects other parts of KDE such as Konsole. See this blog entry on how to report issues upstream to NVIDIA. This page contains a few suggestions on how to improve performance until an updated driver is released.
NVIDIA has released the 18x.xx series driver that can improve performance dramatically with Plasma and KDE4 in general.
Users who have a NVIDIA 6 or 7 series card should add the following lines to their xorg.conf in the "Screen" section, which may improve performance. You don't need to add these lines if you have a 8/9 or above series NVIDIA card, since they're enabled by default.
Option "PixmapCacheSize" "5000000"
Option "AllowSHMPixmaps" "0"
There are some other options you can try, which may improve things if you get poor Desktop Effects performance.
Go to SystemSettings>Desktop>Desktop Effects>Advanced, you will see "OpenGL Options", make sure "Bilinear" or "Nearest (fastest)" is set as the "Texture Filter" option. You can also try turning off "Use VSync" there as well.
Folder View and other plasmoids look badly rendered with an ATI video card and the open source radeon driver.
To work around this issue, you have to change the 2D acceleration method from XAA (X Acceleration Architecture) to the newer EXA. As this involves editing your xorg.conf file, bear in mind that such a modification may damage your system. Do it at your own risk.
To make the switch, edit your xorg.conf file (make a backup just in case) and locate the Device section for your graphics card. Add the line
Option "AccelMethod" "EXA"
before the "EndSection" line. If there is already a line with AccelMethod, change it from XAA to EXA. Save the file and restart the X server.
Notice that EXA is still marked as unstable, and that some other applications such as some KDE3 programs may render incorrectly.
Hints & Tips
Turning off the new job notification system
Plasma uses a different way (as opposed to the past releases of KDE to show job progress (for example, a download). For those who do not like it, there is a configuration file option to revert to the old behavior (KDE 4.1 or earlier). Make sure plasma is not running and edit $KDEHOME/share/config/plasma-appletsrc and add the following lines:
[AppletGlobals][plasma_applet_systemtray]
ShowJobs=false
ShowNotifications=false
Restart Plasma to see the changes in action.
Disabling ARGB visuals
For many of its effects, Plasma makes use of the so-called "ARGB visuals". For older video cards, this can mean a severe performance hit. To disable ARGB visuals and increase performance, you need to set the KDE_SKIP_ARGB_VISUALS environment variable to 1 (KDE_SKIP_ARGB_VISUALS=1) before Plasma starts. You can do so by putting a line setting this variable in /etc/profile or in ~/.profile.
Right-click the panel when your task bar is full
To make some changes to the panel you need to right-click on it - and if you have open applications that may not be easy, The workaround for this problem is to use the panel cashew to bring up the panel settings, then you can right-click anywhere on the panel, including on application tabs, and the command will go to the panel, not the application.
Re-arrange the application tabs on your task bar
Right-click on an empty part of the task bar (or use the method described above) and select Task Manager Settings. In the 'Sorting' combo-box, select 'Manual'. 'OK' to close it. Now you can re-arrange your task icons by holding down Alt and dragging the tabs to their new order. (If you use this alt-drag while the panel config panel is open the whole group of application tabs will move as one.)
Watch some Screencasts
This forum page has links to screencasts that will help you understand Desktop Settings, Panel Settings and the Zooming User Interface (a.k.a. the Cashew).
Miscellaneous tips
Some alternatives for those who like a sparse desktop:
1 - you can remove the panel entirely. Open applications would be available using the ALT+TAB cycling.
2 - Remove the panel and add a short one at the top of the screen, to hold only the task manager
3 - Create a panel containing the task manager and use autohide.
Glossary
See the Glossary page.
Thanks
- Daniel Laidig & Simon St.James - thanks for the umeet IRC logs!
- Marco Martin - thanks for the information on panels!
- Sebas - thanks for letting me use information from your blog entries!
- Half-Left - great example of ZUI usage!
- Aikurn - Excellent videos!
- Marcelo Magno T. Sales - for giving panel Tips on a mailing list
Contributors
- Luca Beltrame - current maintainer
- Joseph M. Gaffney
- Chani
- Dipesh
- Maninalift
- All the anyonymous contributors
| Back to the Introduction page |
 |
Umbrello UML Modeller is a Unified Modelling Language (UML) diagramming tool from KDE |
UML allows you to create diagrams of software and other systems in a standard format called Unified Modelling Language i.e. UML (www.uml.org).
Content of diagrams can be exported into code. Existing code files can be parsed and imported to be used in diagrams.
The following diagram types are supported:
- use case diagram
- class diagram
- sequence diagram
- collaboration diagram
- state diagram
- activity diagram
- component diagram
- deployment diagram
- entity relationship diagram
The Umbrello home page is at umbrello.kde.org.
The source code can be found on the umbrello git repository as part of the kdesdk package.
Screenshots are found on this page.
Mailing lists are:
Vision
Umbrello is in a good state, when you are able
- to parse its source code,
- to draw diagrams and explore its architecture, classes and code
- make changes to it
- and generate the code again out of its model, so that you are ready to compile it again.
Or in other words, when you can use Umbrello for developing and improving itself.
Tips and Hints
Features
If you want a feature added, check the umbrello wish list and add a wishlist entry if it isn't already there. All code contributions welcome.
If you have problems
- You may find an answer in the Umbrello FAQ page.
- For support, please have a look at the Tools & IDEs Forum.
- You can also get direct support in the #umbrello channel on the irc.freenode.net network. Please ask your question and be patient, as soon as somebody is around who can help you will get an answer.
- Mgraesslin/KWin
- OnlyShowIn2.png
- OnlyShowIn.png
- ManageArchives.png
- Move.png
- Smplayer.jpeg
- Smplayer1.jpeg
- Smplayer2.jpeg
- Smplayer3.jpeg
- SMPlayer
Home » Applications » Multimedia » SMPlayer
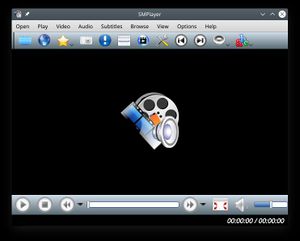 |
A fully-featured video player |
SMPlayer intends to be a complete front-end for MPlayer, from basic features like playing videos, DVDs, and VCDs to more advanced features like support for MPlayer filters and more. SMPlayer player isn't a KDE application, but provide some good integration with KDE.
Features
- It remembers the settings of all files you play. So you start to watch a movie but you have to leave... don't worry, when you open that movie again it will resume at the same point you left it, and with the same settings: audio track, subtitles, volume...
- Configurable subtitles. You can choose font and size, and even colors for the subtitles.
- Audio track switching. You can choose the audio track you want to listen. Works with avi and mkv. And of course with DVDs.
- Seeking by mouse wheel. You can use your mouse wheel to go forward or backward in the video.
- Video equalizer, allows you to adjust the brightness, contrast, hue, saturation and gamma of the video image.
- Multiple speed playback. You can play at 2X, 4X... and even in slow motion.
- Filters. Several filters are available: deinterlace, postprocessing, denoise... and even a karaoke filter (voice removal).
- Audio and subtitles delay adjustment. Allows you to sync audio and subtitles.
- Advanced options, such as selecting a demuxer or video & audio codecs.
- Playlist. Allows you to enqueue several files to be played one after each other. Autorepeat and shuffle supported too.
- Preferences dialog. You can easily configure every option of SMPlayer by using a nice preferences dialog.
- Possibility to search automatically for subtitles in opensubtitles.org.
- Pan&Scan...
- DVD ISO Playback
- Translations: currently SMPlayer is translated into more than 20 languages, including Spanish, German, French, Italian, Russian, Chinese, Japanese....
- It's multiplatform. Binaries available for Windows and Linux.
Screenshots
 |
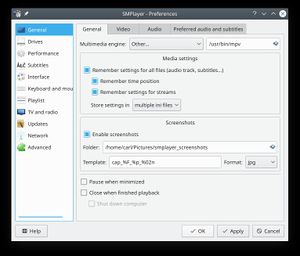 |
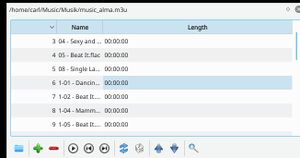 |
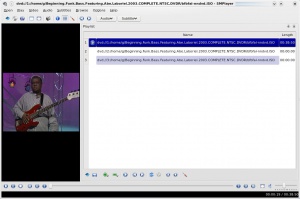 |
Download
If not included in your distribution, you can download SMPlayer from it's website in Windows binary or Linux source code format and in packages made for some specific distributions.
Introduction
On several Linux distributions, the NetworkManager daemon provides user-configurable control of network connections. In KDE, the KNetworkManager (KDE3 and KDE4) and Network Management (KDE4) are the main user interfaces to NetworkManager.
Bugs
Reporting Bugs
To report a useful bug against Network Management, provide the following items of information:
- Your distro version
- Is NetworkManager in use? On some distributions it is optional, as it is out of place on a static, server-like system. Stop now if it is not.
- The version of the Network Management applet (NetworkManager-kde4.rpm on openSUSE, plasma-widget-network-manager in Kubuntu 9.04, plasma-widget-networkmanagment in Kubuntu 9.10, kde-plasma-networkmanagement on fedora)
- The version of the NetworkManager package
- The version of the ModemManager package
- Your computer's hardware if not a vanilla x86 compatible. PPC user? I want to know.
- Your network hardware (use lshal to find this out)
- A system log from NetworkManager during the connection attempt
- for openSUSE: /var/log/NetworkManager
- for kubuntu: /var/log/syslog
- for fedora: /var/log/messages
- For wireless networks:
- Is it using a hidden SSID?
- Wireless security type: WEP/WPA-PSK/WPA-EAP?
- Key length
- Key type (passphrase or hex for WEP)
- Ciphers (TKIP/AES)
- Auth mechanisms (TLS/TTLS/PEAP/...)
- For mobile broadband:
- hardware
- driver in use (see dmesg when you connect the hardware)
- network in use
- network type (GSM/CDMA/UMTS)
- apn used, if any.
- ModemManager logs ("killall NetworkManager", "killall modem-manager", start "modem-manager --debug", "NetworkManager --no-debug") may be helpful in debuggin whether NetworkManager detects your hardware.
And very importantly: Are you able to connect with another client? For example, nm-applet under GNOME or cnetworkmanager on the console. If so, please try to attach comparative troubleshooting information as described at the end of this article.
Bug handling
Network Management on most Linux desktops sits on top of a large and fragile stack of components. This is necessary to deal with the vast number of different configurations. When a connection fails, it can be for any one of a number of reasons throughout this stack, but the symptoms will usually be something like "Connection got to 28% and then failed". Bugs reported at bugs.kde.org will be triaged to try and find out at what layer the failure occurred, so that it can be fixed by those responsible.
The Stack
The Hardware
Wireless hardware has a surprising number of bugs. These are dealt with at the next layer, if you are lucky.
The Kernel
This is where the actual driver that controls the hardware is located. There are many interesting bugs here too. Since the introduction of a standard wireless MAC layer in the Linux kernel, this situation is improving. Some hardware doesn't have a Linux driver, so people control it using the ndiswrapper tool, which loads Windows drivers and their bugs. You can see its output in the system log, and talk to the drivers using the iwtools set of commands.
WPA Supplicant
wpa_supplicant is a low level tool for talking to the driver, providing authentication and encryption settings. It is open source and generally of high quality. Before the advent of NetworkManager, users had to configure it manually with control files in /etc. This has been known to get people out of a tight spot occasionally. It usually logs to /var/log/wpa_supplicant.log. Nowadays it is mostly controlled remotely by....
NetworkManager
NetworkManager is the system daemon at the centre of the networking subsystem on most end user Linux installations. It has root privileges, needed to control the lower layers, and exposes some controls up to clients running in the user session via DBUS. It writes a log in /var/log. NM also controls DHCP clients as needed and rewrites /etc/resolv.conf with the DNS servers it has configured. NetworkManager also provides a SystemSettings service, which is responsible for reading your distribution's network configuration files (system wide) and feeding them into NetworkManager.
User Clients
KNetworkManager applet for KDE 4, Network Management Plasmoid under KDE 4, KNetworkManager under KDE 3, nm-applet under GNOME, and cnetworkmanager is your last life. These are responsible for
- giving feedback on the networking status of this system,
- communicating the user's actions to NetworkManager,
- and for storing and communicating the user's network connection details (policy) to NM.
While they are the most visible part of the system, they are also the least important to making a successful connection. Since they share a standard interface to NetworkManager, they can be exchanged easily.
When Things Go Wrong
Where Does It Hurt?
Simple. Start at the top of the stack and work down. When you find something that works, you found the site of the problem. When you run out of things you can change, hand over to an expert (probably the responsible team at your Linux distribution).
- Are you actually using NetworkManager on your system? Mandriva doesn't use it. Moblin uses Connman.
- Try a different NetworkManager client. If that helps, continue in the next section to try and further localize the problem in Network Management. Then bugs.kde.org, product "Network Management" is the place to go.
- Try to configure a connection using your distro's system configuration tools, so SystemSettings picks it up. It's unlikely but worth a go.
- Try a manually configured connection via wpa_supplicant. The documentation is rather sparse but there are example configurations include in the package. Here is the list of supported hardware. If wpa_supplicant on its own works, NetworkManager is at fault. Talk to your distro or report it at bugs.freedesktop.org.
- If that didn't work, reconfigure a wireless router to use a different (weaker) encryption type or none at all. If this works, the problem is either in wpa_supplicant or the driver. Either way, take it to your distro.
It's All KDE's Fault!
If you are reading this, you will have been able to make a connection using a different NetworkManager client.
First, make sure that you are not running another client as well as Network Management. This will lead to unpredictable results. If you were, remove and restart Network Management. You can run it externally to Plasma asplasmoidviewer networkmanagementif you want.
You should now try to figure out how the connection provided by Network Management differs from that provided by the other client. If you build Network Management from source you can use the tool 'qdbusfornm', which is a version of qdbus extended to handle NM's data types.
If you do not build from source, just replace./qdbusfornm --systemby
qdbus --system --literalin the command shown below. It is a bit harder to read but should give you the same output. If you use
qdbus --system --literalplease take the time to format the output so there is one key per line, similar to the qdbusfornm output below. This is easy and just takes time, so it is better for you to do this than a developer.
The value 0 below identifies the connection. Change it if you have more than one until you find the relevant connection.
./qdbusfornm --system org.freedesktop.NetworkManagerUserSettings /org/freedesktop/NetworkManagerSettings/0
org.freedesktop.NetworkManagerSettings.Connection.GetSettings
returns here
a{sa{sv}}(==802-11-wireless==
 band: bg
 mode: infrastructure
 security: 802-11-wireless-security
 ssid: opensuse-guest
 ==802-11-wireless-security==
 auth-alg: open
 key-mgmt: wpa-psk
 wep-tx-keyidx: 0
 ==connection==
 autoconnect: true
 id: openSUSE
 type: 802-11-wireless
 uuid: {951cc7d9-1fa0-4525-9ab7-7199849e1b19}
 ==ipv4==
 dns-search:
 method: auto
 )
Now you should repeat using the other, working client and copy both sets of output, before attaching them securely to a bug report at bugs.kde.org. With this information we will quickly be able to implement a fix.
Crashes
If you have a crash ensure you install debugging symbols and take a backtrace. In Kubuntu you need to add the debug repository and install plasma-widget-networkmanagement-dbgsym.

Websites for the KDE Community
Websites where users can get general information about KDE. These are either run by KDE or are directly affiliated with KDE.
- The KDE Homepage. Here you will find general information about both KDE software and the KDE Community. There are many links to other resources
- KDE.news or simply, The Dot. This is the authoritative source of KDE-related news and announcements.
- Planet KDE. An aggregation of blogs of KDE developers and contributors. These blogs express the opinion of individual people. It may sometimes contain posts unrelated to KDE software.
- KDE Forums. The official forum of the KDE community. Get or give online support. Brainstorm for projects or applications. Or even just hang around with fellow KDE software lovers.
- KDE TechBase. High-quality documentation and tutorials for KDE development. Perfect for people who want to get involved and contribute to KDE software.
- KDE Store. More applications for your Plasma Desktop. An online source of third-party applications made by the community. Please note that these are not official KDE applications; they are supported from their individual project webpages. The KDE Store is part of the openDesktop project.
- KDE Store also provides Eye-candy for your Plasma Desktop. Jazz up your desktop with a large variety of themes, wallpapers, widget styles, icon themes, and more. This is part of the openDesktop project.
KDE Applications
Some KDE applications have their own website. Please check with the application's page here in UserBase to see if the program you are looking for has one. The Applications Catalogue gives you an overview of the KDE applications that has a page here on UserBase. Find a list of all official applications from KDE on kde.org.
Sites and Articles
Do you have a site dedicated to KDE software or community? How about an article talking about a new cool feature or some tips? Maybe you came across a write-up about KDE on an online magazine. List them all here for the KDE world to see!

NOTE: These sites or articles are not under the control of the KDE community. The KDE community will not be held liable for the content and opinions expressed therein.
Sites
- Introducing KDE4. Little articles covering KDE SC4.x - new applications, features, and improvements over its predecessor. (dated)
- Sordon
- Showcase/Tutorials
- Tts.png
- Mousenav.png
- Preferences-desktop-accessibility.png
- Preferences-desktop-text-to-speech.png
- Tb1.png
- Tb2.png
- Tb3.png
- Tb4.png
- Spell.png
- Tutorials/Modify KDE Software Defaults
There are 3 basic scenarios when you want to modify default settings:
- You are system administrator and get a dozen new users every day. You want the new users to have certain settings that are not default for a KDE Plasma Desktop
- You are system administrator and want to change the desktop or system settings of all your users. Logging in as each user and do the changes in System Settings is not an option.
- You have several KDE desktop machines: maybe a computer at work behind a proxy, a machine at home and some virtual machines for testing. You re-setup computers frequently and want your settings to be rolled out identically afterwards
In any case you will have to make changes to the setting files in ~/.kde or ~/.kde4 or /usr/local/share or /usr/share.
/etc/skel
When a new user is created, the content from /etc/skel is copied to his home directory. If you want to change the settings for all future users, just change the files in /etc/skel.
Examples
To change the default browser, use the program System Settings. However, there are situations where you cannot call kcmshell5 to open System Settings. In this case you can use the following script. It changes the default browser to Firefox:
#!/bin/bash
# This file sets up a computer as tstaerk likes it. Call it after you have performed the OS installation.

# 1. set default browser to firefox
# 1.1. for SUSE Linux, where we have to look in .kde4 instead of .kde
# The key for default browser is BrowserApplication.
cd
cd .kde/share/config
# first delete all the old entries for BrowserApplication
sed -i 's/BrowserApplication\[\$e\]=.*//g' kdeglobals
# add BrowserApplication to the General section if a General section exists
sed -i 's/\[General\]/\[General\]\nBrowserApplication\[\$e\]=!firefox/g' kdeglobals
# add a General section and the key BrowerserApplication if no General section exists
grep "\[General\]" kdeglobals || echo -e "\n[General]\nBrowserApplication[\$e]=!firefox" >> kdeglobals
- Landscape.png
- Portrait.png
- Saturation.png
- Value.png
- Todo overview.png
- Web export small.png
- Web view small.png
- Vcalendar.png
- Mainshot small.png
- Preferences.png
- Preferences2.png
- Tng.gif
- Todo.png
- Recurrence.png
- Print korg.png
- What is KDE (pt BR)
Então, você instalou KDE pela primeira vez, ou então está retornando ao KDE de uma longa viagem em outro lugar. Ou ainda você está planejando usar o KDE, mas não sabe direito o que ele é e quer descobrir o que é essa coisa que está olhando pra você da tela de seu computador?
Comunidade Internacional
(Imagem cortesia de Wade Olson)
Desktop Environment

KDE, ou K Desktop Environment, como o nome sugere, iniciou sua vida como um gerenciador de desktops. Os programas cresceram, e o KDE agora é um time internacional que cria aplicações abertas e gratuitas. O que isso significa é que existem muitos programas trabalhando juntos para dar a você a melhor experiência computacional possível. Isso significa que você não pode usar um programa do KDE se você não usa o desktop do KDE? De forma alguma. com a ajuda de uma ou duas bibliotecas as aplicações podem ser usadas em todos os desktops, inclusive Windows e OS X.
KDE oferece uma variedade de programas para satisfazer as necessidades dos usuários. de um simples e poderoso editor de texto até tocadores de áudio/vídeo de ultima geração, até as mais sofisticadas IDE`s ( programas de desenvolvimento de software ), além do mais, as aplicações KDE seguem uma estrita linha de look`n feel em todos os programas, dando um efeito confortável ao utilizar qualquer programa. KDE tem várias outras qualidades que fazem dele um centro de trabalho de ponta, como:
- Um desktop bonito e moderno
- Sistema de configuração flexível, deixando você personalizar os aplicativos sem editar arquivos de configuração na mão.
- Transparência de rede, acessando facilmente arquivos em outras redes e computadores como se estivessem no seu PC.
- Ecossistema de programas contendo mais de milhares de aplicativos.
- Traduzido em 60 idiomas.

Programas Livres
KDE não é qualquer software. É Programa Livre, do ponto de vista do usuário, isso é um fato importante, mesmo sem ir fundo na parte técnica ou as considerações legais. Porquê? Porquê com software livre, você pode utilizar o KDE sempre que quiser e de qualquer forma que pensar. sem chaves de ativação e limites na instalação, e você é livre para compartilhar com os outros também! então, não apenas você tem em suas mãos um software poderoso, mas você também dá a sua família e amigos a oportunidade de terem também.

Tem Mais!
E Não para por aí.! KDE tem muito para ofertar! aqui estão alguns outros pontos que podem estar interessados:
- Outras Plataformas - Os aplicativos KDE estão funcionando também para Windows, Mac OS X e portáteis como o Nokia N810.
- Office e ferramentas de produtividade - KDE também serve para deixar você produtivo e organizado.
- Framework para desenvolvimento de aplicações - Sempre sonhou em escrever o próximo programa de dominação global? KDE pode te ajudar com isso.
| Voltar para a Página introdutória |
This is a tutorial howto get the quanta-php-documentation up-to-date.
Please follow the step-by-step guide.
First: Install php-documentation
First, you have to install the php-documentation packet for your Distribution.
In Ubuntu, type:
sudo apt-get install php-doc
Second: Download newest php-documentation
- Visit http://www.php.net/download-docs.php and download the "Many HTML files "-archive for your prefered language.
- Extract that package into your home-directory, so you have a directory /home/user/html
- Copy these files into the doc-dir. (in Ubuntu: /usr/share/doc/php-doc/html)
# rm -fr /usr/share/doc/php-doc/html
# mv /home/user/html /usr/share/doc/php-doc/html
- Execute
# chmod -R o+rwx /usr/share/doc/php-doc/html
Third: refresh docrc-file, so that Quanta has a new index
Install php-cli
In Ubuntu, type:
sudo apt-get install php-cli
Copy the code from this page and save it into the quanta-doc dir as /usr/share/apps/quanta/doc/gendoc.php
The script uses the php-XML-Reader. Because of that you have to make some html-files XML-valid:
- Open /usr/share/apps/quanta/doc/php/index.html and /usr/share/apps/quanta/doc/php/funcref.html
- Change the line
<meta http-equiv="content-type" content="text/html; charset=UTF-8">
into
<meta http-equiv="content-type" content="text/html; charset=UTF-8" />
- cd into /usr/share/apps/quanta/doc/
- Execute (as root)
php gendoc.php php
That script will update php.docrc and create php_fref.docrc.
php.docrc is the file for the normal index of the php-documentation.
php-fref.docrc is an additional index file for all pages, functions are listed in it. I thought it could be convenient.
Fourth: Optional: Get better look-and-feel for the pages
It's possible to use a css-file on the documentation. Install and open KFileReplace.
- Click
- Change to /usr/share/doc/php-doc/html
- Set to *.html
- Disable including subfolders
- Set to utf8
- Don't type anything in or
- Click
- Click on the Button in main window
- Activate mode
- for:
<!DOCTYPE HTML PUBLIC "-//W3C//DTD HTML 4.01 Transitional//EN" "http://www.w3.org/TR/html4/loose.dtd">
 <html>
  <head>
   <meta http-equiv="content-type" content="text/html; charset=UTF-8"
- with:
<!DOCTYPE HTML PUBLIC "-//W3C//DTD HTML 4.01 Transitional//EN" "http://www.w3.org/TR/html4/loose.dtd">
 <html>
  <head>
   <link rel="stylesheet" type="text/css" href="style.css" />
   <meta http-equiv="content-type" content="text/html; charset=UTF-8"

- Click on the .
- Click
- Click on the Button (not ) in the main window.
- Create a style.css-File in /usr/share/doc/php-doc/html
Here you could modify the appearance.
If you like the php.net-style, download it from
http://www.php.net/styles/site.css
and modify it. Maybe you want to make the font-size smaller etc.
Good luck
Please copy the following code.
 #!/usr/bin/php
 <?php
 $doc = array();
 $doc2 = array();
 // ####F-ref-seitem
 $doc[] = array('name' => 'Function reference pages', 'link' => '');
 // ####### treeee
 $cXmlReader = new XMLReader();
 $cXmlReader->open($argv[1].'/index.html');
 while($cXmlReader->read())
 {
 if($cXmlReader->name == a && $cXmlReader->readInnerXML() != "")
 {
 if($cXmlReader->depth == 5)
 $doc[] = array('link' => $cXmlReader->getAttribute("href"), 'name' => $cXmlReader->readInnerXML());
 if($cXmlReader->depth == 7)
 $doc[count($doc)-1][] = array('link' => $cXmlReader->getAttribute("href"), 'name' => $cXmlReader->readInnerXML());
 }
 }
 // ####### treeee 2
 $cXmlReader = new XMLReader();
 $cXmlReader->open($argv[1].'/funcref.html');
 while($cXmlReader->read())
 {
 if($cXmlReader->name == a && $cXmlReader->depth != 4 && $cXmlReader->depth != 8 && $cXmlReader->readInnerXML() != "")
 {
 if($cXmlReader->depth == 5)
 $doc2[] = array('link' => $cXmlReader->getAttribute("href"), 'name' => $cXmlReader->readInnerXML());
 if($cXmlReader->depth == 7)
 $doc2[count($doc2)-1][] = array('link' => $cXmlReader->getAttribute("href"), 'name' => $cXmlReader->readInnerXML());
 }
 }
 // ######### ;F-Ref-Liste
 $dir = opendir($argv[1]);
 while($file = readdir($dir))
 {
 if(substr($file, 0, 4) == 'ref.')
 {
 $filec = file_get_contents($argv[1].'/'.$file);
 $i = strpos($filec, '<title>');
 $j = strpos($filec, '</title>');
 $name = substr($filec, $i + 7, $j-$i-7);
 $doc[0][] = array('link' => $file, 'name' => $name);
 }
 }
 closedir ($dir);
 // ################# CONTEXT
 $cXmlReader = new XMLReader();
 $cXmlReader->open($argv[1].'/indexes.html');
 $context = array();
 while($cXmlReader->read())
 {
 if($cXmlReader->name == a && $cXmlReader->readInnerXML() != "" && $cXmlReader->depth == 6)
 {
 if(substr($cXmlReader->readInnerXML(), -2) == "()")
 $name = substr($cXmlReader->readInnerXML(), 0, -2);
 else
 $name = $cXmlReader->readInnerXML();
 $context[] = array('link' => $cXmlReader->getAttribute("href"), 'name' => $name);
 }
 }
 // ############## write tree into file
 function w($text, $nl=0)
 {
 global $file;
 $text = utf8_decode($text);
 fwrite($file, $text.(($nl)?"\n":''));
 }
 $file = fopen($argv[1].'.docrc', 'w');
 w('[Tree]
 Doc dir='.$argv[1].'
 Top Element='.$argv[1].' documentation
 ');
 w($argv[1].' documentation=');
 $c='';
 foreach($doc as $line)
 {
 w($c.((count($line) > 2)?'#':'').$line['name']);
 $c=',';
 }
 w("\n");
 function wrec($array)
 {
 w("\n");
 foreach($array as $line)
 {
 if(count($line) == 2)
 w($line['name'].'='.$line['link'], 1);
 else if(count($line) > 2)
 {
 w($line['name'].'=');
 $c = '';
 foreach($line as $key=>$subline)
 {
 if(!is_numeric($key)) continue;
 w($c.((count($subline) > 2)?'#':'').$subline['name']);
 $c=',';
 }
 w("\n");
 wrec($line);
 }
 }
 w("\n");
 }
 wrec($doc);
 // ############## write context into file
 w('[Context]',1);
 w('ContextList=');
 $c = '';
 foreach($context as $line)
 {
 w($c.$line['name']);
 $c = ',';
 }
 w("\n",1);
 foreach($context as $key=>$line)
 {
 if(!is_numeric($key)) continue;
 w($line['name'].'='.$line['link'],1);
 }
 fclose($file);
 // ############## write tree 2 into second file
 $file = fopen($argv[1].'_fref.docrc', 'w');
 w('[Tree]
 Doc dir='.$argv[1].'
 Top Element='.$argv[1].'_fref documentation
 ');
 w($argv[1].'_fref documentation=');
 $c='';
 foreach($doc2 as $line)
 {
 w($c.((count($line) > 2)?'#':'').$line['name']);
 $c=',';
 }
 w("\n");
 wrec($doc2);
 fclose($file);
 ?>
- Skierpage
- Tinman321
- Mariusz dykierek
- Systemsettings.png
- Systemsettings-search.png
- Partitionmanager.png
- Partitionmanager1.png
- Xxtjaxx
- Xxtjaxx
- Plasma
At A Glance
Plasma is the KDE workspace. Actually it is a technology that can adapt to many types of devices. Currently there are two varieties of Plasma: The Plasma Desktop environment which is the focus of the majority of our pages and Plasma Mobile, the new cool environment for pads and smartphones. The Plasma Netbook environment was removed in KDE Plasma 5 and replaced with the Application Dashboard menu.
A typical Plasma desktop looks like this:

The four key components of a default Plasma desktop are:
- The panel, sometimes referred to as "the task bar", it provides room for the application launcher, the list of windows (programs), clock and system tray;
- The desktop, the area where widgets and icons reside;
- The folder view, a widget that lists the content of a folder on your computer, giving you quick access to basic file management tasks;
- The Plasma toolbox This is located at the top left of the screen as well as at end of the panel. These are used to access configuration and other options quickly and reliably.
All of these default items are fully configurable and can host a wide variety of tools and content.
The Plasma Desktop FAQ
A "Frequent Asked Questions" for the current version of the Plasma Desktop is maintained on this page. It provides succinct answers to common questions as well as links to FAQs for older versions.
Finding your way around Plasma
You can use Plasma as you would use the desktop of any other operating system, by accessing the application launcher, viewing the currently active programs on the taskbar, accessing icons on the system tray, and so on.
An important part of Plasma are the "widgets". Widgets are the individual units of the desktop and they include (although they are not limited to) the application menu, icons, the system tray, the clock, etc. Widgets can exist on the desktop itself, or be inserted into the panel, on the screen saver or on the dashboard among other places. Widgets exist for a large number of tasks besides usual desktop helpers, including microblogging (Twitter, identi.ca), unit conversion calculators, weather forecasts, file sharing and much more. Panels and desktops are also special kinds of widgets themselves, meant to contain other widgets.
How does that relate with desktop usage? Plasma has some new features with respect to traditional desktop usage. We have already mentioned the Plasma toolboxes: those are the way to start interacting and customizing your Plasma Desktop. By clicking on them, a menu will pop up on the screen with a variety of choices: from there you can add widgets to your panel or desktop, resize, add or remove panels, change the wallpaper and other operations.
Folder Views
As you may notice in the screenshot above, there are no icons placed directly on the desktop. Instead, they are placed inside a container called a "Folder View". By default, the Folder View shows the Desktop folder and allows you to drag files to it, open them, cut, copy, paste, rename files and also create new folders/files.
You can have more than one Folder View on the desktop, and they can also be placed in panels. You can set Folder View to show any folder, local or remote, you have access to. Each Folder View can be moved and resized independently to your preference.
Folder View can also be set as the default full-screen desktop background for a more traditional "icons scattered on the desktop" layout.
Panels

Panels allow you to place widgets around the edges of the screen. These collections of widgets can be configured in various ways, including making them automatically hide when not in use or aligned to certain areas of the screen.
By default, there is one panel at the bottom of the screen, but you can add more panels, move and otherwise configure the default panel and remove panels you no longer want. The widgets in all of the panels may also be adjusted to your liking.
For more information on configuring panels in Plasma Desktop and what they are capable of doing for you, visit the Plasma Panels page.
Latte Dock is an alternative panel.
Widgets

Plasma supports widgets written specifically for Plasma (also known as Plasmoids) as well as widgets from other sources such as Google Gadgets, Superkaramba and some Dashboard Widgets from Mac OSX. Additional widgets can easily be found and installed through Get Hot New Stuff.
To see the widgets that are installed on your system and ready to use open the Plasma Widget Explorer by either
- opening the Desktop Toolbox in the upper right corner of the screen and selecting ,
- opening the Panel Toolbox furthest to the right in the Panel and selecting , or
- right clicking on the Desktop and choosing from the context menu.
To place a widget on the Desktop simply drag it from the Widget Explorer to the Desktop. To place a widget in the panel first open the Panel Toolbox and from there open the Widget Explorer (click ), locate the widget you wish to add and drag it to the desired position in the Panel.
Widgets that are docked into a panel usually have an Options menu, while those on the desktop have the configuration options within the 'handle', the shaded area which pops up when hovering over the widget. Clicking and holding the mouse on the blank part of the handle will allow you to drag the widget to the desired position.
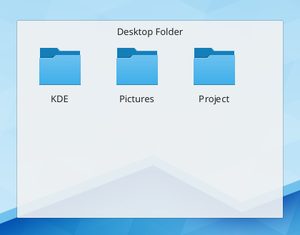
You have four tools on this handle. The top one is the re-sizer. Click and drag on the tool to resize the widget.
The second tool is a rotate tool. Again, click and hold the tool, while rotating to the desired angle.
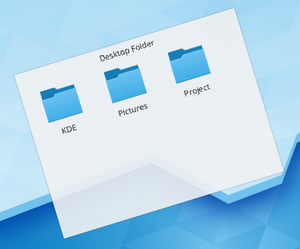
The third is the wrench or spanner which allows you to configure that particular widget's settings.
Finally, the fourth tool is the "expanded view" tool and is available only on widgets that support this feature, such as the Picture Frame or Web viewers. When clicked, the Picture Frame widget will, for example, open the currently viewed in an image viewer while the Web Slice widget will open the web page in a full web browser window.
A list of Plasma widgets with their own page can be found here, and some of our favourite widgets are discussed on the Plasma Widgets page
Activities
The icons shown in the screenshot have small buttons in the top right and bottom right. The small pause button in the top right prevents the activity from being included when switching through Activities using Super + Tab. It also opens up an "x" to delete the activity. To change the names of the activities, look for the small wrench in the bottom right of the icon.

Use Cases
A user likes web comics so they add their favorite web comics via the comics widget. The user now has a full desktop activity dedicated to their favorite web comics. Now the user is happy with the web comics, but the user now has to go to work, so the user creates an activity with the folder view widgets set to the folders of the projects the user is currently working on. After work the user goes home and works on a side project of writing romance novels. The user always gains inspiration by looking at pictures of the user's significant other. The user now creates a new Activity but now puts pictures frame widgets with pictures of the user's significant other. The user also has a folder view of the romance novel project folder. Now no matter what the user is doing the user has a custom tailored activity to match it.
Go to this blog to read a few tips on using activities. Chanis blog has a number of examples as well as screencasts about activities.
Widget Layouts and Virtual Desktops
Virtual desktops, the ability to have a separate sets of windows on separate desktops, can tie in with Activities. You can have a different activity on each virtual desktop. In Plasma Desktop 4.4, this can be configured by entering and navigating to , and checking .
In Plasma Desktop 4.3, You configure this by zooming out and choosing . Then select and zoom in again.
Hints and Tips
There is subpage Plasma/Tips enumerating a lot of useful tips for Plasma.
Tweaking Plasma
- Learn how to add a sidebar with clock and news.
- Customize your Plasma by mixing multiple Plasma themes.
- Learn how to create a look and feel package.
- Learn how to change the default Window Manager in Plasma.
Reloading Plasma
Sometimes you might want to reload Plasma, like right after changing system language so the changes takes effect, or because of a problem with the desktop. To do that, open a terminal(or KRunner) and run these commands:
kstart5 plasmashell --replace
More Information
- The Plasma FAQ's
- Plasma HowTo's - short screencasts
- Glossary
- Some of our favourite plamoids - why not add yours?
- Here's how to install more Plasmas widgets
- Learn the versatility of KRunner
| Back to the Introduction page |
Plasma is one of the key technologies of KDE SC 4 (also known as the "Pillars of KDE"), and one of the most visible to users. As Plasma treats the user interface differently than a traditional desktop, there may be confusion as to what Plasma is, what it does, and how to perform common tasks.
This document attempts to address these problems by providing answers to the most common questions.

General Questions
What does Plasma do?
Plasma is the desktop interface for KDE SC 4, including the application launcher (start menu), the desktop and the desktop panel (often referred to simply as the task bar). However Plasma is more than just this familiar collection of utilities, it is a common framework for creating integrated interfaces. It is flexible enough to provide interfaces for mobile devices, media centres and desktop computers; to support the traditional desktop metaphor as well as well as designs that haven't yet been imagined.
What is wrong with the current desktop technology?
Today's desktops are static. Typically they are tied to a folder in which one can find icons (application launchers), or user-placed documents and folders. Along with pictures and images as backgrounds, the current desktop doesn't go any further, or work for the user. Plasma takes a different approach, engaging the user by creating a dynamic and highly customizable environment.
I don't think it's such a good idea...
With Plasma, you can let your desktop (and accompanying support elements) act like it always did. You can have a task bar, a background image, shortcuts, etc. If you want to, however, you can use tools provided by Plasma to take your experience further, letting your desktop take shape based on what you want and need.
How does Plasma work?
Plasma's components are widgets called Plasmoids. Plasmoids can take on a variety of functions, ranging from displaying your desktop and associated wallpaper, showing your laptop's battery level, displaying your plugged in devices, and drawing the taskbar: basically, they are small applications that live on the desktop. Plasmoids can be grouped together in "containers" called containments. On a default desktop, there are two main elements: the Panel and the desktop itself. Both are containments in the Plasma sense.
It doesn't sound too new... other operating systems have done that.
The key difference here is that plasmoids can interact together. You want a better view of your laptop battery in order to find out when you are running low? You just drag it away from the taskbar and put it on the desktop. Also, applets can be resized and rotated at will, thanks to the use of Scalable Vector Graphics (SVGs). As you can see, the desktop not only interacts with you, as the user, but also with itself in new and interesting ways. You are now able to control how your workspace behaves and what it displays, in a visually pleasing and user-friendly manner. Since Plasma is the sum of its plasmoids, every element, even the desktop itself, is a widget. This allows you to move your desktop anywhere with respect to the windows (back and forward). It is no longer rooted behind everything and becomes instead another element of real interaction.
Kicker and Kdesktop were working fine in KDE 3. Why did you have to change that?
Especially regarding Kicker, there was the important issue of maintainability. The code was in place since the KDE 2 days, and it was difficult to add new features without breaking others. In the end, to proceed forward the only viable option was to start anew from scratch.
I can't find my favorite <insert feature here>!
Don't forget that the Plasma Desktop is still in heavy development and that KDE 3 was an extremely polished codebase: it took seven years to get to that, while Plasma is much younger. With time, the Plasma developers plan on reintroducing features that are missing and fix regressions. As it progresses through the KDE SC 4.x cycle, Plasma will improve with it.
Why was the way the desktop operates changed?
The idea of a Desktop folder is fundamentally a broken concept. It assumes that everything you will access there resides on a single physical directory on your disk. It may be convenient, but at the same time it greatly limits what you can do. For example, you can't use custom layouts for different desktops, as everything would be read from the directory. Also, quite often a desktop structured like that becomes a dumping ground for files and folders, without any other function.
I heard there are no more icons on the desktop...
That is not entirely correct. You can have icons and launchers (shortcuts) by dragging them from Dolphin or the K-menu. What has changed is that the desktop will no longer display the contents of the Desktop folder. However, you can show an arbitrary number of folders (local or remote) on your desktop view, instead of being forced to display only the contents of the "Desktop" folder. To do so, the Folder View applet comes into play.
Also, should you wish, you can replicate the "icons on desktop" paradigm with minimal effort.
What is the Folder View applet?
The Folder View applet, like its name says, is used to display items (folders, files) from a directory. Such a directory can be either a local one residing on your computer, but also a remote FTP, SSH, or SMB share. In the future, it will even contain results from Nepomuk searches and tagging.
You can choose to view either all files, or filter either by specific regular expressions (e.g., all files with a certain extension) or by file type (for example, just images).
This applet also supports basic file management properties (moving, copying, cutting and pasting for example), and you can have as many as you want on your desktop.
Lastly, you can use one Folder View as the whole desktop, effectively replicating the "old style" paradigm.
What's the deal with Kickoff (the new K Menu) ?
During the development of KDE 4.0, different approaches for a K menu (application launcher) were tried. Some projects were ambitious but there was no way they could be completed on time. At the time, one developer ported SUSE Linux's application launcher (Kickoff) to the new KDE desktop architecture. As it was the most ready and feature complete (not to mention the product of usability testing) it was chosen to be the default menu. If you don't like it, the traditional K-menu is available as well - right-click onto the K Menu to find an option "traditional style". Also, some alternative menu systems have been announced and some, such as Lancelot, are ready for daily usage and offer exciting new features.
What is KRunner?
KRunner is the versatile mini-command line you can activate by pushing Alt + F2 or by selecting from the desktop contextual menu. It can search for applications, bookmarks, even sessions basing on your input, show system activity and even do simple arithmetic calculations.
KRunner's functionality can be extended through the use of plugins ("runners").
What are the "cashews"?
What is commonly referred as "cashew" is the Plasma logo you can find on the default desktop, on the upper right corner, and on the panel, on the right hand side (left hand side if you use a Right-To-Left language). By clicking on them, you can access other configuration options, such as panel configuration and the Zooming User Interface (ZUI). Some of these, like the panel cashew, only appear if the widgets aren't locked (see below).
Please provide an option to disable the upper right cashew.
Although putting an option to disable the cashew for desktops sounds reasonable, from a coding point of view it would introduce unnecessary complexity and would break the design. What has been suggested is, since the desktop itself (a containment) is handled by plugins, to write a plugin that would draw the desktop without the cashew itself. As a matter of fact, some distributions ship already a "Desktop without cashew" plugin.
What is the Zooming User Interface (ZUI)?
The Zooming User Interface, or ZUI, is another component of Plasma. It enables the user to group different groups of plasmoids together, and to quickly switch between one and another using a zoom-and-pan approach. Notice that at the time, although significant improvements have been made, this feature is still under heavy development and may be fully functional only with later KDE SC 4.x releases.
How does the ZUI work?
Suppose you have three groups of plasmoids (such as widgets, application launchers, etc.) which you want arranged in specific combinations depending on what you want to do. You first group them according to your tastes, then you can switch between them by zooming out (getting a preview of all the groups) and then back in on the specific group you want to use. Notice that it is different from traditional X11 virtual desktop switching, as there is a higher degree of flexibility by using this approach, as the groups can be totally different from each other.
A very good example of this behavior is shown by this image courtesy of Half-Left from #kde on freenode.
That said, you can tie virtual desktops to ZUI activities.
Why can't I use the ZUI from Dashboard view?
That feature is a work-in-progress. We're looking into it, but can't yet say how and when it will be finished.
On multi screen setups, the ZUI operates on all screens, the Dashboard just on one. Why is that?
The workflows are different. When zooming out, the user wants to get an overview, therefore activities on all screens are zoomed out. Whereas when using the Dashboard, the user usually wants to access specific functionality and might not want to interrupt his or her workflow on other activities.
Configuration
Can I place icons on the desktop?
Of course you can. Dragging an icon from Dolphin or Konqueror to the desktop will work. Notice that dragging on the desktop will not actually create a file there, just a link to it.
To display the contents of your Desktop folder, or any other folder, use the Folder View applet.
Alternatively, right-click on an empty area of the desktop, select and in the dialog that will pop up locate the text. Click on the type combo box and select . Click and you will have a Folder View applet as desktop (showing the contents of the Desktop folder by default), like the "old style" paradigm.

I am using two screens, and I used to have Kicker over the two displays. Can I do that with Plasma?
No. The reason is that having a panel over two displays adds a great deal of complexity, especially when the two displays have different resolution. As a result of this added complexity, this feature would not be guaranteed to work in all cases, hence it was not implemented.
Can I put the panel on only one screen?
All Plasma panels live in one screen. If you want panels on multiple screens, you can add panels and drag them to your preferred location using the panel controller you get when clicking on the Plasma icon in "Unlocked" mode.
How can I add applets to the panel?
Method 1: Open the dialog in the Plasma cashew (upper right corner of the screen) then select the widget of your liking and drag it directly (don't double click or use the button) to the panel.
Method 2: Drag an applet from the desktop to the panel.
Method 3: Click on the cashew on the panel, and select . Once you have selected the applet, it will be automatically added to the panel.
Can I move the applets on the panel?
To do so, open up the panel controller (by clicking on the cashew or by right clicking on the panel and selecting ) and hover the mouse cursor over the applets. Its shape will turn into four arrows, and you'll be able to rearrange the applets as you wish.
Lydia Pintscher's blog has a video showing movement in action. Another one is available on Aikurn's blog. Aikurn has also made an annotated video.
How can I change the height and the size of the panel?
Click on the panel cashew (the small icon on the right side of the panel) to open the panel configuration interface. By clicking on , you can position the panel on any of the edges of the screen. Clicking on height and dragging increases or decreases the size of the panel.
The arrows on the sides of the panel define its size: there are two, which define "minimum" and "maximum" sizes. The maximum size is the size at which the panel can expand when items are added, while the minimum size is the minimum size the panel can have. If they are set differently, the panel will readjust its size depending on the contents.
Under there are additional options to align the panel and configure its behavior.
Can I auto-hide the panel?
Open the panel controller, select , then click on the relevant option.
How can I remove a panel?
Click on the panel cashew, click on , then select . Alternatively you can right click on the panel itself, select and choose .
General Panel Configuration Help
This forum page gives an illustrated guide to configuring the panel.
I heard that you can use OS X's widgets with Plasma. Is this true?
Yes, Plasma can use OS X's widgets. Work has been done to implement also Javascript-based widgets (reverse engineered due to Apple's license).
How do I move, rotate or resize an applet on the desktop?
First of all, hover over the applet you want to resize. The applet handle will appear.
The applet handle takes care of resize, rotate and move.
- To move an applet: Click on the handle, then drag the applet around.
- To rotate an applet: Click on the curved arrow then drag to rotate
- To resize an applet: Click on the square icon and then drag to resize the applet. You can constrain the resize operation to the applet's aspect ratio by holding down the Ctrl key.
You can bring all the widgets to the front by pushing Ctrl + F12, which will bring the Plasma Dashboard to the front. When you are done, you can either push the Esc key or select the option from the cashew.
How can I lock the positions of the widgets?
Method 1: Right click on an empty area of the desktop and select from the contextual menu. If you want to reverse that, right click again and select . The same option is available if you right-click on the panel.
Method 2: Select from the Plasma cashew on the upper right corner or from the panel controller.
How do I remove widgets?
If they're on the panel, right click on the widget and select . If the widgets are on the desktop, you have different options:
- If you hover over them, clicking the on the applet handle will remove them;
- If you use the dialog, you can click on the minus symbol icon next to the widget name to remove it.
Right click on the menu icon and select (if using Kickoff) or (if using the classic menu). Alternatively, you can add either type of menu using the dialog.
Aikurn has a video showing how to switch between the different styles.
How can I add/remove an activity?
Adding an activity: Zoom out from your current desktop view by clicking on the desktop view cashew (the icon in the top right corner) and selecting . You see a toolbar under your current desktop. Click on to create a new desktop view.
Removing an activity: Zoom out from your current desktop view and select the red cross from the toolbar that will appear to remove the activity.
Note: You must (Ctrl + L) before you can remove any activities.
KDE Forums user Fengshaun has made a screencast showing ZUI usage.
How can I quickly move between Activities?
The ZUI method is rather slow, so a better way is to use an Activity Bar. A short how-to here explains exactly what you need to do.
Are there any keyboard shortcuts for Plasma?
In addition to the mouse, there is a number of shortcuts available:
- Lock widgets: Ctrl + L
- Zoom out: Ctrl + -
- Zoom in: Ctrl + = or Ctrl + +
- Next applet: Ctrl + N
- Previous applet: Ctrl + P
- Add activity: Shift-Ctrl + A
- Next activity: Shift-Ctrl + N
- Previous activity: Shift-Ctrl + P
- Applet settings: Ctrl + S
- Remove applet: Ctrl + R
To change shortcuts, click on the desktop cashew and select "Shortcut settings".
How can I associate a keyboard shortcut with an applet?
Simply select an applet's settings (the wrench icon on the applet handle) and then click on . You will then be able to define a keyboard shortcut for your applet. Notice that some applets do not offer this feature (generally the ones that have no configuration).
Can the Dashboard show widgets other than those on my desktop?
Yes, it can. To configure it, click on the desktop cashew and zoom out. Choose from the toolbox that it appears, and check the option. Click on and you will have a different dashboard than your desktop when you access it.
How can I use virtual desktops as activities ?
Zoom out by clicking on the desktop cashew and a new toolbox will open. Click on then check the box . Click on OK and you are done.
Notifications take up too much screen - can I get rid of them?
For those who do not like it, there is a simple way to disable them. Right click on the system tray notification area (the i icon) and select .
There you will have the options of disabling notifications for applications or for jobs (such as file transfers) by unchecking the relevant check boxes.
Theming
I don't like the default look of the panel and other Plasma components. Can I change that?
Yes, the ability to change the look of Plasma was planned since the beginning. Plasma can use "themes", which are essentially a number of SVG images and files specifying the colors, to change its appearance. A number of themes are already available on kde-look.org.
How can I change my Plasma theme?
Right click on your current desktop, select (alternatively, you can select the same option from the desktop cashew) and you will find the option under . You can also download new themes directly from there by clicking the button, using Get Hot New Stuff (GHNS).
Step by step instructions, although made for KDE 4.1, (including screenshots) are available on Aikurn's blog.
Is there support for advanced visual effects (transparency, etc.) without using compositing?
In an effort to keep the codebase clean of workarounds (if not even hacks), the Plasma developers have decided that features that require compositing to work will not have a composite-less version. The main reasoning is that in the past (KDE 3.5.x), such approaches were one of the causes of the unmaintainability of the code, and also because supporting those features is actually pushing graphics card developers to write better graphics drivers.
Troubleshooting
Plasma crashed, how can I bring my desktop back?
Normally Plasma automatically restarts in the event of a crash. If this doesn't happen, open KRunner by pushing Alt + F2 (it should be still running) and type "plasma-desktop". Plasma will be restarted.
My panel is gone, how do I get it back?
kquitapp plasma-desktop; rm $KDEHOME/share/config/plasma-desktop-appletsrc; plasma-desktop
This deletes your plasma settings, so you'll get the default configuration back. If running the 3 commands at once doesn't work, try typing them in manually and wait a few seconds before running the next command.
(Note that the $KDEHOME environment variable may not be set. Try ~/.kde (Fedora, Kubuntu Intrepid, Debian, upstream default) or ~/.kde4 (OpenSUSE, Kubuntu Hardy and several others).)
Some GTK+ applications show wrong system tray icon sizes.
That is unfortunately a problem in the Freedesktop.org system tray specification, which does not define the sizes for system tray icons properly.
I experience extreme slowness when using Plasma with the NVIDIA binary driver.
This is NVIDIA's fault entirely, due to their driver not supporting correctly the XRender X11 extension, and it also affects other parts of KDE SC such as Konsole. See this blog entry on how to report issues upstream to NVIDIA. This page contains a few suggestions on how to improve performance.
NVIDIA has released the 18x.xx series driver that can improve performance dramatically with the Plasma Desktop and KDE SC 4.x in general.
Users who have a NVIDIA 6 or 7 series card should add the following lines to their xorg.conf in the "Screen" section, which may improve performance. You don't need to add these lines if you have a 8/9 or above series NVIDIA card, since they're enabled by default.
Option "PixmapCacheSize" "5000000"
Option "AllowSHMPixmaps" "0"
There are some other options you can try, which may improve things if you get poor Desktop Effects performance.
Go to , you will see , make sure or is set as the option. You can also try turning off there as well.
Folder View and other plasmoids look badly rendered with an ATI video card and the open source radeon driver.
To work around this issue, you have to change the 2D acceleration method from XAA (X Acceleration Architecture) to the newer EXA. As this involves editing your xorg.conf file, bear in mind that such a modification may damage your system. Do it at your own risk.
To make the switch, edit your xorg.conf file (make a backup just in case) and locate the Device section for your graphics card. Add the line
Option "AccelMethod" "EXA"
before the "EndSection" line. If there is already a line with AccelMethod, change it from XAA to EXA. Save the file and restart the X server.
Notice that EXA is still marked as unstable, and that some other applications such as some KDE3 programs may render incorrectly.
Hints & Tips
Add an application launcher to the panel
If you use Kickoff as your menu, right-click on the application icon, and select . If you use Lancelot simply drag the application onto the panel - you may need to hold it there for a second or so before letting go.
Lancelot makes this possible. Click on the menu launcher, then drag Applications as described above. When the popup menu appears, select .
Various parts of the Lancelot menu can be dragged to the panel in this way. Read this description of how to use it.
'Favorites' may be a good choice for adding to the panel
Disabling ARGB visuals
For many of its effects, Plasma makes use of the so-called "ARGB visuals". For older video cards, this can mean a severe performance hit. To disable ARGB visuals and increase performance, you need to set the KDE_SKIP_ARGB_VISUALS environment variable to 1 (KDE_SKIP_ARGB_VISUALS=1) before Plasma starts. You can do so by putting a line setting this variable in /etc/profile or in ~/.profile.
Right-click the panel when your task bar is full
To make some changes to the panel you need to right-click on it - and if you have open applications that may not be easy, The workaround for this problem is to use the panel cashew to bring up the panel settings, then you can right-click anywhere on the panel, including on application tabs, and the command will go to the panel, not the application.
Re-arrange the application tabs on your task bar
Right-click on an empty part of the task bar (or use the method described above) and select . In the Sorting combo-box, select . to close it. Now you can re-arrange your task icons by holding down Alt and dragging the tabs to their new order. (If you use this alt-drag while the panel config panel is open the whole group of application tabs will move as one.)
Watch some Screencasts
This forum page has links to screencasts that will help you understand Desktop Settings, Panel Settings and the Zooming User Interface (a.k.a. the Cashew).
Miscellaneous tips
Some alternatives for those who like a sparse desktop:
1 - you can remove the panel entirely. Open applications would be available using the Alt + Tab cycling.
2 - Remove the panel and add a short one at the top of the screen, to hold only the task manager
3 - Create a panel containing the task manager and use autohide.
Glossary
See the Glossary page.
HowTo
A page of Screencasts to help understand Plasma
Thanks
- Daniel Laidig & Simon St.James - thanks for the umeet IRC logs!
- Marco Martin - thanks for the information on panels!
- Sebas - thanks for letting me use information from your blog entries!
- Half-Left - great example of ZUI usage!
- Aikurn - Excellent videos!
- Marcelo Magno T. Sales - for giving panel Tips on a mailing list
Contributors
- Luca Beltrame - current maintainer
- Joseph M. Gaffney
- Chani
- Dipesh
- Maninalift
- All the anonymous contributors
- Lancelot-1.7-slimglow.png
- UserBase (es)= Qué es UserBase =
UserBase es una colección de paginas dedicadas a ayudar a los usuarios de todo el mundo a obtener la mejor experiencia al usar KDE.
Aquí encontrarás
Lo que NO encontrarás
| * Páginas tecnicas, en su mayoria utilizadas por los desarrolladores - Aunque encontrará muchos enlaces a http://techbase.kde.org/ | |

|
* Documentación "oficial" - La puede encontrar en kde.org o en las páginas de inicio de la aplicación |

|
* Itinerario de eventos - La puede encontrar Aquí |
Listo para contribuir ?
Necesitará abrir una cuenta OpenID para poder acceder. Una vez que este hecho, lea las Directrices de contribución para orientarse en qué hacer.
Porfavor recuerde las directrices anteriores, si tiene algún contenido que considere deba ser centrado en el usuario, pero no estrictamente dentro de esas directrices, por favor consulte con la comunidad del grupo de trabajo en community-wg en kde.org
| Bienvenido a nuestra magnífica comunidad ! |
| Volver a la Página de introducción |
Understanding the structure of this wiki
Paths need to be kept short, as user are generally unable to remember long paths. We therefore ask that a maximum of three levels is used, as demonstrated below.
- Introduction
- Getting Help (Path: /Getting_Help)
- Applications (Path: /Applications)
- Categories of Applications (eg Path: /Applications/Internet)
- Individual Applications (Path: /<applicationname>)
- Application Manuals: (Path: /<applicationname>/Manual (may be a contents page of links))
- Manual pages (Path: /<applicationname>/Manual/Introduction)
- (Path: /<applicationname>/Manual/Section name)
- Tutorials (Path: /Tutorials/) NB This section consists of links to appropriate pages, mainly attached to applications. Only tutorials that can't be linked in that way should be directly under the Tutorials path.
- KCM module (Path: /System_Settings/<kcmname>)
- Sitenotice
- Omerta13
- Tutorials/Access another computer's display
You want to access KDE software that is running on another computer.
Reasons can be
- someone is running Linux and requesting support from you
- you want to train a user how to work with a specific gui software
- you have worked on your desktop computer and want to continue work in front of the TV (Simpsons coming) on your notebook
Prerequesites
You will need the software x11vnc. For example, to install x11vnc on SUSE Linux, open a Konsole and type
yast -i x11vnc
So let's assume you want to access a KDE desktop session of user on the computer user-desktop. Open a Konsole and do:
you@your-computer $ ssh user@user-desktop
user@user-desktop $ export DISPLAY=:0
user@user-desktop $ x11vnc
The program x11vnc tells you where to connect. The line will read like
The VNC desktop is: user-desktop:0
Connect from your notebook:
you@your-computer $ vncviewer user-desktop:0
The "user-desktop" term may be the host name of the server machine if that name is configured in the "hosts" file on the client machine.
Mike Cloaked <mike.cloaked at gmail.com> posted the following commentary regarding installation on Fedora 14. Note that some references are to local directories, and you may have to edit these to suit your system.
Setting up the Printer
The following set up technique works for recent versions of Fedora from F12 to F14.
Download the driver set and untar them. The drivers are available from Samsung's web page.
Do not install their script(s).
Instead pull the following two files out of their Unified Driver file:
Add the file rastertosamsungspl
(from cdroot/Linux/i386/at_root/usr/lib/cups/filter/rastertosamsungspl) to
/usr/lib/cups/filter/
and scx4500w.ppd (from cdroot/Linux/noarch/at_opt/share/ppd/) was needed also. You need to cd to /usr/share/cups/model/foomatic-db-ppds and make directory "samsung", then
gzip -c
/path-to-my-scx4500w/scx4500w.ppd > samsung/scx4500w.ppd.gz
Check that the selinux contexts of the new files match the other in that directory. That is all that is needed. Next plug in the usb line to the main machine running Fedora 12, 13 or 14, and turn on the printer whilst tailing the messages file.
On startup it should immediately recognise the printer and the messages file should show that the device had been found correctly, and see lines like:
Nov 22 18:22:59 home1 kernel: [  336.170027] usb 1-1: new high speed USB device using ehci_hcd and address 4
Nov 22 18:22:59 home1 kernel: [  336.284908] usb 1-1: New USB device found, idVendor=04e8, idProduct=342b
Nov 22 18:22:59 home1 kernel: [  336.284911] usb 1-1: New USB device strings: Mfr=1, Product=2, SerialNumber=3
Nov 22 18:22:59 home1 kernel: [  336.284914] usb 1-1: Product: SCX-4500W Series


Nov 22 18:22:59 home1 kernel: [  336.284917] usb 1-1: Manufacturer: Samsung Electronics Co., Ltd.
A window pops up saying the printer has been added and offers to check the settings - all that needs changing is the paper size from the US Letter to A4 size and then run a test page - which should look perfect.
Then print a system status page from the printer itself which should be fine, and then finally a test print from the main machine.
Then check that the printer is visible to other machines on the LAN. If not then go to localhost:631 in a browser and ensure that the printer is shared to other machines.
You can try to use the ethernet cable later, or change the wireless settings. I have to put it on the local network and given it a sensible ip address rather than the default 192. address that it comes with since my network is 10.0.0.x.
Scanning works nicely but a couple of config tweaks are necessary.
The printer is working, despite being an unsupported printer - and only needs the two files pulled from the Samsung linux application allows the printer to work nicely.
Scanning
I have also now tested scanning on the scx-4500w. For Fedora F14 it was necessary to add under the Samsung section of the file /lib/udev/rules.d/65-libsane.rules:
# Samsung SCX-4500W
 ATTRS{idVendor}=="04e8", ATTRS{idProduct}=="342b", ENV{libsane_matched}="yes"
This was the only step needed. Once the machine was rebooted then scanning worked (eg via GIMP)
Then I simply fired up the GIMP and asked it to scan - it found the scanner, and it worked without any further setup.
So although I have only tested the printing and scanning capability on Fedora 14 via the usb port it does work very nicely.
Yet to test:
- printer access via ethernet
- printer access via wireless
- scanner access via ether/wifi
If anyone has done any other tests on this Samsung SCX-4500W and has step-by-step setup details I would be interested to hear the information. Either way this is a nice printer, and very quiet in operation, and does look pretty cool too!
Network Access
The printer arrives set up with a default ip address of 192.0.0.192.
In order to get the network interface working in my local LAN which is the in the ip range 10.0.x.x I initially booted up an old laptop and plugged in the crossover ethernet cable that comes with the printer. Then I stopped the NetworkManager service, and then started the "network" service.
Next step is to become root and put the laptop on the same ip range as the printer by typing:
ifconfig eth0 192.0.0.10 up
Then start Firefox and go to the address 192.0.0.192 which immediately connects to the embedded management interface on the printer ( called "SyncThru" in Samsung parlance ) and displayed as a web page in Firefox.
Then it is straightforward to find the network page and change the ip address to either a static ip in the range of my local LAN or let it continue to use DHCP. In my case once I had the MAC address of the printer network interface I could add that to my local dhcp server config and give the printer a local name.
If you are not running your own dhcp server then it is probably easier to give it a static ip on the same range as your local LAN addresses.
The networking is arranged so that if the ethernet cable is plugged in on the printer then it uses the wired interface and if not then it will use the wireless interface.
So next go to the wireless interface page in SyncThru, and set up the required wireless settings for your own local wireless access point. In my case it uses WPA2 with AES encryption but your mileage may vary.
As soon as I disconnected the ethernet cable the printer connected to my wireless access point and received its ip address via my dhcp server. Then firing up Firefox on my main machine and going to the printer ip address connected me to the embedded management interface again (SyncThru). From there the usual range of printer settings was accessible and also monitoring of page usage and toner use.
Next to get printing via the network instead of via USB.
- In the main machine go to
- Select and the drop-down (even though it isn't).
- Use the in the "host" dialog and leave the default "Port 9100". Click .
- Select ppd file (as in the sections above) and navigate to it - set the remaining parameters required. Change paper to A4.
Then I sent a test page - and printed a mail item - which seemed fine apart from the page size being a touch too small for the writing at the top and bottom. That can no doubt be tweaked as necessary later. Then any other machine on the network can either use the printer via cups or set it as an independent route via the network as above.
Since the wired cable had been removed this test print went via the wireless network to the scx-4500w. If the printer is wired to your local router via ethernet then the print goes via the wired router - you can't do wireless and wired at the same time.
Scanning via the Network
Scanning via the network is possible by making one simple addition to the file /etc/sane.d/xerox_mfp.conf. Simply add the following lines to the bottom of the file:
#Samsung scx4500w wireless ip network address
tcp xx.xx.xx.xx
where xx.xx.xx.xx is the static ip address of the printer that is set up using the SyncThru management interface.
When starting up xsane a choice of two printers now shows up, and selecting the option with the tcp address defined above allows xsane to access the scanner via the network instead of via usb. This may be slower than usb but it does work.
Having the multifunction printer working with the printer via usb, and the scanner via the network allows a simple workaround for the current known issues where usb2 scanners plugged into a usb3 port causes xsane to hang, which is a common bug in the xhci driver code with the 3.12 and 3.13 kernels.
All-in-one Peripherals
Samsung scx-4500W Laser printer/scanner
Supposedly unsupported, read how it was used in Fedora 10 at Samsung_scx-4500W
Skrooge allows you to keep track of your expenses and incomes, categorize them, and build reports of them. Skrooge is a part of KDE Extragear, in the Office module
Overview
What a strange name!
Yes, it is ![]() It has been inspired by Dickens' A Christmas Carol tale, where an grumpy old man, named Ebenezer Scrooge, turns good after receiving the visit of three ghosts on Christmas night.
It has been inspired by Dickens' A Christmas Carol tale, where an grumpy old man, named Ebenezer Scrooge, turns good after receiving the visit of three ghosts on Christmas night.
Some people may also see the reference to Walt Disney's famous character, Scrooge Mc Duck, which was also inspired by the aforementioned book.
What can I do with Skrooge?
- Keep track of your incomes and expenses
- See how you spend your money
- Manage your investments and see how they perform over time
- Manage several accounts
Features
- Graphical reports
- Several tabs to help you organize your work
- Infinite undo/redo (even after the file was closed!)
- Instant filtering on operations and reports
- Infinite categories levels
- Mass update of operations
- Scheduled operations
- Track refund of your expenses
- Powerful Search and Process functions
Screenshots
Installing Skrooge
The recommended way is to install Skrooge using your distribution's package management tool.
However, Skrooge being a quite young application, it is possible that it is not yet available in repositories. You should of course bug the distro's packagers to include it, but in the mean time you can compile and install Skrooge yourself, it is not that difficult.
Ubuntu Specifics
Ubuntu's policy is not to propose the latest software versions, but rather to focus on stability. For that reason, it is possible that the Skrooge version available in official repositories is several versions behind the latest stable from developers.
To install the last version on Ubuntu, you need to add the following lines in your /etc/apt/sources.list:
For jaunty:
deb http://ppa.launchpad.net/s-mankowski/ppa/ubuntu jaunty main
 deb-src http://ppa.launchpad.net/s-mankowski/ppa/ubuntu jaunty main
For karmic:
deb http://ppa.launchpad.net/s-mankowski/ppa/ubuntu karmic main
 deb-src http://ppa.launchpad.net/s-mankowski/ppa/ubuntu karmic main
- Open a terminal and enter:
sudo apt-key adv --keyserver keyserver.ubuntu.com --recv-keys 796FFDFC
- Finally, tell Ubuntu to re-load the details of each software archive it knows about:
sudo apt-get update
- Install Skrooge:
sudo apt-get install skrooge
Importing existing data
If you are a user of other personal finances managers, you may import your existing data from these, using one of the following formats :
Discussion was also started with the KMyMoney team for a more efficient way to exchange files between these two KDE applications.
More Information
- Skrooge Homepage
- Online Documentation
- Skrooge forum
- IRC: Skrooge developers try to hang in the #skrooge channel. Some users may also help in #kde.
- SkroogeReport.png
- Okteta
Overview
|
Description
Okteta is a simple editor for the raw data of files.
- Values and characters shown either in two columns (the traditional display in hex editors) or in rows with the value on top of the character
- Editing and navigating similar to a text editor
- Customizable data views
- Data view profiles
- Tools dockable on all sides or floating
- Numerical encodings: Hexadecimal, Decimal, Octal, Binary
- Character encodings: All 8-bit encodings as supplied by Qt, EBCDIC
- Fast data rendering on screen
- Multiple open files
- Support for remote files, by http, ftp, fish & other protocols supported by KDE Platform
- Export of data to text, both file and clipboard.
- Checksum/Hashsum calculator: Modular sum (8/16/32/64 bit), Adler-32, CRC-32 and Hashsums by the QCA2 library, can be SHA-0/1/224/256/384/512, MD2/4/5, RIPEMD-160, Whirlpool
- Structures tool for analyzing and editing based on user-creatable structure definitions
- Statistic tool
- String extraction tool
- 8-bit charset conversion tool
- Decoding table listing common simple data types.
- Bookmarks
- Printing
- Table with complete list of all byte values
Data manipulation
- Insert and Overwrite modes
- Unlimited Undo - Redo operations
- Find and Replace operations
- Pattern insertion
- Binary Filter tool with bitwise operations:
- AND filter
- OR filter
- XOR filter
- Inverse filter
- Shift filter
- Rotate filter
- Reverse filter
FAQ
"What is the relation to KHexEdit?"
Okteta is an independent new project, with a completely different codebase and architecture, written from scratch, by a different author.
KHexEdit is discontinued for the KDE 4 series, as it hasn't had a real maintainer and the port to KDE 4 was only incomplete. Okteta is first included in the 4.1 release of KDE. So in fact Okteta is the successor to KHexEdit for KDE 4.
"Are very large files (up and larger than 1 GiB) supported?"
Not yet, as it is still subject of discussion how partial loading and the related issues should be reflected in the UI.
Currently a complete copy of the file is loaded into the working memory, so please be careful if the size of the file is close to the order of magnitude of the size of your working memory.
"What about a diff tool?"
A facility to view and work on differences between files and file versions is planned for later versions of Okteta.
Other Info
Structure definitions used by the tool can be shared on https://store.kde.org/ (also used by the integrated sharing dialog in the tool's configuration).
There are a few tutorials
- Qiii2006
- ZhcnPlasmasmall.png
- ZhcnYaoguo2.png
- ZhcnPlasmayaoguo.png
- ZhcnYaoguo3.png
- ZhcnPlasmadesktop1.png
- ZhcnPlasmamenu.png
- ZhcnPlasmamenu1.png
- ZhcnPlasmamenu2.png
- ZhcnPlasmamenu3.png
- ZhcnPlasmamenu4.png
- ZhcnPlasmadesktop2.png
- ZhcnPlasmaearth.png
- ZhcnKubuntuplasma.png
- ZhcnPlasmaaddbujian.png
- ZhcnPlasma13.png
- ZhcnPlasmaaddmianban.png
- ZhcnPlasmamianban2.png
- ZhcnPlasmamianban3.png
- ZhcnKrunner1.png
- ZhcnKrunner.png
- ZhcnPlasmashezhi.png
- ZhcnFolderviewdesktopandZUI.png
- ZhcnPlasma.png
- ZhcnPlasmaxunizhuom.png
- ZhcnPlasmacrack.png
- Tutorials/File Management (pl)
- Skrooge
- ZhcnKonqueror-welcomepage-kde4.png
- ZhcnKonversation2.png
- ZhcnAkregator2.png
- ZhcnAkregator3.png
- ZhcnAkregator1.png
- ZhcnDolphinfenlie1.png
- ZhcnDolphin10.png
- ZhcnDolphinyulan2.png
- ZhcnDolphin14.png
- ZhcnDolphinyulan.png
- ZhcnKonsole1.png
- ZhcnDolphinbiaoq.png
- ZhcnDolphinbiaoq1.png
- ZhcnDolphin11.png
- ZhcnDolphin12.png
- ZhcnDolphincopy.png
- ZhcnDolphin7.png
- ZhcnDolphin8.png
- ZhcnDolphin6.png
- ZhcnDolphin9.png
- ZhcnDolphin5.png
- ZhcnKuser.png
- ZhcnKdf.png
- ZhcnDolphinusb.png
- ZhcnDolphinusb2.png
- ZhcnDolphinfenlie.png
- ZhcnArk4.png
- ZhcnArk6.png
- ZhcnArk3.png
- ZhcnArk2.png
- Zhcnarksnapshot1.png
- ZhcnArk5.png
- Qiii2006
- ZhcnSystemsettings.png
- ZhcnSystemsettings-search.png
- ZhcnSystemsettingstree.png
- ZhcnSystemsettingstree0.png
- ZhcnKwrite edit.png
- ZhcnKonqueror-filesystembrowsing-kde4.png
- ZhcnKonqueror-as-a-webbrowser.png
- ZhcnKonqueror-as-a-filebrowser.png
- ZhcnKonsole.png
- ZhcnKonsole4profile.png
- ZhcnKsysguardCPU.png
- ZhcnKsysguardRAM.png
- ZhcnKsysguardNet.png
- ZhcnKsysguard1.png
- ZhcnKsysguard2.png
- ZhcnKsysguardTree.png
- ZhcnKsystemlog-groupby-loglevel.png
- ZhcnKinfocenter.png
- ZhcnKinfocenter2.png
- ZhcnKinfocenter1.png
- Plasma/Plasmoids
Plasma Widgets
Here are some of our favourites. Other Plasma widgets are available from a number of sources. If you need help installing them, this page will help you.
System Widgets
Device Notifier
The Device Notifier is used for handling pluggable devices such as USB pendrives (also called flash drives or thumb drives), digital cameras, external USB hard drives, etc. It also comes into play when a medium such as a CD or DVD is loaded into an optical drive.
When you plug in an external device, or load a new medium into a drive, the Notifier window pops up (you can also open it explicitly by clicking on its Panel icon.) It stays open while the cursor is over it, otherwise it hides itself after a few seconds.
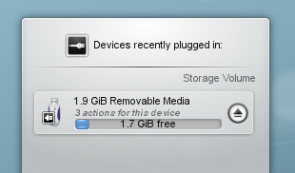
The Notifier window shows a list of all the devices it currently knows about. Moving the mouse cursor over a device will highlight how many possible actions are associated with that device. If the device is mounted, there will also be a small icon to the right of it. Clicking on this causes the device to be unmounted and/or the medium to be ejected. Note that unmounting/ejecting might fail if the device still has open files on it, e.g. if a large file copy hasn't finished. In most cases you can just wait a while and try again.
Clicking anywhere in the shaded box around the device name (but not on the eject/unmount icon if present) pops up a dialogue box with a list of possible actions that make sense for that device. Simply select one and click on OK or hit the Enter key. Double-clicking also works. To dismiss the pop-up without taking any action simply click on the desktop or in another window or press Esc.
The World Outside
LCD Weather Widget
Weather widgets are especially popular if you live in a country with very changeable weather, such as the U.K.
The LCD weather widget gets its information from one of three sources, the BBC weather from the UK Met. Office, NOAA's National Weather Service, or Environment Canada. If it can locate a weather station near you it will give you a range of details about the current weather.
It can also be installed to the Task-bar, in which case you get an icon-size display which simply shows the current outside temperature.
Public Transport Widget
The Public Transport widget displays all the information about trains, trams and buses that you need. It is highly configurable, so you can adapt the widget to your own location. Powerful searching makes it easy to plan your next trip.
Productivity Widgets
Pastebin Widget
This useful tool can be made quite small, to save desktop space, but is invaluable when you need to show a configuration file or screenshot which is too big to be accepted by email. It's also perfect for use with an IRC query.
 |
|
To use it, simply drag the required file onto the widget. The widget will then show 'Drop!'. When you drop your file it will give the URL for accessing it from the server, and can copy it to the clipboard for you. You can also drag images from other applications (such as KSnapshot, which is very handy for screenshots) or text that you have highlighted. You can also middle-click on the widget to send the currently selected text.
It uses both Pastebin and Imagebin servers and these are configurable via the widget's configuration dialog.
PowerDevil
A battery icon sits in your panel. According to your choice of configuration, it can display the remaining amount of charge, or display it when you hover over it. Click on the battery and you get the summary display, while clicking on the Configuration button ![]() takes you to a full configuration screen (click to view enlargement of images).
takes you to a full configuration screen (click to view enlargement of images).
 |
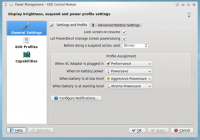 |
A further screen allows you to define and manage a number of profiles, and the final screen gives a summary of your computer or laptop's power-saving capabilities.
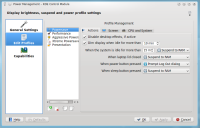 |
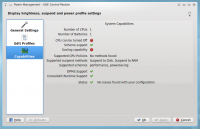 |
Finally, PowerDevil configurations can be set from KRunner, as described in detail here.
More information on configuration options can be found in this Fedora page.
Mail Widgets
Gmail Plasmoid
This widget is designed to be docked in a panel, or added to your desktop, and display the number of unread messages in multiple Gmail accounts. Clicking on the widget will open the Gmail account in your favorite browser. The widget is written in python, meaning that there is no compiling necessary as long as you have the required script-engine installed.
| http://gmail-plasmoid.googlecode.com/svn/wiki/images/screenshots/notification.png | http://gmail-plasmoid.googlecode.com/svn/wiki/images/screenshots/accountlist.png |
More information can be found on the Gmail Plasmoid page.
![]() Support for this application can be found from the project's home page
Support for this application can be found from the project's home page
- Zhcnlancelotair.png
- Zhcnlancelotadd.png
- Zhcnlanceloticon.png
- Zhcnlancelotapp.png
- Plasmoid-tools.png
- Rotate.png
- Lcd-weather.png
- Yawp5.png
- YawpDetails.png
- YawpGlobe.png
- YawpInfo.png
- Pastebin.png
- PastebinDrop.png
- ZhcnYaoguo4.png
- WikiSysop
- Tusooa
- Yakuake snapshot.png
- ZhcnKate.png
- ZhcnKate1.png
- Zhcnkmess.png
- ZhcnChoqok.png
- ZhcnKopete-google-talk-1.png
- ZhcnKopete-google-talk-2.png
- ZhcnKopete-msn-1.png
- ZhcnKonversation6.png
- ZhcnKonversation7.png
- ZhcnKonversation5.png
- ZhcnKonversation4.png
- ZhcnKonversation10.png
- ZhcnKonversation3.png
- ZhcnKonversation0.png
- ZhcnKtorrent2.png
- ZhcnKtorrent3.png
- ZhcnAkregator4.png
- ZhcnAkregator5.png
- ZhcnAkregator6.png
- ZhcnAkregator8.png
- ZhcnAkregator7.png
- ZhcnAkregator10.png
- ZhcnAkregator9.png
- Poc
- Plasma howto-thumbnail.png
- Plasma howto-widget-lock.gif
- Plasma howto-widget-unlock.gif
- Pleasure.JPG
- Plasma howto-desktop-theme.gif
- Plasma howto-desktop-traditional.gif
- Plasma howto-desktop-wallpaper.gif
- Plasma howto-widget-desktop-add.gif
- Plasma howto-widget-desktop-configure.gif
- Plasma howto-widget-desktop-move.gif
- Plasma howto-widget-desktop-remove.gif
- Plasma howto-widget-desktop-resize.gif
- Plasma howto-widget-desktop-rotate.gif
- Plasma howto-widget-desktop-topanel.gif
- Plasma howto-widget-panel-add.gif
- Plasma howto-widget-panel-move.gif
- Plasma howto-widget-panel-configure.gif
- Plasma howto-widget-panel-remove.gif
- Plasma howto-widget-panel-spacer.gif
- Plasma howto-widget-panel-todesktop.gif
- Plasma howto-activity-add.gif
- Plasma howto-activity-dashboard.gif
- Plasma howto-activity-link.gif
- Plasma howto-activity-rename.gif
- Plasma howto-activity-switch.gif
- Plasma howto-extender-restore.gif
- Plasma howto-extender-stack.gif
- Plasma howto-extender-todesktop.gif
- Plasma howto-panel-add.gif
- Plasma howto-panel-alignment.gif
- Plasma howto-panel-autohide.gif
- Plasma howto-panel-height.gif
- Plasma howto-panel-move.gif
- Plasma howto-panel-remove.gif
- Plasma howto-panel-width.gif
- Plasma howto-activity-remove.gif
- Plasma howto-widget-movecashew.gif
- Plasma/HowTo/4.3

The Plasma Workspace is one of the key technologies of KDE SC 4.x (also known as the "Pillars of KDE"), and one of the most visible to users. As Plasma Desktop treats the user interface differently than a traditional desktop, there may be confusion as to what the Plasma Desktop is, what it does, and how to perform common tasks.
The purpose of this document is to show how to perform common tasks in Plasma Desktop. Each HowTo consists of one topic and a short animation, which is reached by clicking on the link.
The animations are encoded in the GIF format and can thus be viewed in most modern web browsers without any additional plugins installed. Note that the animations are looped.
HowTo
Widgets
Desktop Widgets
- Add widget to desktop
- Configure widget
- Move widget
- Resize widget
- Rotate widget
- Remove widget
- Drag widget from desktop to panel
Panel Widgets
- Add widget to panel
- Configure widget [1]
- Move widget
- Remove widget [1]
- Add spacer
- Drag widget from panel to desktop
Desktop
Panel
- Change panel height
- Change panel width [2]
- Move panel
- Change panel alignment
- Make panel autohide
- Add new panel [3]
- Remove panel
Extenders
Activities
- Add new activity
- Switch activities
- Rename activity
- Remove activity [5]
- Link activities to virtual desktops
- Use separate activity for dashboard
Further information
For reuse
To link to an animation from another UserBase article, a thumbnail can be posted. Here's an example:
The code for that is:
{|
|[[File:Plasma_howto-thumbnail.png|link=Media:Plasma_howto-widget-unlock.gif]]
|-
|align="center"|How to unlock your widgets
|}
The animations can also be used outside of UserBase. The BBCode (used in most forums) to post a linked thumbnail is:
[url=GIF][img]http://userbase.kde.org/images.userbase/e/e8/Plasma_howto-thumbnail.png[/img][/url]
Replace GIF with the URL to the GIF file. The corresponding HTML code is:
<a href="GIF"><img src="http://userbase.kde.org/images.userbase/e/e8/Plasma_howto-thumbnail.png" /></a>
A description of making the animated gif is here. Do you want to help out with making animations? See the Talk page to find out how!
- ↑ 1.0 1.1 Note the small green arrow. You can also right click instead of pressing the arrow.
- ↑ See How can I change the height and the size of the panel? for more information.
- ↑ The right mouse button is used in this animation.
- ↑ It's not necessary to drag the extender to the desktop first.
- ↑ You can't remove the activity you "zoom out" from.
How to use this template
If the techbase page has the same name as the userbase page, simply put {{TechbaseLink}} in the source of the page.
Plasma er en af de centrale teknologier i KDE SC 4 (også kendt som "KDE's grundsten"), og en af de mest synlige for brugere. Da Plasma behandler brugere anderledes end traditionelle skriveborde, så kan der være forvirring om, hvad Plasma er, hvad den gør og hvordan man udfører almindelige opgaver.
Dette dokument forsøger at svare på de mest almindelige spørgsmål.

Overordnede spørgsmål
Hvad gør Plasma?
Plasma er skrivebordsgrænsefladen til KDE SC 4 med programstarteren (startmenuen), skrivebordet og skrivebordspanelet (ofte kaldet task bar'en). Plasma er dog mere end denne samling af velkendte komponenter; den er en almen ramme til at opbygge integrerede grænseflader i. Den er fleksibel nok til lave grænseflader til mobile enheder, mediecentre og stationære computere og til at understøtte den traditionelle skrivebordsmetafor såvel som design, der endnu ikke er blevet udtænkt.
Hvad er der galt med den nuværende skrivebords teknologi?
Traditionelle skriveborde er statiske. De er typisk bundet til en mappe i hvilken man finder ikoner (programstartere) og dokumenter og mapper lavet af brugeren. Ud over at vise fotos eller billeder som baggrund gør det traditionelle skrivebord ikke meget for brugeren. Plasma har en anderledes tilgang; den kommer brugeren i møde ved at skabe dynamiske rammer, som kan tilpasses den enkelte.
Det tror jeg ikke er nogen god ide
Plasma lader dig arbejde som du altid har gjort. Du kan have en task bar, et baggrundsbillede, genveje osv. Du kan også bruge Plasmas redskaber til at forme skrivebordet efter dine egne ønsker og behov, hvis du vil.
Hvordan fungerer Plasma?
Plasma er opbygget af widgets kaldet Plasmoider. Plasmoider kan have mange funktioner; de kan vise dit skrivebord med tilhørende wallpaper, overvåge din bærbares batteriniveau, fremvise tilsluttede enheder og håndtere task bar'en. I bund og grund er plasmoider små programmer, som lever på skrivebordet. De kan samles i "beholdere" kaldet containments. Standardskrivebordet består af to komponenter, Panelet og selve skrivebordet. De er begge Plasma containments.
Det lyder ikke så nyt... andre styresystemer har gjort det samme.
Den vigtige forskel er, at plasmoider kan samarbejde. Vil du have en tydeligere oversigt over batteritilstanden for din bærbare? Du trækker bare ikonen fra task bar'en ud på skrivebordet. Appletter kan forstørres, formindskes og drejes som du ønsker det takket være den Skalerbare Vektor Grafik (SVG). Skrivebordets komponenter kan samarbejde med dig, men også med hinanden på nye og interessante måder. Du kan nu kontrollere, hvordan din arbejdsflade opfører sig og hvad den fremviser på en visuelt behagelig og brugervenlig måde. Da Plasme er summen af sine plasmoider, så er ethvert element - selv skrivebordet - et widget. Derfor er skrivebordet ikke længere låst fast bag alt andet, men bliver endnu et element, som du kan arbejde med.
Kicker og Kdesktop fungerede fint i KDE 3. Hvorfor skulle de ændres?
Især med hensyn til Kicker er der problemer med vedligeholdelse. Den har eksisteret siden KDE 2, og det var svært at føje nye ting til uden at ødelægge noget andet. For overhovedet at kunne udvikle KDE's akrivebord var det nødvendigt at starte helt forfra.
Jeg kan ikke finde min elskede <indsæt komponent her>!
Glem ikke, at Plasma-skrivebordet stadig er under udvikling og at KDE 3 var et utroligt veludviklet produkt. Det tog syv år at komme så langt; Plasma er meget yngre. Med tiden vil Plasmas udviklere genindføre de manglende komponenter. I takt med at KDE SC 4 udvikles vil Plasma blive forbedret.
Hvorfor ændrede I den måde skrivebordet virker på?
Ideen med en Skrivebords mappe er grundlæggende forfejlet. Den antage, at alt hvad du har brug for befinder sig i en fysisk mappe på din harddisk. Det kan være bekvemt, men det sætter samtidig stærke begrænsninger for, hvad du kan gøre. For eksempel kan du ikke have forskellige layout's for forskellige skriveborde, da alt findes i den samme mappe. Desuden bliver et skrivebord med denne struktur ofte til en losseplads for filer og mapper uden nogen anden funktion.
Jeg har hørt, at der ikke længere er ikoner på skrivebordet
Det er ikke helt korrekt. Du kan trække ikoner og startere (genveje) fra Dolphin eller K-menuen ud på skrivebordet. Det nye er, at skrivebordet ikke længere vil vise indholdet af mappen Skrivebord. Nu kan du femvise et vilkårligt antal mapper (lokale eller fra netværket) på skrivebordet istedet for kun at vise mappen Skrivebord. Til dette bruges Folder View appletter.
Hvis du vil kan du også let efterligne den traditionelle "ikon på skrivebord" tænkemåde.
Hvad er Folder View appletten?
Folder View appletten bruges, som navnet siger, til at vise mapper og filer i en overmappe. Sådan en overmappe kan enten være en lokal mappe på din egen computer, eller det kan være en netværksmappe, som tilgås gennem FTP, SSH eller SMB. I fremtiden vil et Folder View også kunne vise resultater fra en Nepomuk søgning eller taggede objekter.
Du kan vælge at se alle filer, eller du kan filtrere indholdet med et regulært mønster (fx alle filer med en given endelse) eller efter filtype (fx kun billeder).
Folder View appletter kan også bruges til basal filhåndtering (fx flytning, kopiering, klipning og indsætning), og du kan have så mange som du vil på skrivebordet.
Endelig kan du bruge et Folder View som hele skrivebordet, og på den måde i praksis genindføre den gammeldags tænkemåde.
Hvad er det for noget med Kickoff (den nye K Menu)?
Under udviklingen af KDE 4.0 blev forskellige tilgange til en K menu afprøvet. Nogle projekter var ambitiøse, men kunne umuligt gøres færdige i tide. På den tid blev SUSE Linux's startmenu (Kickoff) overført til KDE's nye skrivebords-arkitektur. Da den var længst fremme, klar til brug og testet for brugbarhed, så blev den valgt som standard startmenu. Hvis du ikke bryder dig om den, så er den traditionelle K Menu stadig tilgængelig - højre-klik på K Menuen og vælg "Skift til klassisk menustil". Der er også andre menuer på vej, og nogle af dem som Lancelot er klar til daglig brug.
Hvad er KRunner?
KRunner er en alsidig kommandolinje, som du kan aktivere ved at taste "Alt-F2" eller ved at vælge "Kør kommando..." fra popup-menuen på skrivebordet. Den kan lede efter programmer, bogmærker og endda sessioner, vise systemaktivitet og udføre almindelige aritmetiske beregninger.
KRunner's funktionalitet kan udvides ved hjælp af plugins ("runners").
Hvad er "cashew'erne"?
Det der ofte omtales som "cashew"'er er de Plasma logoer, som du finder i det øverste, højre hjørne af standard skrivebordet og i den højre side af panelet. Ved at klikke på dem får du adgang til forskellige indstillinger, så som konfigurationen af panelet og Zooming User Interface (ZUI). Nogle af disse cashewer vises kun, hvis widget'ene ikke er låset (se nedenfor).
Vær venlig at gøre det muligt at fjerne cashew'en i det øverste højre hjørne
Det kan lyde ganske fornuftigt at gøre det muligt at slå cashew'en fra, men det er unødigt kompliceret teknisk set, og det strider mod designet. Da skrivebordet (et containment) selv håndteres af et plugin, så er det blevet foreslået, at man kunne konstruere et nyt plugin, som laver et skrivebord uden cashew. Det har nogle distributionerer faktisk allerede gjort.
Hvad er Zooming User Interface (ZUI)?
Zooming User Interface, or ZUI, er endnu en Plasma-komponent. Det lader brugere samle forskellige plasmoider i grupper og hurtigt skifte mellem dem ved en "zoom ind og ud" metode. Bemærk, at denne komponent stadig er under kraftig udvikling, og selv om betydelige fremskridt er blevet gjort, vil den først være fuldt funktionsdygtig i en senere version af KDE SC 4.
Hvordan virker ZUI?
Forestil dig, at du har tre grupper af plasmoider (så som widgets, programstartere osv.), som du har arrangeret i særlige kombinationer afhængigt af, hvordan du vil arbejde med dem. Når du har lavet grupperne, kan du skifte mellem dem ved at zoome ud for at se alle grupperne og derefter zoome ind på den gruppe, som du nu vil arbejde med. Bemærk, at det er anderledes end at skifte mellem de traditionelle X11 virtuelle skriveborde; ZUI er meget mere fleksibel, da grupperne kan være helt forskellige fra hinanden.
Et godt eksempel på denne opførsel er vist på dette billede lavet af Half-Left fra #kde på freenode.
Man kan kombinere virtuelle skriveborde med ZUI, med det er endnu på eksperimentel basis.
Hvorfor kan jeg ikke bruge ZUI fra Instrumentbræt visningen?
Vi arbejder på sagen, med den er under konstruktion, og vi kan ikke sige hvornår eller om den bliver færdig.
Hvis man har flere skærme, så virker ZUI på dem alle men Instrumentbræt kun på en. Hvorfor det?
Arbejdsgangen er forskellig. Når man zoomer ud, så ønsker man et overblik; derfor zoomes aktiviteter på alle skærme ud. Når man bruger Instrumentbræt, vil man i reglen have adgang til en specifik funktionalitet og vil ikke forstyrres i sit arbejde med andre aktiviteter.
Konfiguration
Kan jeg placere ikoner på skrivebordet?
Selvfølgelig kan du det. Bare træk en ikon fra Dolphin eller Konqueror til skrivebordet. Bemærk, at du ikke opretter en fil her men blot en henvisning.
Brug en Folder View applet til at vise indholdet af din mappe Skrivebord.
Du kan også højre-klikke på et tomt område af skrivebordet, vælge "Desktop-opsætning" og i dialogen sætte "Desktop aktivitet" til "Folder View" og klik OK. Nu er hele skrivebordet en Folder View applet, som viser indholdet af mappen Skrivebord som standard, ligesom i gamle dage.
Jeg bruger to skærme og er vant til at have Kicker over begge skærme. Kan jeg gøre det samme med Plasma?
Nej. Grunden er, at det er ret kompliceret at have et panel over to skærme, især når de har forskellig opløsning, På grund af det kunne vi ikke være sikre på at det ville virke i alle tilfælde, så det blev ikke implementeret.
Kan jeg placere panelet på kun en skærm?
Alle Plasma-paneler bor på én skærm. Hvis du ønsker paneler på flere skærme, så kan du tilføje dem og trække dem til din foretrukne placering ved at bruge panelkontrollen, som fremkommer når du klikker på panelets Plasma-ikonen i ulåst tilstand.
Hvordan kan jeg tilføje appletter til panelet?
Metode 1: Åbn "Tilføj Widgets" dialogen i Plasma cashew'en (skærmens øverste, højre hjørne), vælg en widget og træk den til panelet (du skal ikke dobbelt-klikke eller bruge "Tilføj Widgets" knappen i dialogen).
Metode 2: Træk en applet fra skrivebordet til panelet.
Metode 3: Klik på panelets cashew og vælg "Tilføj widgets". Når du har valgt en applet, vil den automatisk blive føjet til panelet.
Kan jeg flytte appletterne i panelet?
Ja, åbn panelindstillingerne (ved at klikke på panelets cashew eller højre-klikke på panelet og vælge Panleindstillinger) og hold markøren over en applet; markøren bliver nu til fire pile. Nu kan du arrangere appletterne som du vil.
Lydia Pintscher's blog har en video som viser, hvordan man flytter appletter. En anden video er på Aikurn's blog. Aikurn har også lavet en annoteret video.
Hvordan kan jeg ændre højden og størrelsen af panelet?
Klik på panelets cashew for at få adgang til at konfigurere panelet. Ved at klikke på "Skærmkant" kan du flytte panelet til enhver af skærmens kanter. Klik på "Højde" og træk for ændre panelets højde.
Pilene i højre ende af panelet definerer dets størrelse: der er to pile, som definere den maksimale og den minimale størrelse. Hvis de er forskellige, så vil panelet tilpasse sin størrelse imellem de to afhængigt af dets indhold.
Under "Mere opsætning" er der flere valgmuligheder for panelets position og opførsel.
Kan jeg automatisk skjule panelet?
Klik på panelets cashew, vælg Mere opsætning > Skjul automatisk.
Hvordan kan jeg fjerne et panel?
Klik på panelets cashew og vælg Flere indstillinger > Fjern panel, eller højre-klik på panelet og vælg Panel-indstillinger > Fjern panel.
Generel hjælp med Panel Konfiguration
Denne forumside giver en illustreret guide til konfiguration af panelet.
Er det sandt, at man kan bruge OS X's widgets i Plasma?
Ja, Plasma kan bruge OS X's widgets. Der arbejdes også på at implementere javascript-baserede appletter.
Hvordan kan jeg flytte, dreje eller ændre størrelse af appletter på skrivebordet?
Hold markøren over appletten indtil "applethåndtaget" viser sig. Nu kan du ændre størrelse på appletten og flytte og dreje den:
- For at flytte en applet: Klik på håndtaget og træk det rundt.
- For at dreje en applet: Træk i den buede pil
- For at ændre størrelse på en applet: Træk størrelsesknappen (over den buede pil). Du kan bevare applettens proportioner ved at holde Ctrl tasten nede samtidigt.
Mine widgets bliver skjult under vinduerne, Hvordan kan jeg vise dem?
Du kan bringe alle widget'erne frem ved at taste Ctrl-F12, hvilket flytter Plasmas Instrumentbræt foran. Når du er færdig kan du enten taste Esc eller vælge "Skjul Instrumentbræt" fra cashew'en.
Hvordan kan jeg fastlåse widget'enes position
Metode 1: Højre-klik i et tomt område af skrivebordet og vælg "Lås widgets" fra kontekstmenuen. Fortryder du, så højre-klik igen og vælg "Lås widgets op". Du har de samme valgmuligheder, hvis du højre-klikker på panelet.
Metode 2: Vælg "Lås Widgets" i Plasma cashew'en i øverste, højre hjørne eller i panelindstillingerne.
Hvordan kan jeg fjerne widgets?
Et widget i panelet fjernes ved at højre-klikke det og vælge "Fjern..." (widget'ets navn vil stå der). Et widget på skrivebordet kan fjernes på flere måder:
- Hold markøren over det indtil widgethåndtaget kommer frem og klik så på X.
- I Tilføj Widgets dialogen kan du klikke på minus ikonet ved siden af widget'ets navn for at fjerne det.
Højre-klik på menuikonen og vælg "Skift til klassisk menustil" (hvis du bruger Kickoff) eller "Skift til Kickoff-menustil" (hvis du bruger den klassiske menu). Du kan også tilføje en menu af en given type ved hjælp af Tilføj Widgets dialogen.
Aikurn har en video, som viser hvordan man skifter mellem forskellige menustile.
Hvordan kan jeg tilføje/fjerne en aktivitet?
Tilføj en aktivitet: Zoom ud fra din aktuelle skrivebordsvisning ved at klikke på skrivebords-cashew'en (i det øverste, højre hjørne) og vælge "Zoom ud". Du vil se en værktøjslinje under det aktuelle skrivebord. Klik på "Tilføj Aktivitet" for at lave en ny skrivebordsvisning.
Fjern en aktivitet: Zoom out fra din aktuelle skrivebordsvisning og vælg det røde kryds fra værktøjslinjen, som fremkommer under skrivebordet.
Note: Du kan ikke have låste widgets i en aktivitet, som du vil fjerne. Vælg Lås Widgets op (Ctrl-L) før du fjerner en aktivitet.
KDE Forums bruger Fengshaun har lavet et screencast, som demonstrerer brug af ZUI.
Hvordan kan jeg hurtigt flytte mellem Aktiviteter
ZUI metodern er ret langsom; det er bedre at bruge en "Activity Bar". En kort gennemgang her forklarer, hvad du skal gøre.
Har Plasma nogle tastaturgenveje?
Der er et antal tastaturgenveje til rådighed:
- Lås widgets: Ctrl-L
- Zoom ud: Ctrl- -
- Zoom ind: Ctrl- = or Ctrl-+
- Næste applet: Ctrl-N
- Forrige applet: Ctrl-P
- Tilføj aktivitet: Shift-Ctrl-A
- Næste aktivitet: Shift-Ctrl-N
- Forrige aktivitet: Shift-Ctrl-P
- Applet indstillinger: Ctrl-S
- Fjern applet: Ctrl-R
Desværre er det endnu ikke muligt at ændre genvejene.
Hvordan kan jeg knytte en tastaturgenvej til en applet?
Vælg applettens indstillinger (svensknøgle ikonet i applettens håndtag) og klik på "Tastaturgenvej". Du vil nu kunne definere en tastaturgenvej til appletten. Bemærk, at nogle appletter ikke har denne mulighed (normalt dem, som ikke har indstillinger).
Kan Instrumentbrættet vise andre widgets end dem på mit skrivebord?
Ja, det kan det. For at indstille dette skal du klikke på skrivebords-cahhew'en og zoome ud. Vælg nu Indstil Plasme i den værktøjskasse, som fremkommer og sæt et hak ved Brug et separat instrumentbræt. Klik på OK, så vil dit instrumentbræt være forskelligt fra dit skrivebord.
Hvordan kan jeg bruge virtuelle skriveborde som aktiviteter?
Zoom ud ved hjælp af skrivebords-cashew'en. I den værktøjskasse som fremkommer, klikker du på Indstil Plasma og sætter et hak ved Forskellige aktiviteter for hvert skrivebord. Klik så på OK og du er klar.
Notifikationer fylder for meget på skærmen - kan jeg blive fri for dem?
For de, der ikke bryder sig om det, er der en nem måde at slå dem fra. Højreklik på statusfeltet ("i" ikonet) i statusområdet og vælg Indstillinger for statusområde.
Nu kan du slå statusmeddelelser fra programmer eller jobs (så som filoverførsler) fra ved at fjerne hakket i det relevante felt.
Temaer
Jeg kan ikke lide den måde panelet og andre Plasma komponenter ser ud. Kan jeg ændre det?
Ja, muligheden for at kunne ændre Plasmas udseende har været planlagt fra begyndelsen. Plasma kan bruge "temaer" til at ændre sit udseende. Et tema består hovedsagligt af et antal SVG billeder og filer, som specifiserer farver. Der er allerede flere temaer tilgængelige på [kde-look.org].
Hvordan kan jeg skifte mit Plasma tema?
Højre-klik på dit aktuelle skrivebord og vælg "Desktop-opsætning" (eller vælg samme punkt fra skrivebords cashew'en); ved punktet "Tema" kan du nu vælge et tema. Du kan også hente nye temaer ved hjælp af Hent smarte nye ting ved at klikke på "Nyt tema..." knappen.
Skridt for skridt instruktioner med skærmbilleder (lavet til KDE 4.1) findes på Aikurn's blog.
Understøttes grafiske effekter (som gennemsigtighed) uden compositing?
For ikke at komplicere kildekoden unødvendigt har Plasmas udviklere besluttet, at der ikke skal være compositing-frie udgaver af ting, som bruger compositing. Hovedårsagen er, at sådanne komplikationer tidligere (i KDE 3.5.x) var blandt årsagerne til, at kildekoden blev uhåndterlig. Desuden er eksistensen af ting, som kræver compositing en spore for grafikkort-udviklere til at skrive bedre grafikdrivere.
Fejlfinding
Plasma gik ned. Hvordan får jeg mit skrivebord tilbage?
Normalt vil Plasma genstarte automatisk efter et nedbrud. Hvis dette ikke sker, så kan du åben KRunner ved at taste Alt-F2 (den skulle stadig køre) og skrive "plasma"; så genstarter Plasma.
Mit panel er forsvundet. Hvordan får jeg det tilbage?
kquitapp plasma-desktop; rm $KDEHOME/share/config/plasma-desktop-appletsrc; plasma-desktop
Dette sletter dine Plasma indstillinger, så du får standard konfigurationen tilbage. Hvis det ikke virker at køre alle tre kommandoer samtidig, så prøv at skrive dem ind manuelt en ad gangen og vent et par sekunder mellem hver kommando.
(Bemærk, at $KDEHOME environment variablen måske ikke er sat. Prøv så ~/.ked (Fedora, Kubuntu Intrepid, Debian, upstream default) eller ~/.kde4 (OpenSUSE, Kubuntu Hardy og flere andre).)
Nogle GTK+ programmer har statusområde-ikoner med forkert størrelse
Det er desværre et problem med Freedesktop.org's specifikation af statusområder, som ikke definerer størrelsen af statusområde-ikoner ordentligt.
Plasma bliver ekstremt langsom, når jeg bruger den med NVIDIA's binære driver.
Det er alene NVIDIA's fejl og skyldes, at deres driver ikke understøtter XRender X11 udvidelsen korrekt; det påvirker også andre dele af KDE SC så som Konsole. Se på denne blog hvordan du rapporterer problemer til NVIDIA. Denne side indeholder et par forslag til, hvordan du forbedrer ydelsen indtil en opdateret driver bliver frigivet.
NVIDIA har udsendt drivere i serien 18x.xx, som kan give drastiske forbedringer af ydelsen med Plasma-skrivebordet og KDE SC 4 generelt.
For at forbedre ydelsen kan brugere, som har grafikkort i serierne NVIDIA 6 eller 7 tilføje følgende linje til deres xorg.conf i afsnittet "Screen". Du behøver ikke at tilføje linjerne, hvis dit NVIDIA kort er af serie 8/9 eller derover, da de er sat som standard.
Option "PixmapCacheSize" "5000000"
Option "AllowSHMPixmaps" "0"
Der er nogle andre tilvalg, som du kan prøve, hvis dine skrivebordseffekter virker dårligt.
Gå til Systemindstillinger > Skrivebord > Skrivebordseffekter > Avanceret, hvor du finder Indstillinger for OpenGL. Her sætter du Teksturfilter tilvalget til Bilineær eller Nærmeste (hurtigst). Du kan også slå Brug VSync fra.
Folder View og andre plasmoider bliver dårligt gengivet med et ATI videokort og open-source radeon driveren.
For at omgå dette problem må du ændre 2D accelerationsmetoden fra XAA (X Acceleration Architecture) til den nyere EXA. Da dette kræver, at du redigerer din xorg.conf fil, så tænk på, at sådan en ændring kan skade dit system. Gør det på egen risiko.
For at gennemføre ændringen skal du redigere din xorg.conf fil (lav en backup først for alle tilfældes skyld). Find Device afsnittet for dit grafikkort og tilføj linjen
Option "AccelMethod" "EXA"
før linjen "EndSection". Hvis der allerede er en linje med AccelMethod, så ret den fra XAA til EXA. Gem filen og genstart X serveren.
Bemærk, at EXA stadig er markeret som ustabil, og at nogle programmer så som KDE3 programmer kan blive ukorrekt vist.
Hints & Tips
Deaktiver ARGB visuals
Plasma bruger de såkaldte "ARGB visuals" til mange af sine effekter. For ældre videokort kan det betyde en alvorlig reduktion af ydelsen. For at slå ARGB visuals fra og øge ydelsen skal du sætte KDE_SKIP_ARGB_VISUALS environment variablen til 1 (KDE_SKIP_ARGB_VISUALS=1) før Plasma starter. Det kan du gøre ved at indføje en linje, som sætter denne variabel i /etc/profile eller i ~/.profile.
Højre-klik panelet, når din task-bar er fuld
For at ændre panelet skal du højreklikke på det, og hvis du har mange åbne programmer er det måske ikke så let. Du kommer omkring dette problem ved at bruge panel cashew'en til at åbne panelindstillingerne; så kan du højre-klikke på panelet (også på et program) og få kommandoen til at gå til panelet og ikke til programmet.
Flyt rundt på programfanerne på task-bar'en
Højre-klik på en tom del af task-bar'en (eller brug metoden beskrevet ovenfor) og vælg "Opsætning af taskmanager". I combo-boksen 'Sortering' vælger du 'Manuel' og dernæst OK. Nu kan du flytte rundt på task ikonerne ved at holde Alt-tasten nede og trække fanerne til deres nye position. (Hvis du bruger denne Alt-træk metode med panelkonfigurationen åben, så vil hele gruppen af programfaner blive flyttet samlet.)
Se nogle screencasts
Denne forum side har links til screencasts, som vil hjælpe dig til at forstå Desktop indstillinger, Panel indstillinger og Zooming User Interface.
Diverse tips
Som alternativ til de, der holder af et rent skrivebord:
1 - du kan fjerne panelet helt. Åbne appliketioner er stadig tilgængelige ved at bruge ALT-TAB metoden.
2 - du kan fjerne panelet og istedet tilføje et kort panel i toppen af skærmen, som kun indeholder task manageren.
3 - du kan have et panel, som indeholder task manageren og som bruger autohide.
Ordliste
Se Ordlisten .
Mere Hjælp
En side med screencasts, som hjælper dig med at forstå Plasma.
Tak
- Daniel Laidig & Simon St.James - tak for umeet IRC log'ene!
- Marco Martin - tak for information om paneler!
- Sebas - tak for at lade mig bruge information fra din blog!
- Half-Left - godt eksempel på brug af ZUI!
- Aikurn - Glimrende videoer!
- Marcelo Magno T. Sales - for at give Tips om panel i en mailing liste
Bidragsydere
- Luca Beltrame - nuværende vedligeholder
- Joseph M. Gaffney
- Chani
- Dipesh
- Maninalift
- Alle de anonyme bidragydere
| Tilbage til introduktionssiden |
Semantic Search
The aim of this page is not to fully explain KDE's Semantic Search technology and every detail, but to give a short overview, some examples, share the vision behind it and link to relevant information on the web.
Baloo is the next generation of semantic search
From KDE Applications 4.13 onwards, the 'Baloo' file indexing and file search framework replaces Nepomuk. Read details on the changes for Applications 4.13 here. Semantic Search no longer uses a single, big database, but separate, specialized databases for each type of data. The new search databases are in $HOME/.local/share/baloo. If you upgraded to KDE Applications 4.13 from an earlier KDE release, you can delete $KDEHOME/share/apps/nepomuk.
Short explanation
As the Glossary mentions, Semantic Search is about classification, organisation and presentation of data. It is not an application, but a component which can be used by developers within applications.
Try out in Dolphin
For example, the Dolphin file manager makes use of Search. In KDE Applications versions prior to 4.13 Semantic Search must be enabled from . The information sidebar of Dolphin (, or press F11) presents information extracted by Search about the selected file, and also allows you to assign tags, ratings and comments to files. This information is then stored and indexed by Search. You can then search for metadata using the navigation bar in Dolphin. Click to , or press Ctrl+F, and search for file names or file contents.
Functionalities
KDE's Semantic Search offers several 'layers' of functionality to applications. The first and most simple of those is manual tagging, rating and commenting, as used in Dolphin. This helps you to find your files faster, but is also a lot of work.
To make finding files containing text easier, Search offers a second functionality: indexing the text of files. You can find files by entering some words which you know are in there, or just (part of) their title.
The third layer is a very complex one, and the reason why the underlying technology, Nepomuk, was conceived as a research project of several companies and universities in the European union. This is where you will find difficult words like 'semantic desktop' and 'ontologies'. Basically, it is about context and relationships.
Indexing files
Search does not index every file on the hard drive. Its default configuration in most Linux distributions excludes some common patterns for backup files and configuration directories. You can change this in . Add folders to be excluded. If you want to turn off indexing of files entirely, just add your home folder there.
In System Settings you can also control whether Search indexes files on removable media such as USB drives and CD-ROMs. In KDE Applications 4.13 this is not available, removable media are not indexed. Future versions are planned to reintroduce this functionality.
Examples
Let me try to explain what Semantic Search offers using two examples. These features are not available fully yet - the base is there but application developers need to integrate this in their applications.
Relationship
Say you received a photo from a friend of yours, 2 weeks ago. You saved it somewhere on your computer. Now how to you find that file? If you don't remember the location, you're out of luck.
Now Semantic Search aims to help you. You know this file came from that friend of yours, your computer does not know. Search, however, can remember this relationship. Searching on the name of your friend will therefore pop up the photo!
Another potential relationship is between a web page you copied text from and the document you pasted it into, or two images showing the same car. Such relations can sometimes be extracted from the files themselves (you could analyze photos and see who or what is on there) or supplied by the applications involved (as in the above email example). This part of Search is still under heavy development, and needs integration in applications, so you can expect it to take a few more years to really shine.
All in all, this part of Semantic Search is about making search smart. Think about how Google tries to be smart with your searches: when you search for a hotel and a city name, it shows above the website results a google map showing hotels in the city you mentioned! It might even suggest a better name in case you made a spelling mistake. Google also tries to put the most relevant information on top of the list of results, using complex calculations on relationships (links) between websites. Semantic Search will be able to offer such smart results and order them on relevancy using relationship information.
Context
These relationships can not only help you while searching for files, but also have an influence on applications and what information they present. Note that this way of using Search is still more a vision than reality! Many of the components are in place, but it is not yet integrated in applications and the desktop as a whole.
So here an example of bringing context awareness to your desktop could help you work more efficiently.
Say you are working on finishing some notes you took in a meeting. The phone rings, and somebody asks you to find that spreadsheet with prices, adjust it for a customer. After a few more interruptions you find your desktop full of files and windows...
It'd be nice to be able to organize all that a bit better, right?
Enter 'activities'. These have been introduced in Plasma, and currently offer different 'desktops'. They are a bit like virtual desktops, except that the desktop itself changes, not the set of applications. Different widgets, background, things like that. Of course, since Plasma 4.3, each virtual desktop can have its own activity, bringing the two in sync.
If applications and desktop were aware of activities, you could create an activity for each of the tasks you regularly work on. So if you often have to change a spreadsheet with prices, you create an activity for that: put a Folder View (or several) widget on the desktop, add a calculator and a todo-widget to keep track of what you still have to change. Maybe even an email folder widget showing the mails with questions regarding these prices spreadsheets!
As soon as somebody asks a question about prices, you switch to this activity. Fire up your spreadsheet application. It is aware of your activity so it shows recent price spreadsheets, not the recent list of inventory you were working on in another activity! Kopete, the chat application shows your colleague who knows all about prices, as she is the person you always chat with when working on this activity.
When you are finished, you go back to another activity, and once again all applications adjust their behavior to fit what you are doing.
The benefits of such an activity-based work flow go further than you might at first expect. It not only helps you find files and contact persons, but also helps in switching tasks itself. The human brain isn't very good at multi-tasking - it takes most people several minutes to get up to speed after switching tasks. Changing the 'environment' helps a lot in speeding this up, even if it's just on the screen. Compare it with getting in the mood for your holiday by packing your bag!
Of course, the above is mostly relevant to people working behind their computer in the office or at home. A gamer or a casual user would probably not use these activities much.
The scenario described above is already partially implemented in the Activities but much work is still left.
Frequently Asked Questions
The following is taken from a KDE forums post. Please feel free to add/remove/modify details if you have the time!
- What is the Nepomuk Semantic Desktop, and the Strigi Desktop File Indexer?
- Nepomuk and Strigi are technologies part of what delivers the abilities of the Semantic Search in KDE. Both are not used directly in the latest generation of KDE's Semantic Search (details), however their successors share much of their code and concepts. Semantic Search provides a way to organize, annotate and build relationships among the data (not only file name and content, but for example which applications used a certain file, or how it is tagged). A number of KDE applications and workspaces use this basic infrastructure to deliver features such as email tagging (KMail) or activity setup (Plasma).
- The file indexing allows applications such as Dolphin to search for files based on content, name, or other meta-data (e.g. tags) associated to indexed files. Such an indexer can also index non-text files, such as PDFs, by accessing the meta-data contained in these files (author, publication information, etc.). Some KDE components ship additional "analyzers" for more file types.
- Why do we need both Akonadi and Semantic Search? Aren't they doing the same thing?
- In short, Akonadi provides a cache of PIM data like calendar items, contacts and email, which is used by applications like KMail and Korganizer but also the calendar build in Plasma. Semantic Search plugs in Akonadi to provide search functionality. How Baloo offers search is actually up to the application. In case of KDE PIM, Xapian is used to provide indexing and search.
- How can I disable the semantic desktop?
- File indexing can be disabled by adding the users' home folder to the . The other functionality is part of the applications that use it and thus can't be disabled without crippling these applications. For example, to not have any search in KMail you'll have to simply remove KMail...
In versions of the KDE Applications before 4.13, Semantic Search would have components running separate from applications. This functionality could be disabled by unchecking in the Desktop Search section of System Settings. In case you want to turn off all semantic features, uncheck . Notice that this will turn off search in Dolphin as well.
- Notice that with the latter option some programs who use Semantic Search for meta-data will offer reduced functionality: for example KMail will not be able to tag mail, or Plasma activities will not offer additional features such as icons, or program data information.
- Baloo/Semantic Search is eating 100% CPU! What do I do?
- Just wait. Certain files are very hard or even impossible to Index. At the moment, this includes for example text files of over 50 megabyte. When Search finds these, it will try for a fixed time. When it fails, it will try to find out what file is broken and disable indexing it in the future. As it indexes files in batches of about 40, it has to find the problematic file by indexing that bunch in parts: first half/second half, index problematic half in pieces again, until the file is found. This can take up to 30 minutes of heavy cpu usage. Unfortunately, while Baloo will not start to index a new batch of 40 files while on battery power, it continues to determine the broken file while on battery. This behaviour has been fixed in in KDE Applications 4.13.1 (it will stop indexing immediately when the power cord is unplugged) and the time the search for each file can take has been reduced to about 10 minutes. The Semantic Search team is working on improving the indexing tools to handle more difficult files.
- Why do I have nepomukservicestub processes even though I've disabled Nepomuk?
- It may be a bug. Please file a bug report with a complete description of your problem and the steps to trigger it.
- File indexing of PDF/some other file types doesn't work.
- PDF indexing is a known issue and it's being tracked in bug #231936. If you have issues with other files, open a bug, preferably adding a sample file that shows the problem.
- The program nepomukservicestub crashes at startup.
- A large number of fixes for crashes has been fixed for the 4.7.2 release of the KDE Workspaces and Applications. If you encounter more, please file bugs report with detailed instructions on how to reproduce the problem, as sometimes the developers are unable to trigger them in their test setups.
- The virtuoso-t process hangs at 100% CPU.
- Virtuoso-t is a key component of the old Semantic Search infrastructure and in some occasions the commands sent by the other components end up taking too much time (hence showing the effect of 100% CPU).
Virtuoso is no longer used by Semantic Search starting the Applications 4.13 release.
- Sometimes Nepomuk consumes too much RAM.
- Many of these problems have been fixed, in other cases however the developers are unable to reproduce the issues correctly. In this case, providing examples and test cases to bug reports increase the chances to get these bugs fixed.
- Search accesses the disk too much on startup.
- A throttling mechanism implemented in the file indexer, versions after KDE SC 4.8 should no longer have this issue.
- My Search database has been corrupted. How do I clean it?
- In the extreme case your database is really corrupted and all other attempts have failed, you can delete the $KDEHOME/share/apps/nepomuk directory (where $KDEHOME is usually .kde or .kde4 in your home directory) while Nepomuk is not running. The database will be cleared, but you will also lose existing information such as tags, ratings and comments.
Advanced troubleshooting
Sharing and privacy
There is one thing I need to touch on before pointing to other sources of information: sharing Nepomuk data. It'd be great if your tags, ratings and comments would be shared with others when you send them files. However, if you tagged a contact with a slightly embarrassing tag ('boring in bed') and send that persons contact information to a mutual friend you probably don't want that tag to be send as well...
This issue is of course being considered and an important subject of research by the Nepomuk researchers. For the time being, these privacy concerns, combined with technical challenges, are the reason Nepomuk context is private. Rest assured the Nepomuk team does all it can to make sure your privacy is respected.
External links
The new Search technology (post KDE Applications 4.13):
- user information article on the dot
- Developer information on community.kde.org
- Wikipedia - Semantic Desktop
The old Search technology:
- Nepomuk pages for developers on KDE TechBase
- NEPOMUK KDE site
- Wikipedia - NEPOMUK Framework
- NEPOMUK website
- article explaining Nepomuk on the DOT
- Getting started user manual
- ZhcnKtorrentweb.png
- Zhcnkmix.png
- ZhcnKimpanel.png
- Zhcnkimpanel2.png
- The madman
- Sabrina153241
- Object-group-koffice.png
- Object-ungroup-koffice.png
- ZhcnKfloppy2.png
- ZhtwKfloppy2.png
- Peter17
- Michaeldsuarez
- Michaeldsuarez
- Preferences-desktop-theme.png
- View-process-tree.png
- Note/zh-cn

Displays an information box. Parameters
- Text of the main body
- (optional) Title of the box (default: Note)
Example: {{Note|This is a note}} gives

Displays an information box. Parameters
- Text of the main body
- (optional) Title of the box (default: Warning)
Example: {{Warning|This is a warning}} gives

- Tutorials
- Membrive
- ZhcnKlipper-shortcuts.png
- ZhcnKlipper-conf.png
- ZhtwKlipper2.png
- ZhtwKlipper-conf.png
- ZhtwKlipper-shortcuts.png
- ZhcnKlipper2.png
- Showfoto browse.png
- Showfoto properties.png
- ShowFoto select.png
- ShowFoto geolocation.png
- ShowFoto histogram.png
- ShowFoto general.png
- ShowFoto tooltips.png
- ShowFoto raw-image.png
- ShowFoto color-management.png
- ShowFoto save.png
- ShowFoto slideshow.png
- ShowFoto zoom.png
- Weather-clear.png
- Tutorials/Access another computer's display (de)
- Yakuake
 |
Yakuake is a drop-down terminal emulator based on KDE's Konsole technology. |
Features
- Smoothly rolls down from the top of your screen
- Tabbed interface
- Configurable dimensions and animation speed
- Skinnable
- Sophisticated DCOP / D-Bus interface
Yakuake is part of KDE Extragear.
Problems
The F12 key is sometimes used by a desktop search application. If you meet this, change it to Ctrl+Shift+F12

Change the audio output when connecting new devices
If you want audio to automatically switch to HDMI when plugging in a new device, do the following:
- Open the volume system settings module
- go to the advanced tab
- check "Automatically switch all running streams when a new output becomes available"
A Windows Vista-like sidebar with clock and news
Once again, the proof that KDE software can do at least as much as Windows...
Creating panel
- Right-click on the desktop
- Click on
- Click on the of this panel
- Drag and drop the panel to a side of the screen clicking and holding on
- Configure the height and width as you wish, but keep quite wide to be able to display the widgets in it
Add widgets
- Still in the panel click
- Add the widget and the or widget
Hide the panel
- Click on
- Click on the option
You're done!
Result
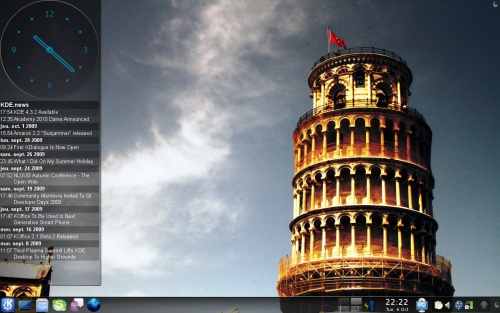
Using Multiple Plasma Themes
The Plasma workspace allows users to create customized themes whose widgets can be themed using multiple themes. For example, it is possible to have the Taskbar be themed using Oxygen, to have the clock be themed using Aya, and much more customization, allowing you to pick the best plasma themes for each object.
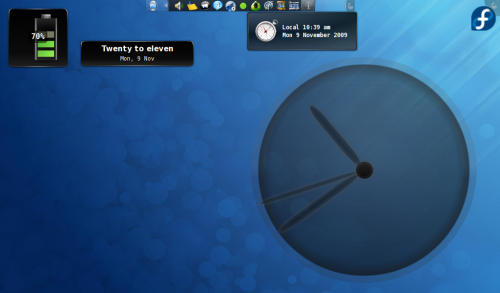
Set up "(Customized)" Theme
Navigate to the configuration dialog via either Krunner or the System Settings Dialog:
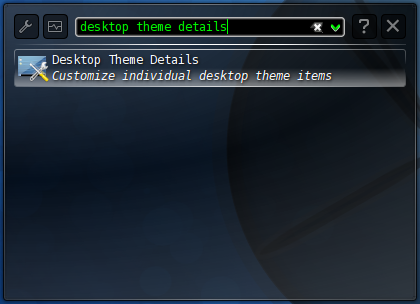
Here you can choose what theme is used for different objects in the Plasma workspace. Configure them to your pleasure (it often helps to test each individual plasma element by applying the entire theme to your desktop first) and press .
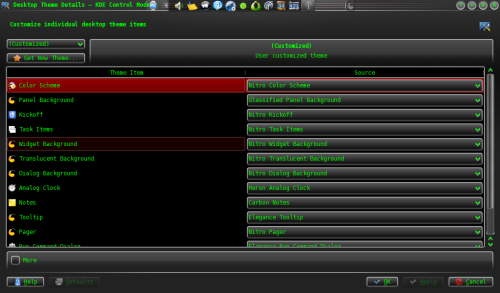
Apply "(Customized)" Theme
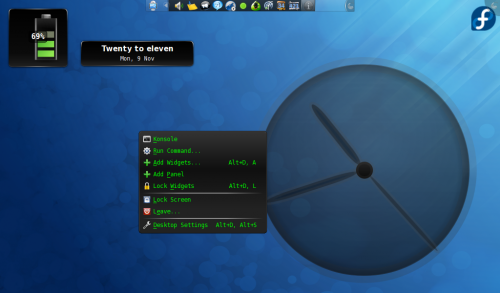
At this point, the workspace settings dialog should list a Plasma theme entitled (Customized). This is the theme mashup that you have created. Select it and hit .
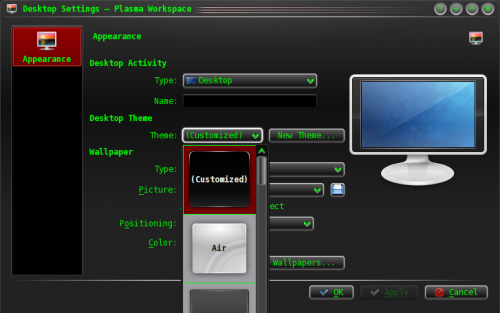
- Windowssidebar.jpeg
- Zhcneva.png
- Zhcneva1.png
- What is KDE (ko)
- Rekonq.png
- Rekonq2.jpg
- Rekonq3.jpg
- Rekonq4.jpg
- Rekonq
 |
The fast, simple WebKit-based KDE browser |
Introduction
Based initially on qtwebkit (and currently on kdewebkit), rekonq is a lightweight browser designed to use the WebKit rendering engine in combination with various KDE technologies, allowing it to integrate seamlessly into the KDE desktop. The name is a throwback to the venerable khtml-based Konqueror which is currently the default KDE web browser.
rekonq has already replaced Konqueror as the default browser in Chakra and Kubuntu, with more distributions expressing similar intent for their future releases. The current stable release version is rekonq 0.7.0.
Interface

By default, the rekonq window uses only one toolbar. This main toolbar consists of four navigation buttons (, , , ), the URL bar and two menu/buttons, one for and one for the . This minimalist approach to the main toolbar marks the most significant user-interface departure from the traditional multi-toolbar paradigm followed by most other browsers like Konqueror.
Further, the main toolbar offers only limited customization - (locked at the top of the window, by default), (medium, by default) and (not shown, by default). This helps keep the rekonq UI simple and puts the focus on the webpage on display.
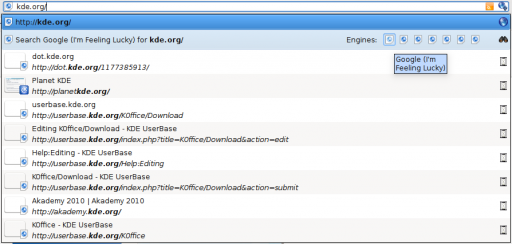
Version 0.5.0 introduces the tech preview of a vastly improved URL bar that offers access to search engines from the drop down completion list itself. The completion list is also populated by matching items from your history and bookmarks.
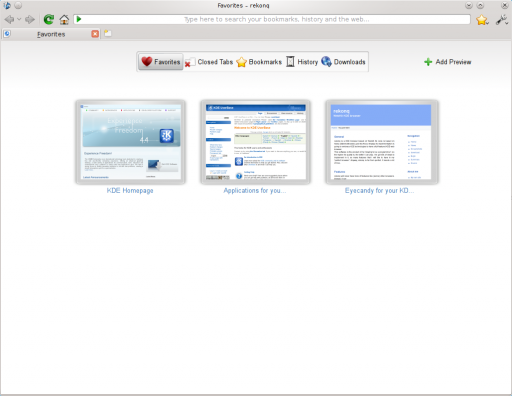
When started, rekonq displays the New Tab page, much of which is taken by a set of preview thumbnails of favorite webpages. These thumbnails offer a speedy way for the user to access their most frequently used webpages. There is also a pane at the top of this page allows the user to switch to previews of recently closed tabs and lists of bookmarked webpages, download and browsing histories.
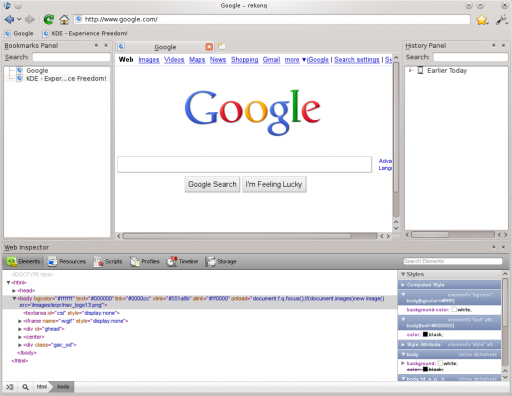
Further configuration options activate several other UI elements hidden by default. These include a toolbar for bookmarks, a panel (a panel, being a mini-window that can be resized, detached or re-docked in the main window) each for bookmarks and history and a web inspector panel (handy for web development).
Features
Under its minimalist appearance, rekonq packs a full set of powerful features. Some of them are described below:
KDE integration
rekonq is designed with the aim of being a KDE browser. And it shows;
Appearance
It obeys your themes, fonts, window decoration, menu highlighting, and many personalization options you set for your desktop.
Applications
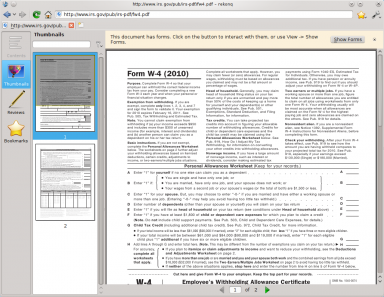
rekonq plays well with other applications in the KDE family. rekonq will always use your chosen default applications to handle file types. PDF files, for example will open in an embedded Okular kpart within rekonq itself. Media files will open in Dragon Player (or any other designated default application for that filetype).
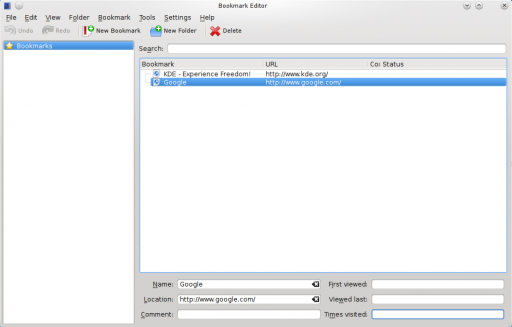
Bookmarks, web shortcuts (more on these later), cookies and authentication information are shared with Konqueror. You will see the same set of bookmarks from either application and you can log onto a website in Konqueror and carry on seamlessly if you decide to switch to rekonq. Your passwords are stored securely in KWallet and can be used from either Konqueror or rekonq.
Your downloads can be optionally handled by KGet. Feeds from websites can be saved to Akregator (or Google Reader).
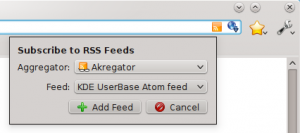 |
Services
KIO support
rekonq supports KIO services, including cookies, cache, proxies and network settings. KIO-slaves like file:/, ftp:/, man:/, help:/, info:/ etc will work in rekonq, too.
Dialogs
In addition to all this, rekonq uses KDE's own file dialog for opening/saving documents. This means, you have access to the Places sidebar from Dolphin while you open or save documents.
Thus, rekonq looks, feels and behaves like a part of your KDE desktop.
WebKit engine
rekonq uses the open source WebKit rendering engine which incidentally began life as a branch of the khtml/kjs libraries from the KDE project. WebKit is fast, powerful and used by many other popular browsers today including Google's Chrome/chromium, Apple's Safari and others.
Auto-load/click-to-load plugins
One of the benefits of using the WebKit engine, is that plugins can be disabled from automatically loading. This comes in handy to surf websites fast, without being bogged down by flash plugins. In the so-called Click-to-load mode, you will instead see a button that you can click on to activate the plugin.
Adblock support
rekonq comes with an automatic subscription to the Easylist filter, which is updated every week. Additionally, you can set up manual filters to block loading of elements from webpages that match your criteria. You can even download and import additional published filterlists or export your list for backup.
If you want to import your Manual Filters e.g. from Konqueror just copy your list into this file: /home/username/.kde4/share/apps/rekonq/adblockrules_local
Web shortcuts support
rekonq allows you to pick from an extensive list of web shortcuts - these are keywords that allow you to search the web quickly. For instance, enteringgg:KDEin the location bar will search Google for "KDE", while
wp:KDEwill search Wikipedia for "KDE". There are dozens of these defined by default. You can edit these or even define custom shortcuts to search on your favorite websites. See Web Shortcuts for details.
Privacy and security features
rekonq allows users to browse the web without retaining information about the visited pages in your history. Note that this feature does not necessarily make you anonymous on the Internet - it only prevents fresh information from being recorded on your computer. You can also delete your history, cookies and other private data anytime straight from the configuration menu button.

When viewing webpages over a secure connection, you can also view SSL information straight from the URLbar by clicking on the icon.
Advanced tab handling
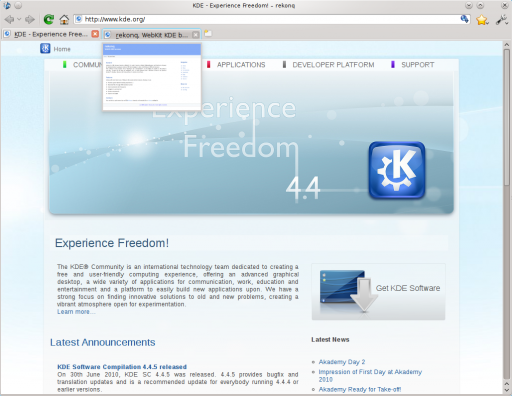
rekonq allows you to rearrange your tabs on the fly. Just drag a tab to the left or to the right and the other tabs will move out of your way. You can also hover over a tab to see a live preview of the webpage being displayed there.
A context menu (right-click menu) gives access to more tab-related functions such as the ability to detach, clone, reload the tab.
Session restore feature
If rekonq crashes, it will automatically attempt to restore your session, complete with all the tabs the next time you start it. If for some reason, the browser continues to crash upon restoring the session, rekonq will automatically start with a fresh session the second time.
Full screen mode
rekonq supports full-screening the webpage straight from the configuration menu button or through a keyboard shortcut (Ctrl+Shift+F, by default). In the full screen view, the main toolbar will auto-hide and the webpage will be displayed over your entire screen.
Zoom slider
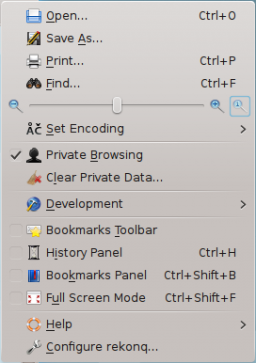
rekonq has a slider to adjust the zoom right from the configuration menu with a handy button to restore the zoom back to default. Of course, you can still use keyboard (Ctrl+ +/-) or mouse (Ctrl + mouse scroll up/down) shortcuts just the same.
Learn more about rekonq from our FAQs, Tips and Tricks page
- ZhcnRekonq2.png
- ZhcnRekonq3.png
- ZhcnRekonq.png
- Talk page
- ZhcnRekonq5.png
- ZhcnRekonq4.png
- ZhcnRekonq6.png
- Tutorials/TweakingPlasma (de)
- Zhcnmousegestures1.jpg
- Zhcnmousegestures2.jpg
- PowerDevil.png
- PowerDevilConfig.png
- PowerDevilProfiles.png
- PowerDevilSummary.png
- Zhcngwenview-video.png
- Zhcngwenview1.png
- Zhcngwenview2.png
- Zhcngwenview3.png
- Mousegestures2.png
- Mousegestures1.png
- Plasma/HowTo/4.3 (fr)
- Yurchor
- TellicoIcon.png
- Tellico
| Tellico is a catalogue application, making it easy to track your books, videos, music, even your wine and anything else. A simple and intuitive interface shows cover images, groupings, and any detail you want. Grab information from many popular Internet sites, including IMDB.com, Amazon.com, and many libraries.
Tellico is a part of KDE Extragear, in the Office module |
At A Glance
The main window for Tellico looks something like:
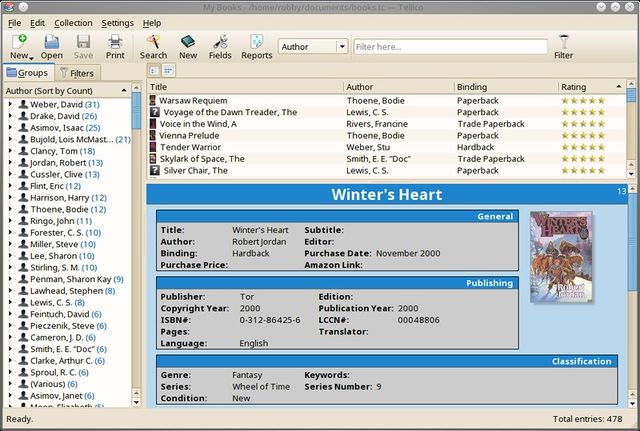
Tellico can use a variety of templates for changing the formatting of the collection information.
Obtaining Tellico
Tellico is available for most Linux distributions, as well as the ports repository for the BSD variants. Please check your package manager to see if a package is available there.
Links to many of the packages are listed on the Tellico download page.
Compiling Tellico from the source code requires installing several development packages.
For Ubuntu/Kubuntu there are unofficial packages available in a PPA.
More Information
- The Tellico website is http://tellico-project.org
- The Tellico user documentation is also available online.
- Questions and comments can be sent to the tellico-users mailing list.
- You can also post a message in Tellico forum.
Bugs
Bug reports for Tellico use KDE's bugzilla.
XSLT processing
Tellico use XSL files for templates, reports, import, processing data source and export. XSL files apply on XML data. The Tellico's DTD will give you the exact name of fields (because Tellico displays translated titles instead of names). Common places for this file are /usr/share/tellico/tellico.dtd or /usr/share/kde4/apps/tellico/tellico.dtd Beware that Tellico use libxslt1.1 which implement XPath 1.0 functions only. Fortunately, you can use EXSLT extensions.
Basical XSLT for transforming export
First, do an XML export. The file will serve as a reference for testing. Testing will be easier if you install an XSLT processor (xsltproc is available on every distribution). Then write an xsl stylesheet. Here's a basic one :
<?xml version="1.0" encoding="UTF-8"?>
<xsl:stylesheet xmlns:xsl="http://www.w3.org/1999/XSL/Transform"
                xmlns:tc="http://periapsis.org/tellico/"
                version="1.0">
<xsl:output method="xml" version="1.0" encoding="UTF-8" indent="yes"/>

<xsl:template match="/">
  <xsl:apply-templates select="tc:tellico"/>
</xsl:template>

<xsl:template match="tc:tellico">
  <xsl:apply-templates select="tc:collection"/>
</xsl:template>

<!-- about your collection -->
<xsl:template match="tc:collection">
<books><!-- sample xml  output -->
<xsl:apply-templates select="tc:entry"/>
<books>
</xsl:template>

<!-- transform each entry -->
<xsl:template match="tc:entry">
<book><!-- sample xml  output -->
<title><xsl:value-of select="title"/></title>
<!-- other fields -->
</book>
</xsl:template>

</xsl:stylesheet>
Default fields in use for import
If you want to extend Tellico, you will certainly modify its XSLT processing files. To do this you will need the name of fields from the DTD, but current xsl files use several other names specific of collections and data sources. Using these default names for fields will makes your XSLT more compatible with others (for example "dewey" and "loc" are used for several data sources).
The list is built at Tellico/DefaultFields
The instructions for compiling Tellico have moved to TechBase.
- Robby
- LtWorf
- Tutorials/Opera (ar)
- Larnapm
- Skanlite.png
- Michael4910
- Umbrello2.png
- Plasma-multiple-themes.png
- Toolbox

Add an Introductory Screenshot and Description
Whenever possible we begin an application's top-level page with this. The code to achieve it is
{|class="tablecenter vertical-centered"
|[[Image:YourScreenshot.png|250px|thumb]]
|Your descriptive text
|}
Format Your Text
Use Headings
Each heading goes on its own line starting and ending with two or more '=' characters. Once there are more than a handful of headings on a page they automatically create a Table of Contents, so use them. The number of '=' characters determines their level in the Table of Contents, thus your headings should be '==Main section name==', '===Subsection name===', '====Sub-subheading name here====', and so on. Avoid using single '=', as that denotes a page heading and every wiki page already has one made from its name; for example, this page's title "Claus chr/DPL/Test" appears as its page heading.
Use bold and italic
Blips are used to specify bold and italic words.
Use '''bold text''' to specify bold text and ''italic text'' to specify italic text.
In order to ensure we get easy and accurate translations, please adhere to the typographical guidelines.
Add a Code Snippet
We have templates to assist in correctly displaying code snippets. Examples of use in various situations are available on the typographical guideline page
If you have problems displaying pipe characters in your code snippet, please see the explanation and markup detailed on Typographical Guidelines
Add Indents
- ":" is used for an indent, and was used in multiples in some old pages. This is deprecated, and causes some problems, so the multiples will be removed as they are found. A single ":" indents by four characters.
Format Dates
Dates in a purely numerical format cause confusion, due to differences in expectations of geographical zones. Please format dates as18 Mar 2011with the month either spelled out completely or in abbreviated form, and the year in 4-digit format. The day may be single or double-digit.
Bulleted Lists
* is the symbol to use for bulletted lists. ** gives a second level:
* Almonds

* Nuts
** Cashews

* Raisins
produces
- Almonds
- Nuts
- Cashews
- Raisins
Enumerations
Enumerations are produced in the same way, using '#'.
# Sift
# Mix
## Stir thoroughly
# Bake
produces
- Sift
- Mix
- Stir thoroughly
- Bake
For more details see wikimedia on lists.
Combining Bulleted Lists and Enumerations
You can have an enumerated sublist in a bulleted list and vice versa, like this:
* Nuts
*# Cashew
*# Crazy
* Other things
produces
- Nuts
- Cashew
- Crazy
- Other things
while
# Nuts
#* Cashew
#* Crazy
# Other things
produces
- Nuts
- Cashew
- Crazy
- Other things

To get each bullet and each sub bullet in its own translation unit you can enter something like this:
* First bullet </translate >
<translate >
** First sub bullet </translate >
<translate >
** Another sub bullet<br /><br />This one consists of two paragraphs </translate >
<translate >
* The next main bullet </translate >
<translate >
** And so on
This displays like this:
- First bullet
- First sub bullet
- Another sub bullet
This one consists of two paragraphs
- The next main bullet
- And so on
The same method should apply to the other kinds of lists.
If on the other hand you need to have more sections in the same item, you can do something like this to have each section in a translation unit of its own:
* First bullet </translate >
<translate >
* Second bullet, first section. </translate><br /><br /> <translate > Second section of the
second bullet. This section has a translation unit of its own </translate >
<translate >
* And so on
This displays like this:
- First bullet
- Second bullet, first section.
Second section of the second bullet. This section has a translation unit of its own - And so on
Itemizations
Itemizations are produced using ; and : alternatively. They are best for giving short descriptions for a group of related objects.
;Animals
: They move around and devour other creatures.

;Plants
: They have roots and feed upon ground water and sun.
produces
- Animals
- They move around and devour other creatures.
- Plants
- They have roots and feed upon ground water and sun.
Add a Link
There are three kinds of links to learn, internal ones, to another userbase page, internal links to a section of a userbase page, and external URL links.
For an internal link the format [[PageLayout]], where you want to display the name of the page, does work, but it is not ideal, particularly for translation to docbook and for localisation. It is better to use the form [[Special:myLanguage/PageLayout|Page Layout]], because that allows translators to link correctly even though the page name is localised. The result is that it directs to the correctly translated page, if one exists. You often need to include the link in a sentence, so in that case you would use
[[Special:myLanguage/PageLayout|this page]]which displays Internal links to subsections of a page use character '#' (hash) and should look like this
[[Special:myLanguage/Tasks_and_Tools#Working_with_Languages|...]]With this kind of link it is very important, that the page you link to declares the reference anchor. If the anchor contains space characters, replace them by character '_' (underscore) when calling the reference. If the reference is found, the section will be automatically displayed by your browser (if it manages anchors). If it is not the case, you will have to go down through the page to find the referenced section. External links are given as the URL and a text separated by a space and delimited by single square brackets as in
[https://en.wikipedia.org/wiki/KDE KDE's Wikipedia page]which gives KDE's Wikipedia page.
Anchor declaration
Anchor declaration must be done immediatly BEFORE the referenced section, and followed by a blank line separating the anchor and its headline. In the following example just copy in the ID value, the title of associated section. It should look like this:
</translate><span id="Working with Languages"></span> <translate>
If the page containing the section that you link to is not yet marked up for translation, you should omit the </translate > and <translate > tags.
External links are slightly different so
[http://techbase.kde.org/Schedules our road map]displays
our road map, which would take you straight to the techbase page.
One last thing to note - when you preview your page, all links are live. This gives you two benefits. You can check (by hovering) that your links are set up as you expected, and you can use a red link to create a new page.
Make an application list
If you want to make a list of applications like the ones in the subpages of Applications, you should use the AppItem template. Simply enter
{|
{{AppItem|System Settings/Locale|Preferences-desktop-locale.png|
Settings for localized handling of numbers, dates, etc}}A short text.
A few more short lines about the app. This is optional.
|-
{{AppItem|System Settings/Shortcuts and Gestures|Preferences-desktop-keyboard.png|
Shortcuts and Gestures}}Another short text. If you do not type <keycap>Enter</keycap> between the texts
you get one section no matter how long the text is.
|}
This gives the following display:
Settings for localized handling of numbers, dates, etc | |
| A short text.
A few more short lines about the app. This is optional. | |
Shortcuts and Gestures | |
| Another short text. If you do not type Enter between the texts you get one section no matter how long the text is. | |
Note, that you should not prepend "Special:myLanguage" to the page name - the template takes care of that. Also note, that you must give a title, even if the title is the same as the page name.
Footnotes
Footnotes are rarely used in our pages, but if you need them you can place a <ref>text</ref> in the source where the footnote mark should appear. There has to be one <references /> somewhere in the source as well, usually towards the end of the page. This is where the text added by the <ref> tags will appear. For more info see the Wikipedia help page.
Illustrate Your Text
Add a single image, centered
[[File:KMail-kde4.png|250px|center]]
Note that you can change the position of the image, but the default is left. The size of the image depends on the circumstances, but for screenshots I recommend no less than 250px and no more than 500px.
Also note that Image: and File: are synonyms.
So that [[Image:KMail-kde4.png]] is the same as [[File:KMail-kde4.png]]. However Image: is deprecated, so prefer File: in new content.
see mediawiki for more info.
Make the Image Clickable and Add a Caption
Where you need to show more detail, create a moderately sized image, clickable, so that the full-size can be seen. Simply add the parameter '|thumb' within the image parentheses.
A caption can also be added as a parameter, but will only show if '|thumb' is present.
Example:
[[File:file_name.png|thumb|this will be the caption]]
Add a caption without a thumbnail
Captions also appear on images marked up with the frame syntax.
Example:
[[File:image.png|frame|left|this will be the caption]]
Prevent text from flowing around image
Sometimes you might not want the text to flow down the sides of your image. You can prevent this by adding a <br clear=all> tag between the file tag and the text in question.
Example:
[[File:image.png]]
<br clear=all>
This text would normally flow down the sides of the image but now it will be found under the image
Use Tables to Precisely Place Multiple Images
{|class="tablecenter" style="border: 1px solid grey;"
|[[Image:Desktop-config-customized.png|230px|center]]||[[Image:Desktop-settings-rightclick.png|230px|center]]
|-
|[[Image:Desktop-theme-details-dialog.png|230px|center]]||[[Image:Plasma-multiple-themes.png|230px|center]]
|}
displays
 |
 |
 |
 |
Note that all the parameters for one image are contained within [[...]], and cells are separated by '||'. To start a new line, insert '|-' on an otherwise-empty line, then '|' at the start of the next one.
For more details on Table formating see mediawiki
Embed a Video
As of July 2012 the MediaWiki EmbedVideo extension has been installed on userbase.kde. This means you can embed videos from various video hosting sites into the page content and have them display in line.
EmbedVideo parser function expects to be called in any of the following ways:
{{#ev:service|id}}
{{#ev:service|id|width}}
{{#ev:service|id|width|align}}
{{#ev:service|id|width|align|desc}}
{{#evp:service|id|desc}}
{{#evp:service|id|desc|align}}
{{#evp:service|id|desc|align|width}}
Where:
service is the name of a video sharing service (See "service name" in the list below)
id is the id of the video to include
width (optional) is the width in pixels of the viewing area (height will be determined automatically)
align (optional) is an alignment (float) attribute. May be "left" or "right".
desc (optional) is a short description to display beneath the video when it is aligned
For example, to include the famous "evolution of dance" YouTube video, you'd enter:
{{#ev:youtube|dMH0bHeiRNg}}
And if you wanted scaled down to thumbnail size, on the right with a short description, you could use:
{{#ev:youtube|dMH0bHeiRNg|100|right|This is an embedded video!}}
As of version 1.0, EmbedVideo supports embedding video content from the following services:
| Site | Service Name |
|---|---|
| Dailymotion | dailymotion |
| Div Share | divshare |
| Edutopia | edutopia |
| FunnyOrDie | funnyordie |
| Google Video | googlevideo |
| Interia | interia or interiavideo |
| Revver | revver |
| sevenload | sevenload |
| TeacherTube | teachertube |
| YouTube | youtube and youtubehd |
| Vimeo | vimeo |
Add Notes and Warnings

Where a note or warning is relevant within your text, use these templates:
{{Info|This is general information}} displays

{{Note|Some important information at this point}} displays
{{Tip|A helpful piece of advice, something to remember}}displays

{{Warning|Take care - this is a dangerous thing to do}} displays

Where the strongest possible warning is needed, the Remember box can be used, but please use sparingly.
{{Remember|1=This is for things that definitely must not be forgotten}}

You can also change the heading:

{{Remember|2=Don't Forget This!|1=You can use...}}
Page Redirection
You can make a page to redirect to another page automatically by using:
#REDIRECT [[Pagename]]
KDE3 and KDE SC 4 Versions of Applications
By default, KDE SC 4 is assumed. If the KDE SC 4 version is not yet ready for release, or where only a KDE 3 version exists, it may be necessary to document the KDE3 version. In this case you should add the template {{KDE3}}
which displays
![]() Should you be writing about a KDE3 version and KDE SC 4 version on the same page, use icons for both — {{KDE4}} which displays
Should you be writing about a KDE3 version and KDE SC 4 version on the same page, use icons for both — {{KDE4}} which displays
![]()
Other Useful Templates
Inserting GUI Icons
The best way to refer to icons in the GUI is to display it in the text. This can be done with a template like this: {{Icon|list-add}}. This will display the ![]() icon.
icon.
For this to work, the icon image must have been uploaded to the wiki. See Update an Image for an explanation on how to upload images. The .png files can usually be found here: usr/share/icons/oxygen. If possible use the 16x16 icon. The file name should have an Icon- prefix as in Icon-list-add.png — apart from the prefix the filename should exactly match the usual name. Note, that when using the template you should neither write the Icon- prefix nor the .png file type extension.
The ![]() icon can also be written as
icon can also be written as {{Plus}}, and the ![]() icon as
icon as {{Minus}}. You can also use {{Configure}} to get the ![]() icon, and
icon, and {{Exit}} gets you the ![]() icon.
icon.
Community Applications
The final consideration concerns those applications which are not distributed as core KDE applications. These need to be indicated by an icon, placing {{Community-app}}
at the end of your sentence or line, just as you would to denote a footnote in general writing. You then need to add {{Community-app-footnote}} which will create a footnote, like this:
![]() Support for this application can be found from the project's home page
Support for this application can be found from the project's home page
Making Major Edits to Existing Pages
If a page is likely to be open for editing for some time there is a danger of conflicts - someone else may edit at the same time, and saving your edit will cancel out theirs, or vice versa. The way to avoid that is to make a temporary entry, directly under the language bar, using {{Being_Edited}} which will display

If this notice persists for an unreasonable time, please either notify irc.freenode.org #kde-www or report on Annew's Talk page
Note: Pages should not normally be marked for translation while they are being actively worked on
Don't forget to remove it when you have finished!
Adding a New Complex Page
If you need to be able to work on a page for quite some time, over several days, for instance, you may like to use the Construction template - {{Construction}}, which displays

Links to Pages in the Neighbourhood
You can add links to a preceding or a following page using the following templates as described here:
{{Prevnext2|prevpage=Previous Pagename|nextpage=Following Pagename|prevtext=The page before this page|nexttext=This page you should read later|index=Index page|indextext=Back to Menu}}
All six arguments are optional. For first pages with no preceeding page or last pages with no following page use this:
{{Prevnext2|nextpage=Following Pagename|nexttext=This page you should read later}}
- Claus chr/DPL/Test
- This page you should read later →
{{Prevnext2|prevpage=Previous Pagename|prevtext=The page before this page}}
- ← The page before this page
- Claus chr/DPL/Test
If you don't specify an indexname the name of the current page will be displayed.
Special:myLanguage with your links; otherwise you create problems for the translators.
Links to bugs
You can link directly to a bug in Bugzilla by using this template:
{{Bug|123456}}
Please do not forget to add the <s> and </s> to strike through a bug that is closed.
Adding a List of Sub-Pages
== Subpages of {{FULLPAGENAME}} ==
{{Special:PrefixIndex/{{FULLPAGENAME}}/}}
is very useful when you want to list subpages with active links, such as
Subpages of User:Claus chr/DPL/Test
It does, however, also list all "other-language" pages, so use with discretion.
- Skierpage/Windows reinstall
- PageLayoutThis page lays out the sections that we would like to see in an ideal page.
You should aim to get as many of the sections into your page as is practicable.
Available Tools
- Tool Box shows you wiki markup for the effect you need
- Typographical Guidelines standardises markup for use in translation, either to official manuals (DocBook) or to other languages.
Sections
| Section | Description | Relevance |
|---|---|---|
| Image header | A two-cell table containing a header, laid out with {|class="tablecenter vertical-centered"
|[[Image:Image.png|300px]]
|Short description
|}
|
important |
| History | A brief history of the application including for example the first release date and others major events. It's recommended to add references. | optional |
| Features | A brief feature list, under a heading, and consisting of bullet points. These are indented by default - no need to specify indentation. | important |
| Details | One or more heading giving more in-depth information about using the application | optional |
| Screenshots | Screenshots to illustrate the above, whenever feasible. These will usually be thumbnails, clickable for enlargement. The size will usually be in the range of 300px to 500px. | important |
| Hints and Tips | Short tips to increase productivity | optional |
| Troubleshooting | List them here or in a subpage | optional |
| More Information | Links to
|
important if existing |
| Category | The category will normally be the name of the applications list that points to your page, e.g. applications listed under Applications/Office would show the statement [[Category:Office]]. | important |
Please make regular checks of the pages relevant to your work (linked from Tasks and Tools) and also Typographical Guidelines as these are updated whenever new issues are noted.
- ShayonM
- Lancelot.png
- Start-here-kde.png
- System-run.png
- PlasmaThese pages relate to the different sections and uses of Plasma, on the desktop or on the netbook.
- Michael4910
- UserBase (cs)
Co je UserBase?
UserBase je kolekce stránek určených k získání nápovědy uživatelům aby kdykoli získaly dobré zkušenosti s KDE.
Na UserBase naleznete
Co zde nenaleznete

* Technické stránky, často využívány vývojáři - mnoho takových odkazů naleznete na http://techbase.kde.org/ 
* "Oficiální" dokumentaci - nalzenete ji na kde.org nebo na stránkách aplikací 
* Rozvrhy akcí - naleznete je zde
Připraveni k přispívání?
Není podstatné zda jste registrovaní před přispíváním, ale vážíme si toho. Pokud se zaregistrujete dostanete svou diskusní stránku, která umožňuje kontakt s vámi. Buď můžete použít OpenID nebo si vytvořte normální účet.
Po registraci doporučujeme přečíst si Pokyny k přispívání (en) kde jste upozorněni na klasické otázky.
Zde naleznete pokyny pro stavbu a vzhled (en) stránky a pro pomoc se syntaxí se podívejte zde (en).
Mějte na paměti výše uvedených pokynů. Pokud máte jakýkoli obsah, který považujete za uživatelsky-centrický, ale není striktně v rámci těchto pokynů, obraťte se Společenství pracovní skupiny na community-wg at kde dot org.
| Zpět k úvodní straně (en) |
- Tutorials/How to search in phone books using Klipper (cs)
- View-process-system.png
- SystemActivity.png
- System Activity
Introduction
System Activity is akin to the Microsoft Windows' Task Manager, Apple's Mac OS X's Activity Monitor and Gnome's System Monitor. It pops up when you press the keyboard shortcut Ctrl + Esc or from the System Activity icon,![]() , in a KRunner (Alt + F2) window.
, in a KRunner (Alt + F2) window.
It shows a list of currently running processes, along with their CPU usage, Memory usage, and various other pieces of information.
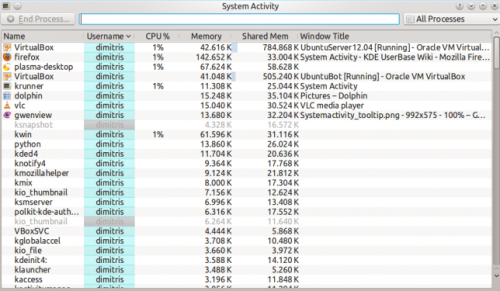
General Tips
Almost every part of the UI displays a tooltip, when you hover the mouse over it for long enough, to provide more detailed information, and "WhatsThis" functionality, activated by clicking the ![]() button, to explain what the information means.
button, to explain what the information means.
For example, hovering over the CPU usage for a process we can see various other bits of information including how much time the program has been running for in total.
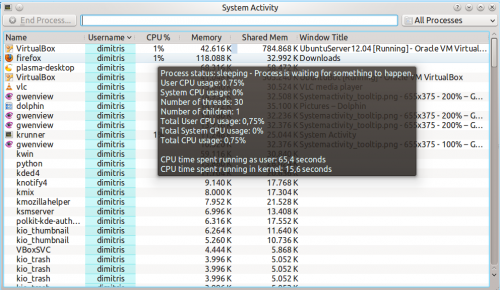
Why is my system currently running slowly?
A system can be running unusually slow because a process (program) is demanding all of the computer's processing power (CPU usage) or is using all of the computer's memory.
By default, processes owned by the current user that are using a lot of CPU or memory are near the top. This means that any misbehaving programs should be near the top and easily visible. For example:
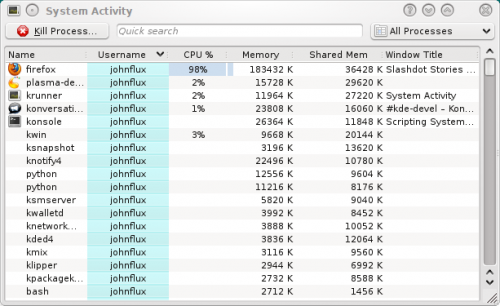
In this example, Firefox has stopped responding and is using 99% of CPU.
To end the process that is misbehaving, click on the process to select it and press the button. This will send a polite request to the program, asking it to close.
I can't kill it - it just won't die!
Thankfully it's fairly rare, but just occasionally you may meet this. If the process is misbehaving it may ignore your request to end, so we may need to force the program to end immediately. Doing this may result in losing any documents etc that the program had opened but not saved. To do this, right click on the process and choose then choose .
Sometimes even this will not kill the process, or the option will not be given. This can happen, for example, in vuze with certain kernels. If the process or one of its threads gets caught in a kernel bug then it can end up being stuck trying to execute a kernel operation and being completely unkillable. Often there is no solution to this other than rebooting the machine.
Zombie processes
Processes which are in a Zombie state are already dead, and so cannot be killed. The system keeps them around until their parent process notices, which is usually a very short amount of time. Seeing a Zombie process usually indicates that the parent process has stopped responding.
Targeting a window to kill
If you want to kill a particular window that has frozen up, simply press Ctrl + Alt + Esc at any time. The mouse cursor should turn into an image of a skull and cross bones. Now click the window that you want to kill. Note that this will kill the application immediately, and you may lose any unsaved data.
The Memory column shows approximately the amount of memory (RAM) that the process is using by itself, privately. The Shared Memory column is approximately the memory that is, or could be, shared with other programs. For example, the KDE libraries are used by all KDE programs and so are loaded into memory only once.
Technical Information
The "Memory" column shows the value of VmRSS - Shared, and so is generally lower than the values shown by top etc. This does not include memory backed I/O pages, and does not include memory used by the x server to store any pixmaps used by the application. This value is often called the Unique RSS size, or URSS. This approximates the value shown as Private memory usage in the .
The Shared memory is the same as the SHR column in top and can be somewhat inaccurate. This approximates the value shown as Shared memory usage in the .
Specifically the process list parses /proc/pid/stat whereas the dialog parses /proc/pid/smaps.
How do I view more Detailed Memory Information about a process?
From KDE SC 4.4 you will be able to select a process in the table, right click on the process, and choose , and get something like:
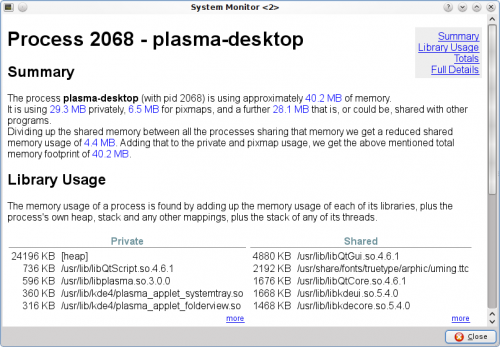
Why do values in Detailed Memory Information not match the process list?
The process list in System Activity is using an approximation to gather the values. The gives more accurate values.
Why is the "Xorg" process using so much memory?
This is the process that displays all the other applications. Its memory usage includes all the memory used on the video card to store all the pixmaps (images) from applications.
In general you do not need to worry about the memory usage of Xorg.
How do I see the PID of a process?
If you want to see the PID of a single process, hover the mouse cursor over the name of the process. The PID will be shown in the tooltip.
If you want to see the PID of all the processes, right click on any column heading and you will see the menu:
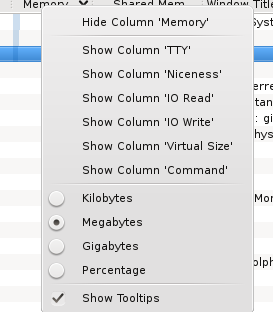
Choose .
Can System Activity show the I/O Hard Disk usage, like iotop?
Right click on the column headings, and choose and again for . It will now show the amount of data being sent to or from the hard disk.
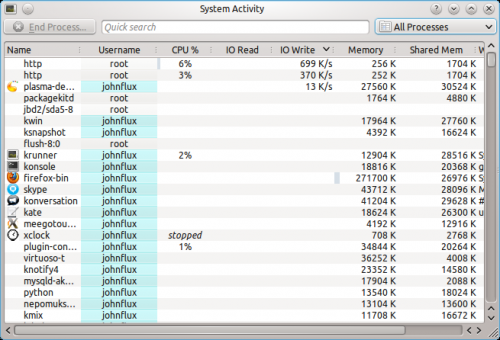
By right clicking on the column header you can choose whether you want to view the actual amount of data being written or read from the hard disk (the default), or whether you are interested in seeing how much data the application is sending or requesting from a file.
Data requested and actual data read from the hard disk are not equivalent - for example, if two applications read from the same file the operating system does not need to read from the actual hard disk twice - it can just read it once and remember it for a short while. Similarly, if one process writes to a file, but then another process writes over the top of that same file, there's no point writing the first version of the file to the actual hard disk.
Why are some processes grayed out?
For example the process xclock:

This means that the process has already died. It is shown as a disabled
process just for convenience to make it easier to see processes that are quit.
The values for the CPU usage, Memory usage, etc are just the values from when the process was last seen alive. A process that has ended does not take up any resources (it uses no CPU, memory etc).
What are all of these processes owned by root and taking up no memory?
These are kernel threads. They exist only inside the kernel, and exist to allow the kernel to perform multiple tasks in parallel.
They are shown because occasionally they can be a cause of heavy CPU usage. For example, under a heavy load, and with bad drivers, a network card can produce a huge number of interrupts, resulting in a high CPU usage in the ksoftirqd kernel thread.
Likewise, a high CPU usage in kjournald can indicate that DMA transfer is not enabled on the hard disk.
Why do I have so many processes?
A normal average-user system has around 150 to 200 processes with strange sounding names. It would be nice to setup a wiki page giving a short description of each of these processes, but so far nobody has done this. ![]()
Why is OpenOffice.org not showing up as a graphical program?
Before version 3.3, OpenOffice.org did not correctly implement the window standards. Specifically, their windows did not set _NET_WM_PID to link the windows to the process. This is now fixed in OpenOffice.org 3.3.
Why is gvim showing up strangely as a graphical program?
This is a fault with the GVim program. GVim does not correctly implement the window standards. Specifically, when it starts up it forks a new process to avoid hanging the shell that it ran from. But it sets the _NET_WIN_PID property to the previous PID. The authors have been notified but have not fixed this yet.
- SystemIn this category we list pages that are concerned with system administration
- Nsouza
- Tellico (de)
- MultimediaThis page lists audio and video playing applications, together with utilities for creating audio and video disks, and controlling your sound channels.
- OfficeThis page lists the components of a full office suite, a Personal Information Manage (PIM) and various supporting applications, including money and time management. All your productivity needs.
- TutorialsLearn the less obvious functions of these applications
- UtilitiesThese are small applications that keep your system in good order or make organisation of your files easier to manage
- SecurityThese are small applications that enhance the security of your system
- RalphMW
- Rekonq1.png
- Rekonq-0.3-3.png
- Rekonq-0.3-4.png
- Needs-update
- Pages using DynamicPageList3 parser tag
- Pages with template loops
- Noindexed pages
- Getting Started
- System
- Desktop
- Applications
- Kopete
- Graphics
- Photography
- Advanced Users
- Template
- Internet
- Office
- Amarok
- Multimedia
- Dolphin
- File Management
- Tutorials
- Configuration
- Utilities
- UnusedTemplates
- Help
- Template/da
- Шаблон/uk
- Home and Hobby
- Pages in English
- Games
- Accessibility
- 模板/zh-cn
- Vorlage (de)
- Grafika (pl)
- Modello/it
- Education
- Template/fr
- Erste Schritte/de
- System/de
- Система/uk
- Development
- Science
- Kexi
- Security
- Privacy
- Mobile
- Plasma
- Widgets
- Contributing
- Index
- Primeiros Passos/pt-br
- Para Empezar/es
- Plasma/da
- Icons
- Getting Started (cs)


