Current Macports 2.1.3 only ships an outdated Amarok 2.6.0 version
Amarok can be installed and used on the Mac OS X.
Installation using MacPorts
To install Amarok on Mac OS X, first one needs to install MacPorts from here. Once MacPorts is installed one needs to run the following command in the terminal:
sudo port install amarok
The port command will fetch all the dependencies, compile, build and install them. This process may take quite some time, four to five hours in a recent install.
Screenshots
The following screenshot shows Amarok running on the Mac OS X:
digiKam 7 has significant improvements to face detection and the following tutorial may be partially out of date. For the latest information about Face detection see digiKam 7 release notes
Face Detection In digiKam 2.0 Beta 2
Transcribed from Mohamed Malik's blog, 12 February 2011
Google Picasa & Apple iPhoto are not the only applications that are capable of detecting faces in pictures. Face detection now has made its way into Linux as well. The upcoming release of digiKam 2.0 in May will feature face detection and tagging support. I compiled digiKam 2.0 beta 2 release and tested this feature and it works like a charm.
Here is how to use this feature..
In the digiKam main window, on the left, you will now see a icon with a person's face. Click that icon, from there you will get a window asking you to scan the collection for faces. You can select which folders will be searched for faces. Take a look at the screenshot below.
Now it shows all the faces that it has detected. The only thing that has to be done is to give it a “tag”, like the person's name and you will see the name appears below the People tag.
It is generally a good idea to write metadata only into JPG files. If you do want to save metadata for every RAW file - enabling use of sidecar .xmp files is a universally safe method. Writing directly into RAW files is safe for .DNG files, but results may vary with other RAW file formats. Use at your own risk.
Transcribed from Mohamed Malik's blog, 1 March 2011
Almost all images contain metadata and this data contains all the settings that you used to create the picture. These include shutter speed, aperture, focal length etc..
Most image management applications allow you to add and remove custom metadata to your files. This can be easily done while using JPEG files. However the same is not very true for RAW files.
When we add more labels and captions to the metadata of an image we need to save it. If you have a lot of RAW files, digiKam gives you the option to write metadata to RAW files as well. However please bear in mind that this feature is still experimental.
In order to enable the writing of metadata to RAW files, you need to edit your configuration of digiKam.
From the main menu go to Settings -> Configure digiKam
Then you will see the configurations menu. On the left hand side select Metadata and enable the option If possible write Metadata to RAW files (experimental)
See screen capture below.
Warning
nn wrote: Problems will arise with the rawfiles checksums, as they will most probably be invalid after writing the tags.
This pages needs screenshots for the Amarok 2.8 version
As you already know, a normal Windows install doesn't use KDE, so if you want to install Amarok, you can't just download the Amarok package. You must install a compatible compiler first. Here is described how to download, install and run Amarok in the Windows operating system.
How to download
If you run into any difficulties, please visit the Amarok on Windows wiki page where the latest links will be kept updated. Otherwise, use the latest at the following links:
How to install
The installation is very simple, just run the downloaded .exe file.
Warning
If you want to update be sure to remove your current install.
Step 1
First, review on the license terms.
Step 2
Second, choose the install location.
If you want to change the default location, select Browse... and choose a new location.
Step 3
Wait a few minutes while the installation finishes.
Step 4
When the installation is done, dismiss the window with Close. Your Amarok installation has finished.
Running Amarok
When the installation finishes, you'll find an Amarok shortcut on your desktop. To run Amarok, just click the shortcut.
This page lists hidden configuration options provided by Gwenview: they may help you tune Gwenview for specific needs, but please keep in mind there is no warranty they will continue working from one version to another.
Setting these options
To set these options you need to be familiar with editing KDE configuration files by hand.
Gwenview configuration file is named gwenviewrc. It is usually located in ~/.config/.
"General" group
PercentageOfMemoryUsageWarning
The percentage of memory used by Gwenview before it warns the user and suggest saving changes.
Default value: 0.5 (50%)
BlackListedExtensions
A comma-separated list of filename extensions Gwenview should not try to load. This is useful to exclude raw files which are recognized as TIFF or JPEG.
Default value: nef,cr2,new
If you change this value, be sure to keep "new" in the list. This is necessary because this extension is used by Gwenview when it saves temporary files.
Note
It seems that this option is no longer present by default. You can still create it; it should work as expected. As to default values: If you have information about that please share
"FullScreen" group
FullScreenColorScheme
Since Gwenview 2.9.
Name of a KDE colorscheme to use when running in Fullscreen mode.
The name of installed color schemes can be found in /usr/share/color-schemes/. You can also use the full path of a color scheme.
Default value: empty string, which means to use the colorscheme shipped with Gwenview.
"ThumbnailView" group
ThumbnailAspectRatio
Since Gwenview 2.10.
Defines the aspect ratio used for thumbnail cells. The default value gives cells which are a bit wider than taller, reducing empty space between rows.
Page Layout helps to standardize the look of pages
Tool Box shows you wiki markup for the effect you need
Typographical Guidelines standardizes markup for use in translation, either to official manuals (DocBook) or to other languages.
Deciding where to create your page
Many people choose to draft a page on their own Talk page, then move the result to the desired site. Sometimes there is a good reason for preferring to do it in the final location. If that is the case, consider using before your content {{Construction}} which will display
Under Construction
This is a new page, currently under construction!
Wiki Structure
For the convenience of users we try to avoid creating a structure more than three levels deep, avoiding having to type long paths for page names. For most purposes, the following guide will suffice:
Please do not use any kind of punctuation in your page names — punctuation like question marks or periods creates serious problems for the wiki software, in particular for the translation system.
Workflow
Navigate to a page, which will contain a link to your new page
Edit this page and insert a link to a new, not yet existing page like this: [[Special:myLanguage/My New Page]]
Write a one-line summary of what you changed
Hit the Preview button and check your work
Save your edits.
Now the page shows a red colored link to your upcoming page. A click on this link will tell you, that the page doesn't exist yet, and offer you to create the page. Clicking this
sends you directly to your new page and will open the edit box.
Note
You can also create a new page, by entering the URL of the new page directly in your browser address bar. In this case, don't forget to link the new page from another page.
Note
A double-Enter is required to make a new paragraph. Please use this after any heading, as it puts headings in a separate translation unit which is preferred by translators using external tools.
Note
If you are making frequent edits to your page, please use either {{Construction}} or {{Being_Edited}} so that translators and other contributors know to wait until you are finished.
Warning
Avoid using text smilies as they cause problems for translation applications (due to unbalanced parentheses). Instead use {{Smiley}} Other smilies can be found on [Commons Wikimedia] and the file-name is sufficient to get the image included
Note
For help about editing existing pages read Modify a Page.
Some of this information is old and may be obsolete. If you are a user of Kopete please either directly edit this page or add notes on the attached Discussion page
Information
A more complete and to-to-date description of setting up your account is available from the Kopete Jabber section
Adding an account
You can configure your Google Talk account in Kopete, by following these steps:
First you will need to add a Jabber account: Settings -> Configure... -> Accounts. There, choose an identity and press Add Account... in the right column. A service list will be displayed, and you have to choose Jabber, and then press Next.
In the first tab you have to enter your complete Google Talk address and password.
Basic Setup tab.
Then go to the Connection tab, and check Use protocol encryption (SSL), Allow plain-text password authentication, and Override default server information checkboxes. Then set server to talk.google.com and port to 5223. If you are behind a firewall and can't connect to the 5223 port you can use the 443 port (standard SSL port).
Connection tab.
If you want to enable voice chat, go to the Google Talk tab and check the checkbox you'll find.
Google Talk tab.
Read more about Kopete Google Talk voice chat support here.
You may need to restart Kopete to get the connection to work if you are editing an existing account.
QCA
Kopete Jabber uses a library called "QCA" (Qt Cryptographic Architecture) for encrypted connections as used by Jabber. Kopete has an internal copy of this library but your distribution may have separated it out. If so, make sure you have "QCA" installed. This may be called "libqca1-tls".
Information on "QCA" for various distributions:
openSUSE: the package is called qca but is installed by default along with Kopete.
Debian: the package is called qca-tls. You may also need the libqca2-plugin-ossl package.
Fedora: the package is called qca-tls and is available via yum from the Fedora Extras repository.
Gentoo: the package is called app-crypt/qca-tls for KDE 3.5, and app-crypt/qca-ossl for KDE 4.0.
Mandriva: just install libqca1-tls
Slackware: install qca-* packages from www.linuxpackages.net and then run ldconf as root.
Kubuntu: the required package is libqca2-plugin-ossl
The qca-tls plugin can also be compiled from source code which can be obtained here. The required file is qca-tls-1.0.tar.bz2 (qca-1.0.tar.bz2 is not the plugin which Kopete needs but the library).
</translate>
While organizing your collection in Amarok is a straight-forward task, you will be manipulating the actual files on your hard drive. Please be sure you have a backup of your files before you begin.
With the Organize Files dialog of Amarok you can easily manage the media files on your hard drive. When you change the naming scheme of media files, you will organize them, which is very powerful. To access the Organize Files dialog, right-click Local Collection -> Organize Files in the Media Sources pane and the menu interface will pop-up.
Warning
Using this option will move the files to a new location, so you not only need appropriate rights for both the origin and the destination location, but also enough space, usually the double of the total file size to have the action perform smoothly. If you are unsure, do NOT use this option.
Context menu to Organize Collection dialog
If the option Organize Files does not appear, you may have Merged View on (toggled by ). In order to safely organize your files, you need to see your collections separated, not merged.
Organizing Files Interface
After selecting the option Organize Files you will first see an additional option that allows you to move the files to a new location, as well as transcode them at the same time. Depending on the codecs you have installed on the system, some format options might not be available and will be grayed out:
First screen when choosing the Organize Files option
For more information about Transcoding, please see the Transcoding section.
After clicking on the Move button on top of the screen, the following interface will show:
The default collection folder. Set multiple folders in Settings -> Configure Amarok.</translate>
Token Bar
Drag and drop multiple tokens here to change the naming scheme of your media files. Only available in Basic view.</translate>
Format Presets
When you have created your naming scheme, save it as a preset by clicking Save Preset. Remove presets by clicking Remove Preset.</translate>
Replace Spaces With Underscores
If checked, converts spaces in filenames to underscores.</translate>
Ignore 'The' in Artist names
If checked, artists' names starting with 'The' will instead be styled ', The'.</translate>
VFAT Safe Names
If checked, replaces characters that are incompatible with MS-DOS or VFAT file systems with underscores. Most people can leave this option enabled.</translate>
Restrict to ASCII
If checked, all non-ASCII characters will be replaced with underscores. Do not check this option if you have non-English characters in your tags. Most people can leave this option unchecked.</translate>
Custom Character Replacement
Replace the tag expressions you write under the Replace box with character strings you write in the With box. Useful if there are mis-spellings in CDDB.</translate>
Destination Preview
Shows the original naming scheme of your media files and how they will look after the changes are applied (not available since ver. 2.4.2).</translate>
Overwrite Destination
If checked, overwrites files of the same name without asking for further confirmation (not available since ver. 2.4.2).</translate>
<translate>
Advanced Contents
The code version of the Token Bar, which allows you to code the name format of media files. Activate it by pressing Advanced... in the interface menu. To change back click Basic....
Enclose conditional inclusion arguments such as CD number in braces, like this:
Typographical Guidelines standardizes markup for use in translation, either to official manuals (DocBook) or to other languages. Please refer to this frequently, as markup will be refined to match translators' needs.
Workflow Stage 1
Correcting old markup
Check that every heading for sections and subsections has an empty line following it.
Many pages have multiple indents set. This was included in earlier mediawiki documentation, but is not longer acceptable as it causes problems for exporting to other formats, so please re-arrange, using single indents only. Bullets can continue to be used nested.
ASCII smilies cause problems and must be removed. They can be replaced by oxygen icons in a small size (11px?) — you can use the {{Smiley}} template . Many more are available from Wikimedia Commons .
Internal links in the form [[Translation Workflow]] should be edited to the complete form, showing link, then visible text such as [[Special:myLanguage/Translation_Workflow|Translation Workflow]]
Many styles have been used to display input text, including <code>, <pre> and tables and boxes. Text intended to be input by the user should use the Input template, {{Input|1=input text (can be multi-line or single)}}. You can still use <code> for very short input, if you don't want the text to appear on a separate line.
Output from terminal and error messages have been similarly marked with a variety of methods. These should be replaced with the Output template, {{Output|1=terminal output}}
Every page should end with a Category statement. These must be standardized categories. A current list of categories can be found on any of the translators' pages linked from this language page
Make sure that there are no unbalanced brackets in any section. If you find unbalanced brackets then add the missing bracket(s) — possibly in a comment like this:
<!--(--> a)
There should be a blank line between bullets in lists. See the sections on lists beginning with Bulleted Lists.
Tables should be split in a similar manner, so that there is a blank line between each row. The first and last items will need to have curly braces balanced.
The old method of beginning a line with a colon (":") to denote an indent causes some serious display problems, not least the navigation panel disappearing to beneath the rest of the content. If you find any such lines, please remove the colon.
Information
This last point may no longer apply. Colons are often used in connection with definition lists and do not seem to cause problems. If you do come across a case where colon-indentation causes the display to be messed up, please notify us via the Talk page.
Stage 2 - Guide to new markup
Marking Links for Translation
A stand-alone link, such as the application-names in Applications/Internet, should use the form [[Special:myLanguage/Ark|<translate>Ark</translate>]]
Where the link is within a sentence the whole of the link should be kept within the translatable message.
Marking sections for subpage linking
Links of the form [[OtherPage#Section|...]] do not work well with the translation system. Whenever you come across this kind of links there are a few things, that must be done:
The links itself should be changed in the usual way to [[Special:myLanguage/OtherPage#Section|...]]
In the page 'OtherPage' you should check that there is an anchor right before the section 'Section'. It should have the form
</translate><span id="Section"></span><translate>
(where of course the string "Section" should be the actual title of the section). There should be a blank line between the anchor and the section header.
Some pages have links to their own sections - often of the form [[#Section|...]]. These links should be changed just like all other subpage links to [[Special:myLanguage/ThisPage#Section|...]] (assuming the name of the page is 'ThisPage'); and do remember to check, that the corresponding anchor exists!
If the page 'OtherPage' is not marked up for translation yet then you should omit the <translate> and </translate> tags.
If a paragraph is moved or removed, take the corresponding tags with it.
Special Tags
Identify all keyboard key-names, and tag, e.g. <keycap>Enter</keycap>
Include concurrent keypresses in the <keycap> tag, e.g. Ctrl + Alt + F1. Note that the separator is (space)+(space)
Treat menu sequences in a similar manner, using the <menuchoice> tag, e.g.System Settings -> Account Details -> Social Desktop. Note that the separator is (space)->(space)
Warning
NEVER add translate section tags (the ones that look like <!--T:18-->). The software will do any handling of tags that is required, and manually changing them will break the system.
Bold type
Identify program names and mark them as bold type, e.g. Klipper
Identify labels and names that cannot be changed by the user, and mark them as bold type.
Remove any bold type marking that were previously entered, but do not match this guideline. (See below for emphasizing a word or phrase.)
Window captions and Icon labels are also marked as bold type.
Italics
Italics can be used to give emphasis as you might in non-technical writing
Use italics on the first appearance of an unfamiliar word or phrase, and if possible link it to #Glossary or a dictionary entry.
When referencing other (external) works, titles are italicized.
Combined Bold and Italics
This should only be used in the context of an example where the user has to substitute text, e.g. "Your new addressbook records are in /home/user/share/contacts"
Tip
Simplified definitions - Programs are launched by users, components are used by programs
Issues that cause Translate problems
Several issues have been identified and discussed, and solutions proposed in the following sections:
These are usually noticed after the first markup, and it may be necessary to re-arrange spacing and/or structure to avoid the problems.
Almost finished
In the summary field at the bottom, enter that you are doing a markup edit.
Use Preview and read through the whole of your work. If you are satisfied, save the page.
Use the link in the sidebar to request release - it takes you to a page where you can add the URL of the page you have edited. Pasting your link there tells us that you believe the page to be ready for translators to work with. We will scan it, and if satisfied we will enable it for translation.
This page lists binary (installation) copies of the Calligra Suite 2 prepared for users. You can also download its full source code.
Stable Release
Calligra 3.1.0 is the current stable version. Please install the newest possible version, older versions will not be fully supported. Really old versions such as 2.4 are not supported at all.
Linux
Please pick your distribution.
Arch Linux
Arch Linux provides Calligra packages in the [extra] repository.
Chakra
Chakra provides Calligra packages in the desktop repository.
The Chakra LiveDVD comes with the latest Calligra pre-installed.
Debian
Debian provides Calligra packages in its main repository. Please note that older Debian versions may not have the most up-to-date version of Calligra.
Fedora
Fedora packages for Calligra are available in the unstable repository of the KDE Packaging Project.
The easiest way to install Calligra on openSUSE is by going to http://software.opensuse.org/package/calligra. Please note, this page may present outdated unmaintained Calligra. In such cases, first click on the Show other versions link and select a newer version.
openSUSE Build Service. Calligra packages are available from the KDE:Extra repository for openSUSE 12.x and 13.x.
Unstable packages based on GIT snapshots are also available from the KDE:Unstable:Extra repository. Use with care
Furthermore, packages including Calligra Gemini, which require software not commonly available in openSUSE, are available from calligragemini repository for openSUSE 13.1, 13.2 and Factory.
Calligra 3.2.0 Alpha is the current unstable (development) version.
Linux
Arch Linux
Arch Linux provides unstable Calligra packages in the [kde-unstable] repository.
Fedora
Fedora packages are available in the rawhide development repo ([1]), and unofficial builds are available for prior releases from kde-unstable repo at [2] .
Ubuntu users can get a nightly build of Calligra with the Project Neon, you need to add ppa:neon/ppa to your sources.list and install project-neon-calligra package.
Warning
"Be warned though, stuff here is REALLY unstable, we do not guarantee it will work all the time and won't eat you data, use at your own risk. Now that we have warned you, enjoy!" Project Neon wiki page
In order to run the installed packages you have to logout and choose "Project Neon" from the login screen. Neon always has the latest version, not necessarily the beta releases.
ROSA Marathon 2012
ROSA users can get the packages for development versions of Calligra from personal repository on ABF. To add it on your system run the following commands:
Installers exist for Windows but are out of date or incomplete. By using an out of date (stable) installer to do a system install, followed by the newer incomplete installer to do a user install you get the most stable yet up to date version of the complete package possible, however breakage may occur as new features are worked on in nightlies before cross-platform bugs are fixed.
Installer for the prior version of Calligra Gemini can still be found on KDE's download network. This version is for Windows Vista and above, and recommended for the "best" experience with automatic interface switching, like in a Intel 2-in-1 Ultrabook, or Microsoft Surface.
These packages also includes binaries for Words and Stage, but lack shortcuts for them.
Status for other Calligra apps:
Up to date Calligra Karbon, Calligra Sheets, and Calligra Words desktop versions are included in:</translate>
<translate>
Krita Gemini is considered obsolete, but is available on the steam store. Successful features from the Gemini fork may be added to future releases of Krita.
Debug Symbols
What are debugging symbols, and why are they important?
When a program is compiled with special switches to generate debugging symbols (the -g compiler switch) extra information is stored in the program file. This information can be used to generate a stack trace that contains much more information, such as the exact line number of the source file where things went wrong. Without this information it is very hard to figure out what went wrong by looking at the stack trace.
Note
Some distributions offer debug symbols in separate packages as listed below. Use them if you want to support the developers with better bug reports.
More info on back traces is available on KDE Techbase.
Debug symbols for Ubuntu/Debian
Please install package calligra-dbg to receive debug symbols for whole Calligra code.
The current process is not polished, the script code is ugly, not intelligent enough, etc.. The only excuse is that it works somehow .
If you want to improve the process, have good Python skills, and know the docbook authoring principles, you can improve the procedure. Please contact Yurchor if you are able to help.
You can obtain the full list of pages for your application with the following script:
<DPL>
  nottitlematch = %/__|%/zh-%|%pt-%|%(%)
  titlematch = Appname/Manual%
  namespace =
  columns = 1
  format = ,\n* [[How To Convert a UserBase Manual to Docbook|How To Convert a UserBase Manual to Docbook]],,
</DPL>
Replace Amarok with the name of your application, put it on your user page, and click on Preview. Rearrange the list according to the ToC of your manual.
Note
If You are working with the Amarok manual be aware that it does not fully conform to manual page naming conventions. You can use
if you want to download all screenshots (it takes some time to download all images from UserBase, grep and wget should be installed), or
python wiki2docbook.py -s Manual.xml
if you need not to download images.
Warning
At some point in the past it became necessary to add a line containing 144.76.227.197 userbase.kde.org to /etc/hosts in order to access UserBase from the script. This is no longer the case. If you already added such a line to your /etc/hosts, then you should remove it again.
Post-processing
Rename Manual.xml.docbook to index.docbook.
Check if conversion was done correctly:
checkXML index.docbook
Fix the errors (better on UserBase pages).
Convert docbook to HTML:
meinproc4 index.docbook
Check HTML pages (all images should be visible, links should not lead to 404-pages).
Replace big images by thumbnails using convert from ImageMagick
Fix links in docbook, so they lead to docbook section, not UserBase pages.
Fix application name according to KDE entity list.
Copy index.docbook and images to your /doc folder and commit them to repository.
K3b docs on UserBase in Opera and converted page in Konqueror.
Updating Your DocBook from UserBase
To update your converted docbook please use the following procedure:
Check the docbook, rename the file into index.docbook and commit it with screenshots into your repository.
Converting DocBook into Other Format
Converting into PDF
Usually, there is no need to convert DocBook manually. You can download the converted PDFs from KDE Documentation site.
Should you need additional customization please do as follows:
Make sure that you have some LaTeX distribution installed (usually, TeXLive).
Create the following script file (named buildpdf.sh) in your DocBook directory:
</translate>
#!/bin/bashexportSGML_CATALOG_FILES=/usr/share/sgml/docbook/sqml-dtd-4.5/catalog:/usr/share/kf5/kdoctools/customization/catalog.xml:/usr/share/sgml/docbook/xml-dtd-4.5/docbook
# add -d to command below to keep the /tmp folder, so you can examine the generated tex.
./dblatex-cvs-install/bin/dblatex-d-bpdftex--style\kdestyle\-o$(pwd|awk-F/'{ print $NF }').pdf\-Platex.output.revhistory=0-Pnewtbl.use=1\-Pimagedata.default.scale=pagebound\-Pliteral.width.ignore=1\-I$KDEDIR/share/doc/HTML/en/\-X\$1
Copy KDE styles (/dblatex-cvs-install/share/dblatex/latex/contrib/) to some TeX dir where it can be found by LaTeX installation (I have copied them to /usr/share/texmf-dist/tex/latex/kde).
Update paths with mktexlsr from root.
Run ./buildpdf.sh index.docbook. This should create ready-to-use PDF file for you. You can stop on this step if you do not want to tweak it.
Copy all files from /tmp/tpb-your_user-digits to the work directory.
Customize and edit tex file in Kile as appropriate.
Compile PDF file with Alt + 6.
Converting into EPUB
Make sure that Calibre is installed in your system.
Convert your DocBook into HTML first. Use meinproc4 index.docbook for this.
Start Calibre and choose Add books.
Select index.html in your DocBook folder. Wait until the book is loaded.
Choose Convert books.
Fill the metadata fields as appropriate.
Calibre conversion configuration page.
Press OK and wait until the work is done.
Copy the book from ~/Calibre Library on your ebook reader.
The performance of Desktop Effects in the KDE Plasma Workspaces is mostly determined by the interaction of the graphics hardware (GPU), it's driver and the Compositor (Kwin). The Compositor tries to choose the best available settings for your GPU by querying the driver for what the hardware supports. Sometimes helping KWin on what the hardware really supports can improve the performance.
Selecting the correct driver
Determining the used driver
It is important to have the correct driver installed and used. If no driver or the wrong driver is used the desktop effects fall back to an non-accelerated backend (XRender).
The information about the used driver is available through KInfoCenter. Click on Graphical Information -> OpenGL and study the information provided in the shown module. The relevant information is found in the Driver section, in particular Vendor, Renderer and OpenGL/ES version. The information is provided by the driver and can be difficult to parse.
OpenGL information in KInfoCenter
If the Renderer says "Software Rasterizer" no driver is installed. For all other drivers please check whether the correct one is used.
Available Drivers
AMD/ATI
For AMD/ATI hardware two drivers are available: the proprietary fglrx or Catalyst and the free Mesa drivers (known as radeon, r300, r600). With the fglrx driver not all functionality is available and the performance in general seems to be better with the Mesa drivers. The recommendation is to always use Mesa drivers with desktop effects. If you find the information "Mesa" in the OpenGL/ES version, then you are using the free drivers and you do not have to do anything.
The Mesa drivers exist in an older and newer version. You should make sure to use the newer ones which you can identify by the word "Gallium" in the Renderer string.
Intel
Intel hardware uses the free Mesa drivers. There are no alternatives available.
NVIDIA
For NVIDIA hardware two drivers are available: the proprietary NVIDIA driver and the free Mesa drivers (known as nouveau). The free drivers are still under heavy development and are not available on all distributions and for all hardware. In general it is recommended to use the proprietary drivers. You are using the proprietary drivers if it says NVIDIA in the OpenGL/ES version string.
Installing the Driver
Installing the driver is specific to the used distribution. Please consult the documentation of your distribution about that matter.
OpenGL Version
KWin supports OpenGL 1.x and OpenGL 2.x. By default KWin uses features of OpenGL 2 if they are available. OpenGL 2 allows to use more effects, but requires stronger hardware. It is important to know that even if your driver only supports e.g. OpenGL 1.4 it is possible that KWin uses features of OpenGL 2 which are available through extensions in the driver.
You can find the OpenGL version provided by your driver in the "OpenGL/ES version" string in KInfoCenter as described above. The version is defined by the first two or three digits, e.g. 2.1.
It is not trivial to find out whether KWin uses OpenGL 1 or 2 as this is completely determined at runtime. The best available test is to use the Invert effect which can be enabled in Systemsettings -> Desktop Effects -> All Effects tab. After enabling the screen should be inverted when using the shortcut Meta + Ctrl + I. If it inverts OpenGL 2 is used, if it does nothing OpenGL 1 is used.
It is possible to force KWin to use OpenGL 1 through Systemsettings -> Desktop Effects -> Advanced tab and unchecking Use OpenGL 2 Shaders. This can improve the performance for older hardware. In general it is completely safe to use OpenGL 2 Shaders if the driver reports a version of 3.x (only available with NVIDIA at the time of this writing).
Tip
For modern hardware the OpenGL 2 Shaders yield a better performance than OpenGL 1. Disabling this option is no receipt for best performance.
kwin_gles
Beginning with KWin version 4.8 it is possible to use the separately built binary kwin_gles as a replacement for kwin. It behaves almost the same as the kwin executable in OpenGL2 mode with the slight difference that it uses egl instead of glx as the native platform interface.
Warning
This also means that if your normal kwin does not work in the OpenGL 2 mode it is unlikely that kwin_gles will.
To test kwin_gles you just have to run kwin_gles --replace in Konsole. Since this is a rather new feature it is not as thoroughly tested as the normal kwin and feedback is always welcome. Assuming that the test succeeded and you want to use kwin_gles on a regular basis you can add an executable script to ~/.kde4/env/ that exports the KDEWM=kwin_gles environment variable.
Thumbnail Scaling
The Compositor supports different scaling methods for thumbnails as rendered in the taskbar preview or effects like Present Windows. It is tried to render the thumbnails as accurate as possible which of course requires more resources.
The scaling method can be changed in Systemsettings -> Desktop Effects -> Advanced tab -> Scale method selection list. The following settings are available:
Crisp
Smooth
Accurate
The table provides an overview of how the thumbnails are rendered with the different settings.
Overview of how the thumbnails are rendered with the different settings
Crisp:
Smooth:
Accurate:
By default Accurate is used. On Intel hardware Accurate is never used and cannot be enabled unless the environment variable KWIN_FORCE_LANCZOS is set to 1.
Switching from Accurate to Smooth can significantly improve the performance of effects like Present Windows.
General Speed of Animations
Animations take some time and the length of an animations is what makes people think that this is a snappy interface or that it lags. This is a very subjective feeling and the difference between too fast and too slow can be milliseconds. It is impossible to have a perfect value for all users.
The global animation duration level can be changed through Systemsettings -> Desktop Effects -> General Tab -> Animation speed selection list. It varies from "Extremely slow" to "Instant" which does not render any animations. By changing from "Normal" to "Fast" many users reported having a more snappy interface.
Qt Graphics System
Since 4.7 (Released July 2011) the Compositor can use the Qt graphics system raster instead of native (X11). This is only relevant for rendering the window decorations and is not related to the compositing backends (OpenGL/XRender).
Which graphics system is used depends on the distribution defaults. For the Compositor raster is recommended especially if the NVIDIA driver is used. KWin will always select the best graphics system for your chosen compositor. The following general combinations can be recommended:
OpenGL with raster
XRender with native
No Compositing:</translate>
<translate>
native in case of remote connections (recommended window decoration: Laptop)</translate>
<translate>
raster if using fancy window decoration (including Oxygen and Plastik in 4.10 or later)
Window Decorations
Some Window Decorations perform animations when a window gets activated. This influences the performance of effects if during an animation the active window changes. The performance impact can be reduced by using the graphics system "raster" (see above).
The default window decoration Oxygen provides an option to disable the animations: Systemsettings -> Workspaces Appearance -> Window Decorations -> Configure Decoration... -> General tab Checkbox Enable animations. Disabling the animations can improve the performance.
All window decorations which can be downloaded through the Get New Decorations... dialog use such animations, but it is not possible to disable them. If there is an performance impact due to the theme, it is recommended to use a different one. In general the themed decorations are not optimized and provided to look good and not to be fast.
Another area of window decorations which can impact the performance are shadows. Again the default decoration Oxygen provides a setting to disable them in the same configuration dialog as described above in tab "Shadows" and the themed decorations do not provide an option to disable shadows.
Blur Effect
The Blur Effect is one of the most expensive effects provided by the Compositor. By default it gets enabled for all hardware except Intel hardware. The performance impact of the blur effect depends on the number of open and translucent windows. Especially translucent widget styles (e.g. Oxygen Translucent) and translucent window decorations (e.g. Aurorae Themes) have an impact on the performance. If such a theme is used and the performance is bad it is recommended to either change the theme or disable the Blur effect.
The performance of the Blur effect can be adjusted through Systemsettings -> Desktop Effects -> All Effects tab -> Configuration dialog of Blur effect. Moving the slider for strength to "Light" requires less resources while moving it towards "Strong" requires more resources. Since 4.8 (release January 2012) the intermediate rendering results can be kept (default) which improves the performance even with translucent themes.
Advanced Desktop Effects Settings
The Compositor provides some advanced settings under Systemsettings -> Desktop Effects -> Advanced tab. Some of the settings have already been explained. This section focuses on the remaining settings. Changing these settings in general do not improve the performance but make it worse. The Compositor uses the best possible settings.
Compositing type
The Compositing type allows choice of the compositing backend, either XRender or OpenGL. By default OpenGL is used which is hardware accelerated. XRender is available even if no OpenGL driver is installed (e.g. virtual machines) and uses mostly the CPU for rendering. Many effects are not available with XRender.
Information
If there is no good reason to change, the default OpenGL is the correct choice. If OpenGL is not available there is an automatic fallback to XRender.
Keep window thumbnails
This has hardly any influence on performance. It is an option to decide how long thumbnails are kept. Best is to not touch this setting.
Suspend desktop effects for fullscreen windows
This setting influences the performance of fullscreen windows such as games. The compositor is suspended as long as there is a fullscreen window. The disadvantage is that it causes flickering when a window appears on top of the fullscreen window (e.g. a context menu) and is too generic. As well on some distributions (e.g. Kubuntu 11.04) the Intel driver causes a crash when closing the fullscreen window.
If the compositor should be disabled while a fullscreen application such as games or video is used it is better to disable compositing either through the shortcut Alt + Shift + F12 or since 4.7 (Released July 2011) through a window specific rule for the window.
OpenGL mode
Warning
The setting is obsolete and has been removed in 4.7 (Released July 2011). Any setting except the default "Texture from Pixmap" is likely to break your desktop.
Enable direct rendering
Warning
The setting is obsolete and has been removed in 4.8 (Released January 2012).
The compositor determines by itself whether direct rendering can and has to be used. Changing this setting will most likely break functionality.
Use VSync
VSync allows you to synchronize the rendering with the screen. Unless there is good reason to change, this setting should be enabled. Even if the setting is disabled the Compositor tries to use the frame rate the screen supports and by default a frame rate of 60 Hz is used.
For multiple screens it is important to know that the rendering can only be synchronized with one screen. In case the screens have a different frame rate it might be valid to disable this option and to set a manual frame rate.
</translate>
digiKam is an excellent tool to enrich a private photo collection by use of Tags and other metadata that can be written right inside the image files so the information you add follows the image file and will not get lost if you change computers or software (alternatively digiKam can save metadata in "sidecar" helper files next to your videos or read-only image files).
Tags in your photo collection work the same as #hashtags on the Internet – they help you to find all your images that belong to the same category that you provided: locations, names of people, events (birthday, national day…) or anything that is meaningful to you (for example pictures that contain Lego; your 2nd car; sunsets; etc.).
In addition, you can mark specific regions on the picture as “Face tags”, add descriptive text, rating from 1 to 5 stars and some more metadata types. All of this needs to be worth it – add data that you will realistically want to search and filter your collection on. Plus remember that you already have photo date, folder name where the photos are located (which is hopefully meaningful) and possibly even geographical coordinates embedded in your image files even before you start adding any tags.
Working with Tags can be as simple as marking the location, who is in the picture and giving 4-5 stars to really nice pictures. Perhaps you will see an existing Tag hierarchy in your digiKam that was built based on Tags that were found in the images that you already have (those tags may come from your relative, friend or even some software and you are free to use those tags as an example or build your own system). On the other extreme metadata can get almost scientific with rules, data models and words like “Digital Asset Management”. When you are ready to try adding some tags, continue with this tutorial on How-to do it.
Recently machine learning "AI" algorithms are doing more and more photo classification fully automatically, without any manual Tagging needed. Still, you can decide yourself how much manual tagging is worth it and what can be guessed by an algorithm. Note that digiKam also includes some similarity search tools and other clever algorithms which will evolve in the future to provide more value and easier search in your private photo collection.
Don't Forget Privacy
Remember to strip your tagged images of all metadata before you share them to people who do not understand metadata. Any metadata that you had or added in digiKam including GPS location, tags, people names, etc. will follow the image file when you share it on the internet or send it to someone (unless you use some tool to remove the metadata before sharing).
In the current version of digiKam (7.2+) it can be a little bit complicated to find all the metadata tools and toolbars, but thankfully there are excellent keyboard shortcuts that will both help you find all the necessary toolbars and also make entering information very efficient if you choose to remember the shortcuts.
F2 (if you have RAW files, be careful renaming only JPG files)
Rename folder:
Shift + F2 (affects folder on your disk)
+ There are more tools such as “Adjust Time & Date” – see the menus and keyboard shortcuts.
Different metadata types
Note
If you are not 100% sure which of the available metadata and tags should you use, consider reading "What tags to use" recommendation.
Tags – How To
To add a descriptive Tag – just press T when you have a picture selected. This will immediately open the right toolbar and you can start typing in a tag. Auto-complete will help you find the right spelling to match existing tags, or you can define a new tag.
Remember that descriptive Tags should be used as keywords - try to use as few unique Tags as possible and make sure you are not creating duplicates with spelling variations.
Tags can be assigned by typing or by clicking on checkboxes - digiKam has an excellent Tagging interface.
Organize tags:
Build/edit tag hierarchy (good idea!) - you can drag and drop tags onto each other to “Move here” and create tags and sub-tags. For example Place “Family X home” under “City Name” to get a basic hierarchy.
Rename tags – right click any tag and select Properties and edit tag “Title”.
Delete tags – note, if you Delete a tag, it will be removed from all files that ever used it!
Changing icon – each tag can have a custom icon (the icon will not be valid outside your digiKam, so do not spend too much effort on this).
digiKam will propagate the change across all image files that used the old name.
Note
digiKam always tries to apply your updated tags to all managed files after you change tag hierarchy; re-name, merge or delete a tag. It will affect all files that used those specific tags previously. Still depending on your settings you may need to force writing of Metadata into files (not just digiKam database) by either using Item → Write Metadata to File or even try using "Sync Metadata and Database" from Tools → Maintenance to fully apply the changes to all files.
Note on tag hierarchies
If you select a sub-tag in the tag tree (see "City Name 1" in the screenshot above) it is redundant to also tick a box in front of the parent tags such as "Country 2" and "- Location". If you have correct metadata settings, digiKam will still correctly write the whole hierarchical structure into file metadata. Therefore the default setting for Toggle Auto → None is very good even for hierarchical tags. (If you do have parent tags selected in addition to a sub-tag, it is not a real problem either - just a bit of redundant data in the files)
Face Tags – How To
Face or People tags are excellent to show not only who is in the picture but also which one out of all those wedding guests is that person you are looking for. Note that digiKam is unique among open-source and multi-platform photo galleries to feature full support for face regions (including imported face tags from other software) – as always digiKam saves your efforts into formats that will be readable by other software and the data stays safely embedded in each image file.
Automatic face detection module in DigiKam is working and being actively developed. It can help you tag people without any privacy concerns of the “free cloud services” such as Google or Facebook. The use of automatic face detection is outside of the scope of this tutorial, but digiKam users do find the feature useful in the current state. No matter how good automatic detection is, you will likely run automatic detection first and then complement the results with manual face tagging.
For effective manual people-tagging use Ctrl + drag a box around a face shortcut. This is a must-know shortcut that beats any other method for adding face tags.
Face Tag visible on the image and in the Tag tab
Note
You do not have to draw a box around every face to add people tags on every picture. If there is no need to specify who-is-who, you can add (and remove) People tags using the same T shortcut from the keyboard only.
Comments, Captions Description and Title
The "Title" (and also “Captions”) field is suitable to write free text description about the photo or video which does not have the limitations like you find in filenames. Shortcut to quickly find the field: Alt + Shift + T. It is not that important how the field is called - the main difference from Descriptive Tags is that you are not expected to be consistent in the words you use or re-use this metadata among many files.
For compatibility reasons it is better to use only "Title" field. It is of course possible to use both "Title" and "Captions" fields together, but then it is important that you have good metadata settings or you are well aware of the known compatibility issues with other software, including possible loss of your "Captions" data.
Star rating
The classic 5-star rating feature. Quite widely supported and reasonably easy to interpret. You can find guides and suggestions how to use this scale or think of your own.
As an example, here is one way to interpret stars, as used by me:
0 stars
Not yet rated
1 star
To Delete (not deleted for some reason)
2 stars
Weak photo (useful for context, or completeness)
3 stars
Good photo (nice to show to people)
4 stars
Very good photo (“best of”)
5 stars
Outstanding photo (“work of art”)
Pick Label (flag) and Color Label
It is not recommended to use these labels for long-term data management.
Flag and Color labeling is quite individual and open for interpretation. So there is a risk that nobody except You will ever understand the meaning behind your choices. Note that Microsoft software does not properly use or show Flag labels or Color labels. The Flag set in WLPG is also not written to the files, so it is not practically usable outside the temporary local database of WLPG [source].
Still, Flags and Color Labels are supported by digiKam and this type of metadata can also be written into the image files. Here is a more in-depth tutorial about this: Color Labels and Picks in digiKam 2.
Geo location
Geo-tags is a big topic where besides manual coding there is also special hardware or GPS-enabled cameras (like most smartphones) that can help recording GPS data into your image files. DigiKam supports Geo-tags and map view, please see documentation or this tutorial for more details: Geotagging in digiKam. Shortcut: Ctrl + Shift + G.
Note
Some people use normal Tags T to create descriptive tags about location as an alternative to actual geographic tags. Without geo-tags, there will be no way to see a map view, but it may be an acceptable compromise.
Author, copyrights and other Metadata
If you wish to add other metadata, you are welcome to use “Edit Metadata” tool with a shortcut: Ctrl + Shift + M.
Advanced topics
Rotating face tags
If you import face tags from Windows Photo Gallery (WLPG) and possibly other software that does not correctly handle image rotation metadata, it is a common problem that in some images the face tags are rotated by 90deg to one side.
Unfortunately, as of now (v7.4) there is no direct way to rotate just face tags within digiKam.
One workaround is to use any software that can losslessly rotate your images, but does not handle face tags (leaves them unchanged). Here is an example of practical workflow using "FastStone Image Viewer":
Right-click on the image with rotated face tags and select Open With to open the file in the free "FastStone Image Viewer" for Windows. (or if FastStone is your default image viewer use can use Item → Open With Default Application).
Losslessly rotate the image in FastStone (or equivalent software) so that it aligns with the face tags. Return to digiKam.
Refresh the album data by either pressing F5 key or using Tools → Scan for new items command. Now you should see a duplicate of both correct and wrong Face Tags while the image is rotated to a side.
Fix the face tags by using Item → Reread Metadata from file. Now the duplicate face tags should be gone, but the image is still lying on the side.
Finally rotate the image to correct orientation using on-screen button or keyboard shortcut in digiKam.
As you can see, the current workaround is quite tedious, so for images with 1-4 persons it is probably easier to re-tag faces manually (until a better method is introduced).
Copy tags from one file to another
In case you create a new variant of an existing image in another software (for example – re-process a RAW file) it is very useful to be able to copy metadata from the previous variant of the image to the newly created file.
Unfortunately, as of now (v7.4) there is no direct way to copy tags from one file to another in digiKam. Some workarounds are to copy metadata using
Peter Albrecht described his digiKam tagging workflow with focus on efficiency that may help you gain speed and efficiency.
switch to thumbnail view (you have to be able to select more than one image)
shift the preview size to the maximum of 256 pixel (you want to be able to recognize the people on the photos)
switch the right side-view to Caption/Tags and select the tab Tags
select picture number one and look at the leftmost person on this picture
hold Ctrl down and select all other pictures, showing this person
search for the corresponding tag in the right side-view, select it and apply.
if there are more persons in picture one, then select this picture again go to step 5, while looking for the next leftmost person.
if you have all the persons in picture one, select picture two and look again for the leftmost person, you have not tagged yet, and go to step 5. (toggling the button tags already assigned in the lower right corner of the Tags tab, is very useful here)
This way you go through all your pictures. In the beginning you have to tag a lot of people, but coming to the last pictures, most people will already be tagged and you can fast jump to the next picture.
Tip
For faster tagging try using keyboard shortcut T and auto-complete when you start typing.
About this tutorial
This tutorial is based on and is made to supersede the older tutorial from 2012: Tag your Photos (with focus on efficiency).
You are very welcome to edit, update and Upgrade this tutorial page to make it better. No attribution or copyrights in this page!
This tutorial is for people who would like to use open-source digiKam in-parallel or instead-of some Microsoft software that organizes photos (especially if you use people face tags):
DigiKam is an excellent replacement for discontinued WLPG and can even be made cross-compatible to use both digiKam and Microsoft software interchangeably (see configuration tutorial) but you should proceed with care and caution when you introduce digiKam or any other software that can alter your existing metadata.
As an alternative to this tutorial, there is "Migrate from Windows Photo Gallery to digiKam" of author Farblos. It covers more of the metadata managed by Windows Photo Gallery than this tutorial, but at a certain cost: The migration process described there is one-way only, where you start with exclusive Windows Photo Gallery usage and end up with exclusive digiKam usage. And it requires a lot of command line interaction, most notably with ExifTool.
Back it up! Seriously
Before you allow digiKam (or any other metadata editor) import (show) your previously tagged image files, make sure you have taken all the precautions:
You have to back-up all your existing image & video files, preferably so that you can very quickly copy them back to the main location (you may need to do it multiple times).
Create a test photo gallery folder where you will copy-in a few files to test in digiKam, before you give digiKam access to your real photo gallery.
Make an additional Permanent backup of photo metadata – see below. This is to save you from any issues that may not even be related to migration to digiKam.
Test as much as possible before you accept that migration was successful and consider overwriting your older backups with digiKam modified files:
Try tagging over 100 photos will all types of tags that you use.
Try searching for photos using different tags (hierarchical, star rating, etc.).
Check how files from different cameras, different sources and formats have migrated.
Make sure you know what will happen with video metadata, people tags on rotated pictures and other potential issues (see "Microsoft image metadata" section).
If you plan to use cross-compatibility with OneDrive tagging, WLPG or other software – try to repeatedly make edits in one program then observe the changes in another so that you have files where each type of metadata was over-written in for example:
WLPG → digiKam → WLPG → digiKam
digiKam → WLPG → digiKam → WLPG
(there should not be any lost, duplicated or abnormal tags created from any of the edits. Exception - digiKam will likely create descriptive tags for all People Face Tags. This is not a significant issue for cross-compatibility.)
Keep your Microsoft Photo Gallery installed as long as possible. This is one more advantage of cross-compatible digiKam setup – you should be able to use old Photo Gallery in parallel to digiKam in case you need to access some video metadata or any other reason.
Permanent backup of photo metadata
Here is an easy method to make a complete metadata backup from all your photos that will easily fit on one M-Disk DVD or a cheap flash drive. You never know when some virus, child or silly mistake will irreversibly wipe or corrupt your metadata. If you notice the damage too late, all your backups may by then already hold the corrupt files and only such permanent backup will be able to help. It is not only good for tags you add manually, but also to preserve more basic metadata like the date when a picture was taken.
The basic principle is that metadata, including all camera data, tags and people face tags are completely resolution-independent – you can dramatically resize and compress image data while preserving 100% of the metadata. Such conversion must be doable by many ways, including in digiKam (please edit this tutorial to add your favorite method), but my personal favorite tool for such metadata backup is:
Method A
Open the free "FastStone Image Viewer" for Windows so that you see the main toolbar (not full-screen mode). This program is reliable and has minimal risk of messing up your files.
Go to Tools → Batch Convert ... and "Add" all your photo gallery folders to the "Input List".
Next to “Output Format” set JPEG and in the “Settings” choose quality for example 70%. (we want images to be recognizable, not beautiful).
Under "Use Advanced Options" choose “Resize based on long side” to for example 1024px. (again just to keep images recognizable, you can go lower if you need to save more space).
Under “Rename” it is nice to add for example
*_metadata_bckp
to each file, so that you better recognize the highly compressed files if you will work with them.
Choose a reasonable output folder and press Convert (folder structure will be preserved).
When everything is done, I suggest you add a text file note with date when you did the metadata backup and for what reasons. Then compress everything with 7zip to reduce the size even more and have one easy to move file for permanent storage.
Note
Such batch conversion in "FastStone Image Viewer" will not back up metadata of videos and likely will skip RAW files. We assume that the key metadata is stored in normal files such as .jpg or in the file and folder names. If you have sidecar .xmp files, they would need a different backup approach, but for backing up from Windows Live Photo Gallery, this method is almost perfect.
Method B
Use command line ExifTool to create recursive metadata-only backups as described in detail here: Farblos/wpg2dk - backup. This method is more powerful than "method A", because ExifTool is also a tool that can be used to restore your damaged metadata (following the same tutorial by Farblos).
Microsoft image metadata
Before you start using digiKam to manage your WLPG tagged gallery, it is good to understand where the potential risks and issues are. Depending on how you used tags in WLPG, some of these concerns may not be applicable to you!
Tag hierarchy needs care – Default Metadata settings in digiKam are prone to create many loose tags out of the nicely organized hierarchies such as for example “Location/USA/New York/Central Park”. If you set up digiKam correctly ("Setup of digiKam for Windows compatibility"), this will be 100% resolved.
Face / People tags are a challenge – digiKam can fully support people tags as they were handled in WLPG (only for backwards compatibility to Microsoft software, you need correct metadata settings in digiKam). More importantly most (or all) vertical orientation images will have “Face tag rotation issue” which is covered in detail further below.
No Flag – setting “flag” in WLPG is not saved to any file (only internal database), so this data is lost any time you move to another computer or another program [source].
No metadata for videos. In contrast to photos, common video file formats do not support embedded metadata. As a result WLPG only stores video metadata in the internal database without any method to export the data Therefore WLPG video metadata is lost any time to you move to another computer or another program. DigiKam actually solves this issue by creating extra .xmp sidecar files next to each un-writable file, so as long as the extra files are not lost, digiKam will always preserve your video tags in the future. In fact, to be safe, it is a good idea to always keep year-month-day date and some keywords in the filename of important video files, because it is easy to separate video file from its metadata.
Beware of "Read-Only" files! – It is worth double-checking that you do not have any Read-Only files and folders in your collection. We must have all metadata stored inside the files for digiKam to read it, but no software will write your metadata into files if the files are write-protected.
In case, you just changed some read-only files to writable, you need to open WLPG and to be safe - add some new tag to all files that were previously Read-Only. Wait for WLPG to write that tag along with all other metadata to all files (then you can easily remove that dummy tag in WLPG or later in digiKam). + you can always double-check which metadata is saved in a file by opening file properties in Windows Explorer.
The rest of the metadata is straightforward. There is marginal risk that captions, star rating and individual descriptive tags from WLPG or OneDrive would get lost. Only reason for this data to get lost is if the image files were set to "Read-Only" or if WLPG did not manage to synchronize tag information to files as it is supposed to. In fact, most software can deal with these more basic tags and you may find other software, such as built-in Windows tools as good-enough alternatives to digiKam which still save metadata into files.
Tip - use digiKam to examine your metadata structure.
digiKam offers excellent built-in ExifTool integration in the right side "Metadata" panel that can be configured in the digiKam settings to show 100% of the Metadata in your images. Together with "XMP" and "IPTC" tabs in the same "Metadata" panel you have a convenient tool to see how the imported metadata looks when digiKam opens your old tagged file for the first time and then see which metadata is written by digiKam after you try to change old tags and add new ones. (ideally, we want digiKam to overwrite all existing metadata fields when you make an edit - so that file does not contain both current and left-over obsolete Tags.)
The Migration
Now when you are ready to Switch to using digiKam you need to decide on one of the 2 routes:
Simple data import using Metadata written inside your image files - approach that can provide nice results for most people (this tutorial is mostly about this approach - see the limitations of this approach in the paragraphs above and below).
Using this approach - you only need to correctly configure digiKam and then let it scan your photo collection - digiKam will just read all the Metadata out of your image files.
Main Dis-advantage of the simple approach - Tags and ratings of videos will be lost along with "Flags" (if you use them) + the Face Tag rotation issue asks for some manual work (which can be done at a later point).
The database migration method is applicable only once - usually only if you have not started editing your photo gallery in digiKam previously.
You have WLPG installed - the method reads data out of WLPG database, not image files.
Main advantage - This method can export metadata on videos, "Flags" and automatically fixes the Face Tag rotation issue (migration is more comprehensive than the simple approach - assuming you have a lot of tagged videos, you use "Flags" or know another reason why the simple approach does not meet your requirements).
Main Dis-advantage 1 - This method requires a lot of command line steps - not an easy process.
Main Dis-advantage 2 - Any time and convenience gained compared to the "Simple data import" will likely be offset by the increased risk of data damage and more additional testing needed to verify that everything worked well.
Microsoft Face tag rotation issue
Microsoft’s face tags (usually from WLPG) are affected by long-term-bug which results in face regions being shown rotated by 90 degrees to one side on some of the pictures.
It seems that we want a one-click fix for the whole collection, but in practice it is not very safe to run a script which will make changes to hundreds or thousands of images which are distributed all around your collection. The backups and testing to avoid potential disasters would take much more time than the “one-click” that we all would like.
Therefore I recommend a semi-automated approach which takes 2-3 button presses per image, but includes direct verification that you are making correct changes only where needed.
Root cause and potential workaround
As long as the image “Exif orientation tag” is not “Normal”, Microsoft WLPG will always treat face tags differently than all other software that recognizes “Exif orientation tag” (for example digiKam). Therefore to make a file universally interpreted by all software including Microsoft WLPG any affected file needs to be losslessly rotated so that “Exif orientation tag” is re-set to “Normal”.
The issue exists because Microsoft is the only company in the world which does not correctly support image rotation tags which are used by most digital cameras.
In practice, the problem is almost exclusively present in portrait orientation images with face tags (but only if the image contained “Exif orientation tag” which is typically written by digital cameras with an orientation sensor - again not in all cameras).
Fixing one file at a time
In case you have only a few affected files, it is possible to make corrections on each individual file – please see the other tutorial for information on how to Rotate face tags on individual files.
Semi-automated approach
WARNING - not yet available
before the “Rotate Face Tags” feature (id=447674) is implemented into digiKam, this approach is not completely feasible. But you can perform the complete procedure at a later point, after you are already using digiKam.
This approach practically does not require any testing, because we will manually check and rotate face tags on each potentially affected image. When done correctly it will take a couple of seconds per file and most likely you have around 1000 affected images (1000 x 3sec = 50min of work). Plus this approach can be used at any time – when you migrate your collection, after you have already fixed a few images or when you add a couple or thousands more images that need to be fixed.
Important
Perform this face tag rotation fix only when you are confident that your digiKam metadata settings are good and your data is safe
Open the Search panel
Click Advanced Search
Select images which have “People” Tags. (When digiKam reads in Microsoft face tags, it automatically creates descriptive tags with “People” parent tag.)
Select “In Tree” option because we are interested in sub-tags of the “People” parent tag
Select “Portrait Orientation” (because this is the orientation data which causes face tag rotation issue in Microsoft’s software).
You can add additional conditions, for example limit the search to specific Album, Date or camera model. This is especially useful if you are adding new photos to a collection that was previously fixed.
Press OK to find all photos that are most likely affected by the issue. (Note, you can always save the current search if you like.)
Now you have a list of all photos that need to be checked by simply switching to the next photo one after another. Make sure you have “Show Face Tags” activated to directly see all face tags on every photo.
The actual fix is done by using “Rotate Face Tags” command which has to be mapped to a keyboard shortcut. (Note, this feature was not yet available in v 7.4, but hopefully is there now.)
The rest of the workflow is:
“Look if the face tags are wrong”, if Yes,
“Press the right keyboard shortcut to rotate face tag into correct direction”, then
“Press Arrow Right to see next photo”.
Fully automatic solution
Since March 2022 there actually is one fully-automatic solution for the face tag rotation issue (along with some other features) - https://github.com/farblos/wpg2dk . Note that this method is Not easy to follow and is suitable for very dedicated users only.
Even if a fully-automatic solution would be easy to use (“require just one-click to run and forget"), I personally would still use the Semi-automated approach for data safety and in most cases also to actually save time (manual face tag changes take less time than all the precautions and verification necessary to run a rarely-used script that executes low-level Metadata changes on your whole photo gallery).
Notice that even if you fix all your old files at some point, you may still get more affected images in the future.
Other Metadata issues
For most users, the instructions above will give great results and you do not need to read any further. In case you encounter specific problems, here are some extra hints:
Metadata is tricky – different software looks for different data and interprets it in different ways. Nevertheless, everyone can retain all their metadata from WLPG and other Microsoft software in digiKam. But with some additional digiKam configuration you will also retain cross-compatibility to continue searching through your metadata directly in Windows, OneDrive or any other Microsoft software.
Finally, if you make some configuration mistake – it is not the end of the world. Perhaps just using your previous backup will solve your issue, but even in really bad cases there are command-line tools such as ExifTool can come to the rescue.
About this tutorial
This tutorial was originally written for digiKam 7.4 in 2021-12. You are very welcome to edit, update and Upgrade this tutorial page to make it better and keep it up to date. No attribution or copyrights on this page (all illustrations are original as well)!
What are the differences between Amarok 2 and the previous versions?
Amarok 2 is a nearly complete code-rewrite so the codebase has little to do with Amarok 1.4. If you are missing a feature, please file a wish in Bugzilla.
Here you have a short list of some new features:
Maybe the biggest new feature is the Service Framework, which integrates networked music sources directly into Amarok. This includes online music stores, media servers, Web music lockers, and more. Thanks to it you'll get easy access to music provided by Magnatune, Jamendo, Last.fm, MP3Tunes Locker, Ampache and many others. Expect more big (and small) names to join during the 2.x lifecycle. See Internet Media Sources for more.
Another exciting feature is the Context pane, occupying the central place of the Amarok's window, replacing the old Context Browser from the 1.x series. It displays contextual information about the music you play, like the album cover, track rating, labels, lyrics, artist information, related songs and artists, guitar and bass tabs and others. Thanks to the Plasma technology it uses, the Context pane can provide very rich content, like AJAX, video and animations, all in an eye-catching fashion. More about the Context pane.
To accompany the Context pane, we developed a new, space efficient playlist. In order to preserve horizontal space, it groups the track name, artist, album name and cover art together, and allows further grouping by album names. Plus you can rearrange it to your heart's content! If you prefer the old 1.4 playlist, you can have that too. See Changing the Playlist layout for more.
Another great gem is the video support. Watching your music videos inside Amarok feels great!
We can't forget the Dynamic Playlists, which extend the old Dynamic Playlists. They allow you to define an automatically populated playlist, based on specific probability driven criteria called "biases". The Dynamic Playlists is joined by the new Automatic Playlist Generator, used to generate lists for specific purposes and of a specified length. See Dynamic Playlists and Automatic Playlist Generator for more information.
There are many more great features like advanced scripting, dynamic collections, usability improvements, improved media devices handling, a new podcast manager, support for more software platforms, and others.
Installation
Can I use Amarok without KDE?
Amarok requires parts of KDE to be installed to run, but will run fine in Gnome or other desktop environments, including Windows and OS X. For Amarok to run, kdelibs and kdebase-runtime need to be installed.
For some features to work correctly, such as the on-screen display, your window manager must be configured to support the relevant freedesktop.org standards. More about running Amarok on other platforms here.
Why does Amarok use KDElibs?
We are committed to supporting Amarok on all platforms. We use KDElibs and Qt because they provide an excellent development environment. Aside from Linux and BSD, Amarok works on Windows and MacOS, and there are installers available, but unfortunately we don't have (yet) the resources to offer full support for those operating systems. Almost all of our developers use free operating systems, and those have priority for us. We do however welcome Windows and OS X developers willing to help, and improve Amarok on those platforms.
for a current complete list of available control commands.
Where can I get support for Amarok?
There are several options. Often times problems you have with the initial install of Amarok are best answered by experts of your particular Unix or Linux distribution. You may seek help from fellow users and developers at the Amarok forum and the Amarok IRC channel at irc.freenode.net channel #amarok.
Note that bugzilla is not a place to seek support. Please do enter a bug if you are serious about helping fix a bug in Amarok itself.
How do I report a bug?
If you find a bug in Amarok, please submit it to the KDE bugzilla instance. To make a complete bug report, please always include the following information:
The exact Amarok version (the version can be found in Help -> About Amarok). You should not report bugs for Amarok versions older than the current stable release as we do not provide backport fixes.
The exact KDE and Qt version, even if you do not run Amarok in KDE (Help -> About KDE)
The exact Phonon backend. You can find this information in the Diagnostics (Help -> Diagnostics )
Whether the bug is reproducible. Please do not report bugs that you can not reproduce as these are almost impossible to fix.
Exact steps how to reproduce the bug
If any of these information is missing the bug report is not complete. Please also be prepared to answer questions from the developers or bug triagers and eventually test other settings.
When I start Amarok, I see an empty playlist. How do I actually get tracks in there?
Use the Media Sources on the left side to navigate to the desired artist/album/track. Then drag the files into the Playlist part on the right. You can use Dynamic Playlists or the Automatic Playlist Generator to populate your playlist. You can also drag files in from any file manager, such as Dolphin. You may also double-click a track, artist or genre in your Media Sources or file-system, or right-click and Add to Playlist or Replace Playlist.
How do I remove tracks from the Playlist?
Select the track(s) you want to remove, and press the Delete key. Or right-click the selection and choose Remove From Playlist.
How can I load a playlist?
Just drag and drop the playlist file into the Playlist, like you would do with any other file. It's that simple!
How can I save the current playlist?
Click the button in the Playlist toolbar. Slow-click the disc icon to chose to save to your harddisk, or to the database.
Playback Questions
How do I play audio CDs?
Audio CDs are treated differently than data CDs, which are also supported. When you insert an audio CD, it will be shown as a local collection. Drag to the playlist or Pop-Up Dropper, or right-click the selected tracks and choose Add to Playlist or Replace Playlist.
</translate><translate>
What media types does Amarok support?
Amarok does not play music by itself, but lets Phonon do that job, specifically the VLC or GStreamer backends of Phonon. Therefore, whatever files they can play, Amarok can play. To analyse file tags, Amarok uses Taglib, which supports most file types that contain metadata.
What is Phonon? What are Phonon backends?
Phonon is the multimedia framework of KDE 4. You can find more information here.
We currently recommend both the Gstreamer and VLC backend as both are actively maintained. If you want to play streams you should use the VLC backend only as the Gstreamer backend has some shortcomings in this regard. Make sure you do not use any other backend as those are obsolete.
If you are using the Phonon-backend-gstreamer make sure you only use plugins from one single gstreamer version, else your sound will be compromised.
Amarok won't play mp3s, what can I do?
You probably lack the codecs required by your particular Phonon backend (Gstreamer, or VLC). Please report this to your distribution if you were not prompted to install them automatically when you started Amarok for the first time.
I have the codecs, but Amarok still won't play mp4s and mkas
When using some phonon backend, like the gstreamer one, Amarok might refuse to play mp4 and mka files. This is a known problem, see bug #290168 for more technical information.
A very simple workaround is to change the file extension. Change mp4 extension to m4a and for mka change it to mkv. Of course you must be sure the files contains audio only. You can use the ffprobe command to look at what data streams are present in the file. If the file has a video stream it must be stripped out. There are a lot of tools able to edit these formats and most of them are based on ffmpeg/libav, which you can use if you are familiar with them. If you prefer graphical tools one possible choice is avidemux.
This is a quick example how you can remove a video stream from an mp4 video with ffmpeg. Stripping a video stream from an mkv file is the same. First check if there is a video stream
If the output of the previous command is null there is no video stream in the file. To create an m4a file with just the audio stream you can use something like
You can also use avconv in place of ffmpeg with the same options, where
-i example.mp4 option is the input file name
-acodec copy is used to not encode again the audio stream but just copy it. This to avoid quality loss, but you can also encode in a different format if you want, and you are not forced to use m4a container in this case
-vn strips the video stream
example.m4a is the output file name
Another possible workaround is to change the phonon backend. For example the VLC backend doesn't suffer this problem.
I have a second soundcard and I'm using ALSA. How do I make Amarok use it instead of the default?
Configure this in the Phonon system settings module. Settings -> Configure Amarok -> Playback -> Configure Phonon
Where's the equalizer?
The equalizer is only available if you are using the phonon-backend-gstreamer. You can find the equalizer in the Tools menu.
How can I control the volume in Amarok only without having to change in KMix?
Most distributions ship the PulseAudio sound-daemon nowadays which handles the sound settings system-wide. If you can't change the volume in Amarok independently of KMix, then your Pulseaudio settings have the option
flat-volume=yes
enabled. Depending on your distribution this is located either in the file $HOME/.pulse/daemon.conf or in the system file /etc/pulse/daemon.conf. More information about Pulseudio-specific settings can be found in pulse-daemon.conf man page.
How do I turn on visualizations?
Visualizations come in the form of an applet. For more information please see the applets page. Visualizations are currently under development and may be buggy at this time.
How can I add podcasts?
Go to Podcast section in the Media Sources pane and then select Add Podcast... Add the podcast URL where indicated. More about podcasts here.
We also have some services, such as gpodder and Podcast Directory to help you find great podcasts. Enable services in the Settings menu: Configure Amarok -> Plugins.
How can I use Amarok to stream to my own radio station?
If you want to stream directly to an icecast or shoutcast server the answer simply is: it is not supported. You could use IDJC for that.
Collection questions
Folder not properly picked up
If you find that most of your music is recognized by Amarok, but some folders are not properly picked up, open a console and type
touch folder
where folder is the path to the folder that has the problem. Then select Settings -> Configure Amarok in Amarok main window menu, open Collection page and click the Full Rescan button. Your folder should be visible again now.
Warning
this will not work on Windows, as the touch command is specific to Linux and BSD-like systems.
Can I use removable media inside Amarok?
Amarok has a greatly improved support for the media devices based on Solid, the KDE hardware layer, that doesn't need a lot of configuration. You should be able to just plug in your device and access it within Amarok. Also, thanks to the Dynamic Collections, your media devices could become part of your music collection, and be searchable and accessible within the Local Music section of the Media Sources pane when it's connected.
You can transfer your songs, albums and artists from your local collection by right-clicking, selecting Copy to Collection and picking your device; and you can also do it in the other way: right-click and select Copy to Collection -> Local Collection. More about Amarok and devices here.
Can I use the old Amarok's collection in Amarok 2? Will my tags, score are ratings be lost?
A database importer is available. You will be able to keep your ratings and statistics just fine. More here.
General questions
What are scripts?
They are little pieces of software that add some functions to Amarok. There are a lot of scripts, and you can find them in kde-apps.org or you can find and install them inside Amarok using the Script Manager. More details can be found here. You will find the Script Manager from the Settings menu, Configure Amarok -> Scripts.
Can I use Amarok 1.4 scripts in Amarok 2?
No. A new and powerful scripting API has been created, which provides huge improvements but won't let you use your old scripts. The new scripting system is based on QtScript and will significantly reduce Amarok's dependencies, a huge problem for non-technical and cross-platform users, and will greatly reduce the amount of external processes launched at runtime. Another advantage is that the new API will allow much deeper integration with Amarok than the old scripting system. Amarok Scripting API.
What are Moodbars?
Moodbars show the mood of a song in the progress bar. More about Moodbarhere.
Can I play video files?
Amarok is mainly a music player so no video file management, collection support, DVD playback, subtitles, or any other sophisticated features are available.
Is it Amarok, AmaroK or amaroK?
It is Amarok! The former spelling was amaroK, but it was changed due to its strange look around 2005.
How are track scores determined?
Amarok assigns a score (a number 0-100) to a song based on how many times you've listened to it and whether you skip the song without it finishing. Every time the song finishes playing, the score is changed.
Here you have an example script that can calculate scores:
if( playcount <= 0 ) # not supposed to be less, but what the hell.
       newscore = ( prevscore + percentage ) / 2
   else
       newscore = ( ( prevscore * playcount ) + percentage ) / ( playcount + 1 )
   end
You can easily create your own script with your own algorithm. Look at the Script-Writing-Howto for further information.
How do I manually change a track's score?
You may change the score manually in the Track Details dialog, available by right-clicking on a track, choosing Edit Track Details and going to the Summary tab.
But I also want that stars system like in other players!
Amarok, of course, supports a user-defined rating system, and you can rate your tracks with a single click using the Current Track applet. You can also do this in the context menu (right-click) Edit Track Details -> Summary tab. If you have the rating stars displayed in your playlist layout, you can also edit there, with the slow double-click.
Can I drag and drop Plasma applets from the main window to the Desktop?
No, but there are several Plasmoids available for your Desktop, which will let you display information provided by Amarok as well as control Amarok.
How can I save a stream?
First of all, load the stream into the playlist. There are several ways to do this: downloading the file and opening it with Amarok; using the menu Playlist -> Add stream; among others.
Once the stream is loaded, you can save it by clicking on in the Playlist pane, and giving it a meaningful name. The Stream will then be added to the Saved Playlists view for later reference.
Where do I find the settings for Amarok?
`kde4-config --localprefix`/share/apps/amarok
`kde4-config --localprefix`/share/config/amarokrc
Troubleshooting
How can I obtain a backtrace?
If Amarok has crashed and you want to report it, visit the Debugging HowTo. The bug report must be made in bugs.kde.org after verifying if it has not already been reported.
Amarok just freezes! How can I help get this fixed?
You can obtain a backtrace of a frozen instance of Amarok using gdb like so:
$ gdb -p `pidof amarok`

(gdb) thread apply full bt all
If this happens you have to check what scripts you have installed and what internet services are running, because some of them may slow down the startup. Also, if you have streams in the playlist when you open Amarok, the startup can take a little longer. The same happens if you have a great number of tracks in the playlist (over 300 and more).
On the other hand, if you don't use KDE, but a different desktop environment, startup time can be increased very slightly because there are more libraries to be loaded.
Packages in the KDE Software Compilation proper have a release schedule that doesn't fit with Amarok's development pace, and since none of the other KDE applications depend on Amarok there is no need to follow this release schedule.
I've found a bug / I've got a great idea for Amarok!
Please report it at bugs.kde.org. If you have a list of suggestions or wishes it may be best to send them to our mailing list: amarok@kde.org. Simply posting the idea to our IRC channels or on an obscure wiki page or blog won't help much as the information will get lost.
Do you accept patches?
Happily! Your best course of action is to let us know what you plan to do before you do any work so we can discuss it, but don't fret; we haven't turned down a patch yet! Discussion is mostly to help you patch the correct bits of Amarok. Submit your patches and code contributions to git.reviewboard.kde.org. See also How to Submit Patches to Amarok. If you have a bug fix then just go ahead; this is open source after all.
Why did you choose the name Amarok?
Amarok is an album by British composer Mike Oldfield. Project founder Mark Kretschmann happens to like it a lot, and he thought the name had a nice sound. Plus, of course, it contains the all important K.
Dolphin is the file management application of Plasma Workspace. It is designed to be simple to use, yet powerful.
Konqueror was the default file manager in KDE 2 and 3, and is still available for those who prefer its interface. It is a web browser, a file manager, media viewer and more. For file management it uses the Dolphin KPart, and so has all of the functionality of Dolphin.
Discover Dolphin
The first section takes you on a guided tour of Dolphin. The second section deals with the concepts of different types of bookmarks. The third section discusses archive management. Finally we look at 'More Cool Things'. The images are clickable - you can see the enlarged view.
Introduction to Dolphin
Dolphin is the file manager of the KDE Software Compilation.
I'll show how to use Dolphin for common file managing tasks, and how to customize it to your needs.</translate>
<translate>
When we open the Dolphin from the [[<tvar|1>Special:myLanguage/Plasma/Kickoff</>|Kickoff menu]] it shows your starting directory - by default it is your [[<tvar|2>Special:myLanguage/Glossary#Home_Directory</>|Home directory]].
To open a file, or go to a folder just click on it. (This can be changed to double-click in System Settings → Desktop Behavior → Workspace or in System Settings → Input Devices → Mouse section for older versions of System Settings)
To select and deselect files and folders hover mouse cursor above icon and click the emerging plus sign to select and minus sign to deselect. Like this:
When you click the plus-sign, this file or folder will be added to your selection. You can select multiple files in the same way. Selection can be done also by dragging a rectangle (sometimes called the "rubber band" method), and selection and deselection with Ctrl + click for one at a time and Shift + click for a consecutive range.
Many selected files looks like this:</translate>
<translate>
Creating a new folder: You can create a new folder in the active directory using context (right-click) menu → Create new or the F10 shortcut.
Tabs: Dolphin supports tabbed browsing. A new tab can be opened for example from File → New Tab (if you have enabled menu bar), by Ctrl + T or by middle mouse click on folder icon and navigation buttons.
Note
Starting from KDE 4.7, Dolphin's menu bar is hidden, but easy to reach and restore. If you prefer menu bar to be present, you can enable it by selecting Control → Show Menubar or pressing Ctrl + M.
Dolphin opens by default when we click on any folder. It can also be started from Kickoff menu.
The Interface
Location Bar
Dolphin integrates a new concept to use the location bar in a faster and more precise way: therefore a breadcrumb location bar is used. Instead of displaying the complete path only the navigation points starting from one of the places are displayed as buttons. By clicking one of these buttons you navigate directly to this folder. In this way you can reach a parent folder from a sub folder in a very quick way.
Between the buttons which represent a folder there is a small arrow which is a button as well. By clicking this arrow you can see a list of all the subdirectories on the same level as your current one, giving you a quick directory change.
Change directories quickly
There is also a classical location bar which displays the complete path. To use this style you can right click on the Location Bar and select Show Full Path. If you want the Location bar to become editable, trigger the keyboard shortcut Ctrl + L or select Control → Location Bar → Editable Location . By clicking on the free space next to the last displayed folder in the breadcrumb style you can switch to an editable Location Bar as well. If the editable style is selected a checkmark is displayed at the end of the location bar. This checkmark is a button which can be used to change back to the breadcrumb style. Of course menu and keyboard shortcut can be used, too.
Split View
Dolphin offers the possibility to split the current folder view so that two folder views are displayed next to each other as known from Midnight Commander, or Krusader. This is a very comfortable view to copy or move files from one folder to another.</translate>
<translate>
You can split the view by clicking on Split in the tool bar or, if you have enabled menu bar, View -> Split (keyboard shortcut F3). To change back to only one folder view you can click on Close or just press F3 again. The symbol will show you which view will be closed. Depending on the currently active view the minus sign will be shown in the left or right part of the symbol. The active view will be closed. This is important to know if you want to use the keyboard shortcut. There is also a button for splitting and closing the view situated in the toolbar. This button displays the minus symbol as well, so it is easy to know which view would be closed.
Of course each view has its own location bar and each view can use a different view mode.
Sorting Files
By default, the files in the currently displayed folder are sorted in ascending alphabetical order. However, this can be changed by selecting Control → Sort by.
Files may be sorted by the following attributes
Name
Size
Date
Permissions
Owner
Group
Type
Link Destination
Path
The sorting method can be changed by selecting Sort by from the toolbar and then select A-Z or Z-A. Additionally you may choose whether folders should be listed first by selecting Folders First.
View Mode
Dolphin features three different folder view modes:
Icons shows each file or folder as an icon with its name
Compact is the same as icons, but in a more compact form, allowing more folders and files to be displayed at once
Details presents a list of files and folders, giving information on each, including but not limited to size and date
The mode can be changed from within Dolphin
Select View Mode from the View menu. This option is only available if the main Menubar is enabled
Select View Mode from the Control menu. This option is only available when the main Menubar is disabled
By selecting the appropriate icon from the main toolbar, if it is enabled
Using the default keyboard shortcuts:
Ctrl+1 switches to the Icon display mode,
Ctrl+2 switches to Compact and,
Ctrl+3 switches to Detailed view.
View as Icons
Each file and each folder is represented by an icon in this mode. Instead of displaying an icon a preview of the file can be shown. This feature can be turned on/off via the menu View → Preview (if menu bar is enabled) or via the main toolbar button Preview.
There is the possibility to display additional information below the icons. These can be turned on/off via Control → Additional Information or View → Additional Information (if menu bar is enabled). In principal the same criteria which are available as search criteria can be selected.
You can group the icons to achieve a better overview. This is turned on via Control → Show in Groups or View → Show in Groups (if menu bar is enabled). Now the icons are grouped and the groups are divided by a horizontal line containing the name of the group as caption. The grouping is related to the selected search criteria.</translate>
<translate>
Details
In view mode "Details" additional information is displayed by default in contrast to view mode "Icons". All files are listed in a tabular. The context menu of the table header offers the possibility to add additional columns. The following columns are available:
Size
Date
Permissions
Owner
Group
Type
Link Destination
Path
Column "Name" is always displayed. By clicking on the header of one of the columns the table will be sorted by this column. By clicking on the same column header the sorting sequence is reversed.
It is possible to display the folders as a tree. In this mode a > symbol is shown next to the folder. By clicking on this sign the folder is expanded and all containing sub folders and files are also shown in the table but they are attenuated. By clicking the sign, which displays an arrow pointing downwards, again the expansion is closed. Of course the tree structure can be used for as many folders as wished. In latest KDE releases, the tree view is enabled by default, but can be deactivated via Control → Configure Dolphin → View Modes → Details with option Expandable Folders.
Setting defaults for all folders
Under Control → Adjust View Properties (or under the menu item View → Adjust View Properties if you have enabled menu bar) you can set any of these attributes to be the default for all folder views.
Panels
Dolphin contains several panels, which can be activated via menu Control → Panels. A panel can be placed in either the left or right docking area. To move a panel, ensure that panels are unlocked (right-click on a panel and select Unlock Panels). Then click on the header of the panel you want to move and drag it to the desired location. The new location of the panel is highlighted as you move the cursor around, before releasing the mouse button. Dropping a panel on top of another combines them into a tabbed view.
In some versions of Dolphin, the header of each panel contains two buttons. The button near to the caption undocks the panel. This makes the panel an independent window which "floats" above Dolphin. The window is still combined with Dolphin and cannot be displayed without Dolphin and cannot for example be minimized like normal windows. By clicking the button again the panel is docked again. The second button closes the panel.
Non Modal Dialogs
When Moving, Copying or Deleting files/directories the dialog disappears even when the operation has not yet completed. A progress bar then appears in the bottom right of the screen, this then disappears also, if you want see the progress you need to click a small (i) information icon in the system tray.
Warning
New users who are not used to this way of working (and even experienced users) can get caught out by this, if you are Moving, Copying or Deleting large directories then you need to use the icon to monitor the progress of your operation.
If you don't then any subsequent actions you do, may well use an incomplete file structure resulting in corrupted files. You have been warned!
Places
Dolphin contains a new kind of bookmarks Places. These are displayed in a panel which can be activated via Control → Panels → Places (keyboard shortcut F9). The default Places are identical to the ones shown in the category Computer of the K-Menu Kickoff.
By clicking one of these places it will be opened in the current folder view. The context menu offers the possibility to edit the places or to remove them again. It is also possible to hide entries temporarily.
The context menu of a folder can be used to add this folder an another entry to the Places panel. Therefore there is a menu item Add to Places. You can also Drag&Drop a folder to the Places panel.
The places panel also contains entries to connected removable devices like USB-keys or CDs. A small plug icon indicates if the device is mounted. The context menu offers the possibility to unmount the device.
The places are used as the basis in the breadcrumb navigation bar. Each address is shown in relation to the nearest parent folder which is one of the places.
Information
The information panel can be activated via Control → Show Panels → Information (keyboard shortcut F11). This panel displays a preview or an icon of the currently selected file/folder or of the file/folder below the mouse cursor. Some additional information like change date or size to the file/folder is displayed as well.
The information panel offers the possibility to rate files, add a comment or tag a file. This is one of the interfaces to the semantic Desktop Nepomuk which provides the advantages of the semantic web for the desktop. Starting from KDE 4.2 it is possible to search for the semantic links given by the tags.
[[<tvar|1>Image:dolphin_panel.png|thumb|240px|center</>|The Information Panel]]
Tip
If you are wondering about missing mp3 ID tags (title, time ...) with some files it is most likely that ID3 Version 2 tags are missing. You can add ID3 version 2 tags with KID3 for example.
Folders
A panel providing a tree structure for the file system can be displayed via Control → Panels → Folders (keyboard shortcut F7). The tree structure offers the possibility by clicking the > and ↓ signs to expand/collapse sub folders. By clicking on one of the folders the content will be displayed in the current view.
Terminal
The terminal emulator Konsole can be displayed directly in Dolphin via Control → Panels → Terminal (keyboard shortcut F4). This makes it possible to use shell commands directly in Dolphin. The terminal is opened in the folder which is displayed in the current view. Shift + F4 opens Konsole in new window.
[[<tvar|1>Image:dolphin_terminal.png|thumb|240px|center</>|Dolphin with a Terminal]]
Bookmarks and Places
KDE Plasma offers two different systems of user-based links to different locations in the file system. One is called Places and the other one is called Bookmarks. They reside in different files, and have different functions.</translate> <translate>
This offers more flexibility, however, it makes it necessary to learn the differences.
In contrast to the way Konqueror stored the bookmarks back in KDE3, both Places and Bookmarks are available to all applications as well as the Dolphin file manager. More of that later.
Places in applications
Places for system-wide navigation
There is a default set of Places -
Home
Network
Root
Trash
but you can add other places. In Dolphin, right-click on a folder and select Add to Places, or just drag a folder onto Places.
[[<tvar|1>Image:DolphinAdd.png|350px|thumb|center</>|Adding a bookmark to Places]]
By default this "Place" will be visible in all applications. If you want to keep it constrained to Dolphin, you need to right-click on the new name in the Places list, where you will find the option to Edit it. There is a check-box for Only show when using this application (Dolphin).
[[<tvar|1>Image:OnlyShowIn.png|350px|thumb|center</>|This Place will only be visible in Dolphin]]
You can see the result of that command if you read ~/.local/share/apps/kfileplaces/bookmarks.xml.
In some applications too there is an option in the File menu to add a folder to Places. At this stage, however, applications vary in which features are available. The important thing to remember is that the default is for Places items to be available to all applications in the File → Open dialogue.
Constraining to one application
Some applications allow you to edit items in the Places menu. For instance, if in Gwenview you right click on a folder in Places you can set an option to Only show when using this application (Gwenview).
Constraining a bookmark to an application
If you need to constrain to an application that does not yet allow you to do that, the only way left is to edit the file ~/.local/share/kfile/bookmarks.xml. Immediately before the </metadata> tag you will need to add the line
<OnlyInApp>appname</OnlyInApp>
Bookmarks in applications
Enable bookmarks
Bookmarks are not enabled in dialogs by default. To enable them
Bookmarks are the second class of user-based links to the file system. Remember opening File → Open and using the spanner/wrench? Next to it is a yellow star. This is the bookmark management menu.
Here you can define bookmarks that will be visible in the same menu on any application. They are stored in one file, ~/.local/share/kfile/bookmarks.xml, which is used by all applications having that menu.</translate>
<translate>
Archive Management in Dolphin
Managing archives now becomes simple. In any directory in Dolphin, highlight the files that you want to compress, and right-click. Here, using the Compress option, you can elect to create a RAR archive, a Gzipped tar archive, or define another compression mode that you have already set up.
[[<tvar|1>Image:Compress.png|350px|thumb|center</>|Create a new archive]]
Similarly, if you right-click on an existing archived file you get a range of actions added to the right-click menu. You can extract the archive to the current folder, to an autodetected subfolder or to another place of your choosing.
Should you wish to add files to an existing archive, you can choose Open with Ark.
Have you ever wanted to open a file, only to find that it is [[<tvar|1>Special:myLanguage/System_Settings/File_Associations</>|associated]] with an application that is not of your choice?
You can, for one, alter this in Kickoff → Computer → System Settings → Common Appearance and Behavior → File Associations. This is the same as running kcmshell5 filetypes in a Konsole.
Alternatively, if you want to change multiple associations right quick, you would edit the *.desktop file directly, e.g. the file /usr/share/applications/org.gnome.Builder.desktop. For example, Gnome Builder associates with a great number of file-types which may not be desirable. So the line
MimeType=application/javascript; # we do not want all of these ....
may be shortened or commented out with # . Maybe a line
   InitialPreference=2
   X-KDE-InitialPreference=3
in the builder.desktop file helps to keep your previous default associated app, with builder being only secondary or tertiary option.
Thirdly, Dolphin and Konqueror offer a quick method for changing a single association:
Right-click on the file and select Properties. The first line there is descriptive, something like:
Type: XML document
At the same level, on the right, there is a spanner (wrench). Click on that and you can add or change an association.
Similarly, by working on a folder, you can change the default file manager to/from Konqueror, if you choose, or add another image browser to the possible associations.
The Actions sub-menu
The Actions sub-menu opens up a whole lot more cool things to do from Dolphin. Some possibilities only appear when applicable to the file you have selected. An apps .desktop file below /usr/share/applications defines what actions are applicable for a particular type of file. Some of the options are
You now notice that Dolphin is proposing a WAV file for each track, plus:
a CDA folder containing indexing information in the usual CDA format.
a Whole CD folder, containing one file for each format (.cda, .flac, .mp3, .ogg, .wav) holding all the tracks
a FLAC folder, containing the tracks encoded into FLAC format (lossless information format)
an Information folder containing the CDDB informations
an MP3 folder, containing all the tracks in MP3 format
a Ogg Vorbis folder, containing the tracks encoded in OGG format
You then just have to copy the folder of your choice, in your preferred format to obtain the relative encoded version of your CD!
Using <tvar|tml>timeline</> to have your recent files as startup folder
[[<tvar|1>File:Recent.jpg|400px|thumb|right</>|Have your recent files always in Dolphin]]
You can start up dolphin (with baloo up and running) with a view of recently modified files: Just navigate to the address/location of timeline:/today/ (copy paste it to the address bar) or use it as dolphin start-up-folder in dolphin-settings.
It is safe to say that digiKam (7.4) is the most powerful image metadata management photo gallery software. Unless you use command-line tools, there is no more universal program to read and write any metadata that you can imagine than digiKam (it even allows you to define new metadata namespaces to read and write data to, in case something is missing). As it is free for everyone, open-source, writes metadata back to files and runs on multiple operating systems – digiKam is truly future-proof tool to manage all your image and video metadata (people face tags, descriptive tags, location, captions, star ratings and more).
Unfortunately, as digiKam tries to be (and can be) cross-compatible with everything at once, the default digiKam settings cannot satisfy everyone. This tutorial provides a suggestion on how to best configure digiKam for new users or people who have managed their photos using any of the Microsoft software, including Windows built-in metadata tools.
"But I do not use Windows!"
Even if you never use Windows yourself, the main reasons to be Microsoft compatible are because Microsoft uses actually quite good in-file metadata storage format and there is a great chance that someone you know will not use digiKam, but due to Microsoft compatibility will still have access to the embedded metadata. (Even simple Windows Search will find photos by Microsoft compatible tags.)
The recommended configuration
Of course, you can use digiKam with default settings, but here are the reasons why you may want to follow this tutorial and change the Metadata configuration.
The Advantages:
Less garbage in the files – the default configuration writes the same metadata multiple times under many metadata fields. While it can be good for ultimate compatibility outside digiKam, it practically guarantees that any other software will read and modify only part of those fields. As a result, if another software is involved, your image will carry both updated metadata as well as old metadata that was originally created by digiKam but not recognized by the other software that did the latest edit (for example OneDrive, Lightroom, etc.)
More robust – This configuration keeps your digiKam tagged images cross-compatible with Microsoft OneDrive and Windows so you can correctly use and edit metadata even on Windows computers where digiKam is not installed (for example if you send files to your relatives). In addition a lot of major photo metadata software, including online services will correctly read Microsoft compatible tags, because it is one of the most common image metadata formats embedded into image files.
This configuration will correctly preserve hierarchical tag structures, without creating lots of duplicate tags (when the same information is written in many metadata fields, other software, for example, Microsoft Windows may interpret the metadata from default digiKam configuration as multiple separate tags)
The Drawbacks:
By disabling Read and Write to less common metadata fields, you are also stopping digiKam from correctly importing such metadata. But it is not very likely to find files that exclusively use the less common metadata fields which we are disabling – usually, the same information will be duplicated in another enabled field. (Plus it is possible to individually disable writing certain metadata fields while still reading them by un-checking “Unify read and write” in the Advanced Metadata settings).
Note
You do NOT have to change default digiKam settings to import all your data if you are switching to digiKam from Windows Photo Gallery (WLPG) or Microsoft OneDrive. BUT without these changes, you will get a mess with cross-compatibility in case you will later view or edit your digiKam tagged files in any Microsoft software.
What you need to know
You have to re-check the Metadata settings every time you update digiKam to a new version, before you resume using digiKam as usual. Currently (digiKam 7.4) you do need to repeat the manual Metadata setting changes after each digiKam update.
There may be bugs, special exceptions or just format changes that could break cross-compatibility that we try to achieve (from digiKam to Microsoft programs). The good news is that such metadata issues are almost always resolvable either by tools built in into digiKam or in the worst cases by other programs, where ExifTool is usually the ultimate solution to just about any metadata problem (see one old example here).
If you are migrating from some Microsoft metadata editing software, there is a dedicated additional tutorial to help specifically WLPG, OneDrive and other Microsoft software users - how-to Switch from Microsoft OneDrive or WLPG to digiKam.
The statement “This configuration keeps your digiKam tagged images cross-compatible with Microsoft” does include some limitations:
If you save people face tags in digiKam it will automatically create descriptive tags for each person in a hierarchy “People/<face tag name>”. This is not the same as WLPG behavior, but still shows-up nicely in any Microsoft software.
If you save people face tags in digiKam it will also create "MWG regions" which follow the main standard to save face tags and performs the same function as Microsoft People Tags. Microsoft software will always display correctly people tags saved in digiKam (and digiKam always reads Microsoft created People Tags), but you can not edit digiKam created face tags in Microsoft software!
Trully cross-compatible changes (edit in digKam or Microsoft at any time) are:
selecting/deselecting descriptive tags,
changing Title in digiKam == changing Caption in WLPG,
changing star rating.
If you encounter some problems while following this tutorial – please add a “Warning” box to the tutorial to warn everyone about a potential issue and consider filing a bug report at https://bugs.kde.org/describecomponents.cgi?product=digikam
Never edit digiKam saved Face Tags in Microsoft programs!
digiKam saves faces as MWG and Microsoft regions, but Microsoft will only edit "Microsoft regions". Because digiKam prioritizes "MWG regions", any changes you make in Microsoft software will be DISCARDED. (But you can always use Microsoft software to tag a new image that did not previously have any face tags - digiKam always correctly reads not-conflicting people tags from Microsoft)"
Change the settings
Here are all the steps to correctly set up your digiKam for the recommended configuration.
Updated digiKam? - Re-check the settings!
Do not forget to re-check the Metadata settings every time you update your digiKam! Some settings can be reset to defaults.
Step 1 – Configure the basics
Before you begin with the details it is good to have the basics right:
Check the folder and file Properties of your photo collection using a basic file browser. Check that:
Either all your image files can be modified (“NOT Read-Only”) – necessary if you want to store all your tags and metadata inside the image files (this is the typical approach for the best metadata preservation).
Or in case you plan to only use sidecar files for all your media (more information about “Sidecar” files further below), then you may choose to set your files to “Read-Only” (but not folders).
Select the right database type for digiKam. According to the documentation, all database options are good but have different pros and cons:
SQLite is effortless to configure, but if you have more than about 100 000 files in your collection it can become a performance bottleneck. Note that you can always migrate to another database type later, so no need to worry about this.
MySQL Internal requires more work to set up, but should pay off in terms of performance in large photo collections. You will actually need to follow the 1st provided “download” link and install “MariaDB Server” (you can leave the root password empty for MariaDB and Disable Networking) and then click “Find” and locate the 1st required .exe file in the MariaDB installation folder.
MySQL Server is only used if multiple computers with digiKam will access the same shared photo library. Again, you can migrate to this type of database at a later point.
Finally when you choose which folders with images and videos digiKam will manage, consider that:
You should NOT add your true main collection to digiKam before you complete "Step 2" and decide if you want to Set up digiKam to ignore RAW files. But you can add some test folder(s) to initialize digiKam and run some tests.
Consider ticking the “Monitor the albums for external changes” setting. It should make digiKam more intuitive to use, but could also impact performance.
Note - Re-initialize database
When you are done with your testing and want to switch to the true photo collection you can always delete all digiKam database files from the folder where it is stored. However, when deleting the digKam database files you also reset the settings to ignore RAW files (this setting needs to be re-applied).
Beware loss of metadata at later times
Later, when you already have been working on your true photo collection with digiKam, you better would not re-initialize the digiKam database the hard way as decribed above. Some of the metadata, in particular that related to face recognition, is not stored in the images or .xmp sidecar files, but only in the digiKam database. Examples are the information on ignored face regions or the flag whether an image already has been scanned for faces.
Step 2 - Fix which metadata is written into files
The main Metadata settings are under Settings → Configure digiKam → Metadata → Advanced. Here we will set DigiKam to not-write to various unnecessary Metadata fields. (For simplicity we are also disabling reading of those fields, but you are welcome to disable only the writing by un-checking the “Unify read and write”.
Start with Caption (aka Comments): here deselect all namespaces except for “Xmp.dc.description” and “Exif.Image.ImageDescription”. AND using Move Up button raise the “Exif.Image.ImageDescription” field to the 1st priority (this is important to stop WLPG from overwriting your Caption by duplicating Title text). Remember that Microsoft WLPG confuses Title & Caption, so it is safer to only use either “Title” or “Caption” but not both at the same time. See “What tags to use” for more info.
Under Color label – leave only “Xmp.xmp.Label” (it is enough)
Under Rating – leave only “Xmp.xmp.Rating” and “Xmp.MicrosoftPhoto.Rating”.
Under Tags we have a more complex case (see screenshot):
The most important setting
If you will make only one change to the settings, then fix the Xmp.dc.subject under Tags . This is crucial for preserving tag hierarchy between digiKam, Windows and other software.
Here we fix the main Descriptive Tag cross-compatibility issue with Windows, WLPG, OneDrive and other Microsoft software [for reference see this and this]:
Disable the default: "Xmp.dc.subject" namespace (it cannot be modified)
Add new namespace and configure it as:
Name:
Xmp.dc.subject
(substitute for the existing one)
Spec_options:
TAG_XMPBAG
Separator:
/
Set Tags Path:
YES
<== this is the FIX to the main problem!
Do the same thing for Xmp.lr.hierarchicalSubject - disable the original and create a new entry. Follow the steps like Xmp.dc.subject above. For 'name' enter 'Xmp.lr.hierarchicalSubject'.
Reason is that Darktable uses these, and if Digikam does not read/write them too, they may get out of sync.
Leave enabled "Xmp.Micosoft Photo.LastKeywordXMP" namespace (as it is used by WLPG)
Then disable all other namespaces (unless you have a specific reason to keep some of them enabled)
Finally under Title – leave only “Xmp.dc.title”. Remember that due to Title & Caption confusion in Microsoft WLPG, it is safer to only use either “Title” or “Caption” but not both at the same time.
Step 3 - Other important metadata settings
Here we check that Metadata is actually written into files, and not just left in the digiKam database.
Under Settings → Configure digiKam → Metadata → Behavior make sure that all Information is written into the Metadata.
There is also “Use lazy synchronization” option which I recommend to enable to improve performance and avoid re-writing each file multiple times for every little edit that you make. It also can help to detect accidental metadata changes.
Under Sidecars the basic idea is to allow digiKam to write sidecar files, but only for media files that can not contain metadata directly (most useful for video files or any file that is set to read-only). According to the documentation, the option “Read from sidecar files” means "digiKam will only read the sidecar while ignoring the embedded metadata.”
Note
Some conservative users actually prefer to configure digiKam to exclusively store metadata in .xmp sidecar files and never make any changes to the image files that normally can contain XMP metadata. Sidecar approach is the safest against data corruption (it is even possible to delete .xmp sidecars using file manager and instantly erase all metadata changes), but it is also the least cross-compatible approach and makes the metadata only visible in correctly configured digiKam. On the other hand, when metadata is separate from an image file, even a naïve user is less likely to accidentally spread sensitive metadata on the Internet, so it is the best approach for privacy.
Finally for Rotation it is preferable to choose lossless data rotation instead of using the orientation metadata flag. (The main reason is Microsoft – MS still does not respect the orientation flags and it causes issues such as your pictures may appear on a side when viewed in Windows as well as problems with rotated face tag regions)
Fix Tree view
This setting is not essential, but if you do not have ticks in the View → Include Album Sub-Tree and View → Include Tag Sub-Tree, then the tree structures in the left panel will not behave as most users would expect – highly recommended to make this change if you are setting up digiKam for a new user.
Unfortunately in digiKam (7.4) the Albums tree still has a limitation that only one tree entry can be selected at the same time - https://bugs.kde.org/show_bug.cgi?id=269340. (it is possible to select multiple tree entries in the Tags tree, but not in the Albums tree.)
Personalize appearance
In addition I would suggest to experiment with settings for digiKam's
appearance in Settings → Themes,
thumbnails in Settings → Configure digiKam → Views → Icons and
sorting in View → Sort … to get to an optimal look and feel for digiKam.
Example of my current appearance settings for thumbnails.
RAW file handling
If you have “digital negatives” (RAW files) together with the usual .JPG image files in your collection there is always a concern about how to best handle these files. Here are some of the common options:
Show All
Most software by default just shows both JPG and RAW files as equals. This is the worst option because it makes it very cumbersome to view, sort or tag your pictures. Remember that when you do need to see both JPG and RAW files together, there are always normal file browsers that are simple and reliable.
Grouping RAWs under JPGs
More advanced software offers to automatically recognize which RAW files belong to which JPGs and apply all operations on the “groups” of files. This is a valid approach IF it is easy to use and robust. DigiKam can do grouping, but there are a few things to consider if you choose to use it:
It is not possible to permanently enable grouping in digiKam (7.4) – grouping must be manually enabled every time by selecting all photos that should be grouped, then right-clicking one thumbnail and selecting Group → Group Selected By Filename.
Important
the Group function is hidden, not visible unless you select more than one photo!
As grouping is not always enabled, it is difficult to explain how to use grouping to infrequent users. And even geeks will not appreciate the required extra manual steps.
Finally the grouping by Filename is very simplistic in digiKam 7.4. If you make any changes to the filename of the JPG file, for example, add “_cropped” or “_altColor” to the filename, it will no longer be grouped with a corresponding RAW file (so you will again see that RAW file during slideshow and will need to tag it separately.
Ignoring RAWs
As digiKam is not a true competitor to a dedicated RAW processor, I prefer to use digiKam only to manage metadata in the photo collection. Then it is optimal to block digiKam from reading RAW files and only deal with JPGs and videos. It means:
Simplicity – even inexperienced users will not get distracted by the RAW format duplicates of every image. And the limitations in grouping of RAW+JPG in digiKam are not a problem.
Perfect consistency – if you do not try to sync RAW file metadata with the JPGs then all potential metadata mismatch problems go away. (for example if you import RAW+JPG files where only JPGs have been tagged by another program)
As RAW files are ignored, they never get modified and there are no additional .xmp sidecar files when you make changes to the Metadata – which is good for backups and performance.
The downside – to move images between folders, you would have to use a generic file browser, because in “Ignore” mode digiKam will normally not do any operations with RAW files.
Also you will need to remove RAW files which are left after you delete unwanted JPGs. This is not just digiKam issue as I personally use multiple image viewers for sorting pictures which also leave RAW files behind. My preferred solution for leftover RAW files is this simple Python executable script that automatically removes all orphaned RAW files: "CleanUp_RAW_files.py"
"Ignoring RAWs" configuration is very convenient to use if you understand what it does.
If you...
Show All
Grouping RAWs under JPGs
Ignoring RAWs
Move complete album
All files & folders are moved
All files & folders are moved
All files & folders are moved
Move file by file
All files can be moved
All files can be moved
ONLY "JPG" files will be moved
Delete file by file
All files can be deleted
All files can be deleted
ONLY "JPG" files will be deleted
Set up digiKam to ignore RAW files
My recommendation is to stop digiKam from reading RAW files and make any changes to RAW files in other software. The full list of RAW file extensions that digiKam can load is given in the documentation [link].
To disable all RAW files (or any other file extensions) go to Settings → Configure digiKam → Views → Mime Types and under “Image Files” add this list with all file extensions that need to be ignored by digiKam:
Even when all the metadata settings are correct, to ensure best cross-compatibility it is still important to use the tags in a compatible way. For example, Windows does not differentiate between “Title”, “Caption” or “Comments” so if you use all of these fields simultaneously, some Microsoft software can overwrite part of what you wrote and cause permanent metadata loss [source].
Here are the strongly-recommended; safe-to-use metadata fields (notice, almost the same as in WLPG):
Descriptive Tags organized in tag hierarchies – tags are good, but tag hierarchy greatly enhances the usefulness of predefined tags. With the recommended settings, tag hierarchy is fully supported and cross-compatible with Microsoft tools.
Face Tags or people tags are excellent to specify who is who in the photo. Supported and useful. Note you can as well tag pets or other non-human points of interest using face regions.
Edit “Title” field – this field is effectively the primary filed for all Comments and Captions despite the name of the field. (In WLPG this data is editable as Caption. More details below.)
Secondary: “Caption” field can be used if you really have to. Microsoft software will show it as “Comment” in file properties, but for example WLPG cannot edit this field.
Star rating – fully supported and a more robust alternative to Colors or Flag labels.
GPS geotag data.
Names (Author) and Copyright under the Information – Rights in the right digiKam sidebar.
Plus you can rename the file, but be careful in case your image has a corresponding RAW file. After re-naming, RAW file should still match the beginning of the new filename.
Finally it is useful to keep meaningful folder names that can contain some basic “Caption” and start with a relevant date in “YYYY-MM-DD” format (to have some control over your files outside dedicated photo management software like digiKam).
For more information how to actually efficiently apply tags in digiKam see “Tagging and Face Tags” tutorial.
For all other Metadata fields and types – use at your own risk. Everything will work in digiKam, but may be hard to access for other software.
Title, Captions and Comments confusion in Windows
This paragraph explains in-depth how the recommended Metadata configuration affects Title, Caption and Comments. In short – it results in a nice match with Windows 10, but if you are migrating from Microsoft WLPG or OneDrive, then you may want to read on.
The screenshot and table below shows how Metadata will appear in:
Windows 10
digiKam 7.4
obsolete Microsoft WLPG.
Where your information appears in different environments using recommended Metadata settings
1 in Windows
2 in digiKam
3 in Microsoft WLPG
Title saved in digiKam is
Title
Title
Caption
Caption saved in digiKam is
Comments & Subject
Caption
NOT visible
Caption saved in WLPG is
Title & Subject
Title (*)
Caption
As you can see from the table:
“Title” is the only field that reliably appears in all 3 compared environments
“Caption” in digiKam will be “Comment” in Windows, but is not visible in the old WLPG. And as long as digiKam uses recommended Metadata configuration, this data is safe from corruption by Microsoft WLPG.
The “Subject” property in Windows is unreliable and unnecessary. Depending on which program saves the data last it will contain duplicate of digiKam’s “Title” or “Caption”. This field is linked to “Xmp.dc.description” (and possibly also other namespaces).
(*) special case – if you create Caption in WLPG (or OneDrive?), on import to digiKam it will be duplicated in digiKam as Title and also as Caption. As the relevant information is just duplicated, it makes almost no practical difference. (If you really want to avoid this, you can disable reading of the “Xmp.dc.description” namespace under Advanced settings of “Caption”, but it is important to keep writing to the “Xmp.dc.description” namespace to be able to overwrite any obsolete “Xmp.dc.description” information.)
Default configuration warning
If you do Not use recommended Metadata configuration in digiKam, any time someone edits “Caption” in WLPG, it would overwrite Both “Title” and “Caption” in digiKam, which can lead to the “Caption” metadata loss. (OneDrive was not tested, but could have the same risk.)
Future improvement suggestions
No doubt we would like faster, more robust and intuitive way to configure digiKam for an average user. Here are some suggestions on how to make digiKam configuration better:
Macro – as a temporary measure, someone could write a script to modify digiKam settings using one executable file. The advantage would be that anyone could read and modify what the script does and therefore make a custom one-click setup script for their unique configuration.
Configuration presets – just as many other programs (for example see Blender keymap presets), digiKam could offer users a choice which Metadata configuration preset to use already during initial configuration. This way there could be multiple ready-made profiles depending on the use case; depending on which other software user migrates from or uses in parallel.
Simplified digiKam – just as there is ShowFoto as a standalone part of digiKam for image editing, there could be a simplified gallery viewer and manager suitable for non-geeks so that everyone could use the metadata features without complex setup tutorials and editing of configurations.
The good news is – digiKam is open source, so anyone can pick up a challenge and make the improvements we all need. Meanwhile digiKam works already, so happy tagging after the setup!
About this tutorial
This tutorial was originally written for digiKam 7.4 in 2021-12. You are very welcome to edit, update and Upgrade this tutorial page to make it better and keep it up to date. No attribution or copyrights on this page (all illustrations are original as well)!
Adding new contacts is one of the basic tasks of an address book application.
Warning
You need to have at least one address book, to create a new contact. Go to How to create a new address book? to learn how to create a new address book.
First click on + New Contact button, this will open a form in a popup.
Click on + New Contact
In the popup, fill out the form with the information that you want to save. At the top of the form, you can select the address book, you want to add the contact.
Note
You can add more than one phone number, website, and email. Just click on the + button and select a category.
Please use the discussion section of this page to voice your opinion on this.
Document bookmarks
Mike McBride
Bookmarks are invisible placeholders that allow you to move easily to specified points in a large document.
Tip
Some other wordprocessors have bookmarks as part of their interface. If you are familiar with their use, you will find that KWord functions in a similar manner.
It should be noted that bookmarks are attached to the text near the cursor, not the page location. If the text moves forward or backward in the document (as text is inserted or deleted respectively), the bookmark moves with the text.
Creating a new bookmark
Creating a bookark is simple.
Place the cursor where you want the bookmark to be inserted. Select Insert->Bookmark... from the menubar.
A small dialog box will appear.
Type a short description of the bookmark location (i.e. Chapter 1, Appendix, Abstract, etc). This description will identify the bookmark for you.
Click OK to create the bookmark.
Click Cancel to return to your document without creating a bookmark.
Jump to a previously created bookmark
To jump to a previously created bookmark, select Tools->Select Bookmark... from the menubar.
A small dialog will appear. Double click on the desired bookmark with the left mouse button. You will immediately be taken to the location in the document that is attached to that bookmark.
Note
Alternatively, you can click once on the desired bookmark with the left mouse button, and then click on OK. This will function the same as double clicking on the bookmark.
Rename a bookmark
To rename a bookmark, select Tools->Select Bookmark... from the menubar.
A small dialog will appear. Click on the desired bookmark with the left mouse button. Now click Rename Bookmark. A small dialog will appear. Enter the new name for your bookmark. Click OK. The bookmark is renamed immediately.
Delete a bookmark
To delete a bookmark, select Tools->Select Bookmark... from the menubar.
A small dialog will appear. Click on the desired bookmark with the left mouse button.
Warning
Be sure you have selected the correct bookmark from the list before proceeding. KWord does not ask for confirmation before deleting the selected bookmark.
Now click Delete Bookmark. The bookmark is deleted immediately.
Import Wizard allows to import emails, settings, addressbook and calendar data in your user account from the following mailers:
Trojitá
Evolution 1.x - 3.x
OS X Mail
Opera
Sylpheed
Thunderbird/Mozilla
The Bat!
Outlook Express
Balsa
Pegasus-Mail
Claws Mail
You can start Import Wizard can either from the application launcher or from KMail with
Tools → Import Wizard...
Import Wizard
At startup the import wizard will detect all supported email applications, and list them for you in the window.
Warning
Close KMail before importing data. Some plugins will modify KMail's configuration file.
Select the email application you want to import from, and click the Next button.
The wizard will then ask if you want to import everything, or give you options to select which types of materials you want to import.
Depending on your selections in the materials to import screen, you will see one or more of the following screens:
To Import mail messages, you need to select the folder you want your email messages to import into. Once selected, click the Import Mails button. Once the progress bar reaches 100%, click the Next button, or the Finish button, if this was your last material selection.
To Import mail filters, click the Import Filters button and it will import any filters it found, once finished click the Next button, or the Finish button, if this was your last material selection.
To Import settings, click the Import Settings button. The wizard will ask you some questions e.g. which folder to use for account folders that do not exist. The wizard will also create your identity. Once complete, click the Next button, or the Finish button, if this was your last material selection.
To Import address books, click the Import address book button, and it will import all address books it finds. Once complete, click the Next button.
Click the Finish button to complete and exit the wizard. If at any time you wish to end the wizard, you can click the Cancel button.
Note
By clicking on the Manual Selection checkbox, you can access an advanced version of the ImportWizard.
KGpg provides a graphical interface to gpg's commands
GnuPG encrypts and decrypts your mail and selected files. There are many command-line options to achieve this. With KGpg the anxiety is removed - you don't have to remember any commands. KGpg can help you set up and manage your keys, import and export keys, view key signatures, trust status and expiry dates. In fact just about everything you need to do is covered by KGpg. A wizard is provided to help you set up your keys.
KGpg is integrated into Konqueror and Dolphin, where a context menu allows you to choose to encrypt a file, with or without signing.
Viewing a key's properties
Right-click on a key to see the options
Extending the life of your keys
As you can see in the image above, you can extend the life of your keys using the Change Expiration button. Simply choose the new date from the popup calendar. To do this, however, you must have access to the private key and its pass-phrase. Without them you can do nothing.
</translate><translate>
Change your passphrase
Should you suspect your passphrase is compromised, you can change this also from the Key Properties dialogue. The Change Passphrase button is below Change Expiration.
Revoking a key
If you lose your private key or think it has been compromised in some way you need to revoke it. To reliably render a key unusable you need to revoke it. Revoking is done by adding a special revocation signature to the key.
The revocation signature can be created together with the key. In this
case it is stored in a separate file. This file can later be imported into
the keyring and is then attached to the key rendering it unusable.
Warning
Please note that to import this signature to the key no password is required. Therefore you should store this revokation signature in a safe place, usually one that is different from you key pair. It is a good advise to use a place that is detached from your computer, either copy it to an external storage device like an USB stick or print it out.
If you have not created such a detached revocation on key creation you can
create such a revocation signature at any time choosing Your Key -> Revoke key, optionally importing it to your keyring immediately.
Note
The option to revoke a key has only been available in the context menu until KDE SC 4.7.1. Since then it has been moved to the key menu.
Tip
When you start KGpg with default settings it will hide in the system tray. If you started KGpg and do not see it anywhere you can probably reach it when you expand the Plasma system tray widget.
Tip
If a contact has more than one key - perhaps some old keys in addition to the current one - and the wrong key is being used for encryption, find the old keys and reduced their Trust status to Not Trusted. They will remain available for decrypting old messages, but not used for new ones.
If you are not in a position to physically verify the identity of your contacts you should especially read the key-signing section which explains the benefits of local-signing.
Please use the discussion section of this page to voice your opinion on this.
Expressions
Mike McBride
Introduction
Expressions are a way to quickly insert common phrases into a document. Once an expression has been selected, the text is inserted into KWord.
Note
Expressions are different from variables. Expressions are inserted as regular text, can only be changed later by manually editing the text. Variables insert a placeholder in the document which can be automatically updated at a later date.
Using expressions
To use an expression could not be easier.
Simply place the cursor at the location you want the expression inserted and select Insert->Expression from the menubar. This will give you a submenu with groups of expressions. Select the group that is appropriate for your expression. This will bring up a list of expressions available to you. Select the appropriate expression.
Once selected, that expression will be inserted at the cursor position.
Add, change and delete expression groups and expressions
Adding an expression is accomplished by selecting Tools->Edit Personal Expressions... from the menubar. This will bring up a dialog box.
The list at the left shows you all available groups (Employees and Notices in the example above). Notices is the currently selected group.
Add a new group
You will need to create a new group the first time you want to add a new expression. KWord will not allow the user to edit or remove any predefined expressions. You create a new group by clicking on the New located below the group list. A new group will be created with the name new group. You can change the name of the new group by clicking on the newly created group in the group list on the left, then editing the text box on the right labeled Group name:.
Change the name of a group
To change the name of a group, simply click on the group in the list on the left side of the dialog. Type the new name in the text box labeled Group name:.
Delete a group
To delete a group, click on the group in the list on the left side of the dialog.
Warning
Be sure you have selected the correct group prior to clicking on the Delete button. KWord will not give you the opportunity to restore the group if it is accidentally deleted.
Click on the Delete button below the group list. The group and all of the expressions it contained are immediately deleted.
Note
Deleting an expression with this dialog does not delete the expression from any document. It only removes the expression from the menus.
Add a new expression to a group
The left side of the dialog box lists all the available groups. Select the group you want to add your expression to by clicking with the left mouse button on the name of the group. The list on the right of the dialog labeled Expressions lists all the current expressions in the current group.
To add an expression, click on the New located below the expression list.
A new expression is created called empty. Type your new expression in the textbox below the list of expressions.
Edit an expression in a group
The left side of the dialog box lists all the available groups. Select the group that contains your expression to by clicking with the left mouse button on the name of the group. The list on the right of the dialog labeled Expressions lists all the current expressions in the current group.
Click on the expression you want to edit in the expression list on the right.
Click in the text box below the expression list. You can now edit your expression in the textbox below the list of expressions.
When you are finished adding new expressions, simply click OK.
Delete an expression
To delete an expression, click on the group in the list on the left side of the dialog. This will show a list of the expressions belonging to that group in the listbox on the right labeled Expressions.
Select the expression you want to delete by clicking once with the left mouse button.
Warning
Be sure you have selected the correct expression prior to clicking on the Delete button. KWord will not give you the opportunity to restore the expression if it is accidentally deleted.
Click on the Delete button below the expression list. The expression is immediately deleted.
Note
Deleting an expression with this dialog does not delete the expression from any document. It only removes the expression from the menus.
When you are finished making changes, simply click OK.
KNode is unmaintained. You can also directly use KMail and move with a filter the mailing list mail to another folder.
Mailing lists are widely used for communication among Free Software projects and interest groups. By sending an email to a special email address, tens, hundreds or thousands of people will receive the message for discussion. It can be useful to separate this mailing-list email traffic you receive from regular email really meant for you. This way, you can casually read a mailing list without worrying about receiving too much mail you might not be interested in.
Tip
To read the details on these screens, click on an image, and use the browser back-button to return to this page.
The Kontact project provides the Knode application, which can be used to read mailing lists completely separately to your regular mail.
Reading mail with KNode
You can find KNode by searching for it in your application launcher. You may need to install it from your distribution packages first if you don't already have it installed. If you have Kontact installed you will find KNode from the navigation menu on the left.
When KNode starts, configure it by using the Accounts tab and clicking Add to add a new Newsgroup Server.
KNode is really a usenet news reader. Usenet news is one of the earliest forms of communication on the Internet. Gmane is a website which provides a service of subscribing to hundreds of public mailing lists, and making the result available to anyone who wants to use it. By using KNode with Gmane, we can read and reply to any mailing list on the Gmane network. Configure KNode to use the server news.gmane.org and port 119. It is also important that you set your name and email address in the identity tab. By entering your email address Gmane will allow you to send mail through their servers.
Next, select the new Gmane item in KNode and select Subscribe to Newsgroups. Allow it to fetch a list of Groups from Gmane. Groups are the Usenet equivalent of mailing lists.
You can now search for and subscribe to hundreds of mailing lists on Gmane, including lists related to KDE software, GNOME, numerous distributions, as well as non-technical lists like backpacking and cycling.
Replying to mail with KNode
So far, we have only configured KNode for reading mailing lists. To reply to messages, and create our own email threads, we need to configure out-going mail.
Go to the Accounts tab again, and this time select Mail Server (SMTP) and click Add. Enter your outgoing email information. If you have already configured KMail for outgoing mail, this should contain the same details. Many people use a separate email address for mailing list traffic to cut down on spam.
Subscribing to mailing lists
Before sending a message to the mailing list, you may need to subscribe to the list. Many mailing lists block emails from email addresses which are not subscribed to the list. For example, to subscribe to the kde-users mailing list (kde@mail.kde.org), find the listinfo page on the KDE software users' mailing list page. After you subscribe to the list and reply to the confirmation email, you're nearly ready to start posting to the mailing list. Go to your options page for the mailing list and turn off mail delivery (look for a link on emails that contain the word "mailman", which is the most common list server - you need to scroll right down the page to find the button "Unsubscribe or edit options".). As you are reading the mailing list through KNode+Gmane, you don't need to have the mail also delivered to your email account.
When you first send a message to a mailing list through KNode, you will recieve a confirmation request email from Gmane. You only have to reply to that once. All subsequent messages sent through KNode will be sent immediately for a complete mailing list experience. If you do not receive an email from Gmane the first time you send a message to a list, make sure you have correctly set your email address in the identity tab when configuring KNode to use Gmane.
Other tips
If you want to use KNode with lists that are not covered by Gmane, you can ask Gmane to subscribe to the list here.
If you are subscribed to private mailing lists, but still want to use KNode to read and write to them, it is possible to install a local leafnode server for that purpose.
Developers, take note
If you are a developer interested in Qt, you may find that Gmane does not offer qt mailing lists like qt-interest. Instead a separate server is accessible at nntp.trolltech.com and port 119.
In our third Layout Tutorial you will again use your own pictures and text
In this lesson you will revise the steps of the first and second tutorials:
add text boxes and adjust their size and position
add illustrations
adjust their size and position
You will also
link text frames and
set up paragraph and text styles.
You will create a page suitable for use as a photo album page, during which we will examine text-flow.
Plenty of white space is advisable in a photo album page, but if your margins are too large you will find that either the pictures or text suffer from lack of space. We will start by increasing the margins on our page. Use the menu entries Format -> Page Layout. Set the margins to 25mm all round, then hit OK.
Warning
Currently (version 2.3.3), changing margins doesn't work as you would expect in KWord. It is expected work from the next version. See this forum thread.
It is advisable to do a little preparation for pages such as this. Bear in mind that photos as they come from your camera are large. Putting three or four of them, unedited, on a page will result in a page that may not print for a very long time, if at all. It may even crash your printer. Instead, create a temporary folder and copy into it all the pictures you intend using. Then use digiKam to resize those pictures to approximately the size you want to use on the page.
Now, place three or four photos on your page and move them until you feel you have a good balance. Create a text frame, alongside your first picture, roughly filling the available space. Take care that the first text frame touches the left-hand margin. This is because frames that are in that position are treated as a column, so no other text frame should touch unless you specifically want it to be treated as such. If you encounter any problems with text flowing through boxes in the wrong order, this is the likely cause, and you may need to re-position the boxes on your page to avoid that margin.
In Properties, give your text frame a recognisable name, then in the Options tab, set Do not show the extra text. Close the Properties box, and select the Text tool. The text tool options docker appear at the lower right of the page, assuming you have the dockers showing. For a photo album you probably need a much larger text style that you would use for most documents, so now we will create text styles for use in this kind of page.
Click on the in the Styles tab and create a paragraph style called Album Title. A text style will be created in association with it. Selecting the character style, use the to set the font and size. I used URW Chancery L, 36 point for my title, and set the colour to green, to match the subject. Go back to the paragraph style and under General Layout set the alignment to Center. Create another Paragraph style for Album Text, using the same font and 22 point size, leaving the text colour and paragraph alignment at the defaults. One last thing - go back to the Album Title Paragraph configuration and set the next paragraph to Album Text. Any changes you make in these configurations will affect all paragraphs that use these styles.
Return to your first text box, then either type directly into the box, or paste in ready-made text. If your text overflows the area selected the rest will not be visible (due to the setting we made earlier). To add your Album Text style, place the cursor within the paragraph, select the style from the list, then will apply it.
Tip
You can select a paragraph or text style before you start writing: Click the desired style in the Tool Option docker and then . Then you won't have to mark each section of text and apply the style.
Now's the time to create a new text box alongside the second picture. Again, fill the available space. The Connect Text Frames options page will pop up. Click on the named frame you earlier created. Again, in the Frameset Properties, set Do not show extra text. Your existing text will flow into this frame. For each new paragraph you will need to apply the Album Text style. Continue adding text frames and text as required.
This style of album page is useful if, for instance, you need a narrative style to accompany the pictures. On the other hand, often just captions are better.
This page shows two methods - one by adding text frames alongside the relevant photo, and the other by adding text frames below, as a caption. In the case of true captions like this, the text frame and photo should be grouped, to ensure that they don't get separated. Remember that this is for demonstration purposes only - mixing the styles like this is not aesthetically pleasing.
Experiment with paragraph and text styles, and layout. Enjoy creating pages to share with family and friends!
</translate>
Several backup options within KMail, the email application from KDE.</translate>
<translate>===Manual Archiving===
Folder → Archive Folder...
Or the context menu launched with a right mouse button, then select Archive Folder....
This will open a dialog that allows you to create a single archive of the currently selected folder.
The archive file name will consist of the prefix Archive_, the path of the selected folder in KMail's folder list, the date in format year-month-day and the selected file extension e.g. Archive_Local Folder_inbox_2013-09-03.tar.bz2.
Archive Folder
The text box Folder: shows the currently selected folder, if you wish to change the folder to be archived click the icon.
The drop down menu Format: allows you to choose a format (choices are: zip, tar, tar.bz2, and tar.gz).
If you would like to change the default name or location, click the icon at the end of Archive File.
Check the Delete folder and sub-folders after completion if you would like everything you archived deleted.
By default all sub-folders will be archived, deselect Archive all sub-folders if you only want to archive the parent folder.
Automatic Archiving
Settings → Configure Automatic Archiving...
Since KDE 4.12, you can configure automatic archiving of a KMail folder.
This is a powerful tool that can be used to assist in backing up your email automatically.
The archive file name will consist of the prefix Archive_, the path of the selected folder in KMail's folder list, the date in format year-month-day and the selected file extension e.g. Archive_Local Folder_inbox_2013-09-03.tar.bz2.
Automatic Archiving
First, select the folder you would like to archive by clicking the Add... button.
Automatic Archiving
Select the format you would like to save it in. e.g. .tar.bz2 in the drop down list.
By default Archive all sub folders is enabled. Deselect this if you only want the parent folder archived.
You can type in the location you would like to save your archive, or click the button (Open File Dialog) to select the folder.
Select how often you wish to backup through the drop down menus next to Backup each:.
If you are limited on drive space you will want to set a limit on Maximum number of archive.
If you have added or modified an archive job it will be executed automatically after closing the dialog.
If you have already added mail archive jobs the Configure Archive Mail Agent dialog will list and allow to modify them.
You can use the check box at the left of each entry in the list to enable or disable archiving of this job.
Using the context menu launched with a right mouse button click on an archive job you can open the folder containing the archives or start the archive job immediately.
Warning
This will overwrite an existing archive created earlier at the same day without notification.
This feature allows you to archive single emails to a specified folder.
For instance, you need to archive all of those pesky bill receipts in one place. Folder Archive Agent can easily accommodate those needs.
Folder Archive Agent
This dialog can be shown for each of your configured accounts including Local Folders and you will need to configure all accounts that you wish to use this feature with.
The first option allows you to enable/disable the folder archive agent. It is disabled by default, to enable check the Enable check box.
You can set the location of your Archive folder by clicking the icon next to Archive Folder: and selecting the folder you wish to use.
For example, you could create a folder called “bill receipts” by clicking the New Subfolder... and typing bill receipts in the dialog. You may choose a folder location anywhere, e.g... a folder in your Local Folders or on your IMAP server.
You have several choices on how the emails will be archived:
Unique folder - Uses the selected folder sorted by date.
Folder by months - Creates new folders inside the selected folder by months.
Folder by years - Creates new folders inside the selected folder by years.
Now when you receive a bill receipt, right mouse button the email and select Archive from the menu.
The email will be archived into your configured archive folder for easy viewing later on.
Exporting
</translate><translate>
Tools → Export KMail Data...
Or pimsettingexporter can be run as a standalone application by running pimsettingexporter in the application launcher.
This feature exports settings and local mail to a compressed file.
Backing up is an essential practice for all users. PIM Setting Exporter is a great tool for backing up or moving all of your settings and email to a new installation. You also use PIM Setting Exporter to import previous backups.
PIM Setting Exporter
To perform a backup, select File → Back Up Data..., it will prompt you to close all kdepim applications.
Warning
Make sure you close all windows, data loss is possible if you don't.
Once you have closed them, click Yes to continue, or No to cancel.
You will be prompted to create a backup name, enter the name into the File textbox, e.g. mymailsettings.
The default file type it saves as is .zip, if you want a different type, deselect Automatically select filename extension and append the extension to the end of your file name.
The next screen will allow you to select what you wish to backup, by default everything is selected.
Note
KMail → Mails selection will only backup mails in your Local Folders, it will backup IMAP settings and download messages upon restore. If you have emails on a IMAP server you wish to be backed up, you should use Folder Archive Agent to archive those emails to a local folder.
The final screen shows the log of the backup process. You can close the window once you have reviewed the log and verified your backup was successful.
To restore your backup, select File → Restore Data... within pimsettingexporter.
</translate>
A file called fajar-pub.key will be created in the current directory. This is a copy of your public key. This is also the file that people must import to verify your signed emails. You can publish it in keyservers around the world, or you can send it directly to the people requesting it, or you can place it in your website for others to download.
If you look inside the file, it will be like this:
-- --BEGIN PGP PUBLIC KEY BLOCK-- --

mQGiBEBVTw8RBACaYvnDkgqNWyktg3urdE9mrpv63x3Iux2zVkuZk8pIRp5HeR/V

[snip snip...]

B394acuU4FdGN/EynYUAn1aRvNmgs0/IU2MDzYQpbHIaqpkE

=RIZC

-- --END PGP PUBLIC KEY BLOCK-- --
Also, you might want to back up your secret key to a secure medium (not just one floppy: this will get damaged), you can use the following command:
This will create a textfile containing your secret or private key, with the filename secret.asc. Do not hand it to someone you do not trust 100%. Hide it in a safe place (or better, more than one).
Finally, it is advisable to generate a revocation certificate and store it in a safe place away from your secret key. In case your secret key gets into the wrong hands, you can revoke it so it can not easily be abused by others. The command to do this is
This will create a textfile with the name revoker.asc containing the revocation certificate.
Setting up Kmail to sign emails using your gpg key
Fire up Kmail, and go to Settings -> Configure KMail -> Accounts -> Identities
Choose the identity that you are using
Then click Modify -> Cryptography -> OpenPGP signing key
It will automatically show your gpg key, that is 'Your Name <mail@address.com>
If it will not, click No key, and choose your key
Now, set up Kmail to automatically sign all emails that you write using your key
Still in the Cryptography tab, tick Automatically sign messages
In the Kmail Configure menu, go to Security -> Composing
Tick mark these:
Store sent messages encrypted,
Always show the encryption key for approval,
Exit the configuration menu by clicking OK.
Testing Kmail by creating a new message
You will notice that there is a Sign Message banner. It's already active.
Write your message and when you are done, send it.
Kmail will ask for you to type the secret passphrase that you made during the gpg --gen-key step. Type it in, and then Kmail will show you a confirmation window of the signed message. Click OK to send it.
If you test it by sending to yourself, you will notice that Kmail displays the message with a GREEN header, with words like this: Message was signed by Fajar Priyanto (Knowledge is power! http://linux.arinet.org) (Key ID: 0x85EEC6A5). The signature is valid and the key is ultimately trusted.
People that have your public key will have that display also, but those who don't have the key, will have the message displayed in yellow with words like this: Message was signed with unknown key 0xBFE7357F. The validity of the signature cannot be verified.
CONGRATULATIONS!
You now can communicate in a more secure way if you want to. I know this how-to is very short and might not be very clear. Well, please give me suggestions and I will improve it when the time comes. Also I intend to write the second part of this topic which covers how to ENCRYPT messages, import other public keys, and install Crypto Plug-ins. Special thanks to Tim Sawchuck and Philip Cronje and all my friends in the Mandrake List.
Issues
Messages signed by a key already known display correctly in KMail, but new keys were not being imported, and you can't sign messages. The culprit is a missing package. Installing pinentry-qt (you may need pinentry-qt4) appears to solve both problems.
KMail no longer does in-line signatures. GnuPG has to be used instead. KGPG is a useful application that helps in the management of signatures, both your own and those collected.
Note
To be sure the "passphrase agent" (gpg-agent) is enabled, check your ~/.gnupg/gpg.conf and eventually uncomment the line containing "use-agent".
In KMail'sSettings -> Configure KMail -> Security tab -> Miscellaneous, select GnuPG Settings, then Configure. On the GPG Agent page, give a path to which logs can be written (Write server mode logs to FILE), in case of problems. You can check the log in KMail'sTools -> Filter Log Viewer. It's probably a good idea, too, to increase the cache time - I use 3600.
Warning
The following startup and shutdown scripts may be already in use from your distro, but not written in this path. Do not install these scripts unless you have problems with startup and shutdown
If you do not have it already, in ~/.config/plasma-workspace create a directory called env. In there, create a file called gpgagent.sh containing
In the same way you would clean up gpg-agent on shutdown, so if you do not have it already, create another directory called shutdown into ~/.config/plasma-workspace and create in it another script file called stop_gpgagent.sh containing
This layout was produced for use in a charity plant sale. Learn the techniques and you can use them for many purposes. You can save and reuse these images for practice. Click on the thumbnails to get the full size image.
In this lesson you will
add text boxes and adjust their size and position
format text
add illustrations
adjust their size and position
Launch KWord and select the Blank Document template. You will be presented with an empty page, with the size most likely for your region - usually A4 or Letter. Using the Format menu, select Page Layout. For this project I am using A4, but it shouldn't take much adjustment to fit it to a Letter page.
For this kind of layout you need fairly generous margins, so set the top to 25mm and the other three sides to 20mm. If you work in Imperial, make them 1" at the top and 3/4" on the other sides.
Warning
Currently (version 2.3.3), changing margins doesn't work as you would expect in KWord. It is expected work from the next version. See this forum thread.
In the right-hand toolbox, under Add Shape, click on the Text shape tool and draw a box margin to margin and 3cm (about 1.25") high - you can see your cursor position on the ruler at the left. The result will be a coloured box, but that is just a marker. You get a Frameset dialog. This is going to be our banner heading, so you can change its name if you wish, but you won't need to change anything else. Click OK and the text box fills with sample text. Now Click on the text editing tool - the sample text disappears and you can add your heading. I used URW Chancery L, 48pt for the title and 24pt for the subheading. Highlight both lines of text and click on to centre it. Font, size, centering, and other text attributes can be set in the Abc tab of the Tool options docker. If you do not see this docker in the lower right part of the window, you can bring it up by selecting the Show -> Show dockers menu item or pressing Ctrl + H.
Create another text box, margin to margin, and 1.5cm deep, and add the sub-text:
This plant gets its unfortunate name because many people think that the flowers develop a strong smell if taken into a warm room
While a box is selected, hovering over it produces a cross-arrow cursor. You can use this for large movements of the box. We will later use Properties to make fine adjustments.
That's the heading all sorted. Now we need to look at illustrating our page. Many cameras use a 4:3 format, so we will use Image frames that are 8cm x 6 cm.
Using the Image shape tool create your first box touching the left-hand margin, just below your text box. Drag it as close as you can to the desired size - it can be tweaked later. Like the text box it creates a coloured box, then it opens a dialog for you to point it to the desired picture. We will select Hellebore1.jpg for this picture.
Repeat the process, creating this image box immediately below, and just touching the bottom margin. Select the file Hellebore3.jpg.
The third image box should be the same size, touching the right margin, and positioned vertically as close as you can to half-way between the other two. Select the file Hellebore2.jpg
Warning
You may find, that adding images does not quite work as described above. Instead you may find that the image is entered in its full size, completely ignoring the box you carefully dragged. If that is the case, you just have to resize and reposition the image. In this case it is probably easier to simply select the Image Shape tool, click somewhere in your document, pick the image and adjust it afterwards.
To resize the image grab one of the small squares at the edge of the image - the marker becomes a pair of small arrows pointing up/down, left/right or diagonally depending on which square you use - and drag it to the desired size. To reposition the image grab it anywhere - the marker becomes a four small arrows pointing up/down/right/left - and drag it to the desired position
Now we need to tweak the position, to get them exactly where we want them. First, make sure you are using the default (pointer) tool
Tip
The default page already has a basic text frame, covering the whole of the usable page. If at any time you can't reach a frame to work with it, click on an empty part of the page and you should see the frame highlighted. From the Frames menu, Send to Back, so that it's behind your working frames.
Look at the image frame that is best aligned to the left margin - select that frame by clicking on it, right-click and select Frame/Frameset Properties. On the Geometry tab you can see position and size. If your margin is 20mm, set X: to 2cm. Correct the Width to 8cm and Height to 6cm.
Repeat these settings on the other left-hand image, so that they are perfectly aligned. For the right-hand image, set the Width and Height to match the others. Setting X: to 11cm should line it up nicely.
Now we turn our attention to adding the descriptive text boxes.
Select the Text shape, and draw a box approximately 6cm wide and 3 cm deeps, in the center of the space to the right of your first picture. Into that paste the text:
Flowering Season:

Late winter, typically starting February and lasting for several weeks.
You will see the text automatically wrap to the box. Right-click to get the Frame/Frameset Properties, and adjust the width until the wrap gives you reasonably balanced lines.
The second text box is created and adjusted in the same way, using the text:
Description:

Very dark green, deeply divided palm-like leaves below bright acid-green flowers which are often burgundy-tipped.
The final text box uses the words:
Habitat:

Prefers to be out of strong sunlight.  Thrives under trees where the bright flowers add a welcome glow.
Again, adjust the width on the Geometry tab of the Frame/Frameset Properties. You now need to check the X: setting for the two text boxes Flowering Season and Habitat, making sure that they are identical. The width is less important, but a badly-aligned box is very noticeable. The middle box doesn't have anything to line up with, so just adjust until it looks central in the space.
Just one task left. Return to the heading and sub-heading banners and use the Frame/Frameset Properties to ensure that they start and end on the margins.
That's all there is to it. If you were doing an advertising flyer you could have a smaller-text banner across the bottom with your contact details.
In the next tutorial you will use your own images and text, and we will explore text-flow, both around shapes and between boxes.
</translate>
There are numerous environment variables that are useful when managing and controlling a KDE environment. Supported environment variables are listed below.
Automatically Set Variables
KDE_FULL_SESSION
Set to true by KDE startup, it is used by some programs, such as Konqueror, to know if they should consider remaining in memory for future re-use when being closed. If not set, those programs will exit after being closed (e.g. kdesu does that, it's also useful for debugging).
If you plan on using this variable to detect a running KDE session, check if the value is not empty instead of seeing if it equals true. The value might be changed in the future to include KDE version information.
KDE_SESSION_VERSION
Introduced in KDE4, this environment variable is set to the major version number of the KDE desktop being run on startup. This allows one, for example, to know which kreadconfig? to run: kreadconfig${KDE_SESSION_VERSION}. For KDE3 this will resolve to kreadconfig and for KDE4 this will result in kreadconfig4, and so on for each subsequent major version of KDE.
Display and Window Management
KDEWM
If the KDEWM environment variable has been set, then its value will be used instead of kwin as KDE's window manager within the startkde script.
KDE_DISPLAY
An old(?) way to set DISPLAY for multihead.
KDE_MULTIHEAD
Set this variable to true to indicate that KDE is running on a multi-head system.
File System
KDEDIRS
Overrides KDEDIR and allows you to specify multiple directories where KDE searches for its data. Useful if you want or have to install some programs to a different prefix than the rest of your KDE.
Please note that at least the startkde script expects the KDE install directory to be listed first.
KDEHOME
If not set, KDE uses ~/.kde as directory where your personal data is stored.
KDE_HOME_READONLY
Set this variable to indicate that your home directory is mounted read-only.
KDEROOTHOME
If not set, KDE uses ~root/.kde for root's personal data. This was introduced to prevent KDE from accidentally overwriting user data with root permissions when a user runs a KDE program after switching to root with "su".
KDESYCOCA
Allows you to specify the path and the name of the generated KDE configuration cache file.
KDETMP
Allows you to specify a path other than /tmp for KDE to store its temporary files.
KDEVARTMP
Allows you to specify a path other than /var/tmp for KDE to store its variable files.
Localization
KDE_LANG
Allows you to override the KDE language configuration. For example, "KDE_LANG=fr kprogram &" starts a program in French if the necessary files are installed.
KDE_UTF8_FILENAMES
If this environment variable is set, KDE assumes all filenames are in UTF-8 encoding, regardless of the current C locale.
Networking
KDE_NO_IPV6
Set this variable to disable IPv6 support / IPv6 DNS lookups.
KDE_USE_IDN
The content of this variable defines for which top level domains the usage of IDN is enabled. If not set, "at:ch:cn:de:dk:kr:jp:li:no:se:tw" will be used.
Performance Related
KDE_IS_PRELINKED
Set this variable to indicate that you have prelinked your KDE binaries and libraries.
KDE_MALLOC
If set to "1" the fast malloc routine provided in kdecore is used if KDE was compiled with --enable-fast-malloc, otherwise the libc's routine is used.
KDE_NOUNLOAD
If this variable is set, then KLibLoader is told to never unload dynamically opened libraries.
KDE_DOUNLOAD
If this variable is set, then KLibLoader is told to always try to unload dynamically opened libraries. Warning, this will most probably lead to crashes!
PLASMA_PRELOAD_POLICY
whether we want to preload the popups of all plasmoids in the Plasma session.
It can have 3 values (case insensitive)
"none": never preload popups
"adaptive": preload popups of most frequently used plasmoids
"aggressive" preload popups of every plasmoid
Troubleshooting and Debugging
KDE_DEBUG
Setting this variable disables KDE's crash handler DrKonqi and instead lets the application create a core dump. This allows post mortem debugging. An alternative to KDE_DEBUG is launching the application with the command line option --nocrashhandler. Setting ulimit -c 0 will also prevent core dumps.
KDE_DEBUG_NOPROCESSINFO
Normally the current program name will be shown on every line of KDebug output. Setting this variable hides it.
KDE_DEBUG_NOAREANAME
Normally the current KDebug area will be shown on every line of KDebug output. Setting this variable hides it.
KDE_DEBUG_NOMETHODNAME
Normally the current method name will be shown on every line of KDebug output. Setting this variable hides it.
KDE_DEBUG_FILELINE
Setting this variable adds the source file and line number to every line of KDebug output. Since kdelibs-4.6.
The source file is shown relative to the top of the project directory, provided that add_definitions(${QT_DEFINITIONS} ${KDE4_DEFINITIONS}) is used in the application's CMakeLists.txt
KDE_DEBUG_TIMESTAMP
Setting this variable to "1" adds a HH:MM:SS timestamp to every line of KDebug output. Setting the variable to "2" adds millisecond accuracy to the timestamp.
KDE_COLOR_DEBUG
Starting with KDE 4, setting this variable will get you colorful debug output.
KDE_COLOR_DEBUG_ALWAYS
KDE_COLOR_DEBUG does not provide coloured debug messages for processes spawned by the main process. With this all debug messages will be coloured.
KDE_FORK_SLAVES
Set this variable to spawn KIO-slaves directly from the application process itself (by default, KIO-slaves are spawned using klauncher/kdeinit). This option is useful if the KIO-slave should run in the same environment as the application; for example this is the case for non-Plasma systems that do not have klauncher installed.
Look and feel
The following environment variables influence the look and feel of the user interface.
KDE_PLASMA_COMPONENTS_PLATFORM
Defines what platform is assumed to look for QML components, default is "desktop", at the moment the other supported is "touch". It is possible to influence the behavior of standard QML based widgets on different devices by either setting this variable or writing in the kdeclarativerc config file.
PLASMA_CUSTOM_PREFIX_PATHS
Defines what fallback chain of paths to use to resolve relative paths in Plasma packages. a common usage is:
To say that the plasma widget must behave as a full application targeted to tablet devices.
QT_QUICK_CONTROLS_MOBILE
Make the Kirigami applications emulate running on a mobile device, such as a mobile phone
KDE_KIRIGAMI_TABLET_MODE
Make the Kirigami applications emulate running on a tablet device, such as a tablet or a transformable laptop, touch input will be preferred to mouse/keyboard input
freedesktop.org Compliance
The following environment variables are defined in the freedesktop.org base directory specification and are supported by all XDG-compliant environments and applications, such as KDE.
XDG_DATA_HOME
Defines the base directory relative to which user specific data files should be stored. If $XDG_DATA_HOME is either not set or empty, a default equal to $HOME/.local/share is used.
XDG_CONFIG_HOME
Defines the base directory relative to which user specific configuration files should be stored. If $XDG_CONFIG_HOME is either not set or empty, a default equal to $HOME/.config is used.
XDG_DATA_DIRS
Defines the preference-ordered set of base directories to search for data files in addition to the $XDG_DATA_HOME base directory. The directories in $XDG_DATA_DIRS should be separated with a colon ':'. If $XDG_DATA_DIRS is either not set or empty, a value equal to /usr/local/share/:/usr/share/ is used.
XDG_CONFIG_DIRS
Defines the preference-ordered set of base directories to search for configuration files in addition to the $XDG_CONFIG_HOME base directory. The directories in $XDG_CONFIG_DIRS should be separated with a colon ':'. If $XDG_CONFIG_DIRS is either not set or empty, a value equal to /etc/xdg is used.
The attributes which can be set are grouped by function in three tabs:
Size & Position</translate>
<translate>
Arrangement & Access</translate>
<translate>
Appearance & Fixes
Each attribute has a set of parameters which determines its disposition.
</translate><translate>
Parameters
Each attribute, minimally, accepts one of the following parameters. Additional, attribute-specific arguments are listed within each attribute definition.
Do Not Affect
Ensure a subsequent rule, which matches the window, does not affect the attribute.
Apply Initially
Start the window with the attribute and allow it to be changed at run-time.
Remember
Use the attribute setting as defined in the rule and if changed at run-time, save and use the new value instead.
Force
The setting cannot be changed at run-time.
Apply Now, Force Temporarily
Apply/Force the setting once and unset the attribute.
The difference between the two is at run-time, Apply Now allows the attribute to be changed and Force Temporarily prohibits it to be altered until all affected windows exit.
Warning
For Apply Now, if the rule has no other attributes set, the rule is deleted after evaluation whereas Force Temporarily, the rule is deleted after the last affected window terminates.
</translate><translate>
Attributes
Tip
The Detect Window Properties button back-fills attribute-specific values - for more information see Window Matching. For example the height and width values of the Size attribute is set to the height and width of the detected window.
Tip
Yes/No arguments are used to toggle on or off attributes. Leniency with grammar helps one understand how a setting will be processed. For example, the attribute Skip taskbar, when set to No means do not skip the taskbar. In other words, show the window in the taskbar.
</translate><translate>
Size & Position
Position
Position the window's upper left corner at the specified x,y coordinate.
Tip
KWin's origin, (0,0), is the upper left of the desktop.
These attributes are used to toggle the maximum horizontal/minimum horizontal/full-screen window attribute.
Desktop
Place the window on the specified (Virtual) Desktop. Use All Desktops to place the window on all Virtual Desktops.
Minimized, Shaded
Toggle the Minimize and Shading window attribute. For example, a window can be started Minimized or if it is started Minimized, it can be forced to not.
Tip
Maximized attribute is emulated by using both Maximized horizontally and Maximized vertically or Initial placement with the Maximizing argument.
Initial placement
Override the global window placement strategy with one of the following:</translate>
<translate>
Default - use the global window placement strategy.</translate>
<translate>
No Placement - top-left corner.</translate>
<translate>
Smart - place where no other window exists.</translate>
<translate>
Maximizing - start the window maximized.</translate>
<translate>
Cascade - staircase-by-title.</translate>
<translate>
Centered - center of the desktop.</translate>
<translate>
Random</translate>
<translate>
Top-Left Corner</translate>
<translate>
Under Mouse</translate>
<translate>
On Main Window - restrict placement of a child window to the boundaries of the parent window.
Ignore requested geometry
Toggle whether to accept or ignore the window's requested geometry position. To avoid conflicts between the default placement strategy and the window's request, the placement strategy is ignored when the window's request is accepted.
Minimum size, Maximum size
The minimum and maximum size allowed for the window.
Obey geometry restrictions
Toggle whether to adhere to the window's requested aspect ratio or base increment.
In order to understand this attribute, some background is required. Briefly, windows must request from the Window Manager, a base increment: the minimum number of height X width pixels per re-size request. Typically, it's 1x1. Other windows though, for example terminal emulators or editors, use fixed-fonts and request their base-increment according to the size of one character.
</translate><translate>
Arrangement & Access
Keep above, Keep below
Toggle whether to keep the window above/below all others.
Autogroup with identical
Toggle the grouping (commonly known as tabbing) of windows.
Autogroup in foreground
Toggle whether to make the window active when it is added to the current Autogroup.
Autogroup by ID
Create a group via a user-defined ID. More than one rule can share the same ID to allow for seemingly unrelated windows to be grouped.
Tiling
Override the default window behavior to either Tiled or Floating.
Skip taskbar
Toggle whether to display the window in the taskbar.
Skip pager
Toggle whether to display the window in pager:
Skip switcher
Toggle whether to display the window in the ALT+TAB list.
Shortcut
Assign a shortcut to the window. When Edit... is clicked, additional instructions are presented.
</translate><translate>
Appearance & Fixes
No titlebar and frame
Toggle whether to display the titlebar and frame around the window.
Active/Inactive opacity
When the window is active/inactive, set its opacity to the percentage specified.
Tip
Active/Inactive opacity can only be affected when Desktop Effects are enabled.
Moving/resizing
Deprecated as of >4.8
Focus stealing prevention
When a window wants focus, control on a scale (from None to Extreme) whether to honor the request and place above all other windows, or ignore its request (potentially leaving the window behind other windows):</translate>
<translate>
None - Always grant focus to the window.</translate>
<translate>
Low</translate>
<translate>
Normal</translate>
<translate>
High</translate>
<translate>
Extreme - The window's focus request is denied. Focus is only granted by explicitly requesting via the mousing.
Tip
See Accept focus to make a window read-only - not accept any keyboard input.
Accept focus
Toggle whether the window accepts keyboard input. Make the window read-only.
Ignore global shortcuts
Toggle whether to ignore global shortcuts (as defined by System Settings -> Shortcuts and Gestures -> Global Shortcuts or by running kcmshell4 keys in konsole) while the window is active.
Closeable
Toggle whether to display the Close button on the title bar.
Tip
A terminal window may still be closed by the end user by ending the shell session however using Accept focus to disable keyboard input will make it more difficult to close the window.
Window type
Change the window to another type and inherit the characteristics of that window:</translate>
<translate>
Normal Window</translate>
<translate>
Dialog Window</translate>
<translate>
Utility Window</translate>
<translate>
Dock (panel)</translate>
<translate>
Toolbar</translate>
<translate>
Torn-Off Menu</translate>
<translate>
Splash Screen</translate>
<translate>
Desktop</translate>
<translate>
Standalone Menubar
Warning
Use with care because unwanted results may be introduced. For example, a Splash Screen is a automatically closed by KWin when clicked.
Block compositing
Toggle whether to disable compositing while the window exists. If compositing is enabled and the rule specifies to disable compositing, while any matching window exists, compositing will be disabled. Compositing is re-enabled when the last matching window terminates.
When you build documents that are more complex than a business letter, such as a book, newsletter, or resumé, the document is often broken down into sections. Each of these sections may have a similar appearance.
You can use text styles to easily keep a consistent look throughout your document.
Tip
If you are familiar with Styles in Microsoft® Word, KWord text styles perform similar functions in KWord. You can skip to the next section.
Lets look at a section of a document and try to identify appropriate text styles:
In this example, you can see several different text styles at work:
The title is centered, underlined and in bold text
The section title (Income) is boldfaced.
The caption for figure 1-1 is smaller than normal text and boldface.
The rest of the document is in a standard font.
We do not need to know exactly how we want the text and paragraphs of these sections to look yet. All we need to do is identify these sections of text as “Section Titles”, “Normal Text”, etc.
Once we have finished the document, you can change the look of all the text labeled “Section Title” all at once.
This will ensure that all section titles appear consistent throughout your document.
KWord has 8 predefined text styles.
Note
Text styles should not be confused with table styles or frame styles.
Text styles determine how the characters and paragraphs appear. Framestyles, control the borders and background color for the frame. Tablestyles determine how tables appear in the finished document.
Changing the text style of text
To change the text style of text, first, select the text you want the changes to apply to.
You can now change the text style in one of two ways:
Select Format->Style from the menubar. This will show the list of available text styles, select the text style from the list.
You can select the text style using the combo box on the Paragraph toolbar. This combo box looks like this:
Simply select the new text style from the list provided.
Tip
You can change the text style of an entire paragraph. Simply place the cursor in a paragraph (making sure that no characters are selected) and select a new style. Every character in the paragraph will be converted to the new text style.
Creating a text style
If you plan on using text styles extensively in a large document, you will probably want to create new text styles specific for your needs.
Creating a new text style based on a current text style
To create a new text style select Format->Style Manager... from the menubar.
This will bring up a dialog box.
In the list box on the left, is a list of all the currently defined text styles. Select the current style that most closely resembles the new text style. Click on that text style once with the left mouse button.
Click the New button.
KWord will create a new text style based on the selected text style. It will assign it a temporary name [New Style Template (8)].
Type a descriptive name in the box labeled Name. This will be the name of the text style.
The rest of the dialog is used to make the alterations needed to create the new text style.
The preview box will show you what your new text style will look like.
Click Cancel to abort the creation of the text style.
Changing the Font Size, Type etc.
The tab labeled Font is used to set the font type, font style, formatting, etc.
This tab functions identically to the change font dialog used to edit general text. Changes to this tab affect to all text formated with this text style.
Changing Paragraph Spacing and Indents
The tab labeled Indents & Spacing is used to adjust spacing between lines, and paragraph indentation.
This tab functions identically to the same tab in the Format Paragraph dialog. Changes to this tab affect to all text formated with this text style.
Changing Paragraph Alignment
The tab labeled General Layout determines how the text is placed within the line. With other applications, you may have referred to this as Alignment, or Justification.
This tab functions identically to the same tab in the Format Paragraph dialog. Changes to this tab affect to all text formated with this text style.
Changing Paragraph Borders
The tab labeled Decorations is used to define and configure graphical borders around your paragraphs.
This tab functions identically to the same tab in the Format Paragraph dialog. Changes to this tab affect to all text formated with this text style.
Changing Paragraph Numbering/Bullets
The tab labeled Bullets/Numbers is used to make all text formatted with this text style into a list.
This tab functions identically to the same tab in the Format Paragraph dialog. For more information see the section entitled Lists.
Changing Tab-stops.
Using the tab labeled Tabulators it is possible to define tab stops for the new text style.
This tab functions identically to the same tab in the Format Paragraph dialog. For more information see the section entitled Using Tab Stops.
Creating a text style based on formatted text
If you have text that is already formatted correctly for a new text style:
1. Select the text and select Format->Create Style From Selection... from the menubar.
2. KWord will prompt you for a name for your text style. Enter the name in the text box.
3. Click the OK button.
A new text style is created with the font, paragraph spacing, paragraph alignment, borders and shadows of the currently selected text.
Note
Future formatting changes to this selected text will not automatically change the text style you just created. If you want the changes to become part of the text style, you must edit the text style.
Deleting a text style
Deleting an unneeded text style is easy.
Select Format->Style Manager... from the menubar.
This will bring up a dialog box.
From the list of available text styles, select the style you want to delete by clicking once with the left mouse button.
Warning
Be sure you have selected the correct text style before you click Delete. KWord will not ask for confirmation, so you will not be given an opportunity to back out.
Click Delete.
The text style is now deleted.
Editing a text style
The true power of text styles, is the ability to edit the formatting options of that text style after the text style is defined. By changing the formatting of the text style, KWord will immediately change every paragraph with that text style, and maintain a consistent look to the document.
KWord uses the same interfaces to edit the formatting options of a text style, that it used to create the text style in the first place.
To edit a current text style:
Select Format->Style Manager... from the menubar.
This will bring up a dialog box.
Select the text style you want to edit from the list on the left by clicking once with the left mouse button. Now you can make the changes you want to this text style.
The preview box will show you what your new text style will look like.
Warning
Do not change the name of your text style.
Doing so will delete your current text style from the list (and create a new one with the new name).
Any paragraphs which were originally formatted with this text style, will revert to “Standard”.
Click Cancel to abort all changes to this text style.
Import a text style
KWord has the ability to import a text style from one KWord document and include it in the list of text styles in another KWord document.
To import a text style, select Format->Import Style... from the menubar.
This will bring up an empty dialog box.
Click on the Load button. This will bring up a file selection dialog. Choose the KWord file you want to import the text style from and click OK.
The dialog box will now fill with all available text text styles available for import.
Tip
If KWord encounters a duplicate text style name in the selected file, it will append a number to the end of the text style name to identify the imported style.
As an example, if you import the Standard text style from another KWord file, KWord will change the text style name to Standard-1.
Select all the text style you want to import. Then click OK.
Please understand that the software and documentation provided here is mostly not written by the KMail team, so they cannot provide support for it. In fact they often cannot even test these applications - use at your own risk. Some of these utilities are extremely old
</translate><translate>
Mail Import Tools
You should first try to import your old mail using KMail's File -> Import Messages... menu.
If you need to import mails and directory structure from Outlook, you can use Thunderbird (Windows version) to import Outlook data, then you can use the Kmail import from Thunderbird and point the directory where theThunderbird data has been saved.
If that doesn't work, the following programs might be helpful:
readpst, a utility for converting Microsoft Outlook mail files (personal folders) to standard UNIX mbox format, Added 2005-01-24
Outport, a program for exporting data from Outlook to Evolution, from which KMail can import messages, Added 2004-07-23
mozilla2kmail.pl, a simple bash script to convert mail from Mozilla to KMail, Added 2004-06-12
Sylpheed2Maildir, a simple bash script to convert a sylpheed mail box directory to maildir format. Added 2003-05-27
Eudora2Unix, a collection of Python scripts that together convert Qualcomm Eudora mail folders to mail directories for unix or Linux. Updated 2003-03-31
mh2maildir transformator, a small shellscript for transforming mails from MH format to Maildir format. Added 2002-11-06
ol2mbox, Outlook Express to mbox converter (not maintained anymore). Added 2002-02-09
tb2kmail, a tool to export mail from The Bat to KMail. Added 2002-01-07
xfmail2mbox.sh, a shell script by Jörg Reinhardt <joeyhh(at)gmx.de> to convert xfmail folders to mbox (which is used by KMail). Requires awk. Updated 2001-02-12
</translate><translate>
Mail Export Tools
MHonArc, a mail-to-HTML converter. Added 2003-03-31
tKMailHonArc, a frontend for MHonArc to convert KMail email folders (mbox, maildir) to HTML. Added 2003-03-31
mbox2pdf, perl script for converting an email mbox to a hyperlinked pdf. Uses hypermail-2.2.0 and LaTeX. Added 2011-08-11.
</translate><translate>
Addressbook Import Tools
lookout, a small Python script that enables you to convert your Outlook 97 addressbook data to KAB. Added 2002-07-31
pineToKMail, a perl script to convert a pine addressbook to a KMail addressbook.
Mail client test file v0.5 (55kB): This mbox file triggers some bugs and has very long field values to trigger buffer overflows. You may use this to find possible security problems - not only in KMail, but in any mail client that supports mbox folders. Just copy this file to ~/Mail/ and start KMail.
KMail and SpamOracle Mini HOWTO This is a description of how to configure KMail to filter spam using SpamOracle (Bayesian self-learning algorithm filtering for English and non-English messages) on IMAP and POP accounts without using procmail, Updated 2004-01-19
Startup script for SpamAssassin (Christian Banik <christian at buschaos.de>, 2002-07-11) This is a startup script for SpamAssassin in SuSE Linux 8.0. You can install SpamAssassin from the RPMs. You have to remove the old startup script /etc/rc.d/init.d/spamassassin and copy this script to /etc/init.d/spamd. cd to /etc/init.d and call insserv spamd. On the next bootup, SpamAssassin will be activated.
</translate><translate>
Other Tools and Patches
Lyris Filter, a script to repair broken IDs and In-Reply-To headers produced by the commercial listserve product Lyris, Updated 2005-01-16
KMail power tools to save and remove attachments from emails, Added 2009-09-23
Script to filter by header (by Marc Mutz)
This perl script can be used with a pipe through filter action after a remove header -> Reply-To action. It's useful for people who want to change certain headers based on the content of other headers. This is something KMail filters currently do not support, but is useful here and there.
This particular script replaces (if used in conjunction with the remove header -> Reply-To action) the Reply-To header of mails sent from a Debian-style bugtracking system with <bugno>@bugs.kde.org. This is useful if bug reports are delivered to developers through a mailinglist that overwrites the Reply-To header with its post address:
uniqmail, a small bash/sed script that removes mail duplicates from mbox files.
Using KMail and Maildir (by Georg Lehner, jorge(at)toa.magma.com.ni):
qmail delivers (with standard Maildir setup) Mail into the subdirectories of ~/Maildir/, that means, personal mail never goes to a "public" directory (e.g. /var/spool/mail/) as is the case with traditional mail transport agents.
qmail provides a command: maildir2mbox, to re-"deliver" mail from ~/Maildir/ to this namely public directory, we wrap this command into a script: qmail2kmail.
KMail is set up to read mail from the "traditional" place, but qmail2kmail is run before checking mail via the precommand directive in the configuration, so it finds all incoming mail where it is supposed to find it in a traditional setup.
Setup:
My qmail binaries reside in /var/qmail/bin, which is most probably not the "right" place to put them, so fix this on your system and in the qmail2kmail script.
I installed qmail2kmail in /usr/local/bin, I suppose it should be world executable, or at least by the qmail-groups, if you are concerned about security you should know how to figure out and rewrite these instructions.
In the KMail configuration you should have something similar to:
[Account 1]
  Folder=inbox
  Name=Mi correo en TOA
  Type=local
  check-exclude=false
  check-interval=0
  precommand=/usr/local/bin/qmail2kmail
and everything should work fine. Here comes qmail2kmail:
#!/bin/sh
  #
  # LEG06012001
  # Convert Mails in Maildir format in ~/Maildir/ to mbox format in ~/Mail/inbox
  #   as required by Kmail.

MAILDIR=~/Maildir/
  MAILTMP=tmpdir
  MAIL=/var/mail/$USER
  export MAILDIR MAILTMP MAIL

/var/qmail/bin/maildir2mbox
Note that "tmpdir" is a scratchfile and will be overwritten, so if you happen to have a file tmpdir in the place where maildir2mbox wants to create it, you will get in trouble.
A solution would be to use the tempfile command, but it happens to not exist on every Unix, so a local solution will have to be found if necessary. If qmail2kmail doesn't run in the $USER's homedirectory (which I did not check out) I would strongly recommend to use at least:
MAILTMP=$USER/.qmailtemp
Note that I also successfully installed qmail-pop3d and fetched mail via POP3 from the local host, but it is slower and clumsier.
</translate>
Please use the discussion section of this page to voice your opinion on this.
Autocorrection
Auto correction is a system for correcting common typing errors, converting abbreviations to their full spelling and adjusting capitalization. As you could guess from its name, this all occurs automatically, while you are editing your document.
Enabling/Disabling Autocorrection
To toggle autocorrection on, select Tools->Autocorrection->Enable Autocorrection from the menubar. When enabled, autocorrection makes changes to your document as you type. You can determine which changes to make by configuring autocorrection.
To toggle autocorrection off, select Tools->Autocorrection->Disable Autocorrection from the menubar. When disabled, autocorrection changes are not made. You can, however, apply autocorrection manually.
Configuring Autocorrection Options
To adjust the options for autocorrection, select Settings->Configure Autocorrection... from the menubar.
A dialog window appears to help you set your options.
Simple Autocorrection
Convert first letter of a sentence automatically to uppercase
When selected, KWord will automatically capitalize the first letter after a period. You can tell KWord when not to alter capitalization in certain instances (ie “Sr.” or “Jr.”. For more details, see the section entitled Autocorrection Exceptions.
Convert two uppercase letters to one uppercase and one lowercase letter
When selected, KWord will automatically convert a double capital letter (a common typographical error), into a single capital letter. You can tell KWord when not to alter capitalization in certain instances. For more details, see the section entitled Autocorrection Exceptions.
Autoformat URLs
When selected, KWord will scan text for patterns which suggest a certain section of text is a URL and automatically creates a link.
For more details on links, see the section entitled Document Links.
Suppress double spaces
When checked, KWord will ignore the second space typed. This prevents users from adding double spaces between words or sentences.
Remove spaces at the beginning and end of paragraphs
When selected, KWord will automatically remove spaces at the beginning and/or the end of a line of text.
Automatically do bold and underline formatting
When selected, KWord will look for words surrounded by asterisks ( * ). It will remove the asterisks and change the font of all words in between the two asterisks to bold face.
KWord will also look for words surrounded by underscores ( _ ). It will remove the underscores and underline all words in between the two underscores.
Replace 1/2... with ½...
When selected, KWord will automatically change 1/2, 1/3 and 3/4 to their single character equivalents.
Use autonumbering for numbered paragraphs
If you start a paragraph with a number and a symbol ( 1) for example). KWord will automatically convert that paragraph to a numbered paragraph. All future paragraphs will be consecutively numbered.
Replace 1st with 1^st
When selected, KWord will automatically change 1st to 1st.
Capitalize name of days
Automatically capitalize the days of the week (Sunday, Monday, Tuesday, etc...).
Use list-formatting for bulleted paragraphs
When selected, KWord will look for lines that begin with - , and automatically convert the paragraph style to a bulleted list. The bullet is selected with the left button below this option.
Custom Quotes
Select the tab labeled Custom Quotes
Replace double quotes with typographical quotes
When selected, this option will replace the standard keyboard double quotes, with typographical quotation marks. If you want to change the quotation character, click on one of the buttons. Clicking on Default, restores the default paragraph marks.
Replace single quotes with typographical quotes
When selected, this option will replace the standard keyboard single quotes, with typographical quotation marks. If you want to change the quotation character, click on one of the buttons. Clicking on Default, restores the default paragraph marks.
Advanced Autocorrection
To switch to the Advanced Autocorrection, click on the tab labeled Advanced Autocorrection.
This allows you to automatically have KWord replace one string of text with another. This can be useful for special symbols, commonly used abbreviations that you want spelled out, or abbreviations.
KWord uses different autocorrection strings depending on the language. Set the correct language using the combo box labeled Replacements and exceptions for language:.
The check box labeled Enable word replacement is used to toggle on and off the autoreplacement features of KWord. If there is no mark in the check box, then KWord will not perform any autoreplacements from the list in this dialog.
If there is a mark in the check box labeled Replace text with format KWord will not only change the text when it finds a match, but it will change the formatting of the new text. If there is no mark in this check box, then KWord uses the same formatting options for the replaced text as it found in the search text. For more information on setting the format options for replacement text, see the section on Changing the format of the autocorrection string.
Adding an autocorrection string
To add an autocorrection string, simply type the text you want KWord to check for in the text box labeled Find, then enter the text you want KWord to substitute in the text box labeled Replace.
Note
If you want to insert symbols or special characters not available on your keyboard, you can click the buttons with three periods on them and select a special character from the table provided.
When these are entered, click Add. Your text strings are now added to the table.
Editing an autocorrection string
Changing the text you want to find.
KWord does not allow you to change the text to search for. This is to prevent disastrous mistakes.
Instead, you must delete the current autocorrection rule and add a new text string with the corrected text to find.
Changing the text you want to replace.
Begin by clicking once on the string you want to edit. It will be highlighted and the find and replace text will be listed in the text boxes above. You can alter the replacement text. When you are done, simply select Modify.
Deleting an autocorrection string.
Simply click on the string you want to delete. Now click the Remove button. The string is removed.
Warning
Be aware that KWord does not give you a chance to back out once you have deleted a string. Be sure you have selected the correct string before you click the Remove button.
Changing the format of the autocorrection string.
Note
Currently, you must create the autocorrection string before you can format it.
Once the autocorrection string has been created, simply click on it once with the left mouse button.
Now click on the Change Format... button. A small dialog will appear:
You can use this dialog to select the format of the replaced text.
The left column consists of 13 check boxes. If there is a mark in the check box, then KWord will change any replaced text to match the property selected. If no mark is in the check box, KWord does not consider that property when replacing text.
Family:
Use this combo box to select the font family you want your replacement text to use.
Size:
Use this spin box to set the font size you want KWord to use for your replaced text.
Color: and Background Color:
Clicking on either of these two buttons allows you to select the font color and/or background color respectively, you want KWord to use. For more information on selecting a color, see the section on Selecting Colors from the Color Dialog.
Bold: and Italic:
Use these Yes/No radio boxes to determine whether you want KWord to change the fonts to boldface or italicized fonts.
Strikeout:
You can select None, Single, Double or Simple Bold to use for the replacement text.
Underline
You can select None, Single, Double, Simple Bold or Wave to use for the replacement text.
Vertical alignment:
You can select Normal, Subscript or Superscript to determine what font alignment you want KWord to use.
Shadow: and Word by word:
Use these Yes/No radio boxes to determine whether you want KWord to use shadow text and/or word by word underlining and strikethrough in the replacement text.
Capitalization:
You can select Normal, Uppercase, Lowercase, or Small Caps to determine what capitalization to use for the replacement text.
Language:
You can select the language of the text you will use to replace the found text.
Once you have selected your options, click OK to accept your text options.
Click Cancel to ignore all changes.
Click Reset to restore the options dialog box to the initial values prior to making any changes.
Click Clear to remove all marks from the checked options.
Autocorrection Exceptions
There are instances where KWord will make autocorrection changes that are inappropriate. You can use the fourth tab of this dialog to define exceptions to the rules previously discussed.
The dialog for exceptions is shown below:
To prevent KWord from deciding an abbreviation or other text is the end of a sentence, simply enter the text fragment in the text box below Do not treat as the end of a sentence:. Then click Add.
As an example: Adding “Jr.” to this dialog prevents
“Robert Jones Jr. is a friend of the family.”
from being changed to:
“Robert Jones Jr. Is a friend of the family.”
To remove an erroneous entry, simply click once on the wrong entry with the left mouse button and click on the Remove button.
The second set of boxes performs a similar function to the first except text entered in these boxes will allow two capital letters in a word if it is entered in this text box.
Simply enter the word in the text box below Accept two uppercase letters in:. Then click Add.
As an example: Adding “CD” to this dialog prevents
“CD”
from being changed to:
“Cd”
To remove an erroneous entry, simply click once on the wrong entry with the left mouse button and click on the Remove button.
Manually applying autocorrection
If autocorrection is turned off in your document, you can manually enable autocorrection.
To manually apply autocorrection, first configure your options by using the autocorrection dialogs.
Then select Tools->Autocorrection->Apply Autocorrection from the menubar.
KWord will start at the beginning of the document and apply all selected autocorrection options to the entire document.
When KWord is finished, it will return you to your document for further editing.
Please use the discussion section of this page to voice your opinion on this.
Mail Merge
Introduction
KWord has the ability to use data from an outside database (or internal database) to personalize your documents for individual members/clients/friends.
This section of the manual will cover all aspects of creating, merging and printing documents that are specific to KWord. This manual will not cover:
Creating an external database.
Security issues regarding databases.
Detailed instructions on SQL. It is assumed you have some knowledge regarding SQL if you are using a SQL database for your data source.
Accessing the network or Internet.
For answers to these questions, other documentation is available on the Internet that is specific to the software you have chosen.
You can retreive your mail-merge data from a number of sources:
If you want to use an outside SQL database, click here for instructions.
If you want to use a KSpread file for your data, click here.
If you want use information from your KDE Address Book, click here.
If you want to use the internal database of KWord, click here.
Using an external SQL database as a data source
KWord has the ability to use several of the most popular open source databases as a source of data for personalized documents.
Note
In order to access an outside database using SQL, your machine needs to have the appropriate database module compiled into your copy of QT.
To begin, select Tools->Configure Mail Merge... from the menubar. A dialog box will appear.
Click on Open Existing.... Another small dialog will appear.
Select QT-SQL Source and click on OK. A new dialog box will appear.
Enter the URL or IP address of the computer that holds the database in the text box labeled Hostname:.
Select the driver named QMYSQL3 from the combo box labeled Driver:.
Enter the database name you were provided in the text box labeled Database name: and a user name in the text box labeled Username:.
If the database access is through a port other than the default port enter that port number in the text box labeled Port:.
Tip
If you are going to be using this database at other times, you can click on the button labeled Keep settings.... KWord will ask for a descriptive name.
When you want to restore these settings on future sessions, simply select the descriptive name from the combo box in the upper left of the dialog box.
When all information is correct, click OK. KWord will ask you for a password to that database. Enter the password in the text box, and click OK.
KWord will now ask if you want to replace your current data source with the source you have selected. Click Yes.
You are now connected to the database. Now you need to select the data from the database. This dialog box has re-appeared.
Click on Edit Current.... Another dialog will appear.
This dialog is designed to help you enter and test your database query. The dialog is divided into three sections: Database information, Query information and Query line.
The database information section is labeled Information and consists of two combo boxes. The left combo box (Available tables:) gives you a list of all available tables within the current database. Select the desired table from the list by clicking on the table name with the left mouse button. A list of all available fields from that table will appear in the right combo box.
The query line is a text box located near the bottom of the dialog labeled Query:. Simply type your SQL query into this text box and click Execute. KWord will query the database and return the specified query in tabular format in the Query Result box. You can alter, or edit your query on the query line and each time you click Execute, the new query results will appear.
Note
KWord does not limit your query strings. They can be simple and straight forward:
select * from Clients
Or complex multitable queries:
select Clients.FirstName, Clients.LastName, Clients.address, data.Birthday, data.EyeColour from eMail, data where data.FirstName=Clients.FirstName and data.LastName=Clients.LastName
Clicking Setup, will allow you to log into a different database.
When you have the correct query in the Query: text box, click OK to select that query.
This will return you to the mail merge main dialog box.
Click Close.
Now that you have selected your data query, it is time to insert the merge fields in the document. Click here to continue.
Using a KSpread file as a data source
KWord can use data in a KSpread document for personalizing documents.
Note
In order to use this data, you only need to know the location of the KSpread document and the worksheet (page) number the data is located on.
Using a KSpread document to create personalized documents is a three step process:
To begin, select Tools->Configure Mail Merge... from the menubar. A dialog box will appear.
Click on Open Existing.... Another small dialog will appear.
Select KSpread Table Source from the drop down box labeled Available sources: and click on OK. A new dialog box will appear.
Enter the URL or file name of the KSpread document in the text box labeled URL:. You can type the file name directly into the text box, or click on the button with the blue folder and use the file dialog to select the KSpread file.
Once you have selected the KSpread document, the drop down box labeled Page number: will show you all the available pages or worksheets within the KSpread document. Select the page (or worksheet) that contains the mail merge data.
When all information is correct, click OK. KWord will ask you if you want to replace the current data source. Click Yes to continue.
You will again see the mail merge main dialog box.
Click Close.
Now that you have selected your data query, it is time to insert the merge fields in the document. Click here to continue.
Using your KDE Address book as a data source
KWord can use data in your address book for personalizing documents.
Using address book entries to create personalized documents is a three step process:
To begin, select Tools->Configure Mail Merge... from the menubar. A dialog box will appear.
Click on Open Existing.... Another small dialog will appear.
Select KDE Addressbook Plugin from the drop down box labeled Available sources: and click on OK. A new dialog box will appear.
The dialog consists of two listboxes labeled Address Book and Selected Addresses. By moving entries from your Address book to the Selected Addresses listbox, you will be including those entries in your merge document.
To add an entry, select the entry in the left listbox by clicking with the left mouse button. Then click Add.
To remove an entry, select the entry in the right listbox by clicking with the left mouse button. Then click Remove.
Tip
You can locate entries quickly by entering the first 2-3 letters of an entries name in the textbox labeled Filter on:
Note
You can load the full address book application by clicking the Address Book... button.
You can also save a distribution list using the Save as Distribution List... button. For more information on distribution lists, see the documentation on the KDE Addressbook.
When you have selected all the entries and distribution lists you want, click OK. KWord will ask you if you want to replace the current data source. Click Yes to continue.
You will again see the mail merge main dialog box.
Click Close.
Now that you have selected your data query, it is time to insert the merge fields in the document. Click here to continue.
Using an internal representation of tabular data to create documents
For small sets of data, or when you do not currently have a database containing the merge data, KWord offers you the ability to enter the data directly into KWord in tabular form. This internal data structure can then be used to create documents with this data inserted at predefined locations.
Using an internal representation of the data to create personalized documents is a three step process:
After the data has been created once, you can go back and change the data as needed, and produce another set of personalized documents from that data.
Enter the data
To begin, select Tools->Configure Mail Merge... from the menubar. A dialog box will appear.
Click on Create New.... Another small dialog will appear.
There is currently only one option in this dialog box, Internal Storage. Click on OK. A new dialog box will appear.
This is a record card for creating your tabular data file. Along the top is a toolbar and the main part of the dialog is space to hold your entry/data pairs.
Defining the structure of your data table
First, we need to add one or more entries (merge fields). This is accomplished by clicking the Add entry button (third button from the right along the toolbar). A small dialog box will appear. Type a descriptive name of your entry in the dialog box (Name, Address, Balance Due, etc....).
Note
This is for the name of the entry, not the data that is contained within the entry.
Click OK, and the entry is added to the card.
Repeat this process until all needed entries are visible on this first card.
If you want to delete an entry, simply click once on the entry name with the left mouse button and select Remove entry.
Warning
Be very sure you have selected the correct entry name. Once you tell KWord to delete the entry, the entry and all of the data within those entries will be deleted immediately. You will not be given the option to stop or reverse the process once it is begun.
Entering the data into the table
Now that the structure of your data is defined, you can enter the data into your entries.
At the top of the dialog box, are 4 buttons surrounding a spin box. The spin box gives the current record number. All records are numbered in the order they are added starting with number 1. You can use the spin box to go directly to the desired record or you can use the arrows to graphically move through the list of records.
Button
Action
Move directly to record one
Move back one record
Move forward one record
Move to the last record in the dataset
To enter the data, simply place the cursor in the text box to the right of the entry name, and type in the data. (KWord uses “No Value” as the default value for all entries in newly created records.)
To add a record, click the button.
To delete a record, click the button.
Warning
Be careful when you are deleting records. Once deleted, the record cannot be retrieved.
Continue to enter all data until your dataset is complete.
After your dataset is complete, click OK to save the changes to your dataset. This will bring up the mail merge main dialog:
Click Close. Now it is time to insert the merge fields in the document.
Insert merge fields in document
Now that KWord knows the entries available in your data source, you can insert the merge fields into your document.
A merge field is a placeholder within the document. This placeholder will be replaced in each personalized document with the value of the entry for that individual record.
Insert a merge field
To insert a merge field, place the cursor at the desired place in the document. Select Insert->Variable->Mail Merge... from the menubar. A list of available entries will appear. Select the desired entry, and click OK.
The merge field is inserted at the current cursor location. The merge field is surrounded by brackets.
You can place the cursor in a new location in the document and insert another placeholder. When you are done inserting placeholders, you can proceed to printing your document.
Delete a merge field
You can delete a merge field two ways.
Place the cursor at the end of the merge field, and press the Backspace key.
Place the cursor at the beginning of the merge field, and press the Delete key.
Previewing and printing the merged document
Once you have inserted all the merge fields you want, you are ready to preview and print the personalized documents.
Preview your documents before printing
To preview your document select Tools->Configure Mail Merge... from the menubar. A dialog box will appear.
Click Print Preview.... You will be able to see the final output of your personalized documents prior to printing.
Print your personalized documents.
You print personalized documents using the same methods that you do to print traditional documents. For more information on printing see the section on [[Kword/Mnual/PrintDoc|Printing a Document].
Symptom: You have a problem with KDE-PIM and would like to know whether others have reported and solved the problem. You wonder how to read the archives of the kdepim-users mailing list.
Symptom: You want to store mails in a special folder. Maybe you are using an IMAP server and want to store your mails on the server, not in the client.
Solution: In Kmail, choose Settings -> Configure KMail -> Identities -> (Choose an identity) -> Modify -> Advanced -> Sent-mail-folder
Store trash mails in a special folder
Symptom: You want to store mails in a special folder. Maybe you are using an IMAP server and want Trashed mails to be stored on the server, not in the client.
In some versions you will need Settings -> Configure KMail -> Accounts -> Receiving tab -> (Choose an account) -> Modify -> IMAP settings tab -> Trash folder (or Wastebin folder, depending on your distro)
Store encrypted mails as unencrypted
Symptom: You exchange encrypted mail with a friend, but would like to store it unencrypted, once you have opened the message.
Solution: To store emails that have been decrypted once in unencrypted format henceforth, add this to your kmail2rc configuration file, in the [Reader] section:
store-displayed-messages-unencrypted=true
This may only work with SMIME but implementation for OpenPgP is being worked on.
Spam filtering on an IMAP server
Symptom: You intend moving on to reading your mail from an IMAP server, and wonder how filtering and spam handling will occur?
Solution: The machine that already has your mail can become your imap server. You will need to configure a server application. Dovecot is one such, and the guidance on the project web pages make it easy to set up. That still leaves you with the problem of filtering, as it makes sense to do it on the server (when you point kmail at the server you will see the folders that you have created on the server). Again there are options, but one of the best known is procmail. Again there is plenty of information on the Internet on how to set this up. You give it a set of "recipes" - here's an example:
If you have maildir folders, each recipe must end with a "/". If your folders are mbox, just omit the "/"
If you have been using bogofilter with kmail you will already have a wordlist. This can be used at server level, too, so you won't have to start training from scratch. The trick is to set this before the procmail recipes:
Note that it is going to use a mailbox for spam and one for unsure - I add a 'a-' to the name to ensure that they are easily seen, at the top of the list.
Finally, to improve performance, run the following command occasionally on saved spam and Unsures:
This is not a complete guide to setting up a server, but notes on how to set up the server to work as you expect in KMail.
</translate><translate>
Get more screen space in KMail
Symptom: You are using KMail under KDE 4.2 or later on a netbook, and find that the new Aggregation display leaves you little screen space
Solution: In 4.2 you have a new set of icons next to the quick search bar. You can use these to choose a different theme and a different aggregation. If you want to change the look so that a mail uses a single row instead of two rows, go to - the tooltip says Select View Appearance (Theme) - and change the theme to Classic. If you want to disable grouping by date, change the aggregation to Standard Mailing List. Now your KMail will look exactly like it did in earlier versions.
In 4.4 and 4.5 these settings were moved to the main menu, View -> Message List -> Theme and View -> Message List -> Aggregation
Get more screen space in KMail - reduce font size
Symptom: You still lack screen space, and would prefer more visible lines at the expense of font size, but your attempts only partially work.
Solution: In Settings -> Configure KMail -> Appearance -> Fonts you can select Custom Font and change the setting for each component in the list. This is when you discover that your folder list and the message bodies do use the fonts you want, but the message list still has too large a font.
Now you have to look at that set of new icons at the top right, close to the search box, for - the tooltip says Select View Appearance (Theme). Choose Configure, then Appearance tab. There is a list of Content Items, and below that a mockup of column headers. Each one of those column headers needs to be clicked on, and your new Custom font set. At the end of this the message list will display in the same font as the rest of your layout.
In later versions that don't have those icons you can make the changes by right-clicking on the Message List headers, and selecting Theme -> Configure -> Appearance Tab Again, you need to work with the header of each column.
</translate><translate>
Un-configure KMail folder tool tips
Symptom: You are using KMail under KDE 4.2 or later on a netbook, and find that the tooltips over folders hide too many folder names
Solution: Right-clicking on the header of the Folder List now brings up several more configuration options. One section is headed Display Tooltips, and the choices are Always, When Text Obscured, Never. When Text Obscured is handy for folders that have long names, so that only part of the name is displayed. Folders where you can see the full name won't pop up the tooltip.
Un-configure KMail message list tool tips
In KMail, Settings -> Configure KMail -> Appearance -> Message List uncheck General -> Display tooltips for messages and group headers
Remove Alternate Line colourings
In System Settings -> Appearance -> Colors -> Colors, for each color set except Common Colors (which doesn't have it), change the Alternate Background to be the same as the Normal Background.
Mandriva and Mageia don't use the name System Settings. As in KControl, the KDE 3 control centre, they name it "Configure your Desktop" to distinguish it from "Configure your Computer", a.k.a. the Mandriva (or Mageia) Control Center (MCC). Other than this name change, the method is as described above.
Store messages from separate email accounts in separate inbox folders
For POP create folders in ~/.kde/share/apps/kmail/mail/ (copy and rename the default folder). These then appear in the drop down list in Settings -> Configure KMail -> Accounts -> Modify -> POP Settings -> Destination Folder.
Create other folders in the same location for sent mail. These can be set in Identities -> Advanced.
This recipe may not be applicable to KMail 2 due to move to Akonadi-based mail storage.
---
Configure GMail without OAuth
Solution: In KMail, change option Settings -> Configure KMail -> Accounts -> Receiving tab -> (Choose an account) -> Modify -> Advanced -> Authentication from Gmail to PLAIN.
For some personal reasons Google does not consider usual IMAP authentication methods as "secure", so you will need explicitly allow it.
Transfer mail and settings to another computer (or another user account on the same machine)
Solution: The messages are typically in ~/.kde/share/apps/kmail/. For very old installations of KMail, the messages can also be in ~/Mail. Note that KMail uses hidden sub-directories inside that directory, so you need to make sure to copy hidden directories as well.
For settings you will need to copy the following files:
~/.kde/share/config/kmailrc,
~/.kde/share/config/mailtransports, (since KDE 4.0)
~/.kde/share/config/emaildefaults and
~/.kde/share/config/emailidentities .
Your address book is usually stored in ~/.kde/share/apps/kabc/. Calendar data is in ~/.kde/share/apps/korganizer
Be aware that some distributions use ~/.kde4 instead of ~/.kde/ for their KDE configuration data. Look at the output of the command kde4-config --localprefix if in doubt.
From version 4.4 you may have some Akonadi-controlled entries that also need to be kept. Add to the above list -
Everything under ~/.local/share/
Everything under ~/.config/akonadi/.
~/.kde/share/config/nepomukserverrc
Everything under ~/.kde/share/apps/nepomuk/ (KAddressBook stores contact groups in Nepomuk.)
If you plan to use an USB stick as transport medium for your data, be sure to read section "Cannot copy mail to a USB stick" below.
Problem: Cannot copy mail to a USB stick
Symptom: You are setting up a new computer and want to transfer all your mail. You decide to copy everything to a usb stick. The job starts, then you start to get failure message,
Unable to copy ............Invalid argument
Solution: Your usb stick is (V)FAT formatted, and thus can't handle maildir folder names (nor can it handle permissions, which can cause many other problems). You have two choices. Either format your usb stick as ext2 (in which case you should be aware it can't be read on Windows OSes without installing additional software there) or create a tar file of all your mail, copy that to the stick and extract it to your new host.
Troubleshooting
Problem: You are losing mail
Symptom: You are losing mail. One message in your Inbox had an empty subject line and the date 1st January 1970. When you clicked on it, it was empty. When you clicked on the next message that changes to the same state.
Solution: This happens where there is corruption in your index files. First thing then, do notclick on any more messages.
With the KMail 1.10 shipped with KDE 4.1 or newer, right click on the folder and select Rebuild Index (you can do the same from the Folder menu).
With earlier KMail versions the process is slightly more complicated. Close KMail. In Dolphin, navigate to where your mail is stored (typically in ~/.kde/share/apps/kmail/) and look for index files associated with the affected mailbox. There will be two or three, and be easy to spot. Delete them. They will be recreated when you re-start KMail. You will have lost the mails that had disappeared, but the rest of the mail should be visible again.
You have empty 'ghost-mails' in your inbox (or other folder)
Symptom: For some reason, certain messages aren't accessible in KMail. They show up in the message list window but selecting them there results in a blank message window. I can't open them or reply to them, etc.
Solution: This problem is most likely due to corrupted index files, see issue "You are losing mail" above. So just follow the advice given there.
</translate><translate>
You get the error "Unable to fetch item from backend" when entering IMAP folder
There are a number of possible reasons for this and it's something the KMail team hopes to tackle in time. Meanwhile, there are some work-arounds:
Work-around 1
edit ~/.local/share/akonadi/mysql.conf
Under the [mysql] section, add:
binlog_format=row
If this doesn't work, try work-around 2 (below).
Work-around 2
This one is mostly a matter of restarting so KMail can fetch those pesky items... Some possible steps:
Use Alt + F2 or Konsole to type: kquitapp kmail, then wait a minute, then akonadictl stop, wait a minute, type akonadictl start, wait a minute, type kmail. This stops KMail (closing all windows), stops the KMail backend, starts the KMail backend, starts KMail. Having a working internet connection increases the chances of success. Sometimes, you can also just do kquitapp kmail, wait a minute, and start KMail again. Often, a few restarts seem to be needed. It is unclear what is the reason for this, but on bad network connections it is more likely to happen.
See also the below item for how akonadiconsole can be helpful.
</translate><translate>
Your mails are not being sent, without error messages
If KMail does not send mail without saying anything, the 'agent' responsible for 'dispatching' the mails can be stuck. Of course, you need to ensure you have proper network connectivity for mail to be send!
To remedy this, it might help to abort the current action and re-start it. First, quit KMail by using KRunner (Alt + F2) or Konsole and typing: kquitapp kmail. Note that a normal Alt + F4 or File -> Quit does not do the trick! Wait a minute, then start KMail again. Now start akonadiconsole using KRunner (Alt + F2) or Konsole. Go to the Mail Dispatcher Agent, do a right-click and abort the current action. You will most likely get some error messages popping up. Go back to KMail and choose File -> Send Queued Messages. Now it might work. If not, instead of aborting the current action, try toggling the offline/offline status of the Mail Dispatcher Agent or restarting things like mentioned in the workaround 2 of the problem above this one.
Note
akonadiconsole can be quite helpful for a number of situations as it shows all the 'agents', the separate components of the KMail backend. You can stop and start them, put them in offline mode, abort ongoing actions etc. It can be very helpful when things get stuck.
Problem: Wrong address autocompletion
Symptom: You sent an email to a friend and mis-typed his address. Now that address keeps popping up as a suggestion, every time you try to send to the correct address. You can't find it in your addressbook.
Solution:Recent addresses are actually stored in ~/.kde/share/config/kmailrc, but rather than risk making a mistake in a manual edit, go to KMail's Settings -> Configure KMail -> Composer and you will see a button Edit Recent Addresses
Problem: Cannot follow a link in a mail
Symptom: You have set Firefox as your default browser, but when you click a URL in KMail it loads a local temporary version of the page with broken relative links.
Solution: You should add "%u" or "%U" to the Firefox executable in the settings. If that is not present KDE assumes that the application is not capable of handling remote urls (http) and hence creates a local copy first.
Problem: You get an authentication error message
Authentication support is not compiled into kio_smtp. The message will stay in the 'outbox' folder until you either fix
the problem (e.g. a broken address) or remove the message from the 'outbox' folder.
Solution: Install the sasl-devel-package and recompile kdepimlibs. E.g. for SUSE the package is named cyrus-sasl-devel and you install it with the command
yast -i cyrus-sasl-devel
When running cmake to compile kdepimlibs, you will see:
-- The following external packages were located on your system.
 -- This installation will have the extra features provided by these packages.
 [...]
 + cyrus-sasl
Your correspondents complain about your bottom-posting
Symptom: Your correspondents use mail agents that routinely top-post, and they complain that they have to scroll down to read your replies. You, on the other hand, post to mailing lists, where it is a requirement that you bottom post to maintain the natural order of reading.
Solution: Highlight the portion of your received message to which you want to reply, before hitting the Reply icon or keyboard shortcut. The composer window that opens will quote only the section that you highlighted and your correspondents will be able to see your reply without unnecessary scrolling.
KMail spellchecking doesn't work with the Deutsch dictionary
Symptom: Your default dictionary is set to "Deutsch", but when typing in German, the spell-checker doesn't alert you to mis-spelled words.
Solution: Change your default dictionary to "Deutsch (Deutschland)". It's worth remembering, too, that you can associate different dictionaries to each Identity, and also by using the View menu on a Compose screen, you can choose to have the dictionary used displayed while composing a message, and change dictionaries, using that, when desired.
Error: Could Not Determine Resource Status
Symptom: When fetching mail, you get an error message reading like:
Error while getting folder information.
Could Not Determine Resource Status
An attempt to determine information about the status of the resource
Unable to get information about folder INBOX.customflags.The server replied: Mailbox does not exist, or must be subscribed to.,
such as the resource name, type, size, etc., was unsuccessful.
Technical reason: Could Not Stat Resource
Reason: You are using Courier IMAP as your mail server.
Solution: If you are your own mail server administrator, set up a different mail service, for example cyrus. Here is a description how to do it.
Problem: Kmail is slow
Symptom:Kmail is really slow to get your mails.
Solution: It might be that the spam tool you're using is slowing down Kmail. If you used Kmail tools menu to add a spam tool and added Spam Assassin (for example) then try another one. I noticed that bogofilter is much quicker. You'll need to remove the 1st one and add the 2nd. You'll then need to train the spam tool you just added (bogofilter): KMail Anti-Spam Tools
Symptom: You just copied your mail folders from an earlier version (see "Migration" above) and now Kmail is really slow to respond shortly after it starts up, for at least several seconds with Kontact burning 100% cpu.
Solution: Work through all your saved message folders and Mark all messages as read, from either the Folder menu or right-click on the folder in the tree view side panel.
Symptom: You experience very long delays when sending messages, and KMail is frozen while you wait.
Solution: There was a bug in the various Release Candidates for KDE SC 4.4 which caused KMail to do lengthy searches for matching addresses. Updating to the full 4.4 should cure the problem.
Symptom: When you type in the composer window, characters appear very slowly.
Possible Solutions: This is a known bug. Some have reported that disabling then re-enabling desktop effects may help. Others have reported that switching to a desktop theme, other then Oxygen, works.
Problem: Cannot save SMTP password - kwallet is unavailable
Symptom: When saving your SMTP password in the KMail SMTP configuration dialog you get a "kwallet is unavailable" message.
Solution: You need to reset the KWallet configuration for KMail.
Stop KMail
Start KDE Wallet Manager
Open Settings -> Configure Wallet
Delete the Kontact and KMail entries (Kontact or KMail entry may not be there)
Save and close KDE Wallet Manager
Start KMail
Enter the SMTP password in the Configure Account dialog
Save - answer yes to the KWallet dialog
KMail with other desktops or applications
Problem: KMail does not start up.
Symptom: You want to start KMail from a minimal desktop environment like fvwm2. It does not start.
Reason: You are missing the dbus functionality.
Solution: Start KMail using dbus-launch like this:
dbus-launch kmail
</translate><translate>
Tell Firefox to use KMail for mailto: addresses
Firefox 3 - In the Firefox menu, select Preferences -> General, choose the Applications tab, then type
mailto
in the search box. Choose KMail
</translate><translate>
Set Firefox as your default browser
Symptom: You want to click on a link in KMail and have it opened in Firefox. At the moment, another browser is used. You want to change this.
Solution: This solution will affect all of KDE, not just KMail. Start systemsettings -> Default Applications -> Web Browser -> Open http and https URLs in the following browser -> firefox.
If you are an administrator and want to set this setting automatically for your users, it is
for SUSE Linux
in your user directory in .kde4/share/config/kdeglobals add the line
BrowserApplication[$e]=!firefox
under category [General]
for all other Linux distributions:
in your user directory in .kde/share/config/kdeglobals add the line
BrowserApplication[$e]=!firefox
under category [General] If General category doesn't exist you should add it.
Symptom: You set up a Roaming profile to access your home server while you are on the road, but it keeps trying to connect even when you are at home. Auto-connection is disabled in the setup screens.
Solution:Settings -> Configure KMail -> Accounts -> Receiving (tab) -> (select the account to exclude) -> Modify ->General (tab), uncheck Include in manual mail check. This will exclude the profile when you hit the download icon, but the profile will still be available from the drop-down list, making it easy to get your mail while away from home.
KMail2 Issues
KMail2 doesn't send mail
Some users find that mail does not go out, and it appears that smtp is missing, even though the Settings page looks correct. It has been reported that this is cured by opening akonadiconsole and adding Mail Dispatcher Agent.
If the computer was suddenly turned off in suspend mode (e.g. by a power cut) sometimes e-mails simply stay in the outbox without being sent, but no error message is generated either. This may be due to the fact that the Mail Dispatcher Agent is set to "offline" in the configuration file during suspend and is not changed back due to the "crash". Edit the following file:
In case migration from KMail 1 to KMail 2 fails or you have weird problems after it, you can try to do a clean import of your data, instead of migrating the existing settings. Be warned, that needs more manual setup, so do only if you are confident with setting up again your KMail accounts, and it can generate a large amount of network traffic for IMAP resources.
1. Stop Akonadi and related applications - quit KMail/Kontact/KOrganzier, and issue this command:
akonadictl stop
Make sure no Akonadi or MySQL process is running:
ps ux | grep mysql
ps ux | grep akonadi
They should not show anything else but the grep process itself.
2. Remove old Akonadi database and config - delete the following folders
~/.local/share/akonadi
~/.config/akonadi
You might want to also delete also the files starting with akonadi from
~/.config
but it's actually quite convenient not to do that: then recreating the resources
(in the same order as before) will auto-fill all your settings automatically again.
3. Restart Akonadi server
akonadictl start
4. Add back the accounts
Now it is time to add back your account. You can use KMail (Kontact) for it, or you can use the akonadiconsole tool.
In KMail: Settings -> Configure KMail -> Accounts and use Add.
If you use IMAP, add a new IMAP E-Mail server . If you want disconnected mode (so you can read the mails offline), enable it on the Advanced tab. Be sure to check that you are subscribed to all your important folders.
You might already see a Local folder resource. This points to a local maildir folder. You can either modify this to point to your existing maildir folders or you can add a new resource for local mails.
When adding a maildir resource you can choose between KMail Mail Folder or Maildir. Unless you have a mixed folder containing both maildir folders and mbox files, you should choose Maildir. For independent mbox files, like the one in the /var/spool/mail, you can set up a new MBox folder.
Add the POP3 accounts as well. In case you have multiple Local Folders set up, choose on the Advanced tab the destination folder where the newly downloaded mails are put.
For all accounts, configure the mail check interval. For Local folders disable interval checking and also disable Include in manual mail check in the Retrieval options.
Add the sending (SMTP) accounts.
5. Fix your filters, identities and favourite folders
If you have client side filtering (common with POP3 mails), go to Settings -> Configure Filters and fix the destination folder for the filters, they most probably are wrong. Otherwise mails will end up in folders you don't expect.
Spam filter (at least in version 4.7.3 and earlier) does not work as expected in that the rule that the wizard creates does not send spam to the folder you have defined.
The workaround for this is to change the "spam" and "spam unsure" (if the spam filter you use support that) from looking at Status-fields in the header X-Spam-Status to look "Anywhere in headers" for X-"yourspamfilter"-Classification: SPAM or unsure. Look at the filters the wizard creates and copy the "contains" part. Example for Spambayes: X-Spambayes-Classification: spam and X-Spambayes-Classification: unsure
You also need to verify the identity settings and set the sent-mail, drafts and templates folders to point to the right folders. To do that go to Settings -> Configure KMail -> Identities, modify the identity, go to the Advanced tab and modify the above mentioned folder settings.
Check also that your Favourite Folders are the ones you have chosen before.
6. Initiate a mail check
Start a mail check for your accounts. I suggest doing it per account
First do for IMAP, if you have.
Next is to check (import) your local mails. One solution is to do a full check in one go File -> Check Mail In and select the local account, the other is to click one by one on the folders, that should initiate the check for that folder (alternatively right click on the folder name and select Update Folder).
The initial import might be slow and could use a lot of memory, especially in case you have folders with a large amount of mail. In that case per-folder check is preferred. In case the check (complete or for one folder) is finished and the memory usage is still high, you could restart the Akonadi server - as seen above - or just the maildir agent, if you use akonadiconsole. Don't worry, this high memory usage is only for initial import.
Initiate a check mail for POP3 resources.
Hopefully after these steps, you will have a much nicer KMail experience.
Local Folders is added over and over
In some cases you might end up with a maildir account pointing to a certain place (like $HOME/Mail), but you still see a Local Folders folder in the folder list with Inbox/Outbox/Trash/Drafts/etc. subfolders and KMail keeps putting mails there, especially sent mails.
The problem is that certain folders are marked as special folders (system folders) and if you don't have them, KMail cannot operate correctly. That is the reason why it keeps re-creating that folder.
A this time there is no easy way to change this in the UI for all types of special folders. Here are what you can do:
The Sent-Mail, Drafts and Templates folder is configurable for each identity. Go to Settings->Configure KMail->Identities, select your identity, click on Modify, go to the Advanced tab and set the folders to point to the right place.</translate>
<translate>
The default Inbox is configurable for each POP3 account. Go to Settings->Configure KMail->Account, select your POP3 account, click on Modify go to the Advanced tab and set the Destination folder.</translate>
<translate>
For IMAP accounts you can configure the Trash folder. Do like above. The setting name is Trash folder.</translate>
<translate>
The most problematic part is the Outbox. First, locate specialmailcollectionsrc in your KDE configuration directory ($HOME/.kde4/share/config or similar). It contains something like this:
Now start akonadiconsole, on the Agents tab, locate your local account in which you want to have your Outbox folder, click on it and note the identifier that appears in the lower part ( akonadi_maildir_resource_XXX or similar). Put this identifier in the above shown specialmailcollectionsrc, by replacing the existing one.
After that restart akonadi (you can do from the akonadiconsole, Server->Restart Server or from command line with
akonadictl restart
Now remove the Local Folder that you don't want to use anymore.
If it keeps reappearing and the Mail Dispatcher Agent still crashes, you need to do one more thing in akonadiconsole. Go to the Browser tab, find the outbox you want to use, right click on it, Folder Properties, Attributes tab, enter SpecialCollectionAttribute then Add, double click on the Value near the SpecialCollectionAttribute and enter outbox. Add also another attribute, the attribute name has to be ENTITYDISPLAY and the value ("outbox" "mail-folder-outbox" "" ()) (just copy paste from here). Restart akonadi and now you should be able to remove completely the unneeded local folder account.
If you "lost" your Trash folder and want to set a new folder to act as Trash, you can use the same approach described above, but for the SpecialCollectionAttribute value enter trash .
Hints and Tips
Add a Tag to aid searching
You must first define your tags, which is done in Settings->Configure KMail->Appearance->Message Tags. Now you will find that the (right-click) context menu, under Mark Message, offers you the choice of your defined tags.
Watch threads
If you want to follow a thread, right click and choose Mark Thread -> Watch Thread.
From this point on all messages on the thread that starts in this message will be marked as Watched.
Watch your own threads:
This is useful in case you are registered to a mailing list such as kdepim-users@kde.org and want to filter out the threads you participate in.
Create a filter to mark all your incoming messages to a mailing list as "Watched"
To create a filter go to:
Settings -> Configure Filters
select Match all of the following
Add the conditions:
From -> Contains ->yourmail@maildomain [1]
List-Id -> ContainslistID [2]
[1]replace yourmail@maildomain with your outgoing mail address
[2]replace listID with a specific mailing list id e.g (<kdepim-users.kde.org>) or just a '.' to include outgoing mail to all mailing list with '.' in their id (basically all).
Under Filter Actions choose Mark As -> Watched.
In the Advanced tab
Uncheck if this filter matches, stop processing here.
so that other filters such as sorting the incoming messages from the mailing list to sub-folders would execute.
Place that filter before other filters that may stop the filtering process,
or simply put it first.
(changing the filters order is done using the two arrows up and down, under the available filters list)
Create a search on mailing list messages
Go to the folder where your mailing list messages are stored e.g (Local Folders/KDE-PIM-USERS)
and hit S key or in the menu Edit -> Find Messages.
Select Match all of the following[3]
Add the condition: Message Status -> is -> Watched
Give the search an informative name (Search folder name) like KDE-PIM-USERS-Watched
Make the search. After it is done you can close the search window.
Now whenever you start a thread or participate in one, it is Watched.
[3] Pay attention to the Include sub-folders.
E-Mail Translation
Symptom: you receive mail messages in different languages and want to translate them without doing lots of copy and paste.
Solution: using an external program to translate your E-Mail and display it.
Step by step implementation
Warning
The provided solution was tested limited number of times and should be used with caution.
Prerequisites, make sure you have those before starting
libtranslate
perl
perl module Email::MIME
kmail
Setting up a pipe filter
In Kmail go to Settings -> Configure filters
create a new filter and name it Translate
add a Filter Criteria that would be always true (e.g Subject -> Does not equal -> "321546543")
add a Filter Action Pipe Through
~/bin/mail_translate.pl
open the Advanced tab and un-check everything except for Add this filter to the Apply Filter menu, you can also set a shortcut and an icon here.
Putting the script in place and configuring it
save the following script to a file named mail_translate.pl and put it in your ~/bin directory.
Currently the script will translate from English (en) to Hebrew (he), you probably need another type of translation. To change that settings look inside the script for the phrase $from_language = 'en' and $to_language = 'he' and replace the 'en' and 'he' parts with the combination you need, if you are not sure, a full list of language codes is available from the ISO 639-2 list.
Testing
before charging innocent E-Mails and translating them first try that on something you don't mind to lose, look in your trash or spam folder. Right click on any translatable item Apply Filter -> Filter Translate A dialog box should pop-up with the original message followed by it's translation.
Troubleshooting
If the script is not working you can test it outside of KMail to narrow down the responsible component. Save a mail message as 1.mbox file and run in the terminal
$~/bin/mail_translate.pl < 1.mbox > 2.mbox
If the output file 2.mbox is not the same as 1.mbox then there is a problem in the script and it shouldn't be used.
Note
this script will only translate the Plain Text parts of an E-Mail message and not the HTML parts.
Edit and save messages without changing message parameters
Get rid of that long mail trail in top-poster replies. You can edit a message and remove unwanted parts by saving it to disk (Save As), editing it separately in a text editor, and then import it again. Just delete the original. This method also works to detach encapsulated messages and keep them as separate messages.
Easily archive all e-mails
Create a filter that matches all messages and copies them to a folder, and then create a shortcut to manually apply this filter. It can be done following these steps:
In KMail go to Settings -> Configure Filters</translate>
<translate>
Click the button on the left and give your filter a name (this will appear on the shortcut also, I simply used "Archive")</translate>
<translate>
Under Filter Criteria, choose Match all messages</translate>
<translate>
Under Filter Actions, choose Move into Folder and select the folder you want to archive to.</translate>
<translate>
In the Advanced tab, uncheck Apply this filter to incoming messages</translate>
<translate>
Then check Apply this filter on manual filtering, Add this filter to the Apply Filter menu and Additionally add this filter to the toolbar.</translate>
<translate>
Click the button with the icon to select a shortcut (I used q because it didn't conflict with anything else)</translate>
<translate>
Choose an Icon for the shortcut menu</translate>
<translate>
Click Apply or OK and you are Done!
</translate>
There are 275 pages beginning with Ka-Kz but not Kd
If you already did the above, just do the following whenever you want to update your checkout and installation:
cd extragear-network/konversation; svn up; cd build; make; sudo make install
See the links in the next section for more information on working with Subversion.
Krita/Manual/BrushEngines/InstantPreviewInstant Preview(Previously known under the code name Level Of Detail/LOD strokes) is Krita's special speed-up mechanism that was funded by the 2015 Kickstarter. Krita slows down with really large images due the large amount of data it's crunching in painting these images. Instant Preview works by taking a smaller version of the canvas, and drawing the feedback on there while Krita calculates the real stroke in the background. This means that if you have a 4k screen and are working on a 4k image at 100% zoom, you won't feel any speed up.
Activating Instant Preview
Warning
Instant Preview requires OpenGL 3.0 support at minimum. So if you don't have high-quality scaling available in settings->configure Krita->display->scaling filter, then you wont't be able to use Instant Preview either.
The Global Instant Preview toggle is under the view menu
Instant Preview is activated in two places: The view menu(shift+L), and the settings of the given paintop by default. This is because Instant Preview has different limitations with different paint operations.
For example, the overlay mode in the color smudge brush will disable the ability to have Instant Preview on the brush, so does using 'fade' sensor for size.
Similarly, the auto-spacing, fuzzy sensor in size, use of density in brush-tip and the use of texture paintops will make it more difficult to determine a stroke, and thus will give a feeling of 'popping' when the stroke is finished.
When you check the brush settings, the Instant Preview checkbox will have a * behind it. Hovering over it will give you a list of options that are affecting the Instant Preview mode.
The Instant Preview checkbox at the bottom of the brush settings editor will give you feedback when there's settings active that can't be previewed right. Hover over it to get more detail. In this case, the issue is that auto-spacing is on.
Now you will find a hidden file called “.smsjoker-script” in your home directory. Open this file with e.g. Kate and change the parameters OWN_NUMBER and PASSWORD. Use values you have used when creating your account.
Last step has to be done in Kontact. Open addressbook and select Settings -> Configure addressbook ….
Look for SMS Text and enter the following string:
smsjoker-script "%N" "%F"
Screenshot:
Configure Kontact
How to use this?
Select a contact in your addressbook which includes mobile phone number and click on SMS.
Screenshot:
Select SMS
A small window appears. Please enter your message.
Screenshot:
Enter your Message
After clicking on Send your SMS is sent.
Another small passive window appears and informs you about the delivery status and account balance.
</translate>
You can start chatting with a contact by clicking on the name. A new window will open and you can type in messages into the smaller field at the bottom, where the cursor already resides. When you want to send your text, hit Enter or press the Send button. You and your partner can communicate now via Jabber.
Your first chat
Transfer files
To transfer files via Jabber click on Send File and select the file you want to send in the popup window. You will be notified when the transaction is complete or failed for some reason.
Warning
This may not work in some cases due to incompatible configurations of some servers
Group chat
Jabber is not only capable of communicating with one person. You can use Group Chat to do an IRC style discussion, where many people can talk with each other. To use Group Chat, you have to right-click on the Kopetesystray icon, and select yourJID -> Join Groupchat..., where "yourJID" stands for your own Jabber ID. A new window appears where you can join a chatroom.
Groupchat
Click on Query to show the list of existing chatrooms on your Jabber server. Select one and press Enter to enter this room.
Alternatively you can type in and create your own chatroom by writing its name into the line Room. Then press Enter or click Join to join.
After you created the chatroom, you'll see a new field appearing in your Kopete window with the JID chatroomname@jabber.example.org. Treat it as a normal contact, i.e. you have to click on this JID to chat etc.
At this point you have set up a working Jabber client and are in principle able to chat with your contacts. But for a better experience of Kopete, you are able to configure the application for your best needs. A set of Useful configuration hints is the content of the next page in this tutorial.
Use your calendar when you can't use a graphical user interface
konsolekalendar is an application to administer a calendar without a graphical user interface. It normally works with the calendar that is marked "Default", if you use KOrganizer. However, it is possible to create a calendar if you don't have one already.
As it is strictly a command-line application, konsolekalendar's syntax must be learned first.
Here is a short introduction to using konsolekalendar:
If you do not already have a calendar set up, you first need to create one
Be aware that beta testing is potentially dangerous to your installation. Don't install beta versions on production systems. If you are aware of the risks and that's ok for you: Keep on. Your help is appreciated. Nevertheless, especially for beta versions goes: This software comes with no warranty at all!
Before starting beta testing it's a good idea to make a backup of your configuration, stored in
~/.kde/share/config/konversationrc
and your application data, stored in
~/.kde/share/apps/konversation
If you found a bug or have a feature request, let us know by filing it in the KDE Bug Tracker.
kdebase-runtime from KDE Platform v4.4.0 or higher.
Optional: A QCA provider plugin providing Diffie-Hellman key exchange and Blowfish ECB/CBC support for the encryption features; usually that plugin is qca-ossl.
Optional: An installation of KDE's Konsole terminal emulator to provide the KPart component used by the console tabs feature.
Optional: Python and Perl interpreters as well the bash shell for bundled scripts.
Manual checkout and update
To install the latest Konversation code for KDE Platform v4 from Git you first need to clone the repository. For read-only public access, use the following:
If on the other hand you have a KDE developer account, use this instead to be able to push your changes to the repository later:
gitclonegit@git.kde.org:konversation--branch1.5
After having cloned the repository, go on like this:
cdkonversation
mkdirbuild
cdbuild
cmake-DCMAKE_BUILD_TYPE=debugfull-DCMAKE_INSTALL_PREFIX=<desiredinstalllocation>../
make
sudomakeinstall
If you already did the above, just do the following whenever you want to update your checkout and installation:
cd konversation; git pull; cd build; make; sudo make install
See the links at the bottom of this page for more information on working with Git.
Some of this information is very old and may be obsolete. If you have any recent knowledge of Jabber Transports, please either edit this page or write notes on the attached discussion page.
It is known that GoogleTalk works with Jabber and needs no special steps to set it up.
How to use Transport with the Kopete Jabber plugin
Why this document ?
On May 18th, 2005, an upgrade on the Microsoft server broke Kopete's MSN support.
Even though a patch was quickly available this requires users to upgrade their version of Kopete, which is not always possible. This could also happen again and with some others closed protocol.
For those who can't upgrade and need to use MSN with Kopete it is possible to connect using Jabber transports.
What are Jabber Transports ?
Jabber is an instant messaging protocol, like MSN or ICQ. If you don't know it already, visit the Wikimedia Jabber page.
Jabber transport allows a person from the Jabber network to communicate with persons from others networks (like MSN or ICQ).
Kopete supports others protocols natively. This is better since the support of these protocols is often more complete. Features like file transfers or avatars don't always work with transports. The features supported by a transport depend on the type of transport (which network it relays) and the version of the transport the server is running.
The support of transports in Kopete is a bit limited, but still usable.
Create a Jabber account
If you don't have a Jabber account already, you need to create one.
If you can't, or don't want host a Jabber server yourself, find a public server.
There is a list of public servers available at xmpp.net
If possible, select one which has a support for the gateway you want to use.
In Kopete, click Settings -> Configure, go to the accounts page and click the button to create a new account.
Select the Jabber protocol. Click on the button to register a new account.
Here, enter your server, your desired login and password.
Once the account is created, you can click next and get connected.
Welcome to the jabber network.
Subscribe to a Gateway
Click on the account icon (the small light on the right hand side of the statusbar).
Select Services... and retrieve the list of services from the server.
Select the gateway you want and click subscribe.
If your server doesn't have the gateway you want, you still can use the gateway of another server. It seems that you have to choose development version (with tag "DEVELOPMENT") of transport to work with MSN.
Servers that are known to support it:
jabber.org.uk
myjabber.net
bloodyxml.com
borderlinenormal.com
(add more here)
Enter here your MSN login and password (or ICQ,....)
Now all your MSN contacts will be added to the Jabber list.
How to add MSN contacts
If you can't add the contact friend@hotmail.com, and if your MSN gateway is called msn.bar.com here is how to do it.
In Kopete, click add new contact. Select your Jabber account and fill in the contact identifier (it's friend%hotmail.com@msn.bar.com in the above example, i.e, replace @ by %, and add the gateway name).
</translate>
Be aware that beta testing is potentially dangerous to your installation. Don't install beta versions on production systems. If you are aware of the risks and that's ok for you: Keep on. Your help is appreciated. Nevertheless, especially for beta versions goes: This software comes with no warranty at all!
Before starting beta testing it's a good idea to make a backup of your configuration, stored in
~/.config/konversationrc
and your application data, stored in
~/.local/share/konversation
If you found a bug or have a feature request, let us know by filing it in the KDE Bug Tracker.
Optional: A QCA provider plugin providing Diffie-Hellman key exchange and Blowfish ECB/CBC support for the encryption features; usually that plugin is qca-ossl.
Optional: An installation of KDE's Konsole terminal emulator to provide the KPart component used by the console tabs feature.
Optional: Python and Perl interpreters as well the bash shell for bundled scripts.
Manual checkout and update
KDE Frameworks v5 version (Konversation v1.6.x and higher)
To install the latest Konversation development code from Git you first need to clone the repository. For read-only public access, use the following:
gitclonegit://anongit.kde.org/konversation
If on the other hand you have a KDE developer account, use this instead to be able to push your changes to the repository later:
gitclonegit@git.kde.org:konversation
After having cloned the repository, go on like this:
cdkonversation
mkdirbuild
cdbuild
cmake-DCMAKE_BUILD_TYPE=debug-DCMAKE_INSTALL_PREFIX=<desiredinstalllocation>../
make
sudomakeinstall
If you already did the above, just do the following whenever you want to update your checkout and installation:
cd konversation; git pull; cd build; make; sudo make install
See the links at the bottom of this page for more information on working with Git.
KDE Platform v4 version (Konversation v1.2.x - v1.5.x)
<translate>
Jabber Group Chat, also called MUC (multi user chat) is the Jabber equivalent of IRC channels.
Warning
Some of this information is old and may be obsolete. If you are a user of Kopete please either directly edit this page or add notes on the attached Discussion page
The Kopete support of MUC is only partial, this is because our backend XMPP library (iris) only supports the old GroupChat protocol. Anyway, Kopete is still pretty good and some good improvements have been made in the version 0.12
This page will describe some hidden Kopete features.
MUC is really a good alternative to IRC. It supports almost everything that IRC supports and even more.
Join a groupchat
First things first, Kopete users sometimes ask how the join a groupchat.
This is the join groupchat action in the jabber menu.
There, a dialog asks you for the room and the server and your nick.
Imagine you want to join kde@conference.kdetalk.net. "kde" is the room and "conference.kdetalk.net" is the server.
Style
Using the default style for groupchats is a bit annoying due to the space waste.
Fortunately, some styles render groupchats well.
For Kopete 0.12 I would recommend these styles:
The Gaim style with the Contact Color variant.
The Kone style with the Contact Color No Icon Compact variant (available on kde-look)
Invitation
Did you know that from Kopete v.0.12, it is possible to invite a contact to a MUC ?
Simply drag and drop the contact in the MUC chat window.
Bookmarks
Kopete uses JEP-0048 for showing the chat bookmark menu.
There is no Kopete interface to remove or edit bookmarks. Each chat you join is automatically added to your bookmarks.
You could anyway use the send RAW XML dialog (in the jabber account menu) to edit the bookmark in XML on the server, as explained in JEP-0048 and JEP-0049
More generally, most of moderation and admin features are available with the XML console, although you need to have compiled kde with debug in order to see the result in the debug output. Run kdebugdialog and make sure jabber raw (14131) is checked.
By default, messages in a group chat are notified with the "not important message" notification.
If someone types your nick in the channel, the message will be highlighted, and the "highlight" notification will be emitted.
The Highlight plugin has great value in group chat. Go into the configure plugins menu, and enable highlight. You can add filters to match some word or regular expression in a chat and you can change the notification level of such messages.
Thus, you can stay idle in a groupchat and be notified when someone talks about a subject you are interested in.
</translate>
There are some packages of Kontact Touch for MeeGo 1.2 Harmattan. This is the operating system of the Nokia N9 (and N950) smartphones.
Installation
To install the packages you have to switch your phone into developer mode, since the packages are not yet available in the Application Store (reachable via Settings -> Security -> Developer Mode). This will also install an ssh server on your device which makes the rest of the installation much more comfortable.
Configure SSH
Note
This step is not really necessary since you can also do everything directly on the terminal of your device.
To connect to your ssh server you first have to set a password for the "user" account. To do that open the Terminal application and use devel-su to log in as root (default root password is rootme) and set the password for the user by calling passwd user. Now you are able to connect to your device as user and configure the OpenSSH server as usual.
Repositories
Kontact Touch packages need the nokia development repositories and the files.kolab.org repo (which contains the packages) so that all dependencies can be installed. To enable them (as root):
When using a non-English version of apt, the continue question still needs a y as an answer to move on.
Note
If you get an error like:
https://downloads.maemo.nokia.com ./ libgmp3c2 2:4.3.2+dfsg-1+maemo5+0m6
The requested URL returned error: 404
You can get the the package here and install it manually with dpkg -i. The link to this package appears to be broken in the Nokia repository.
Use "MyDocs" as Cache
Warning
When syncing an significant amount of data and you are not absolutely sure it will fit in your home directory, you must move the cache off the home directory partition to MyDocs! Consider three times the size of your complete imap account contents. If you fill up the root partition an N9 defect might make your device unbootable and in need of reflashing.
You can symlink the akonadi directory (/home/user/.local/share/akonadi) to somewhere where you have enough space available. MyDocs usually has more space available, see the following
steps:
make sure that akonadi is disabled (akonadictl stop / akonadictl status)
As root do (Please check after each step if it worked correctly and not copy/paste everything):
The configuration change of the socket directory is necessary because MyDocs is by default a vfat that does
not support akonadi's way of symlinking it's socket in the .local directory.
When starting with an empty akonadi database, it is recommened to raise the threshold value
which determines when an object will be saved as flat file. Therefore less files get saved to /home/user/.local/share/akonadi/file_db_data/. This avoids hitting the Mydocs-partition limitation on the number of 32764 files per directory too early. You can do this to add the following line to the "General" section of /home/user/.config/akonadi/akonadiserverrc with an editor. You can choose any value, the default is 4096. Make sure akonadi is stopped.
SizeThreshold=8192
Additional Notes
Make sure to check out the general Kontact Touch page, especially note the recommendation to use KWallet in the account setup section.
With some of the platform integration missing, you may get dialogs which are hard to use just with
the touch screen because they are too small to hit with your fingers. Especially some of the settings are hard to reach. Consider using the VNC mode, which you can enable in the SDK setting of the N9. This way you can type and use a mouse from a desktop system.
Known problems (Version 20120522)
The Strigi daemon fails to start putting up an error message now and then and causing
address completion and full text search not to work.
The icons might be just some strange red squares until you restart.
Use this tool to share your desktop with a remote guest/tech using the VNC protocol</translate>
<translate>
Krfb (server) is one of a pair of KDE programs - Krdc (client) is the other - that let you share your desktop (make it visible remotely) through the local network with another user, probably somebody like the tech downstairs who you wants to help you figure out how to do something you are having trouble with. You can call the tech on the phone and be talking with her while she assists you. The tech can even "drive" your computer if you decide to let that happen.
Krfb is a server program, serving to a client, e.g. Krdc. It must be matched by a client or "guest" program that is running on another computer. In this explanation, we will use the terms:
guest for the machine and user that is remote who you want to invite
host for the machine and you as the one who is sharing your desktop
You will also need to refer to the Krdc page to make complete sense of this explanation.
This explanation is, therefore, from the perspective of the "host" person, sharing out, who wants help from a technician/friend and invites them to work remotely as the "guest".
Steps to Connect Using Personal Invitation
Start Krfb: K Menu (Kickoff) -> Applications -> Internet -> Desktop Sharing (Krfb)
Call the guest/tech/friend you want to invite.
Click the "New Personal Invitation" button
Tell the guest the address of your computer which is shown in the Krfb window. (Mention the need for the port number which is required by Krfb)
Carefully tell the guest the password, emphasizing the capital and lower case letters and the dash.
When the guest enters the correct password you will see a popup window in which you can approve the connection by clicking appropriate button. (You can really wreck your relationship with the tech, by rejecting the connection, but that wouldn't be too good.)
Information
Screen Images are clickable, which displays the full-size image. You have to use the back-button of you browser to return.
Krfb invitation screen
Krfb invitation details
Krfb accept/reject
Once the connection is established, you and the tech can continue to talk while either you or the guest control your computer. You or the guest tech can launch programs, minimize/restore windows, change settings, anything that you could try to do alone on your own. Because the tech is watching your screen, it will be easier to see if you missed a step or made a wrong choice. When you have the choice, make menu selections with the mouse instead of using keyboard shortcuts. The guest cannot see your keyboard or your fingers as you type, but will be able to watch as your mouse pointer moves around the screen.
Connecting using Email Option
Krfb also lets you send your guest an email which will include the address and password. Remember that email isn't normally encrypted. The password will be in open text on the network. Once your guest gets the email, she will be able to use Krdc to connect to your hosting computer. The guest tech or friend must be ready to receive the email invitation. Like the personal invitation, the invitation is open just for an hour.
Email invitation
Warning
Note that closing the Krfb window using the "close" button does NOT stop Krfb. It continues to run as a background task. Make sure to notice the icon in the system tray, typically near the right end of the panel, When you are ready to quit sharing, right click the Krfb icon in the panel and choose the quit option. Do not try to restart Krfb through the K menu. You'll just launch another instance of the program, not connect to the one that is already running. More than one Krfb instance can make things very confusing.
Krfb icon in system tray
When you quit Krfb completely, the connection to your guest will be broken.
Notes:
If you have an active firewall running on the "host" machine, you will need to open port 5900. If a firewall is blocking port 5900, the process of sharing at the host end will appear to work fine, but the guest will get a message saying the server wasn't found. It is difficult to determine whether the connection failed because of a mistyped address or a firewall. It may make sense to plan ahead and have your first sharing session with the tech in the same room with you. You and she can work through any difficulties about the connection and then do help sessions remotely after that.
If you close the Krfb window, it does NOT stop the program. To quit Krfb, right click the program's icon in the system tray and choose the option to quit.
Turning off your host computer does NOT stop Krfb. It will pop up at the next restart. You must quit through the system tray icon.
Though it is possible to use Krfb/Krdc across the Internet, cable modem/routers at the host "end" must be set to forward port 5900 and there are similar issues trying to cross corporate firewalls.
About information (version, etc.) is found by right clicking the system tray Krfb icon.
'If the guest user clicks the Print Screen key, the screen capture tool Ksnapshot will launch on both guest and host.
The VNC protocol does NOT enable file sharing between guest and host. You will need to transfer files saved on either computer by some other method.
<translate>
Kontact Touch is an email and groupware client for touch screen devices,
like smartphones, netbooks or tablets. It is a sister product to Kontact Desktop based on the same backend, a full featured Kolab Groupware Client and
providing end-to-end email security. Kontact Touch is based on the KDE Platform and produced
by the KDE PIM and KDE Mobile initiatives.
Here are the about dialog and some screenshots and videos.
Kontact Touch is a usable application since February 2011. Your experience will depend a lot on the packaging and platform integration for your device, though. Feedback and help is always appreciated.
After installation you will find five new icons on your phone
that open the mail, calendar, addressbook, notes and tasks frontends
to Kontact Touch.
Touch one of these and it will start. Note that the first start of any of these applications will take a long time, as it has to initialise the backend. Expect an initial waiting time around a minute.
Experts: You can start everything from the command line if you like, but then check the notes for your platform for the right executable names.
Setting up your accounts
First thing you would want to do is set up a new email account.
To do this you start mail, pull the flap Actions on the Homepage out, press Accounts, Add Account and then follow the instructions.
Note
you cannot do this from all frontends at the moment - but for email it works fine. If you should have a Kolab Server, all other applications will access the data from your server too.
You may change the following settings, by choosing the account and
use Configure Account:
Switch off interval sync while the initial sync is in progress. You can turn it on later.
Switch off handling of server side subscriptions (otherwise you might not see some folders you are expecting to see).
Enable disconnected mode for email if the number of emails you have is not that high in total. It means a longer initial sync, but afterwards only changes get synced and the emails will be fully cached on the device.
Warning
Kontact Touch uses several process to send and fetch data. By default it will try to encrypt them all. If something called KWallet comes up: use it! It will save your password, so you do not have to retype it each time.
Several server authentification warnings might appear for the different connections, because the SSL or TLS connection certificates are not known to the system. Both kwallet and multiple authentification warnings indicate that your platform integration is suboptimal.
Understanding the Interaction ideas
Navigate through your folders by our flatten tree view. You can also choose to see multiple folders at once, when you click on Select on the homepage.
Actions can be accessed through what we call flaps. You have to pull them out, in order to not mix interaction up with clicking through your accounts and folders.
We hope the other ideas are straight forward and discoverable. If you have any question please feel free to ask us.
Get encryption working
One of the core features of Kontact Touch is the ability to communicate safely using S/MIME or OpenPGP. We advise you to first set up your personal certificate and secret key on a desktop computer, e.g. by using Kleopatra. Then transfer it to the device and import everything using Kleopatra. Check out the platform specific installation instructions for more hints.
Contributing / Questions and Answers / Feedback / ...
You discovered a defect
The overall stability of the product is good. It can be trusted will real data and offers a lot of useful functions, because Kontact Touch shares the backend with the desktop client. Still as of July 2012: There are a number of known issues and often there is little platform integration and suboptimal packaging.
Consider doing an update to the latest version available for your platform before reporting a problem. Maybe it has already been solved.
When posting a report, please add some information, so we can efficiently fix any bugs:
The platform Kontact Touch is running on. (e.g. MeeGo, Mer, OpenSuse)
Your device's vendor and model. (e.g. N900, N9, Vivaldi, Ideapad)
The Kontact Touch version you use. (You can find the version number in the about dialog)
Please report to the correct category: kmail-mobile (Mail), korganizer-mobile (Calendar and Tasks), kjots-mobile (Notes), kaddressbook-mobile (Contacts) or kdepim-mobile for issues that affect all applications.
If you think that a screenshot might illustrate your problem well, consider making one and add it (see here for finding out how to do screenshots on a N900).
Please provide any other relevant information, so we can quickly reproduce and fix your problem.
You want to share your experiences?
We are accompanying the development by steady usability work. You are very welcome to participate in this process. For this, but also for less structured feedback, consider joining our mailing list.
You can further customize your Kubuntu installation by adding new software packages. Below you will find several methods for installing new packages (software).
Software Management
There are several ways to manage applications in Kubuntu. A convenient way to add or remove applications is with a package manager.
</translate><translate>
Graphical Clients
By default Kubuntu comes with a great package manager called Muon Discover. Muon Discover is an advanced program with a graphical user interface (GUI) and can be used for installing and removing applications.
It will automatically notify you for updates (in the lower right hand corner), but you can use it at anytime to install new packages by going to KickOff and type Muon. Select Muon Discover from the results.
If you prefer the Ubuntu-style "Software Center" you will need to install it from within Muon.
Muon Discover
Muon Discover might provide information about required dependencies, these are other packages (programs) that the piece of software that you want to install needs to run. Once this information is acknowledged, the required packages will begin downloading. When the installation process is complete, the software will be ready to use. It is rarely necessary to restart the system after software installation or updates. If it is, the system will warn you and give you a restart icon to do the restart at your convenience.
Muon Discover also provides an easy method to remove software that is no longer needed.
Tip
Start Muon Discover with Kickoff Application Launcher (K menu), click on 'Installed' and find the application you want to remove. Click 'Remove' and Muon Discover will remove the application.
Tip
You can search for applications with the search box on the top and the categories below the bar. The application information will be displayed in the large white space below the search area. Click on the application title to be installed. Click the 'Install' button to start the installation process.
Repositories
Thousands of programs are freely available to install in Kubuntu. These programs are stored in software archives ("repositories") and are made available for installation over the Internet. Installing new programs in Kubuntu is quick, reliable, and secure because each program is built specifically for Kubuntu and is checked thoroughly before it is made available. Kubuntu repositories are categorized into four groups:
Main
Restricted
Universe
Multiverse
Two factors are used to determine categories:
The level of support provided for a program by its software development teams.
The standard Kubuntu LiveDVD contains some software from the "Main" and "Restricted" categories. Once a system has information about the Internet-based locations for these repositories, more programs are available for installation. Using the software package management tools installed by default, it is possible to discover, install, and update any piece of software directly over the internet without the need for the LiveDVD.
Personal Package Archives allow any person in the Ubuntu community who has committed to observe the Ubuntu Code of Conduct to upload Ubuntu source packages to be built and published as an apt repository by Launchpad. Software from Launchpad's Personal Package Archive (PPA) requires a GnuPG (GPG) key so your system can verify that it's getting the packages from the correct source and that the packages have not been interfered with since they were built. GnuPG is GNU's tool for secure communication and data storage.
Warning
The contents of Personal Package Archives are not checked or monitored. You install software from them at your own risk.
The package files associated with Kubuntu have the ".deb" suffix because of Kubuntu's close relationship with the Debian GNU/Linux distribution. Individual ".deb" files can be downloaded and installed. Humble Bundles, for instance, distribute debs. Administrative privileges are required.
Tip
Simply left-click on the ".deb" file to initiate the installation process. A prompt will appear for a password associated with the necessary administrative privilege.
Install from Source
Files with the .tar.gz or .tar.bz2 suffix are package files known as "tarballs" or "source" packages. These are widely used in Linux. If there is no native Kubuntu package available in any of the repositories, it may be possible to compile and install the package from source. For tips on compiling software, look at the Compiling Software page on the Ubuntu Wiki.
Drivers
On every Operating System (Windows, Mac OS X, and Linux) there are programs called Drivers which you install on your computer. These Drivers let your computer use new hardware or existing hardware, like Wifi. There Drivers also cover your graphics card e.g NVIDIA, AMD, sometimes the nonfree or restricted drivers let the cards perform better than the free ones. The Driver Manager handles installing and uninstalling these for you. These improvements may cover gaming, video editing and processing to image editing.
Oyranos is a Color Management System (CMS), which relies one the ICC file format standard for color space definitions. The use of ICC color profiles shall enable a flawless and automated color data exchange between different color spaces and various devices with their respective physical color behaviors.
Color matching between different devices is possible, provided that the color characteristics of the involved devices are known. The quality of a color transform for devices from one color space to an other depends particularly on the quality of the color measurement and the profiling algorithm used during ICC profile creation. Each color space definition happens in reference to a Profile Connection Spaces (PCS). The PCS is a well known color space, based on the average "human observer" as defined by CIE.
Color profiles are often available from manufacturers of imaging devices as digital cameras, monitors and printers. In Oyranos, ICC profiles are assigned to calibration states of color devices, to get close to the device behavior as was present during ICC profile creation.
Oyranos allows detailed settings like preferred editing color spaces and the behavior of color conversions or simulation. Oyranos reduces the work involved in all color management related decisions through automation, useful defaults and grouping of settings in selectable policies.
Default Profiles
ICC profiles should always be attached to all colors. In the case that colors are undefined, users can set various default ICC profiles in Oyranos settings.
Editing XYZ
The preferred XYZ Editing Color Space shall describe CIE*XYZ.
Editing Lab
The preferred CIE*Lab Editing Color Space shall describe the CIE*Lab.
Editing RGB
The preferred RGB Editing Color Space should represent a well behaving color space like sRGB.
Editing CMYK
The preferred CMYK Editing Color Space should represent a color space that complies to well defined printing conditions like FOGRA or SWOP.
Editing Gray
The preferred Gray Editing Color Space shall describe a single lightness channel color space for grayscale images.
Assumed XYZ source
The selected color space will be assigned to untagged XYZ color content and define colors for further processing.
Assumed Lab source
The selected color space will be assigned to untagged CIE*Lab color content and define colors for further processing.
Assumed RGB source
The selected color space will be assigned to untagged RGB color content and define colors for further processing. Typical sRGB should be assumed.
Assumed Web source
Assigns an untagged RGB Image with source from the WWW this color space. This will always be sRGB as defined by W3C.
Assumed CMYK source
The selected color space will be assigned to untagged CMYK color content and define colors for further processing.
Assumed Gray source
The selected color space will be assigned to untagged Gray color content and define colors for further processing.
Rendering
The conversion between color spaces of different shape and size can happen in various ways. The Perceptual rendering intent is usual the best choice for photographs and artistic imagery. It is used in many automatic systems. The Relative Colorimetric rendering intent provides a well-defined standard, one-to-one color mapping, but without applying white point adaption. This can lead to color clipping in case of colors falling outside the target gamut as a price for the otherwise colorimetric correctness. The Relative Colorimetric intent is often used in combination with Black Point Compensation. The Saturation rendering intent shall provide an optimal use of saturated device colors. The Absolute Colorimetric rendering intent works like the relative colorimetric one except the white point is adapted. All rendering intents beside the colorimetric ones rely on the color tables designed by the profile vendor.
Rendering Intent
Rendering intent for color space transformations is typical the Relative Colorimetric intent plus Black Point Compensation or the Perceptual intent.
Use Black Point Compensation
BPC affects often only the Relative Colorimetric Rendering intent.
Gamut Warning
Most users want a simple display of colors and will not check if colors match the simulation color space.
Save Mixed Color Space Documents
Mixed color spaces inside one single document can be difficult to handle for some systems. The settings can give the option to flatten document color spaces.
For Screen
Handle mixed color spaces in preparing a document for screen output. A conversion to sRGB helps in easy data exchange and is what most users want.
For Print
Handle mixed color spaces in preparing a document for print output. A conversion to the default editing color space is typically what most users want.
Mismatching
Decide how to resolve conflicts with input color spaces and current settings.
No Image profile
This setting decides what to do in the case that colors have no color space assigned. Typical the according assumed ICC profile should be assigned.
On RGB Mismatch
Incoming color spaces can differ from the default editing color space. For most users, an automatic conversion is fine. However, for more demanding work, the numbers need to be preserved.
On CMYK Mismatch
Incoming color spaces can differ from the default editing color space. For most users, an automatic conversion is fine. However, for more demanding work, the numbers need to be preserved.
Proofing
Proofing Settings allows one to decide about the simulation color space.
Proofing
Select a color profile representing a device to be simulated. This profile will only be applied if proofing is enabled.
Proofing Rendering Intent
Behavior of color space transformation for proofing. Most people want a preview on screen only. The Relative Colorimetric intent is right for that. The Absolute Colorimetric intent needs a very careful profiling and non-trivial setup, but allows for side-by-side comparisons.
SoftProof
Enable simulation of output print on the monitor. Most users do not work for a certain media and leave color handling to the system. They want no simulation.
Hardproof
Enable simulation of an output color space on a local printer. Most users do not work for a certain media and leave color handling to the system. They want no simulation.
Effect
Effect Settings allows one to decide about an abstract effect color space.
The repository installation file will add the extras-devel and Kontact-Touch-testing repositories . Simply click that link on your N900 browser to add the necessary repositories.
Warning
To use the Kontact-Touch repository you will have to enable the http://wiki.maemo.org/Extras-devel repository. (The above link will do that.) Like all other beta software that has dependencies on extras-devel, we would like to remind you to not blindly update from -devel and recommend disabling extras-devel again after installing or updating Kontact Touch
To verify the downloaded packages in this apt repository you should import the Intevation File Distribution Key into apt:
You can find some additional instructions on how to install different Kontact Touch repositories on the N900 in this README
For testing purposes you should always use the TESTING section. Do not use the other sections. We try to update the testing section about once a week.
Update
Use the command line to update. (At the moment the update does not work via the N900 program manager, we believe it has some subtle problems.)
Make sure to have the package rootsh installed, to be able to get administrator rights. Use the application X Terminal or a remote shell connection and enter the following to do the update
(Technical background: 'apt-get upgrade' would not install new packages that kdepim-mobile might need. Only doing 'install kdepim-mobile' used to fail with some package sets because the dependencies were not tight enough. So it is better to do both 'install kdepim-mobile' and 'upgrade'.)
Note that you have to reboot the N900 or manually restart several services like akonadiserver in order to profit from changes in these underlying services.
If you are testing, rebooting the phone before your next tests is strongly recommended.
Stop all Kontact Touch related processes
We have included a small script that stops and shuts down all processes that might cost you resources even after you quit any KDE mobile application. Just open a console and, to be sure there are no resource eaters running, run
kdepim-shutdown
Alternatively you can restart your phone.
Deinstallation
If installation happened only using the hildon application manager, you should be able to uninstall the same way.
When apt-get was used manually, you might have selected some additional packages for which you need apt-get to remove them again. Typically this will need
apt-get remove kdepim-mobile
You could find the following helpful to remove all the KDE related stuff.
. Everything that has an "ii" in the beginning of the line still is installed. Another attempt to see what is already installed from a KDE SC 4.x is
dpkg -l | grep -e "^.i.*4:4"
.
(Pay attention that other installations might use the KDE components, like libkok is used by freoffice.)
Clear the configuration
If you want to start over or remove the configuration of the KDE components
completely, you need to deal with three places. First make sure that no kdepim related application is running anymore! Here are a number of commands to move the old files into a new backup directory 'dot.kde-20100728'.
Also, some resources (like unsent mails) can be found at ~/.local/share/local-mail, ~/.local/share/contacts, ~/.local/share/notes and ~/.local/share/.local-mail.directory .
There is one step that you might have to do after moving away (or deleting) the .kde directory. Some packages create a preset kdewallet.kwl file for the 'user', which you need to recreate. The script doing so usually can be rightfully called so by the user:
The above snippet will install the German (-de) translation. Remove the "-de" for English, and substitute a language code for any other language.
Get encryption working
There is a touch version of kleopatra, if the package is not installed by the dependencies,
install it. You can use it to import your certificates or you just use Gnupg like you would
on other GNU systems on the command line.
You might need to check the permissions and the owner on the .gnupg folder, it seems
that there are some conditions where this folder belongs to root. For crypto to work
as a user, the user will need to be able to write the files in the folder.
Alternatively: Assuming you have all your keys together on your computer, you can find them most likely in ~/.gnupg. Please copy this folder to your N900, by simply connecting it via USB with your computer and copying the folder (Note: you might need to change some settings to be able to see hidden files. In Dolphin this would be Alt + . ). Now disconnect your N900.
If you already have a .gnupg folder on your phone, consider making a backup or deleting it before you do next steps.
Close all Kontact mobile applications. Open X Terminal on the N900. If you copied the .gnupg to the root folder of your MemoryCard on your N900 (Default Name: 'MyDocs') the following commands in X Terminal will do the job for you:
mv MyDocs/.gnupg ~/.gnupg
chmod 700 ~/.gnupg
Now you should be able to read and write signed and encrypted messages.
</translate><translate>
General Hints
If an application hangs you can press ctl(sym) + backspace (upper left and upper right button) simultaneously to get back to the application overview.
To enter special symbols like < > or | you can push the arrow symbol in the upper left corner and then the ctl(sym) to get a symbol table.
To make a screenshot, press Ctrl + Shift + P. The screenshot(s) will be saved in /home/user/MyDocs/.images .
If you like to start the applications from the command line, you need to use the wrapper scripts, as long as qt-experimental is used, to set the right LD_LIBRARY_PATH, e.g. kmail-mobile.sh, korganiser-mobile.sh, kaddressbook-mobile.sh.
There are many good reasons to install Kubuntu, such as:
Kubuntu makes your PC easier to use.
Kubuntu is an operating system built by a friendly worldwide team of expert developers. It contains all the applications you need, including a web browser, office suite, media apps, instant messaging, in addition to many others. For a list of the included software, see the Software page.
Kubuntu is a free, open-source alternative to Windows and Mac OS X.
It can be easily installed alongside, or instead of, Windows.
Preparing the installation media
Checking the MD5SUM
Doing this will ensure that your download is complete and that it has given you a fully working ISO to boot, which can be later installed from.
From Windows XP -> 7 -> 8 -> 10
Microsoft Windows does not have any built-in tools for MD5SUM but they do provide a tool for checking the MD5SUM. How-To-Geek also provides some information regarding MD5SUM reading material or Cygwin can be installed and UNIX utilities used instead.
From Mac OS X
Open the Terminal app, then navigate to the directory where the ISO is saved. Run:
md5 -r kubuntu-15.10-desktop-amd64.iso
And compare the output to the hashes page for the ISO file.
The first thing to do is to make sure you're in the directory with the .iso file (It will most likely be found in the Downloads directory). Then run the command 'md5sum': For more a more detailed explanation of MD5SUM: [4]
md5sum kubuntu-15.10-desktop-amd64.iso
Windows 7/8
USB/Flash Drives
For a GUI (Graphic User Interface) we use UNetBootin.
You can use UNetBootin to download the ISO(image file) automatically or it can be downloaded: Get Kubuntu.
If you choose the 'Diskimage' option you use the ... button to select your downloaded ISO. Then click OK.
UNetBootin Windows 8
Warning
Pay special attention when selecting the right USB device under 'Drive'.
DVD
The recommended tool for you to use is ImgBurn.
There is an excellent tutorial written by the Admin on the ImgBurn forums. It can be found here.
Existing Kubuntu Install
USB/Flash Drives
For a GUI (Graphic User Interface) we use UNetBootin.
You can use UNetBootin to download the ISO(image file) automatically or it can be downloaded here: Get Kubuntu.
Using the command line we use the 'dd' command.
Insert your USB drive into your computer and find the corresponding drive using:
lsblk
Then format the USB drive with the 'dd' command: sudo dd if=Downloads/kubuntu-15.04-desktop-amd64.iso of=/dev/sdX
Warning
Be extremely careful to set /dev/sdX to the right value, if you direct it to your hard drive you will wipe the disk.
DVD
For making a DVD we recommend this KDE tool called k3b, which can be found here.
K3b
Look for More actions..., click it and then pick Burn Image... from the list of actions.
K3b Image Selection
Then you select the image (iso) that you want to burn to the DVD from your computer.
Note
Most torrent clients and browsers store your downloads in the 'Download' directory.
Note
Most of the default settings for K3b for DVD burning do not require any changes.
Other Linux Distributions
GNOME based
USB/Flash Drives
For a GUI (Graphic User Interface) we use UNetBootin.
You can use UNetBootin to download the ISO(image file) automatically or it can be downloaded through Get Kubuntu.
DVD
Brasero
KDE based
If you're using a Linux Distribution that uses KDE you can follow the Kubuntu instructions as K3b is provided in every KDE based distribution.
Install Process
First, you will need to download Kubuntu. See Get Kubuntu
Note
You will need to press a special key on the keyboard in order to boot from your chosen Installation Media. Ex: Esc, F2, F10, F12, or Del , depending on the OEM (Original Equipment Manufacturer).
Install Welcome Screen
When the installer starts you will see these options:
Try out Kubuntu without changing anything on your computer.
Install Kubuntu on your computer.
Prepare
For the best result, ensure that:
Your computer has enough room for Kubuntu and your data (your songs, pictures, videos, and documents).
Your computer is connected to the Internet so that you can download updates and third-party software during the installation of Kubuntu.
Install Prepare Screen
Include this third-party software includes software that either does not follow the Open Source model or the Ubuntu Philosophy, but is safe for use on your system.
Downloading updates while installing will ensure that you have the latest bug and security fixes included and applied once the installation is complete.
Disk Setup
This is where you choose how to organize your hard drive. This step is the most complicated and consequential in the entire installation process, so take your time.
Tip
You will be able to change your mind and go back until the Install Now button is clicked.
The following sections are some possible installation scenarios you might choose. Each of these choices points to a page or series of pages with more details. For each option (except Manual), the installer asks which hard drive to use. After choosing, you will see a before and after layout on that hard drive.
Resize
This will resize the partitions for you and install Kubuntu on the free space. With this option, you can create what is called a dual-boot and choose which OS to boot into at startup.
Note
This is available only if at least 25GB are free.
Use entire disk
Using this option the installer will create two partitions on your hard drive; one for most of the content, including the root and home directories, and one partition for the swap.
Entire Disk option
Warning
This option will completely erase your hard drive. You will lose any operating systems (Windows, Mac OS X, Linux, etc.) and all of your data that is stored on that drive.
When using Manual to set up your system as you would like it, keep these thoughts in mind:
Manually setting up your hard drive
The root ( / ) directory needs at least 25 GB of space.
The home ( /home ) directory needs as much space as you will need for your files, music, pictures, and documents. So it is best to use the remaining space for the home partition, unless you are going to have a dual boot.
Swap space of at least half of the available RAM is recommended. For instance, with 8 GB of RAM, you should make the swap have at least 4 GB.
Note
If you have a Windows 8 sticker on your machine you might need to make a separate EFI partition with a fat32 filesystem.
For more detailed information regarding the Disk Setup of a Linux system you can check the DiskSpace page.
Timezone
During this step you get to pick the Region where you live and then the Timezone of the location in that Region. An example would be that I live in New York, so my Region is North America and my Timezone is New York (EST).
Setting your timezone
Keyboard
This is the step that will set up your keyboard's language or, if applicable, a different version of the language. For example, there is a Cherokee American English setting as well as different setups with special keys used in certain languages; in Kubuntu we try to make the use of the system easy for everyone!
Keyboard Screen
User Info
At this step of the installation you will be putting in user information like your name, username, and password. The password will be your key to logging into your new installation as well as installing new software, updating your system, and more, so keep it written down somewhere!
The Properties of Folder dialog lets you rename and specify all of its properties. Note that most properties are only available for your own folders and not for default folders like inbox etc. Default folders also cannot be renamed.
General
If you need to rename a folder change the entry in the Name: field. Act on new/unread mail in this folder is enabled by default on new folders, it allows notifications about new mail that arrives in the folder. Uncheck this option on folders like SPAM and trash that you do not desire notifications.
When replying to messages in this folder, check Keep replies in this folder if you want the replies to be stored in this folder rather than into the default configured sent-mail folder.
Check Hide this folder in the folder selection dialog if you do not want this folder to be shown in folder selection dialogs, such as the Jump to Folder and Move Message to dialogs.
By default new folders use the default identity. Uncheck Use default identity and select a new one from the Sender identity drop down menu. See Identities configuration for information on Identities. Replies to messages that were sent directly to you will still default to the message's “To” address if an according identity is found.
If you have groupware, you can change the contents e.g. calendar, notes, etc. of the folder in the Folder contents: drop down box.
If you share the folder with other users, you can Share unread state with all users which will show the same unread state for all users.
For example, a ticket system that all emails must be read and multiple users are responsible for reading unread tickets.
View
The Use custom icons option lets you choose icons that are different from the default ones in the folder list.
With Show column drop down you can set the visible columns in the header pane to Default, Sender, or Receiver. This is useful if you use a folder to save your own sent messages.
In the Message List section you can select and configure an Aggregation and Theme for this folder different from the default configured in KMails settings. For more details see the Message List tab in the Appearance page.
Retrieval
If you have an account that does not receive much mail and you don't want KMail to query the server as often, you can uncheck Use options from parent folder or account to set a higher interval in Automatically synchronize after: spin box.
In Retrieval Options you can change Always retrieve full messages option to Retrieve message bodies on demand if you have a slow connection. You can set how long the message will remain locally in the following spin box.
Templates
On this tab you can define folder-specific templates for your custom folders. For more details see the Standard Templates tab in the Composer page.
Expiry
You can set automatic cleanup or deletion of emails in this tab. Check the box if you would like to automatically expire read or unread messages respectively. Set the amount of days in the spinbox. If you do not want to permanently delete the messages you can assign a folder to move them to in Move expired messages to: textbox or folder selection dialog. Once you have reviewed the messages and want to permanently delete them, you can go to the folder expiry options of the folder you chose to move them to and set the option Delete expired messages permanently, then click the Save Settings and Expire Now button.
Warning
Messages that are deleted during expiration of old messages cannot be restored, so be careful with this setting.
Access Control
(IMAP only)
Here you can manage the access control lists (ACLs) of IMAP folders.
Note
The IMAP server must have user level ACL configured and enabled for this tab to be visible.
The currently active ACL is shown in the list. It consists of pairs of User Ids and the Permissions granted to users identified by that User Id[1]. ACLs are settable per-folder.
Note
As with everything else when using disconnected IMAP, you need to sync with the server for the changes to be transferred to the server.
IMAP ACLs define a lot of fine-grained permissions that you can grant or deny other users. For the sake of clarity, KMail will present them as the following five categories that you can choose from (see Table 3.1, “ACL Rights Summary” for the details if you already know IMAP ACLs).
None
Grants the users identified by User Id no rights at all. This is also the default for users not explicitly (or implicitly, as a group) listed in the ACL. These users will not see this folder in the list of IMAP folders presented to them by their mail clients.
Read
Grants the users identified by User Id reading rights for this folder. This also includes the ability for their mail clients to mark mails as read and store this information on the server[2].
These users will see this folder in the list of IMAP folders presented to them by their mail clients.
Use this to create a shared folder that others can read, but not modify.
If you were the editor of a company's news letter, you could create a folder for the purpose of distributing the news letter, grant everyone reading rights, and save the letter to this folder instead of sending it out by email to a catch-all address.
Append (also known as Post)
Grants the users identified by User Id reading (see above) and posting rights for this folder.
Use this to create a shared folder that others can read and post messages to, but cannot otherwise modify.
If you wanted to create a company-wide discussion forum, instead of using a web-based form or a separate company-private usenet server, you could create a bunch of folders (one per topic), and grant everyone reading and posting rights. Instead of posting to an NNTP server or writing their messages into a web form, people would just write emails and store them in the folder suiting the topic of the message.
Write
Grants the users identified by User Id reading, posting (see above), and writing rights for this folder.
The right to write to a folder includes deleting of messages, creating subfolders, and storing other attributes than read/unread on the server (e.g. answered).
Use this to create a shared folder that everyone has (almost, see All) the same rights for.
In the Append example, you could assign write rights to a group of people acting as moderators, which would then be able to remove off-topic posts, and create sub-topic-folders for high-traffic folders.
All
Grants the users identified by User Id reading, posting, writing (see above), as well as administration rights, i.e. the right to modify the ACL of this folder.
This is the default set of rights for the owner of a folder.
Table 3.1, “ACL Rights Summary” summarizes the IMAP ACL rights associated with each permission level.
[Table 3.1]
Mailing List
If you are going to use the folder for a mailing list open the Mailinglist Folder Properties dialog with Folder → Mailing List Management from the menu. Then you should check Folder holds a mailing list to associate this folder with the mailing list. Next you should click on Detect Automatically. KMail will then try to guess some information about the mailing list from the currently selected message. If KMail could not determine some addresses then you can add the missing information manually. To do this first select the Address type for which you want to add an address. You can choose between:
Post to List
This address is used for sending messages to the mailing list. This is usually an email address.
Subscribe to List
This address is used for subscribing to the mailing list. This can be an email address or the address of a web page.
Unsubscribe From List
This address is used for unsubscribing from the mailing list. This can be an email address or the address of a web page.
List Archives
This is the address of the archive of the mailing list. This is usually the address of a web page.
List Help
This address is used for requesting help for this mailing list. This is usually an email address.
After selecting the appropriate Address type you enter the email address or the address of the web page and then click on Add. With Remove you can remove addresses.
If all addresses have been added then you can execute an action, e.g. go to the list archives, by selecting the appropriate Address type and then clicking on Invoke Handler. If there is an email address and an address of a web page for the desired action then you will have to select the Preferred handler prior to clicking on Invoke Handler. Select KMail if you want to send a message to the email address and select Browser if you want to go to the web page.
Alternatively to invoking the handler for Post to List you can send a new message to the mailing list via Message → New Message to Mailing-List...
Shortcut
You can define a keyboard shortcut to access the folder.
Maintenance
This tab shows an overview about the folder type and its size, the number of read and unread messages in the folder and allows you to enable text indexing.
</translate>
This page is incomplete, inaccurate or just not good enough! Your help will be greatly appreciated. Before editing, please make sure You understand this Introduction to new contributors.
Configuring KMail
Configure Kmail
KMail configuration can be reached throughSettings → Configure KMail....
Listed below are the links to the many configuration options in KMail.
You can quickly set up new accounts with the Account Wizard. The following describes the manual configuration tabs. This page allows you to create one or more (incoming and outgoing) accounts, i.e. combinations of mail servers, login information and other settings. Typically, you will create one incoming (used to retrieve messages) and one outgoing (used for sending messages) account. You can create as many accounts as you want, though, and assign each one to different identities or decide on a per-message basis.
Apart from the options presented in the configuration dialog, some options can only be set directly in the KMail configuration file or through KIOSK (eg. Input into Konsole). These so called “hidden” configuration options cannot be changed via the normal KMail Settings dialog; they must be made by modifying the configuration file using a text editor or the kwriteconfig program. The configuration file is to be written in the format of [Section Name] and the following lines are the variables and their settings. If you are manually editing the configuration file you will need to add the [Section Name] before adding variables. The kwriteconfig will add the section for you as long as you use the --group switch.
The KMail configuration file is called kmail2rc and can be found in your home directory. The location can vary according to your operating system or distribution, but can always be found by running the command
kf5-config --path config --locate kmail2rc. For the remainder of this section, assume that the configuration file is located in /path/to/kmailrc.
Warning
Whenever changing these options, make sure to quit KMail first before editing the configuration file. Only restart KMail after you have made and saved the changes to the configuration file.
Send Message Distribution Notifications with an empty sender string (SendMDNsWithEmptySender)
Some servers might be configured to reject such messages, so if you are experiencing problems sending MDNs, make sure this option is set to false.
To enable this feature, add to the [MDN] section of the Configuration File:
SendMDNsWithEmptySender=true
If there is no such section, simply add [MDN] on a line by itself just above the option.
Alternatively, input the following into Konsole:
The default setting of “false” strictly speaking violates Internet standards, but is set that way for practical reasons, to avoid servers rejecting MDNs that KMail generates because they think they are SPAM.
MaximumAttachmentSize
This allows the maximum filesize allowed for attachments in the mail composer to be limited. To limit attachments to 20 MB in size, for example, add a line under [Composer] section of the Configuration File:
This option allows you to configure the application to close fully, even if there is a system tray icon configured, which would normally keep the application running. To enable the feature, add a line under [General] section of the Configuration File:
CloseDespiteSystemTray=true
Alternatively, input the following into Konsole:
kwriteconfig --file /path/to/kmailrc --group General --key CloseDespiteSystemTray true
OutOfOffice Specific
When manually entering entries into the configuration file, and there is no such section, simply add [OutOfOffice] on a line by itself just above the option. Applying defaults to the out-of-office configuration dialog via the corresponding button will restore this domain, in case the user has changed it.
CheckOutOfOfficeOnStartup
With this option enabled, KMail will check on every startup if there is an active out-of-office configured and show a warning if this is the case. To disable the feature, add a line under [OutOfOffice] section of the Configuration File:
Allow out-of-office settings to be adjusted by the user.
In case you don't want users to be able to upload their own out-of-office scripts to the server you can add to the [OutOfOffice] section of the Configuration File:
AllowOutOfOfficeSettings=false
If there is no such section, simply add [OutOfOffice] on a line by itself just above the option.
Alternatively, input the following into Konsole:
Allow out-of-office scripts to be uploaded by the user, but no settings changed.
If you want to allow your users to upload their own out-of-office scripts but you do not want them to be able to change the domain to react to and the react-to-spam setting, you can add to the [OutOfOffice] section of the Configuration File:
When editing vacation (out-of-office) scripts, the user can specify a domain to limit the sending of such replies to. To pre-load this setting with a default value, add to the [OutOfOffice] section of the Configuration File:
Enable sending of out-of-office replies to messages marked as SPAM.
By default, out-of-office replies are not sent to messages marked as SPAM. To override this behavior, add to the [OutOfOffice] section of the Configuration File:
In versions prior to 1.9, KMail saved all attachments to disk with permissions set to 600 — only readable or writable by the owner of the file. In response to user feedback, this was made configurable in KMail version 1.9, with the defaults changed to honour the umask set on the user account while saving files to disk. To enable this feature, add under [General] section of the Configuration File:
disregardUmask=true
Alternatively, input the following into Konsole:
kwriteconfig --file /path/to/kmailrc --group General --key disregardUmask true
AutoLostFoundMove
Activate this option to automate the handling of not yet uploaded messages in disconnected IMAP folders that cannot be uploaded. This can happen if the folder was removed from the server or your access rights have been restricted. Such messages will automatically be moved to a newly created lost+found folder if this option is enabled; you will be asked how to proceed every time otherwise.
Configuration File:
ShowUserAgent
Starting in version 1.9, KMail can show the User-Agent or X-Mailer value from the message header when using Fancy Headers (see View → Headers menu). To enable this feature, add under [Reader] section of the Configuration File:
The following lists contain words that should not be used because KEXI can use them in actual or future versions when dealing with data. Note that this is not a list of SQL keywords that are supported by KEXI but reservation for the future.
Warning
When designing your database you should do your best to avoid using these reserved words because otherwise you might end up having problems with your database file or even accidentally modify or remove the data.
Tip
If you still want to use reserved words enclose them with double quotation marks "".
Kexi SQL Reserved words
This list contains keywords that are reserved for use in Kexi SQL:
</translate>
AFTER
ALL
ASC
BEFORE
BEGIN
BETWEEN
BY
CASCADE
CASE
CHECK
COLLATE
COMMIT
CONSTRAINT
CROSS
DATABASE
DEFAULT
DELETE
DESC
DISTINCT
DROP
END
ELSE
EXPLAIN
FOR
FOREIGN
FULL
GROUP
HAVING
IGNORE
INDEX
INNER
INSERT
INTO
KEY
LIMIT
MATCH
NATURAL
OFFSET
ORDER
OUTER
PRIMARY
REFERENCES
REPLACE
RESTRICT
ROLLBACK
ROW
SET
TEMPORARY
THEN
TRANSACTION
UNION
UNIQUE
UPDATE
USING
VALUES
WHEN
<translate>
Kexi SQLite Driver Reserved words
This list contains keywords that are reserved for use by Kexi SQLite Driver:
</translate>
ABORT
ATTACH
CLUSTER
CONFLICT
DEFERRED
DEFERRABLE
DETACH
EACH
EXCEPT
FAIL
GLOB
IMMEDIATE
INITIALLY
INSTEAD
INTERSECT
ISNULL
NOTNULL
OF
PRAGMA
RAISE
STATEMENT
TEMP
TRIGGER
VACUUM
VIEW
<translate>
Kexi MySQL Driver Reserved words
This list contains keywords that are reserved for use by Kexi MySQL Driver:
</translate>
ACTION
ADD
AGAINST
AGGREGATE
ALTER
ANALYZE
ANY
ASCII
AUTO_INCREMENT
AVG
AVG_ROW_LENGTH
BACKUP
BDB
BERKELEYDB
BIGINT
BINARY
BINLOG
BIT
BLOB
BOOL
BOOLEAN
BOTH
BTREE
BYTE
CACHE
CHANGE
CHANGED
CHAR
CHARACTER
CHARSET
CHECKSUM
CIPHER
CLIENT
CLOSE
COLLATION
COLUMN
COLUMNS
COMMENT
COMMITTED
COMPRESSED
CONCURRENT
CONVERT
CUBE
CURRENT_DATE
CURRENT_TIME
CURRENT_TIMESTAMP
CURRENT_USER
DATA
DATABASES
DATE
DATETIME
DAY
DAY_HOUR
DAY_MICROSECOND
DAY_MINUTE
DAY_SECOND
DEALLOCATE
DEC
DECIMAL
DELAYED
DELAY_KEY_WRITE
DESCRIBE
DES_KEY_FILE
DIRECTORY
DISABLE
DISCARD
DISTINCTROW
DIV
DO
DOUBLE
DUAL
DUMPFILE
DUPLICATE
DYNAMIC
ENABLE
ENCLOSED
ENGINE
ENGINES
ENUM
ERRORS
ESCAPE
ESCAPED
EVENTS
EXECUTE
EXISTS
EXPANSION
EXTENDED
FALSE
FAST
FIELDS
FILE
FIRST
FIXED
FLOAT
FLOAT4
FLOAT8
FLUSH
FORCE
FULLTEXT
FUNCTION
GEOMETRY
GEOMETRYCOLLECTION
GET_FORMAT
GLOBAL
GRANT
GRANTS
HANDLER
HASH
HELP
HIGH_PRIORITY
HOSTS
HOUR
HOUR_MICROSECOND
HOUR_MINUTE
HOUR_SECOND
IDENTIFIED
IF
IMPORT
INDEXES
INFILE
INNOBASE
INNODB
INSERT_METHOD
INT
INT1
INT2
INT3
INT4
INT8
INTERVAL
IO_THREAD
ISOLATION
ISSUER
KEYS
KILL
LAST
LEADING
LEAVES
LEVEL
LINES
LINESTRING
LOAD
LOCAL
LOCALTIME
LOCALTIMESTAMP
LOCK
LOCKS
LOGS
LONG
LONGBLOB
LONGTEXT
LOW_PRIORITY
MASTER
MASTER_CONNECT_RETRY
MASTER_HOST
MASTER_LOG_FILE
MASTER_LOG_POS
MASTER_PASSWORD
MASTER_PORT
MASTER_SERVER_ID
MASTER_SSL
MASTER_SSL_CA
MASTER_SSL_CAPATH
MASTER_SSL_CERT
MASTER_SSL_CIPHER
MASTER_SSL_KEY
MASTER_USER
MAX_CONNECTIONS_PER_HOUR
MAX_QUERIES_PER_HOUR
MAX_ROWS
MAX_UPDATES_PER_HOUR
MEDIUM
MEDIUMBLOB
MEDIUMINT
MEDIUMTEXT
MICROSECOND
MIDDLEINT
MINUTE
MINUTE_MICROSECOND
MINUTE_SECOND
MIN_ROWS
MOD
MODE
MODIFY
MONTH
MULTILINESTRING
MULTIPOINT
MULTIPOLYGON
NAMES
NATIONAL
NDB
NDBCLUSTER
NCHAR
NEW
NEXT
NO
NONE
NO_WRITE_TO_BINLOG
NUMERIC
NVARCHAR
OLD_PASSWORD
ONE_SHOT
OPEN
OPTIMIZE
OPTION
OPTIONALLY
OUTFILE
PACK_KEYS
PARTIAL
PASSWORD
POINT
POLYGON
PRECISION
PREPARE
PREV
PRIVILEGES
PROCEDURE
PROCESS
PROCESSLIST
PURGE
QUERY
QUICK
RAID0
RAID_CHUNKS
RAID_CHUNKSIZE
RAID_TYPE
READ
REAL
REGEXP
RELAY_LOG_FILE
RELAY_LOG_POS
RELAY_THREAD
RELOAD
RENAME
REPAIR
REPEATABLE
REPLICATION
REQUIRE
RESET
RESTORE
RETURNS
REVOKE
RLIKE
ROLLUP
ROWS
ROW_FORMAT
RTREE
SAVEPOINT
SECOND
SECOND_MICROSECOND
SEPARATOR
SERIAL
SERIALIZABLE
SESSION
SHARE
SHOW
SHUTDOWN
SIGNED
SIMPLE
SLAVE
SMALLINT
SOME
SONAME
SOUNDS
SPATIAL
SQL_BIG_RESULT
SQL_BUFFER_RESULT
SQL_CACHE
SQL_CALC_FOUND_ROWS
SQL_NO_CACHE
SQL_SMALL_RESULT
SQL_THREAD
SSL
START
STARTING
STATUS
STOP
STORAGE
STRAIGHT_JOIN
STRING
STRIPED
SUBJECT
SUPER
TABLES
TABLESPACE
TERMINATED
TEXT
TIME
TIMESTAMP
TINYBLOB
TINYINT
TINYTEXT
TRAILING
TRUE
TRUNCATE
TYPE
TYPES
UNCOMMITTED
UNICODE
UNLOCK
UNSIGNED
UNTIL
USAGE
USE
USER
USER_RESOURCES
USE_FRM
UTC_DATE
UTC_TIME
UTC_TIMESTAMP
VALUE
VARBINARY
VARCHAR
VARCHARACTER
VARIABLES
VARYING
WARNINGS
WITH
WORK
WRITE
X509
YEAR
YEAR_MONTH
ZEROFILL
<translate>
Kexi PostgreSQL Driver Reserved words
This list contains keywords that are reserved for use by Kexi pqxx Driver:
</translate>
ABORT
ABSOLUTE
ACCESS
ACTION
ADD
AGGREGATE
ALTER
ANALYSE
ANALYZE
ANY
ARRAY
ASSERTION
ASSIGNMENT
AT
AUTHORIZATION
BACKWARD
BIGINT
BINARY
BIT
BOOLEAN
BOTH
CACHE
CALLED
CAST
CHAIN
CHAR
CHARACTER
CHARACTERISTICS
CHECKPOINT
CLASS
CLOSE
CLUSTER
COALESCE
COLUMN
COMMENT
COMMITTED
CONSTRAINTS
CONVERSION
CONVERT
COPY
CREATEDB
CREATEUSER
CURRENT_DATE
CURRENT_TIME
CURRENT_TIMESTAMP
CURRENT_USER
CURSOR
CYCLE
DAY
DEALLOCATE
DEC
DECIMAL
DECLARE
DEFAULTS
DEFERRABLE
DEFERRED
DEFINER
DELIMITER
DELIMITERS
DO
DOMAIN
DOUBLE
EACH
ENCODING
ENCRYPTED
ESCAPE
EXCEPT
EXCLUDING
EXCLUSIVE
EXECUTE
EXISTS
EXTERNAL
EXTRACT
FALSE
FETCH
FIRST
FLOAT
FORCE
FORWARD
FREEZE
FUNCTION
GLOBAL
GRANT
HANDLER
HOLD
HOUR
ILIKE
IMMEDIATE
IMMUTABLE
IMPLICIT
INCLUDING
INCREMENT
INHERITS
INITIALLY
INOUT
INPUT
INSENSITIVE
INSTEAD
INT
INTERSECT
INTERVAL
INVOKER
ISNULL
ISOLATION
LANCOMPILER
LANGUAGE
LAST
LEADING
LEVEL
LISTEN
LOAD
LOCAL
LOCALTIME
LOCALTIMESTAMP
LOCATION
LOCK
MAXVALUE
MINUTE
MINVALUE
MODE
MONTH
MOVE
NAMES
NATIONAL
NCHAR
NEW
NEXT
NO
NOCREATEDB
NOCREATEUSER
NONE
NOTHING
NOTIFY
NOTNULL
NULLIF
NUMERIC
OF
OFF
OIDS
OLD
ONLY
OPERATOR
OPTION
OUT
OVERLAPS
OVERLAY
OWNER
PARTIAL
PASSWORD
PATH
PENDANT
PLACING
POSITION
PRECISION
PREPARE
PRESERVE
PRIOR
PRIVILEGES
PROCEDURAL
PROCEDURE
READ
REAL
RECHECK
REINDEX
RELATIVE
RENAME
RESET
RESTART
RETURNS
REVOKE
ROWS
RULE
SCHEMA
SCROLL
SECOND
SECURITY
SEQUENCE
SERIALIZABLE
SESSION
SESSION_USER
SETOF
SHARE
SHOW
SIMPLE
SMALLINT
SOME
STABLE
START
STATEMENT
STATISTICS
STDIN
STDOUT
STORAGE
STRICT
SUBSTRING
SYSID
TEMP
TEMPLATE
TIME
TIMESTAMP
TOAST
TRAILING
TREAT
TRIGGER
TRIM
TRUE
TRUNCATE
TRUSTED
TYPE
UNENCRYPTED
UNKNOWN
UNLISTEN
UNTIL
USAGE
USER
VACUUM
VALID
VALIDATOR
VARCHAR
VARYING
VERBOSE
VERSION
VIEW
VOLATILE
WITH
WITHOUT
WORK
WRITE
YEAR
ZONE
<translate>
Kexi Oracle Driver Reserved words
This list contains keywords that are reserved for use by Kexi Oracle Driver:
</translate>
ADMIN
AFTER
ALLOCATE
ANALYZE
ARCHIVE
ARCHIVELOG
AUTHORIZATION
AVG
BACKUP
BECOME
BEFORE
BEGIN
BLOCK
BODY
CACHE
CANCEL
CASCADE
CHANGE
CHARACTER
CHECKPOINT
CLOSE
COBOL
COMMIT
COMPILE
CONSTRAINT
CONSTRAINTS
CONTENTS
CONTINUE
CONTROLFILE
COUNT
CURSOR
CYCLE
DATABASE
DATAFILE
DATE
DBA
DEC
DECLARE
DISABLE
DISMOUNT
DOUBLE
DUMP
EACH
ENABLE
END
ESCAPE
EVENTS
EXCEPT
EXCEPTIONS
EXEC
EXECUTE
EXPLAIN
EXTENT
EXTERNALLY
FETCH
FLUSH
FORCE
FOREIGN
FORTRAN
FOUND
FREELIST
FREELISTS
FUNCTION
GO
GOTO
GROUPS
INCLUDING
INDICATOR
INITRANS
INSTANCE
INT
KEY
LANGUAGE
LAYER
LINK
LISTS
LOGFILE
MANAGE
MANUAL
MAX
MAXDATAFILES
MAXINSTANCES
MAXLOGFILES
MAXLOGHISTORY
MAXLOGMEMBERS
MAXTRANS
MAXVALUE
MIN
MINEXTENTS
MINVALUE
MODULE
MOUNT
NEW
NEXT
NOARCHIVELOG
NOCACHE
NOCYCLE
NOMAXVALUE
NOMINVALUE
NONE
NOORDER
NORESETLOGS
NORMAL
NOSORT
NUMERIC
OFF
OLD
ONLY
OPEN
OPTIMAL
OWN
PACKAGE
PARALLEL
PCTINCREASE
PCTUSED
PLAN
PLI
PRECISION
PRIMARY
PRIVATE
PROCEDURE
PROFILE
QUOTA
READ
REAL
RECOVER
REFERENCES
REFERENCING
RESETLOGS
RESTRICTED
REUSE
ROLE
ROLES
ROLLBACK
SAVEPOINT
SCHEMA
SCN
SECTION
SEGMENT
SEQUENCE
SHARED
SNAPSHOT
SOME
SORT
SQL
SQLCODE
SQLERROR
SQLSTATE
STATEMENT_ID
STATISTICS
STOP
STORAGE
SUM
SWITCH
SYSTEM
TABLES
TABLESPACE
TEMPORARY
THREAD
TIME
TRACING
TRANSACTION
TRIGGERS
TRUNCATE
UNDER
UNLIMITED
UNTIL
USE
USING
WHEN
WORK
WRITE
<translate>
Kexi Sybase Driver Reserved words
This list contains keywords that are reserved for use by Kexi Sybase Driver:
</translate>
ACTION
ADD
AGAINST
AGGREGATE
ALTER
ANALYZE
ANY
ASCII
AUTOINCREMENT
AVG
AVG_ROW_LENGTH
BACKUP
BDB
BERKELEYDB
BIGINT
BINARY
BINLOG
BIT
BLOB
BOOL
BOOLEAN
BOTH
BTREE
BYTE
CACHE
CHANGE
CHANGED
CHAR
CHARACTER
CHARSET
CHECKSUM
CIPHER
CLIENT
CLOSE
COLLATION
COLUMN
COLUMNS
COMMENT
COMMITTED
COMPRESSED
CONCURRENT
CONVERT
CUBE
CURRENT_DATE
CURRENT_TIME
CURRENT_TIMESTAMP
CURRENT_USER
DATA
DATABASES
DATE
DATETIME
DAY
DAY_HOUR
DAY_MICROSECOND
DAY_MINUTE
DAY_SECOND
DEALLOCATE
DEC
DECIMAL
DELAYED
DELAY_KEY_WRITE
DESCRIBE
DES_KEY_FILE
DIRECTORY
DISABLE
DISCARD
DISTINCTROW
DIV
DO
DOUBLE
DUAL
DUMPFILE
DUPLICATE
DYNAMIC
ENABLE
ENCLOSED
ENGINE
ENGINES
ENUM
ERRORS
ESCAPE
ESCAPED
EVENTS
EXECUTE
EXISTS
EXPANSION
EXTENDED
FALSE
FAST
FIELDS
FILE
FIRST
FIXED
FLOAT
FLOAT4
FLOAT8
FLUSH
FORCE
FULLTEXT
FUNCTION
GEOMETRY
GEOMETRYCOLLECTION
GET_FORMAT
GLOBAL
GRANT
GRANTS
HANDLER
HASH
HELP
HIGH_PRIORITY
HOSTS
HOUR
HOUR_MICROSECOND
HOUR_MINUTE
HOUR_SECOND
IDENTIFIED
IF
IMPORT
INDEXES
INFILE
INNOBASE
INNODB
INSERT_METHOD
INT
INT1
INT2
INT3
INT4
INT8
INTERVAL
IO_THREAD
ISOLATION
ISSUER
KEYS
KILL
LAST
LEADING
LEAVES
LEVEL
LINES
LINESTRING
LOAD
LOCAL
LOCALTIME
LOCALTIMESTAMP
LOCK
LOCKS
LOGS
LONG
LONGBLOB
LONGTEXT
LOW_PRIORITY
MASTER
MASTER_CONNECT_RETRY
MASTER_HOST
MASTER_LOG_FILE
MASTER_LOG_POS
MASTER_PASSWORD
MASTER_PORT
MASTER_SERVER_ID
MASTER_SSL
MASTER_SSL_CA
MASTER_SSL_CAPATH
MASTER_SSL_CERT
MASTER_SSL_CIPHER
MASTER_SSL_KEY
MASTER_USER
MAX_CONNECTIONS_PER_HOUR
MAX_QUERIES_PER_HOUR
MAX_ROWS
MAX_UPDATES_PER_HOUR
MEDIUM
MEDIUMBLOB
MEDIUMINT
MEDIUMTEXT
MICROSECOND
MIDDLEINT
MINUTE
MINUTE_MICROSECOND
MINUTE_SECOND
MIN_ROWS
MOD
MODE
MODIFY
MONTH
MULTILINESTRING
MULTIPOINT
MULTIPOLYGON
NAMES
NATIONAL
NDB
NDBCLUSTER
NCHAR
NEW
NEXT
NO
NONE
NO_WRITE_TO_BINLOG
NUMERIC
NVARCHAR
OLD_PASSWORD
ONE_SHOT
OPEN
OPTIMIZE
OPTION
OPTIONALLY
OUTFILE
PACK_KEYS
PARTIAL
PASSWORD
POINT
POLYGON
PRECISION
PREPARE
PREV
PRIVILEGES
PROCEDURE
PROCESS
PROCESSLIST
PURGE
QUERY
QUICK
RAID0
RAID_CHUNKS
RAID_CHUNKSIZE
RAID_TYPE
READ
REAL
REGEXP
RELAY_LOG_FILE
RELAY_LOG_POS
RELAY_THREAD
RELOAD
RENAME
REPAIR
REPEATABLE
REPLICATION
REQUIRE
RESET
RESTORE
RETURNS
REVOKE
RLIKE
ROLLUP
ROWS
ROW_FORMAT
RTREE
SAVEPOINT
SECOND
SECOND_MICROSECOND
SEPARATOR
SERIAL
SERIALIZABLE
SESSION
SHARE
SHOW
SHUTDOWN
SIGNED
SIMPLE
SLAVE
SMALLINT
SOME
SONAME
SOUNDS
SPATIAL
SQL_BIG_RESULT
SQL_BUFFER_RESULT
SQL_CACHE
SQL_CALC_FOUND_ROWS
SQL_NO_CACHE
SQL_SMALL_RESULT
SQL_THREAD
SSL
START
STARTING
STATUS
STOP
STORAGE
STRAIGHT_JOIN
STRING
STRIPED
SUBJECT
SUPER
TABLES
TABLESPACE
TERMINATED
TEXT
TIME
TIMESTAMP
TINYBLOB
TINYINT
TINYTEXT
TRAILING
TRUE
TRUNCATE
TYPE
TYPES
UNCOMMITTED
UNICODE
UNLOCK
UNSIGNED
UNTIL
USAGE
USE
USER
USER_RESOURCES
USE_FRM
UTC_DATE
UTC_TIME
UTC_TIMESTAMP
VALUE
VARBINARY
VARCHAR
VARCHARACTER
VARIABLES
VARYING
WARNINGS
WITH
WORK
WRITE
X509
YEAR
YEAR_MONTH
ZEROFILL
<translate>
Kexi xBase Driver Reserved words
This list contains keywords that are reserved for use by Kexi xBase Driver:
</translate>
ABORT
ATTACH
CLUSTER
CONFLICT
DEFERRED
DEFERRABLE
DETACH
EACH
EXCEPT
FAIL
GLOB
IMMEDIATE
INITIALLY
INSTEAD
INTERSECT
ISNULL
NOTNULL
OF
PRAGMA
RAISE
STATEMENT
TEMP
TRIGGER
VACUUM
VIEW
<translate>
Note
Reserved words are kept separate for each driver so that they can also be used as reference.
All about lines! All three of these brushes produce lines of sorts, so this tutorial tells you the differences! In particular, the Curve brush is my recommended tool for drawing comic and anime lines, unless you're using the more expressive Sketch brush.
Curve brush
At first glance this may seem like a boring tool merely for decoration effects, but in fact, this is perhaps my favourite tool for drawing smooth, variable-width lines with a mouse (comic lines, basically).
Settings
First off, the line produced by the Curve brush is made up of 2 sections:
The connection line, which is the main line drawn by your mouse
The... curve lines I think, which are the extra fancy lines that form at curves. The curve lines are formed by connecting one point of the curve to a point earlier on the curve. This also means that if you are drawing a straight line, these lines won't be visible, since they'll overlap with the connection line. Drawing faster gives you wider curves areas.
You have access to 3 settings from the Lines tab, as well as 2 corresponding dynamics:
Line width: this applies to both the connection line and the curve lines. </translate>
<translate>
Line width dynamics: use this to vary line width dynamically.
History size: this determines the distance for the formation of curve lines.</translate>
<translate>
If you set this at low values, then the curve lines can only form over a small distances, so they won't be too visible.</translate>
<translate>
On the other hand, if you set this value too high, the curve lines will only start forming relatively "late".</translate>
<translate>
So in fact, you'll get maximum curve lines area with a mid-value of say... 40~60, which is about the default value. Unless you're drawing at really high resolutions.
Curves opacity: you can't set different line widths for the connection line and the curve lines, but you can set a different opacity for the curve lines. With low opacity, this will produce the illusion of thinner curve lines.</translate>
<translate>
Curves opacity dynamics: use this to vary Curves opacity dynamically.
In addition, you have access to two checkboxes:
Paint connection line, which toggles the visibility of the connection line
Smoothing, which... I have no idea actually. I don't see any differences with or without it. Maybe it's for tablets?
Drawing variable-width lines
And here's the only section of this tutorial that anyone cares about: pretty lineart lines! For this:
Use the Draw Dynamically mode: I tend to increase drag to at least 50. Vary Mass and Drag until you get the feel that's most comfortable for you.
Set line width to a higher value (ex.: 5), then turn line width dynamics on:</translate>
<translate>
If you're a tablet user, just set this to Pressure (this should be selected by default so just turn on the Line Width dynamics). I can't check myself, but a tablet user confirmed to me that it works well enough with Draw Dynamically.</translate>
<translate>
If you're a mouse user hoping to to get variable line width, set the Line Width dynamics to Speed.</translate>
<translate>
Note: the Speed trick works well on Linux, but on my Windows XP system the Speed setting is actually unstable, which makes this trick unusable. I don't know if this affects all Windows systems or just me, but if you encounter this problem, please confirm it at this bug report.
Set Curves opacity to 0: This is the simplest way to turn off the Curve lines. That said, leaving them on will get you more "expressive" lines.
Additional tips:
Zig-zag a lot if you want a lot of extra curves lines.
Use smooth, sweeping motions when you're using Draw Dynamically with Line Width set to Speed: abrupt speed transitions will cause abrupt size transitions. It takes a bit of practice, and the thicker the line, the more visible the deformities will be. Also, zoom in to increase control.
If you need to vary between thin and thick lines, I suggest creating presets of different widths, since you can't vary the base line width from the canvas.
Alternative:
Use the Draw Dynamically mode
Set Curves opacity to 100
Optionally decrease History size to about 30
The curve lines will fill out the area they cover completely, resulting in a line with variable widths. Anyway, here are some comparisons:
And here are examples of what you can do with this brush:
Particle brush
Like the Curve brush, the Particle brush produces fancy lines. Unfortunately, it lacks the dynamics options of the curve brush, making it less suited to drawing simple lines.
Unlike the Curve brush, the Particle brush produces more or less parallel lines.
You can tweak the following settings:
Particles: the number of lines, in a way. Most of them will be concentrated on one side, forming what looks like a very thick line then thinner ones.
Opacity weight: the opacity of the lines.
dx scale / dy scale: The displacement of the lines.</translate>
<translate>
These values can range from -100.00 to 100.00</translate>
<translate>
Low values like the default 0.30 create smooth curves</translate>
<translate>
Higher values up to 100.00 create very "turbulent" lines. I actually rather like the corresponding effect.</translate>
<translate>
Warning: renderings with negative values (whether small or large negative values) are very slow and can cause your system to freeze. Avoid negative values and you'll be fine.
Iterations: This actually affects the "spread" between lines. The Lower the value, the bigger the distance between lines, whereas at high values, the line will end up compact.
Gravity: Controls the... well, see the examples. The Higher the value, the less "gravity", i.e. the more messy the lines will be.</translate>
<translate>
Vary this value between 0.900 and 1.000. When the value is too low, it'd be like having a very high Drag value.
Airbrush mode: the various lines stop "catching up" to the mouse once you release the mouse. If you want them to continue, however, until they reach the mouse, you can turn on the Airbrush mode. In this mode, while the mouse is held down, the curves will continue to be drawn.
Dyna brush
There are two things confusing with this brush:
There are 4 modes, and they are not affected by the same values.
Not all possible value are "safe" values. Mess with them too much and your brush will become so big that you risk freezing your program.
Luckily for you, I've crashed my system enough times to figure out what's what for you!
Settings overview
So which settings affect which modes?
(these were tested with a mouse, so I don't know how tablet pressure affects them)
These aside:
Mass and Drag: The Dyna brush draw as though you're using the "Draw Dynamically" mode. Mass and Drag are basically the same as with Draw Dynamically, and affect the speed and resistance of the brush. You'll probably want to increase drag to increase control.
Two: Next to the Circle shape, you have a Two checkbox. I've never managed to figure out what it does, sorry. :\
Now, for a closer look at the drawing modes.
Drawing modes
Circle
This brush is made of two parts:
A connection line, which can be made invisible by unchecking Paint Connection Line
Circles: their maximum diameter are controlled by the Diameter function.</translate>
<translate>
By default, this value is 0, so only the connection line is drawn.</translate>
<translate>
To get circles, you need a minimum diameter of 2. You probably won't need values bigger than 10.</translate>
<translate>
The circles vary in size and spacing: faster mouse movements give bigger circles with larger spacing.
Lines
This brush creates a series of parallel-ish lines, and is mostly affected by two settings:
Line spacing: increasing this increases the maximum distance between lines. This value can range between 0 and 99.99. Drawing slower decreases the line distance, and drawing faster increases it.
Lines: the number of lines, with a maximum of 99. This mode is quite stable, so you can set both Line spacing and Lines to maximum (you probably don't need to though)
Angle: by default the brush orients to the drawing direction of the mouse. You can force it to orient it to a fixed angle.
Paint connection line: there won't actually be an extra line, but a line near the center may look thicker.
Polygon and Wire
These two brushes are actually complementaries of each other (as far as I can tell anyway), so the size settings affecting them are the same. The faster you draw, the more spread out the grids.
Initial width: determines the width of the brushes. An intial width of 1.50 corresponds roughly to a diameter of 150 px (with the default Width Range of 0.05), so unless you want a brush that big, you may want to lower this value.
Width range:</translate>
<translate>
Warning: This setting actually has a multiplying effect on the initial width: Doubling it from say, the default 0.05 to 0.10 will double the brush size. Since the default initial width gives about 150 pixels, increasing this value will quickly cause your brush to become huge and freeze the drawing process (guess what happened when I tried testing the maximum value of 99.99?).</translate>
<translate>
In fact, the lower this value, the more width variations. At 0.10 there's barely any size variations, so just keep this value below 0.10. If you're using the default 1.50 Initial width, you can use a width range value as low as 0.02 or 0.01.</translate>
<translate>
The faster you draw, the thinner the shape.</translate>
<translate>
If, for some reason, you want to increase this value, adjust the Initial Width downwards to avoid dealing with an enormous brush.</translate>
<translate>
If you set both Initial width and Width range to a negative value, the negatives will cancel out. If only one of them is negative however, it'd be like drawing with an Initial width of 0.
Angle: by default the brush orients to the drawing direction of the mouse. You can force it to orient to a fixed angle.
Paint connection line: The connection line is only visible in the wire mode.
Airbrush mode
The last setting to describe is the Airbrush mode. Like the Particle brush, Airbrush mode will cause the brush to keep drawing even if you stop your mouse movement. Because of its "dynamic" drawing behavior however, the brush will basically keep drawing in a spiral pattern approaching the mouse.
Konversation has built-in support for running external scripts which, partnered with D-Bus and Konversation's own D-Bus methods, cover the most common scripting use cases, such as displaying information in the current chat window or controlling another application or even Konversation itself. This guide introduces the basics of writing a Konversation script. It covers only the essential concepts necessary to get started. Language- and system-specific nuances will be left to the user as a learning exercise.
Requirements
All you need is a text editor and a programming/scripting language. Konversation supports any programming language that:
Can accept and process command-line arguments (argv's).
Can connect to and call D-Bus, or at least make external system calls (such as executing the program "qdbus"). It is probably better and more secure to use the language's native D-Bus bindings if available, rather than executing a system call to run qdbus.
At the moment, Python, BASH (or Shell), and Perl are known to work and have examples shipped with Konversation. But any language fulfilling the two requirements above would probably also work. This guide will give examples in Python.
Case 1: Display Information into the Current Chat Window
Probably the most common scripting scenario is getting some text to display in the current Konversation tab (channel or private message), with the data usually coming from an external source. This source could be the script itself, another application (such as the media script included with Konversation), or the Internet (like getting weather information and displaying it in Konversation). Whatever the source, there are 3 steps to perform:
Getting the input - catching and parsing the command sent by the user from Konversation.
Processing the data - gathering data from sources and manipulating it based on the input.
Sending the output - throwing the information back to Konversation through D-Bus.
The following is a nonsensical example of a Konversation script that roughly follows that pattern.
#!/usr/bin/env python# mood - a Konversation script to display a witty remark based on the user's mood.# Usage: /exec mood [mood_string]<!--T:12-->importsysimportsubprocess<!--T:13-->command=['qdbus','org.kde.konversation','/irc']<!--T:14-->argc=len(sys.argv)<!--T:15-->ifargc<2:command.append("error")text="Server required"elifargc<3:command.append("error")text="Target required"elifargc<4:command.append("error")text="No mood given"else:server=sys.argv[1]target=sys.argv[2]mood=sys.argv[3]<!--T:16-->ifmood=="hungry":text="Hungry! Anyone got a horse?"elifmood=="sleepy":text="I yawn, therefore I am."elifmood=="gloomy":text="Roses are red. Violets are blue, and so am I ..."elifmood=="happy":text="Thinking happy thoughts (with a dash of pixie dust)."elifmood=="hyper":text="Just a spoonful of sugar? I think I took a whole jar! *cartwheels*"elifmood=="excited":text="Are we there yet? Are we there yet? Are we there yet?"else:text="What were we talking about again?"<!--T:17-->command.append("say")command.append(server)command.append(target)<!--T:18-->command.append(text)<!--T:19-->subprocess.Popen(command).communicate()
Getting the Input
When Konversation calls an external script, it runs it with some predefined arguments, like this:
script_name server target [additional arguments ...]
Arguments are usually stored in a collection (a list or an array, depending on the language) called "argv" indexed from 0 to N, with N being the number of arguments.
argv[0] is always the script name itself. In most cases, it's safe to ignore this.
argv[1] is the address of the server the user is currently connected to. In case of multiple connected servers, this will always be the server to which the channel or query window is connected to.
argv[2] is the target, the name of the chat window where the command to run the script came from which, more often than not, would be the same window where output would be displayed. Of course, you can always change this.
argv[3] to argv[N] will be any additional arguments that would be sent by the user calling the script through Konversation. This can be anything from flags to enable/disable options in the script or data or text that can be displayed in the output of the script. Not all scripts have additional arguments, like the uptime and sysinfo scripts.
Remember
Even if your script doesn't require additional arguments or even if the user didn't supply them, Konversation will always send the system and target arguments. Meaning, argv[1] and argv[2] will always be set. The minimum argument count will always be 3 (remember, indexing starts at 0).
Processing the Data
In the example script, the mood variable, supplied by the user in argv[3] of the script, is compared to predefined values and the appropriate remark is assigned to the text variable. This is a simple example of data processing. You can also fetch data from a predefined data source, like the fortune script. Or assemble information coming from the operating system, such as done in the sysinfo script. Whatever information or text you need to be displayed in Konversation, you create that here.
Warning
A word of caution: Be careful when creating multi-line text output, as your server or the channel you're sending to may have anti-flooding policies. When dealing with a potentially large, it might be best to have it displayed in another way (like in a text editor).
Now that the needed information is processed and assembled, it's time to prepare it for sending back into Konversation, which is discussed in the next section.
Sending the Output
Controlling Konversation externally, like through a script or the command-line, involves using its D-Bus methods. Konversation has several of them, including a group whose purpose is to display messages. Sending D-Bus messages can be tedious. Fortunately, Qt provides a much easier way of doing that, using the helper program "qdbus". Without going into much detail, all the D-Bus commands we will be sending to make Konversation display messages starts with this string:
qdbus org.kde.konversation /irc
Depending on what kind of message the script will be sending, additional options will be added to that command. Here are but a few examples:
This is probably the command that will be most commonly used. It sends message to the chat window target connected to server. If you want the message to be sent to the same chat window where the script was called from, use argv[1] and argv[2] for server and target, respectively. Of course you can always change the target to any channel or nick you want in that server.
qdbusorg.kde.konversation/ircerrormessage
This displays the message in the same chat window where the script was invoked. The difference is that the message isn't actually sent to the IRC server and is only visible to the user. The message is also formatted as something like "[D-Bus] Error: message". Useful for informing the user about errors in using the script or if something fails in the script. It doesn't need a server or a target.
qdbusorg.kde.konversation/ircsayToAllmessage
Sends the message to all channels and query windows in all servers. Please use sparingly and observe proper netiquette. It doesn't require a server and a target.
qdbusorg.kde.konversation/ircactionToAllmessage
sayToAll's action sibling. Sends the message to all channels and query windows in all servers BUT prepends "/me" to the actual message, resulting in displaying something like "*YourNick message*". Again, netiquette applies.
Note
To send an action ("/me") message only to the current chat window (where the script was called from), compose the actual message as "/me message" and use the say variant of the command (first one in this list if you got lost ).
There are other /irc related qdbus commands, some of which change the user's status instead of displaying the command. Feel free to explore other possibilities. Another Qt helper program, "qdbusviewer", provides a graphical interface for browsing through the available commands for Konversation and other "D-Bus aware" programs. You will probably need it a lot especially for the second scripting scenario discussed later.
Getting the Script to Run
Now it's time to actually make the script run in Konversation. Here are the steps:
Make your script executable. chmod +x script_name does it all. It would be better to not include extensions (.sh, .py, .pl, etc.) in your filename, to make it easier to call the script.
Place the script in either one of two folders:
If you want your script to be available all users in your system, put the script together with the other scripts installed with Konversation. This may vary from distro to distro (or your own personal tinkering), but common a location is /usr/share/apps/konversation/scripts/. In case it's not there, get the output of the command kde4-config --install data and append /konversation/scripts/ to it. Consult your distribution's support channel if it's still not there.
If you want the script just for yourself, simply place the script in ~/.kde/share/apps/konversation/scripts/. Some distros might still be using ~/.kde4/ instead so adjust accordingly.
Post version 1.3.1 note: another way to find out where the installed scripts are is to run this command in Konversation's input line (using the media script as an example, since it comes with any Konversation installation): /exec --showpath media. Note that if there are two scripts with the same name in the user's home and in the system locations, the one in the user's home will take precedence and be the one shown here.
To actually run the script, you need to invoke it by running this command in Konversation's input line: /exec script_name [additional arguments]
This will call your script and pass the arguments to it. Remember that your script_name is always argv[0], and that the current server and chat window are passed as argv[1] and argv[2], even if you didn't include them in your command. Therefore, any additional arguments would be argv[3] and so on.
For convenience, you can create a command alias in Konversation so that you can invoke your script simply using /script_name instead of the actual syntax given above. To manually do this, go to Settings -> Configure Konversation -> Command Aliases page. Click on the New button and enter "script_name" in the Alias<m/enuchoice> field and "/exec script_name" in the <menuchoice>Replacement field. So next time you need to run your script, you can simply do use /script_name [arguments]
Alternately, whenever Konversation is started, it automatically creates a command alias of "/script_name" for "/exec script_name" for every script it finds in the scripts/ directories mentioned earlier.
For the previous example, the script is named "mood" and can be invoked either using /mood [mood] or /exec mood [mood], like:
/mood gloomy
That's basically all you need to know to make a Konversation script. To make it a bit more interesting, let's have an example of another common scripting scenario.
Case 2: Controlling an External Program from Konversation
Thanks to D-Bus, and the fact that a lot of KDE applications have D-Bus methods, you can control any KDE application right from within Konversation. Even without D-Bus, you can let your script start, stop, or possibly even control other applications simply with a command in Konversation. This lets you do a lot of things, like sending a command to a terminal emulator, opening a bug report in a browser providing only the report number (like the bug script), or simply running a system command (and probably displaying the results of that command, as the cmd script does).
The following script performs the first example. It first makes Yakuake visible and then runs the command supplied by the user. The script is rather simple and doesn't involve displaying anything back to the user, except in the case of an error when calling the script itself.
#!/usr/bin/env python# yakrun - Konversation script that runs the command supplied by the user in Yakuake and toggles Yakuake's state# Usage: /exec yakrun [command]<!--T:49-->importsysimportsubprocess<!--T:50-->errorCommand=['qdbus','org.kde.konversation','/irc','error']toggleCommand=['qdbus','org.kde.yakuake','/yakuake/window','toggleWindowState']runCommand=['qdbus','org.kde.yakuake','/yakuake/sessions','runCommand']<!--T:51-->argc=len(sys.argv)<!--T:52-->ifargc<4:text="No command to run."<!--T:53-->errorCommand.append(text)<!--T:54-->subprocess.Popen(errorCommand).communicate()else:command=" ".join(sys.argv[3:])<!--T:55-->runCommand.append(command)<!--T:56-->subprocess.Popen(toggleCommand).communicate()subprocess.Popen(runCommand).communicate()
Language-specific Notes
Be careful when processing arguments and assembling them into a single string with spaces, which might be more error-prone in some languages, such as BASH.
We've finally reached dynamics! Hurrah! Now, there are Way too many different combinations, and I don't have a tablet to show them all anyway, but I will list the most interesting settings that I know of.
Common settings
All dynamics will usually allow you to set the dynamics to one of 14 different settings.
Of these, 7 are tablet settings, some only available to more advanced tablets: Pressure, X-Tilt, Y-Tilt, Ascension, Declination, Rotation and Tangential pressure. Since I'm tablet-less, I won't describe them here (I don't even know what most of these are D: ).
This, however, leaves a whole 7 options that even us mouse-users can play around with! These are:
Speed
speed of drawing
Drawing angle
the direction of your brush
Attention
For the next 4 settings, read the curve from right to left.
I think it was set up this way so you can fade your lines without having to reverse the curve.
Distance
the distance you've drawn so far, but more used for repeating patterns
Time
The level of dynamics is dependent on the amount of time passed. This means if you're drawing at different speeds, repeating patterns won't come out in a regular way.
Fade
like Distance, but more intended for overall, non-repeating behaviour (technically the same though). You can have both Distance and Fade at the same time!
Perspective
this applies when you have a perspective assistant on, and your brush's "assistant" option is on. Also see the first part of my Brush tutorial for assistants.
Fuzzy
basically "random" or "jitter"
You will also have access to the two following options:
Use curve: allows you to set the dynamics using the curve. Otherwise, the brush will only take any absolute values defined. Basically, just keep it on.
Use the same curve: by default all the settings will share the same curve. Turn it off for some more variety.
As I address various dynamics I may also address a few examples of tweaking curves.
Opacity
By default, the Pressure setting for Opacity dynamics is activated for tablet users: the harder you press, the higher the opacity. For mouse users, you can set the dynamics to Speed.
The Opacity and Flow settings at the top are synchronized with the ones on the top toolbar. Remember that you can use these, as well as vary the spacing, to control the base opacity of a brush.
Tip: To make smoother transitions, draw using the "Draw dynamically" mode on the left bar.
I'll admit that I don't often use Opacity dynamics with a mouse because:
It's easier to fiddle with Opacity/Flow/Airbrush mode and pass over the same area again
I prefer color smudge brushes for shading. This will depend on your style however.
Size
On the other hand, I use Size dynamics all the time! Uses include:
Size changes to defined shapes (such as chains)
Varying size of texture / folliage
Repeating patterns
Random size
Perspective of course
Let's start with the one thing that mouse users wish to be able to do, that tablet users can do easily: increasing then decreasing the stroke's size. I actually use 3 different settings, two of which use the pixel brush:
</translate>
ACL Right
None
Read
Append
Write
All
Lookup
x
x
x
x
Read
x
x
x
x
Store Seen
x
x
x
x
Insert
x
x
x
Post
x
x
x
Write Flags
x
x
Create
x
x
Delete
x
x
Administer
x
<translate>
<translate>
<translate>
<translate>
Brush engine
Size Dynamics
Use for
Pros
Cons</translate>
Pixel brush
Speed
Objects, textures, rough lines
Vary size multiple times by varying speed
Transitions less smooth for thin, generic lines, difficult to quickly decrease size for short strokes</translate>
Pixel brush
Time
Short, generic strokes
Fast, can vary length a bit with speed
Timing is an issue for longer strokes, strokes are generic</translate>
Curve brush
Speed
Long, complex strokes
Super smooth, vary width relatively easily
Lacks the extra options/brush tips of pixel brushes</translate>
<translate>
Tip: Again, to make smoother transitions, use the "Draw dynamically" mode.
Whoa, for Method 2, that's that scary-looking curve? It's simple actually.
Remember, for Distance, Time, Fade and Perspective, you read the curve for Right to Left:
a. Increase smoothly to maximum size
b. Then decrease again
c. Stay 0.
The reason for c. is because Krita doesn't allow a duration under 1 second, actually quite a long time for short strokes.
With this setting, the whole curve is drawn within about 0.33 seconds. Vary this duration a bit to suit your own needs.
Tip: Method 2 is a function of time, so you have the following options to vary the length of the stroke:
Just draw faster/slower
Zoom in or out, so a smaller/bigger length is covered during that time.
If you're drawing with dynamic mode like I do, varying the "drag" value will also change the speed at which the curve is drawn: lower it for faster drawing.
This ability to vary length is the advantage this setup has over Distance.
The rest is just adjusting the brush size with Ctrl + drag.
I won't cover Method 3 in detail here since it's the wrong section, but it basically involves:
Using the Curve brush
Set Lines -> Line width to something in the range 5~20
Set Lines -> Curves opacity to 0
Line width -> Speed
So? What about the other settings?
Fun stuff! When using Distance and Fade at the same time, don't forget to uncheck Use same curve.
Spacing
For the most part, Spacing scales proportionally with brush size. This is a good thing because you won't end up with absurd densities when you scale up. You can add spacing dynamics though, the spacing dynamic will vary between 0 and the default spacing of your brush.
Moving on.
Mirror
If you need to flip your brush around, you can do so easily by checking the corresponding box at the top of the Mirror dynamic section.
It is actually pretty hard to synchronize distance and mirroring, by the way, so unless you just want random mirroring, I suggest making a custom animated brush. I just use the checkboxes otherwise, and ignore the options for dynamics.
Softness and Sharpness
Softness
Softness basically takes a hard brush and makes it softer. It only seems to work with two types of brushes:
Autobrush -> Default
Autobrush -> Soft brushes
It doesn't seem to work with anything else.
Note
Don't set the Softness to 0. It's probably a bug, but it stops working when you set it to 0. Just set it to a value very close to 0.
Sharpness
So Sharpness does the opposite of Softness, right? Not exactly, here's what it does:
It takes the threshold value, and basically eliminates all the grey values below the threshold.
Then, it takes the remaining areas, and make it a uniform value.
None of the dynamics seem to work. Weird.
Note
Don't set the Sharpness to 0. This one's buggy too.
Rotation
Along with Size dynamics, Rotation dynamics is probably one of those you'll use most, if only for the handy Rotation -> Drawing angle.
Many of the predefined brushes have built-in rotation, but Rotation -> Drawing angle is still very handy, and saves you the trouble of having to create multiple frames for custom brushes.
By the way, for custom brushes, make sure they're facing to the left.
Another thing that's very nice with Rotation is Rotation -> Distance to create controlled or unexpected patterns:
See the one on the bottom-right? I got that one from Aldy's brush set. The behaviour of the brush absolutely baffled me, and it turned out to be a simple autobrush with 0.02 spacing and Rotation -> Distance set at 50 px. Weird eh? Not that we're complaining. Vary the brush tip, the spacing and the distance for all sorts of frill effects.
Finally, Rotation -> Fuzzy is a whole lot of fun, especially in combination
with other dynamics. Examples include:
Random line styles
Texture-like effects
Or just to rotate some static images
Explore different settings, and don't forget to tweak spacing to adjust the effect.
Scatter
This first thing you'll want to do is lower the default, maximum value of 5.0 to something more reasonable, like 0.5.
The second thing you may want to do is adjust the spacing, as that affects the number of copies being scattered (the less the spacing, the more the copies).
Well, that's it. You don't really need to set the curve dynamics. Scatter away. Wee!
Color Source, Color Dynamics and Patterns
Color Source
A paintbrush usually just picks up a color and drops it on the canvas. Krita's pixel brush actually allows you to choose from 6 sources:
Plain color: the foreground color
Gradient: color from the gradient. It will usually just use the first color, unless you've added dynamics.
Uniform random: weird option, ignore it?
Total random: also weird option, ignore it?
Pattern: You brush the pattern onto the canvas. In this option the pattern is "static": it's like you're slowly revealing a layer with a pattern on it rather than painting a pattern.
Locked pattern: Your brush will pick up a bit of pattern and repeat that.
Note
In all cases, Krita still uses brush tips, except they'll be used to define the outline and degree of transparency (examples to the right).
You can access gradients and patterns from the top toolbar.
Krita also allows you to make custom gradients and custom patterns. Since the location of my last explanation of custom gradients isn't obvious (it's in the layers management tutorial), I'm repeating it here:
Custom gradients
In the Gradient drop-down, click Custom Gradient.
The black arrows represent control points with the colors left or right.
The white arrows just determine the speed of transition.
To add a new segment, click a segment, right-click and choose Split Segment
Note: Each segment has independent left and right values (shown in the example). This means you can easily create "abrupt" transitions.
If you don't want abrupt transitions, click the color button, copy the html value, open the color of the next segment, and paste the value in.
Custom patterns
To make a custom pattern:
Scribble your pattern on a new layer
Open the Custom pattern tab in the Patterns drop-down.
Source -> Current layer.
Click Update to get a preview.
Krita will automatically take only the visible areas, cutting away excess transparent areas.
Click Use as pattern
Now switch to your brush with "Pattern" as source and draw away.
Color dynamics
The following dynamics only work with:
Source -> Plain color or
Source -> Gradient
Darken and HSV
Darken makes your color a bit darker, I haven't found another use for it
Hue, Saturation and Value take your base color and vary its HSV value
To illustrate what they do, I have activated the following dynamics:
Distance: 300 pixels, no repeat
Two curve settings: full range, and smaller changes around the center value
Darken just darkens your color.
With HSV, the center value corresponds to your base color. If you vary Hue, then Saturation and Value won't change, but the hue will, etc. In theory this allows you to create small to large variations in HSV value.
However there's a much easier way of doing this: with Mix.
Mix
With Plain color, Mix will use the range of colors between your foreground and background colors.
With Gradient, Mix will use the range of colors of the gradient.
This makes it very easy to have brushes with varying shades of color.
If, for example, you want to make leaves with varying shades of green, you just have to have two green shades as foreground and background colors, and turn on Source -> Mix -> Fuzzy.
Texture -> Pattern
The last option left in brush dynamics is Texture -> Pattern. To illustrate what it does, I took a plain round brush and turned on the Pattern option.
Some options include:
Scale: The size of your pattern
Horizontal Offset/Vertical Offset: As you can see, the patterns are fixed. You can use these options to nudge them a bit horizontally or vertically.
OffsetStrengthOffset: Well, I'm not sure what it does mathematically, but here's a visual example:
As you can see, Strength doesn't do anything in particular to clear-cut patterns, but you'll see a difference when you're using images with lots of different values.
Finally we have Cutoff Policy. To demonstrate this, I made a pattern of my own:
As you can see:
Disregard Cutoff<(menuchoice>: dragging the sliders doesn't do anything.
<!--T:165-->
<menuchoice>Mask out: Areas below or above a certain threshold won't get painted over
Disregard pattern: Areas below or above a certain threshold get painted over
If you want, you can make a brush with a texture-like predefined brush tip, turn source to Pattern and add Texture -> Pattern. I can't guarantee the results, but it makes for some interesting effects.
Combos
We've had an overview of nearly all of the features of Krita's pixel brush now, so before we end this tutorial, here are some combos to try out, from the possibly useful to the outright silly. These were made with mouse users in mind.
Rather than confuse you with all the exact values to use, I grouped them up in a file to download.
Experiment around to come up with your own combos!
Of course, I skipped all the brushes that are basically "Use a texture-like predefined brush."
Here's a list for your reference.
And this concludes the tutorial on the Pixel Brush. Have fun!
</translate>
Welcome to the second part of my tutorial! This somewhat boring (but still useful!) episode will cover:
Layer management tips and tricks
General image editing tips and tricks
Tips:
Unless you always draw everything on the same layer, always remember to make a new, transparent layer to draw on instead of the background layer (unless you're drawing the background). I always forget to do this, and haven't found an easy work-around yet...
Better yet, get the habit of stuffing things into layer groups.
Layer management
Krita has lots of ways to manage layers and their visibility. I'll be addressing some of them in more detail.
Reminder tips:
Filling a layer with a color: Backspace (background color) or Shift + Backspace (foreground color).
Delete a layer's content: delete. Use this instead of Backspace to clear a transparent layer.
Inherit Alpha (alpha = transparency)
Suppose you want to draw some clothes. You have a "base" layer, and you want to add:
a layer for shadows
a layer for highlights
a layer for patterns
then a layer for textures
You want everything to be constrained to the area of the drawn clothes.
Alpha-inheritance locks the visibility state of a layer to only areas visible on all the layers below it, in the same stack. Basically, the layer "inherits" their visibility. Technically, this enables or disables the layer's alpha (as shown in the "channels" docker).
Note
Layers outside a layer group ("Base 1" in the example) can't affect individual layers in the group ("Group" in the above example), but it can affect the group as a whole, treating the group as a normal layer in the group.
To activate alpha inheritance for a group:
Right-click on the group folder, select Properties..., and uncheck Alpha
Or select the group folder, go to the Channel docker, and uncheck Alpha:
Do's and don'ts:
Comic frames
This feature works with vectors layers, which makes it handy to create comic frames. See Anitim's Comic with Krita tutorial on Youtube for more.
</translate><translate>
Layer masks and Erase mode
A layer or group's transparency mask basically dictates their visibility state:
Black mask areas -> fully visible areas
White mask areas -> invisible areas
Grey mask areas -> transparent areas
Unlike true erasing, your original drawing is still there: you can turn off the mask to make the corresponding layer or group fully visible again.
Tips:
You can add masks to groups. Their position relative to the layers in the group doesn't seem to matter.
You can duplicate or clone masks and move that to another layer or group, in case you need several layers to "share" masks.
Creating and editing masks
To edit a mask, you basically have to erase on it. You basically have 3 ways to give shape to a mask: create from selection, brush on erase mode and gradients.
Selection to mask
If you have a selection active, then when you make a mask, the mask will automatically take the shape of the selection.
Tip: You can feather the selection for a more smooth transition: choose Select -> Feather selection in the top menu.
Brushes on Erase mode
You can toggle on the "Erase mode" on most brushes with E. Drawing on the mask again with a not-invisible brush will allow you to "add opacity" again.
Warning
The opacity setting from the top toolbar seems to be ignored: even if you lower the opacity from there, you will still end up erasing 100% from the mask. This is rather a problem when you want just partial transparency.
</translate>
<translate>
However, opacity from the brush editor seems to work. So, if you need partial transparency, open up the brush editor, lower the opacity there, and erase away.
Gradients
You can also use gradients on "Erase" mode. Remember that on erase mode:
The opaque areas of the gradient will erase the mask
The transparent areas will leave it intact
You can create custom gradients too. The example left uses a radial gradient with several full opacity and partial opacity stops.
Custom gradients in Krita
The black arrows represent control points with the colors left or right.
The white arrows just determine the speed of transition.
To add a new segment, click a segment, right-click and choose Split Segment
Note: Each segment has independent left and right values (shown in the example). This means you can easily create "abrupt" transitions.
If you don't want abrupt transitions, click the color button, copy the html value, open the color of the next segment, and paste the value in.
Gradient shapes: (from Tool options)
Layers on erase mode:
Erase mode works a lot like masks, except:
It affects all the layers and groups beneath it
The opacity setting from the top toolbar works properly when erasing with brushes.
Basically, easier than making masks, though you have to stuff corresponding layers into sub-folders.
Filter brushes, masks and layers
I'm sure you've noticed by now that Krita has: filter brushes, filter masks And filter layers?
</translate>
<translate>
<translate>
<translate>
<translate>
Feature
Description
Comments</translate>
Filter brush
"Draw" filters with a brush!
-Not everything works as expected...
- Many default settings start with "none", so remember to actually enter a value!</translate>
Filter mask
Apply a filter to a layer or group!
- Non-destructive editing! You can turn the filter-mask on or off at any time.
- Right-click and select Properties to adjust filter settings</translate>
Filter layer
Applies filter to All layers below it
- You can tweak your whole image with a filter without flattening it first!
- You can erase parts of the filter layer!</translate>
<translate>
Tips:
Switch off the visibility of filter masks or filter layers when you're drawing on affected layers, or the whole thing becomes really slow, since everything is updated dynamically.
Can be edited like Masks/Erase layers: see section on masks.
Also great for group or image-level adjustments like Brightness/Contrast or Hue without having to flatten the image.
Local selections
Local selections basically allow you to "save" a selection to a layer. With a local selection "on":
When you select that layer, the local selection will be activated.
When you switch to another layer, the local selection will turn off.
You can also switch the local selection off manually, or have several local selections per layer.
In this example, after creating the first local selection, I then inverted it and created a second one. As you see, this allowed me to divide my (transparency-locked) base clothes layer into two, so I can color them independently.
Warning
When you create the local selection from a selection, there are two selections active at the same time:
The original one, which will Not disappear when you switch to another layer
And the new local selection, tied to that layer.
This will lead to some confusion when you want to switch the selections off. To switch them both off:
Switch the original active selection off with Shift + Ctrl + A
Toggle off the local selection by switching to another layer, or by toggling local selection off in the layer docker
Tip: As with layers and masks, you can duplicate a local selection and drag it to another layer.
Clone layers
Krita can make either duplicate or clones of layers.
Duplicates are basically independent copies. Nothing special there.
Clones, however, are linked to the original:</translate>
<translate>
They cannot be painted on independently</translate>
<translate>
But they will update automatically as the original is changed</translate>
<translate>
You can also change the blending mode (Normal, Multiply, Overlay, etc.)
Tip: You can clone groups! The output is a single, dynamically-updated layer!
What is this for? Well:
Re-using elements: You can move clones. When making comic or animation frames, you can more easily re-use elements.
Organizing: You could organize say... greyscale layers in another folder, and use clones in sub-groups. So, to view only the greyscale, you can turn the greyscale folder visible. (selective viewing can also be achieved with the composition docker)
Play with blending modes: for some reason or other, you may want to make an exact copy of your layer just to see how a clone with a different composite mode changes your image. A common-ish usage would be to clone comic frames or lineart to place at the top.
How to use all these features
Still awake? I'm going to give you an overview of features seen so far, but before that I'll address a limitation of just using alpha-locking (transparency-locking).
Filling in a flat area, locking the transparency and just shading on it will satisfy most people's requirements. There is one problem though: edge cases.
This is actually quite problematic if you're smudging near the edges to blend some colors.
Both alpha-inheritance and masks allow you to overcome this issue, because additional portions are just hidden, Krita still uses the hidden parts for calculating smudging and such.
(obvious features available for all layers and groups)</translate>
Layer-locking
Prevents you from drawing on layer accidentally
(obvious features available for all layers and groups)</translate>
Alpha-locking
You can only draw on areas already opaque
Issues when smudging edges</translate>
Alpha-inheritance
"Anti-spillover" for shading and texturing layers
Can't affect layers in sub-groups individually, but you can alpha-lock a group</translate>
Masks
Transparency fade effects
Transparency can only be tweaked by "erasing" for now. Opacity for erase brushes must be tweaked from the brush editing panel, not the top toolbar</translate>
Erase-mode layers
Like masks, but on a layer
Easier to use than masks, and opacity for erase brushes can be tweaked from top toolbar. Affects all layers beneath it, so caution!</translate>
Filter brush/mask/layer
Apply filters through a brush/Mask/Layer
Filter masks or layers allow non-destructive and/or partial aplication of filters. Turn off visibility when drawing to avoid slow-down.</translate>
Local selections
Save selections to a layer
Helps you further divide a layer into zones</translate>
Duplicate layers
Copy of a layer, group or mask
Good for some composite effects </translate>
Clone layers
Linked layer that updates when the original is updated
Cannot be edited independently save for moving. Allows easy re-use of elements. Cloning a group produces a single, easy to manage and dynamically-updated layer.</translate>
Vector layers*
Comic frames (See Anitim's Krita Comic tutorial on Youtube)
Vectors are editable shapes, which makes them handy for comic frames. Vector drawing is a whole genre, though Krita isn't specialized in vectors, so I won't cover it here...
</translate>
<translate>
The above are just some usage suggestions. I figured most of them from scratch, so I don't know how other people use them.
Additional tips:
Greyscale layers: If you're the type of person who likes to separate greyscale and coloring layers, then you can change a layer into pure greyscale layer with Layer -> Convert Layer Type... (from the main menu) and changing it to grayscale
You will now automatically draw in greyscale on this layer, even if you use a color brush. Other layers remain color layers.
Use Layer in the main menu for other, rather self-explanatory layer functions:</translate>
<translate>
Save Layer as Image (works for groups)</translate>
<translate>
Merge with Layer Below: also available from right-clicking images. Be careful if they're using different blending modes.</translate>
<translate>
Flatten Layer</translate>
<translate>
Mirror / Shear / Scale / Rotate</translate>
<translate>
Layer Effects
That's it for layers, layers management and layer properties. (ugh)
Image properties and editing
Alternate name: "This is where you learn to transform and tweak stuff." A lot here happens to be basic stuff available to most image editing programs, but then again people have to start somewhere to learn the basics...
Basics
Basic stuff, that everybody should know.
Canvas resize: Drew a torso, filling the whole canvas, and then you realized whoops? You wanted to draw the rest of the body as well? That's what Image -> Size Canvas... from the top menu is for. You can always crop later (crop tool to the left bar).
Krita will also implement an "infinite canvas" mode soon, and I'm really looking forward to it!
Press M to mirror the image.
Using the move tool on a group moves all the layers in it at the same time.
Ctrl + drag with the move tool will constrain to horizontal or vertical moves.
Colors and color adjustment operations:
Greyscale to RGB: Scanned your image in greyscale, but now you want to color it? Image -> Convert Image Type -> Model: Red Green Blue.
Adjust colors: Filter -> Adjust -> HSV Adjustment.... Since I'm bad with colors, I use this all the time to fix my colors. D:
Tips:
Since I use them often, I've assigned shortcuts to Brightness/Contrast curve (Shift + C) and HSV adjustment (Shift + H). You can too from Settings -> Configure Shortcuts....</translate>
<translate>
Cleaning up your lineart: way too many people upload their mushy grey-looking lineart scans. Making it black and white is easy:</translate>
<translate>
Open up Filter -> Adjust -> Brightness/Contrast curve...</translate>
<translate>
The Vertical lines specify the amounts of different grey values. Basically most greys should be white, and the other end should be converted to black.</translate>
<translate>
So just do this:
And so you get a usable lineart! Set it to the top of the layers on "multiple" mode. Deevad also has a tutorial that covers lineart preparation (among others).
Selections
You can access 8 selection tools from the toolbar:
Tip: Drawing with path selection:
Turn off "snapping" in the tool options. "Snapping" will cause the mouse to behave in a certain way, like jumping to a guide or snapping to angles. If you actually want this behaviour, great! If you don't, turn it off.
Types of lines:
Actions for selections:
To deselect, click Shift + Ctrl + A. With the rectangle or elliptical selection tools, clicking on the selection again will also deselect it.
By default, creating a new selection replaces the existing ones. However, if you want to work more on a selection, you can make use of selection modes in tool options:
From left to right:
Replace (the normal mode): replaces previous selections
Intersect: only the intersection of the previous and current selections will remain active
Add: add to the previous selection
Subtract: remove from the previous selection
Other options from top menu Select includes:
Invert Selection inverts the selection.
Feather Selection... : This will make the borders of the selection more "fuzzy", i.e. smooth transition until no-selection (like a mask's grey areas).
Grow/Shrink Selection...: exactly what it says.
Border Selection...: creates a border from the selection. If you want to make a frame for example, you can make a rectangular selection, then make a border with it.
Select Opaque: all visible areas are selected.
Various uses:
Convert selection to mask: create a "transparency mask" with a selection active
Convert selection to filter mask: create "filter mask" with a selection active
Convert selection to local selection: create a "local selection" with a selection active
Mask to selection: Select -> Mask To Selection from the top menu.
And of course, you want to make proper selections before transformations.
Transformation tool and deform brush
Krita's transformation tool has 2 modes: a normal-ish one, and a weird deform one called "warp" (good for deforming textures?).
Transformation tool: Free Transform Mode
The mouse icon changes when you hover near the points. Unfortunately the screenshot doesn't show this, but you can try for yourself.
To confirm the transformation, press Enter or choose apply from tool options.
From tool options, you can also input values manually.
For the most part, this works fantastic! Unfortunately the perspective function seems more like it's from a 3D program than a 2D program: it rotates the entire plane around the cross.
I admit I would have preferred a perspective interface that works more like Krita's perspective guides (i.e., you drag the corners individually), which is also how it works in Gimp. In the worst case, you could try switching to Gimp for perspective transform then switching back.
Transformation tool: Warp Mode
Warp mode is this strange mode where you deform the drawing by dragging on control points.
Although I haven't tried it yet, you could try it for deforming fabric texture, for example.
You can also place control points yourself with custom:
Toggle between adding points and warping with the (Un)lock Points button
With points unlocked, you can place new points (shown here in red)
With points locked, dragging on them will deform the drawing
Deform brush
Finally, you can deform things with the deform brush (find it where all the other brushes are). ! I'm not sure why the default is Swirl CW, but there are actually 8 modes. Access them from Color -> Deform Options in the brush editing panel.
Here I also turned on the Airbrush mode, which makes the brush keep working as long as the mouse button is pressed down (instead of having to move the brush).
This concludes this episode of this tutorial. As you may have realized, Krita allows you to achieve a same result with many different ways. It's up to you to choose which one you are most comfortable with.
Thie episode covers just about everything except the truly fun part of Krita (drawing), so just memorize it once and you're set.
Quick start: Create a first project, add some clips, transitions, and effects, and render it. Quick as of Only the details that are required
Project details: More in-detail. Correct fps number, resolution (which to take if the input video is FullHD and the output should be 720p e.g.), proxy clips ...
Editing: Features related to editing on the timeline, like cutting, transitions, moving, grouping.
Kdenlive's application-wide persistent settings are stored in the following locations, depending on your platform.
GNU/Linux
~/.config/kdenliverc : contains the general settings of the application. Delete this and restart kdenlive to reset the application to "factory" settings
~/.config/session/kdenlive_104534dcfdb61d887154xxxxxxxxxxx_154yyyyyy_98zzzz : temporary session info
~/.cache/kdenlive : cache location storing audio thumbnails, video thumbnails, and proxy clips
~/.local/share/kdenlive/HD : lumas folder inside here contains the files used for Wipes
~/.local/share/stalefiles/kdenlive
Windows
%LOCALAPPDATA%\kdenlive\cache : cache location storing audio thumbnails, video thumbnails, and proxy clips
%APPDATA%\kdenlive : contains user library clips, speech models, profiles and titles
%PROGRAMFILES%\kdenlive\bin\data\kdenlive\lumas : lumas folder inside here contains the files used for Wipes
↑Note that a single User Id might refer to more than one user. Depending on the IMAP server and its configuration, there may be User Ids that correspond to groups of users, anonymous users, or any user. Consult the manual of your specific IMAP server implementation for more information.
↑Every user has their own list of read mail, so none of your unread mails will suddenly be marked as read just because someone else has already read them.
The Composite transition combines the video data from two video tracks into one. This transition is used in combination with Alpha Channel information supplied by one of the Alpha Manipulation Effects or by the use of a Wipe File. This Alpha Channel data describes how the data from the two video tracks should be combined. Until you define some alpha channel data using an Alpha Manipulation Effect or a Wipe File, changes in the Composite transition settings will have no visible effect.
Note: The disadvantages of the Composite transition are: luma bleed, and less precise position control. When compared to Affine, the Composite transition, it does not support rotation or skewing but it is much faster, albeit at the cost of luma bleed.
Alpha operations
Alpha operation options are Over, And, Or and Xor
Operation Over
The clip with alpha information is located on the top track: the selected color acquires transparency.
The clip with alpha information is located on the bottom track: we see only the top clip.
Operation And
The clip with the alpha information is located on the top track: the selected color becomes transparent.
The clip with alpha information is located on the bottom track: everything in the image becomes transparent, except for the selected color.
Operation Or clears any alpha information
Operation Xor
The clip with alpha information is located on the top track: everything in the image becomes transparent, except for the selected color.
The clip with alpha information is located on the bottom track: the selected color acquires transparency.
Tutorial showing how to use the "Blue screen" function, composite transition and Keyframes to animate one image moving over another in the Kdenlive video editor.
{{#ev:youtube|M8hC5FbIzdE}}
Tutorial 3 - Video Masks
This tutorial uses the Composite transition and a custom video mask (a.k.a. a Wipe File or matte) to create an effect where you can make it appear that one video is playing on the screen of a still of a computer monitor.
The mask/matte is created with GIMP.
Save your mattes to /usr/share/kdenlive/lumas.
It would appear that you need to stop and restart Kdenlive in order for it to pick up new matte/wipe files saved in the above directory.
There appears to be a defect in this functionality which means that when the composite is on 100% Opacity, the wipe file does not work. You need to change it to 99% to make the effect kick in.
{{#ev:youtube|FIpnGlRY27U}}
Screenshot of Composite transition using a custom wipe file to mask out a section of video - as described in Tutorial 3.
Aspirational goal - a compositing experiment made using detonation films free sample effects.
Warning: video below may be inappropriate for some users.
{{#ev:youtube|vo-xntF1bns}}
The following effects are available under the Effects List -> Audio. The links below are to the MLT framework documentation for these audio effects. Somewhat better documenation may be found at Steve Harris' LADSPA Plugin Docs here.
The first step is creating a new (empty) folder for our new project. I will call it quickstart-tutorial/ in this tutorial. Then get some sample video clips, or download them from here:File:Kdenlive-tutorial-videos-2011-avi.zip (7 MB)[1], and extract them to e.g. a quickstart-tutorial/Videos/ subfolder inside the project folder.
The image on the left shows the suggested directory structure: Each project has its own directory, with video files in the Videos subdirectory, audio files in the Audio directory, etc. (read more)
(The tutorial from now on assumes that you use the sample videos provided, but it works with any.)
New Project dialog
Open Kdenlive and create a new project File -> New.
Choose the previously created project folder (quickstart-tutorial/) and select an appropriate project profile. The video files provided above are 720p, 23.98 fps.[2] If you are using your own files and don’t know which one to use, Kdenlive will suggest an appropriate one when the first clip is added [3] , so you can leave the field on whatever it is.
If you like you can change to the dark theme: Settings -> Colour Theme i.e Breeze-Dark
Adding clips
Project Bin: Adding video clips
Now that the project is ready, let’s start adding some clips (i.e. the ones you downloaded). This works via the Project Bin widget; a click on the Add Clip or Folder icon directly opens the file dialog, a click on the small arrow shows a list of additional clip types that can be added as well. Video clips, audio clips, images, and other Kdenlive projects can be added via the default Add Clip or Folder dialog.
Kdenlive window with the tutorial files
After loading the clips, Kdenlive will look similar to this. On the top left there is the already known project tree. Right of it are the monitors that show video; The clip monitor displays video from the original clips, the project monitor shows how the output video will look, with all effects, transitions, etc. applied. The third, also very important, item is the timeline (below the monitors): This is the place where the video clips will be edited. There are two different types of tracks, Video and Audio. Video tracks can contain any kind of clip, audio tracks as well – but when dropping a video file to the audio track, only the audio will be used.
Saving a Kdenlive project
Let’s save the work via File -> Save. This saves our project, i.e. where we placed the clips on the timeline, which effects we applied, and so on. It can not be played.[4] The process of creating the final video is called Rendering.
Now comes the actual editing. Project clips are combined to the final result on the timeline. They get there by drag and drop: Drag some Napoli (assuming you are using the files provided above, as in the rest of this quick start tutorial; If not, please make sure your screen is waterproof, and perhaps tomatoproof) from the project tree, and drop it onto the first track in the timeline. In this case track V2.
First clips in the timeline
Since some cutlery is needed as well, grab the spoon clip and drop it on the first track as well (track V2). Then drag the Napoli to the beginning of the timeline (otherwise the rendered video would start with some seconds of plain black), and the Spoon right after the Napoli, such that it looks like in the image on the left. (Where I have zoomed in with Ctrl + Wheel.)
Timeline cursor
The result can already be previewed by pressing Space (or the Play button in the project monitor). You will see the Napoli directly followed by a Spoon. If the timeline cursor is not at the beginning, the project monitor will start playing somewhere in the middle; you can move it by dragging it either on the timeline ruler or in the project monitor. If you prefer keyboard shortcuts, Ctrl + Home does the same for the monitor that is activated. (Select the Project Monitor if it is not selected yet before using the shortcut.)
Resize marker
Since after eating comes playing, there is a Billiards clip. Add it to the timeline as well (track V1). For the first 1.5 seconds nothing happens in the clip, so it should perhaps be cut to avoid the video becoming boring. An easy way[5] for this is to move the timeline cursor to the desired position (i.e. the position where you want to cut the video), then drag the left border of the clip when the resize marker appears. It will snap in at the timeline cursor when you move close enough.
Overlapping clips
To add a transition between eating (the Spoon) and playing billiards, the two clips need to overlap. To be precise: place the second clip above or below the first one. The first clip should end some frames after the second one begins. Zooming in until the ticks for single frames appear helps here; it also makes it easy to always have the same transition duration, five frames in this case.
You can zoom in by either using the zoom slider at the bottom right corner of the Kdenlive window, or with Ctrl + Mousewheel. Kdenlive will zoom to the timeline cursor, so first set it to the position which you want to see enlarged, then zoom in.
Transition marker
Now that the clips overlap, the transition can be added. This is done either by right-clicking on the upper clip and choosing Insert a Composition and choose Wipe or, easier, by hovering the mouse over the lower right corner of the Spoon clip until the pointing-finger pointer is shown and the message "Click to add composition" appears. The latter, by default, adds a wipe transition, which is in this case the best idea anyway since the Spoon is not required for playing.
Let’s now add the last clip, the Piano, and again apply a wipe transition. When adding it on the first track of the timeline (track V2), you need to click on the new clip’s lower left edge to add the transition to the previous clip.
Effects
Effect List
The Piano can be colourized by adding an effect to it. Click on the effect view (if effect view is not visible enable the view: View -> Effects). Type rgb in the search field then double-click the RGB Adjustment effect.
Once the effect has been added, click on an empty part in the timeline and you see its name on the timeline clip. It will also be shown in the Effect/Composition Stack widget.
Effect Stack with RGB adjustment
To get a warm yellow-orange tone on the image, fitting the comfortable evening, blue needs to be reduced and red and green improved.
The values in the Effect/Composition Stack widget can be changed by using the slider (middle mouse button resets it to the default value), or by entering a value directly by double-clicking the number to the right of the slider.
The Effect/Composition Stack widget always refers to the timeline clip that is currently selected. Each effect can be temporarily disabled by clicking the eye icon, or all effects for that clip can be disabled using the check box at the top of the Effect/Composition Stack widget (the settings are saved though), this is e.g. useful for effects that require a lot of computing power, so they can be disabled when editing and enabled again for rendering.
For some effects, like the one used there, it is possible to add keyframes. The framed watch icon indicates this. Keyframes are used for changing effect parameters over time. In our clip this allows us to fade the piano’s colour from a warm evening colour to a cold night colour.
Keyframes for effects
After clicking the keyframe icon (the clock icon framed in the previous image), the Properties widget will re-arrange. By default there will be two keyframes, one at the beginning of the timeline clip and one at the end. Move the timeline cursor to the end of the timeline clip, such that the project monitor actually shows the new colours when changing the parameters of the keyframe at the end.
Make sure the last keyframe is selected in the Properties list. Then you are ready to flood the piano with a deep blue.
Moving the timeline cursor to the beginning of the project and playing it (with Space, or the Play button in the Project Monitor), the piano should now change the colour as desired.
Keyframing was the hardest part of this tutorial. If you managed to do it, you will master Kdenlive easily!
Since the clips do not provide any audio, let’s search for some nice piece of music, from your local collection or on web pages like Jamendo. The audio clip should, after adding it, be dragged to an audio track on the timeline.
The audio clip can be resized on the timeline the same way as video clips are. The cursor will snap in at the end of the project automatically. To add a fade out effect at the end of the audio clip (except if you found a file with exactly the right length) you can hover the top right (or left) edge of the timeline clip and drag the red shaded triangle to the position where fading out should start.[6]
Rendering
Rendering dialog
A few minutes left, and the project is finished! Click the Render button (or go to Project -> Render, or press Ctrl + Enter) to get the dialog shown on the left. Select the desired output file for our new video with all effects and transitions, choose MP4 (works nearly everywhere), select the output file location and press the Render to File button.
Rendering progress
After some seconds rendering will be finished, and your first Kdenlive project completed. Congratulations!
Complete manual
Further documentation for the current version of Kdenlive can be found in the full manual.
↑720 is the video height, p stands for progressive scan in contrast to interlaced video, and the fps number denotes the number of full frames per second.
↑Provided Configure Kdenlive Settings under Misc is set to Check if first added clip matches project profile
↑To be correct, it can be played using melt yourproject.kdenlive, but this is not the way you would want to present your final video since it is (most likely) too slow. Additionally, it only works if melt is installed.
↑Writing it this way suggests that there are several ways of cutting a clip. This is in fact true.
↑This shaded triangle is a shorthand for adding the effect Fade -> Fade out. Both ways lead to the same result.
Effects in Kdenlive can be used to modify the audio and video properties of the source material.
You add effects to clips by choosing them from the Effects Tab and dragging them onto a clip in the timeline. Or by selecting a clip in the timeline and choosing Add Effect from the Timeline menu or Add Effect from Clip in Timeline right click menu . For more detail see QuickStart - Effects
The effects that are in play on a given clip can be viewed and edited via the Properties Tab that displays when the clip in question is selected in the timeline.
You can also apply effects to an entire track. This is achieved by dragging an effect from the Effect Tab to the Track Header. Or you can click on the track header and chose Add Effect from the Timeline menu . Tracks which have effects added in this fashion will have a gold star icon in the track header.
Figure 1a. Track header showing star icon indicating an effect has been added to this track.
Effects Tab
Make the Effects Tab visible from the View menu (View -> Effects)
Figure 1b - effects tab. The Information icon (6) has been toggled so that the tab displays a brief description of the selected effect at the bottom
The effects tab has 5 different icons that cause the application to show and hide different categories of effects.
By default the effects tab displays the "Main Effects" (Icon 1 selected). These are the Audio Correction, Alpha/Transform, Analysis and data, Colour and the Image adjustment categories.
Icon 2 makes it display all the video effects categories (This option hides the Audio Correction category that is in the "Main Effects" and adds the Misc and Motion categories).
Icon 3 makes it display all the Audio effects categories
Icon 4 is Custom effects
Icon 5 is Favorite Effects. This is the same list that appears in the "Insert an Effect ..." context sensitive menu obtained on a clip in the timeline. An effect gets in this list by choosing Add to Favorites from the context sensitive menu on each of the effects.
Icon 6 toggles the information display which - when on - shows a description of what the effect does.
If you find that you are missing some effects or effects categories that you know and love it is probably because you need to choose to display the hidden effects by choosing an Icon other that Icon 1 - "Main Effects"
To add an effect to a clip, simply drag it from the Effects Tab to the clip on the timeline.
The Properties Tab and its Menu
The Properties Tab
The Properties Tab displays the settings for the effects on the currently selected clip (Figure 3) or the settings for the currently selected transition (Figure 4) depending on whether it is a clip or a transition that is currently selected.
Figure 3 - Properties when a clip with effects is selected
Figure 4 - Properties when a transition is selected
Click the eye icon shown at 2 to temporarily disable the effect and toggle the button to the state shown at 1.
Click the empty eye icon shown at 1 to re-enable a disabled effect and toggle the button to the state shown at 2.
To remove an effect from a clip, click the trash can icon labelled 3 in the image below. The arrow labelled 1 minimizes the effect in the Properties Window. And the icon labelled 2 brings up the Properties Tab menu shown.
Reset Effect
This reverts all the settings in the effect back to their default values.
Save Effect
This allows you to save the current effect and all its settings. The saved effect will appear in the Effect List in the Custom category.
Create Group
This creates an Effect Group. An Effect Group is a place holder for multiple effects. You can then save the group of effects — they will the appear in the Effect List, in the Custom Section. You can then later apply the whole group of effects to other parts of the timeline.
To add effects to the group, first add the effect in question to a clip. Then drag that effect and drop it onto the Effect Group in the Properties Tab.
Create Region
New in ver >=0.9.3
The "Create Region" feature enables a user to apply an effect to a part of a clip only. It is a really powerful feature but currently the UI is not fully ready to get its full potential.
Basically, you add an effect to a clip — for example "Sepia" — then you go in the effect's menu and select "Create Region". This will now open a file dialog.
In that dialog, you need to point to an MLT clip with alpha transparency. This is where Kdenlive is not 100% ready because there are many ways we could create such clips, using for example a threshold filter or rotoscoping. But as a start, let's say you can open any image with alpha transparency, or a title clip created with Kdenlive. Then, the "sepia" effect will only be applied on the non-transparent areas of this "region" clip.
Keyframes in effects
Many effects use the concept of "Keyframes". Keyframes are user-defined points in your clip where you want an effect to start, stop or change. You can set the parameters for your effects to different values at different keyframes and Kdenlive will then gradually change the parameters between the two keyframes so that by the time the video has arrived at the next keyframe it will have adjusted the parameter to match that key frame. It interpolates between keyframes.
See QuickStart - Effects for an example on keyframing the RGB adjustment effect.
Since Version 20.08.0
Effect panels get zoom bars. Adjusting keyframes just get easier.
The effect’s keyframe panel has new icons, improved keyframe grabbing and new functions like:
File:Move-kf-to-cursor.mp4</translate>
<translate> # Select the keyframe you want to move</translate>
<translate> # Move the cursor to the position where you want to move the keyframe to</translate>
<translate>
Click on Move selected keyframe to cursor position
File:Duplicate-keyframe.mp4</translate>
<translate> # Select the keyframe you want to duplicate</translate>
<translate> # Move the cursor to the position where you want to insert the new keyframe</translate>
<translate>
Click on Duplicate selected keyframe
File:Apply-value-to-selected-kf.mp4</translate>
<translate> # Select all keyframes you want to apply the value on</translate>
<translate> # Go to one of the selected keyframes and change the value(s) as you want</translate>
<translate> # Click on Apply values to selected keyframes</translate>
<translate>
Select the parameters you want to apply and click on OK
You can import and export keyframes from/to the clipboard. This feature is not only useful to copy keyframes from one clip to another, it can e.g. also be used to copy the results of the motion tracker to a transform effect.
To export the keyframes the clipboard click on inside the keyframe widget and choose Copy keyframes to clipboard
Import keyframes dialog
</translate>
<translate>
To import keyframes from the clipboard click on inside the keyframe widget and choose Import keyframes from clipboard. If you have valid data on your clipboard you should see a dialog similar to the screenshot where you can adjust the mapping of the data.
Effect Zones
Since Version 21.04.0
The new Effect Zones allow you to apply effects to specific regions of tracks or the timeline. Zones can be set from the effect zone bar in the timeline or from the interface in the effect panel.
Some keyframe controls have a seek to active frame button (labeled 1 in screenshot A below). When seek to active frame is toggled on and you click on one of the keyframes in the keyframe list, Kdenlive will scroll the preview window to that keyframe. In the example of the screenshot, we have selected the keyframe at 9:20 in A and the clip position caret (highlighted in red box) shows the location of this keyframe. Clicking the keyframe at 10:00 in B shows how the clip position has moved.
Effects Demos
The following three YouTube videos display the results of a number of the video effects available in Kdenlive (Spanish captioning).
The available effects are defined by .xml files found in $KDEDIR/share/kde4/apps/kdenlive/effects (e.g. /usr/share/kde4/apps/kdenlive/effects).
Or at /usr/share/kdenlive/effects on version 15.n.
These .xml files contain the default values for the effects parameters. So if you don't like the default values for the effects in Kdenlive, you can modify the defaults by editing these .xml files.
FAQ:
Q: How to duplicate an effect to use similar settings somewhere else?
A: Select your effect in the timeline. In the Properties Tab choose Save (from the Properties Tab Menu). You will now find this effect available in the Effect ListCustom section.
A: Other solution: select a strip containing the effect, Copy, then, where you want to apply it again, right-click and select Paste effect instead of Paste.
Q: How to apply an effect on several clips (all) at the same time?
A: You can select multiple clips with Shift + drag (left mouse button) around them. Then right-click and group clips (or Ctrl + G).
Editing is done in the Timeline. Add a clip by dragging it from the Project Tree or the Clip Monitor. Once a clip is dropped on a track, it can be moved (drag and drop it) to another place on the same track or onto another track.
With 19.08.0 editing with keyboard shortcuts was introduced. This will speed up the editing work and you can do editing steps that are not possible or not as quick and easy with the mouse. Working with keyboard shortcuts in 19.08 is different as in the former Kdenlive versions. Mouse operations have not changed and working as before. See 3 point editing.
Seeking through your project
The timeline cursor shows your current position in the project. The positions of the cursors on the timeline ruler and Project Monitor are always in sync. Position can be moved in the following ways:
Keyboard shortcut: right / left arrows for one frame, Shift+ right / left for 1 second
Clicking/dragging in the Timeline ruler or in an empty area of the timeline.
Clicking the up or down arrows on the Project Monitor timecode widget
Cutting a clip
To cut a clip, the easiest way is to place the timeline cursor where you want to cut the clip, then select the clip (left click in it) and use the menu Timeline -> Current Clip -> Cut Clip (default shortcut: Shift + R).
A clip can be resized from its start or end by dragging its left or right edge. If you want a more precise resize, you can place the timeline cursor wherever you want the resize to end and use the menu Timeline->Resize Item Start (default shortcut: 1) or Timeline->Resize Item End (default shortcut: 2)
To even more precisely control the length of a clip, double click it in the timeline and adjust its duration using the Clip duration dialog. You can have frame-level accuracy with this method.
You can also resize a clip by cutting it with the Razor Tool and then deleting the bit you do not want.
Removing Space Between Clips
Right click in the space between the clips and choose Remove Space. Be aware however that if you have clips on multiple tracks in the timeline and they are not grouped, then removing space may disturb the alignment of the clips between the different tracks — the space is only removed from the timeline where you clicked. Under this situation it may be safer to use the Spacer Tool.
Middle Tool Bar
There is a toolbar between monitors and the timeline that controls various aspects of the editor.
1d. Mixed Audio tracks changes the order in which tracks are displayed to mixed audio and video tracks. For example, from the bottom of the timeline to the top of the timeline: A1, V1, A2, V2, A3, V3
1e. Split Audio tracks changes the order in which tracks are displayed to separate audio and video tracks. For example, from the bottom of the timeline to the top of the timeline: A1, A2, A1, V1, V2, V3
1f. Split Audio tracks (reverse) changes the order in which tracks are displayed to separate audio and video tracks with the audio tracks in reverse order. For example, from the bottom of the timeline to the top of the timeline: A1, A2, A3, V1, V2, V3
4. Selection Tool - Also selected with the 'S' hotkey. Allows the selection and manipulation of clips on the timeline
5. Razor Tool - Also selected with the 'X' hotkey, or to cut at the point of the play head use "Shift-R". This allows a clip to be cut into two clips.
6. Spacer Tool - Also selected with the 'M' hotkey. This tool will select all clips at one point in the timeline and allow them to be shifted at once.
7. Position indicator - displays the time point or frame number of the location of the hovering mouse on the left side, and the total length of the project on the right side.
7a. hh:mm:ss:ff; Sets the position indicator to display time units
7b. Frames Sets the position indicator to display frames
8. Mix Clips - allows same-track transitions to be applied between two clips. See Same Track Transitions for a detailed explination.
When Track Compositing is set to None you will not get tracks with alpha channel information to composite with the other tracks unless an explicit composite or affine transition is added between the clips. This is the behavior that Kdenlive displayed in older ( <= ver 0.9.X).
</translate><translate>
Track Compositing - Preview
When track compositing is set to Preview tracks with alpha channel information will be automatically composited with the other tracks using an algorithm that is somewhat faster than the algorithm used with Track Compositing - HighQuality but which slightly degrades the colors.
</translate><translate>
Track Compositing - HighQuality
When track compositing is set to High-Quality tracks with alpha channel information will be automatically composited with the other tracks using an algorithm (qtblend) that is somewhat slower than the algorithm used with Track Compositing - Preview but which retains higher fidelity color information.
</translate><translate>
Timeline Edit Mode - Normal Mode
In this edit mode, you can not drag clips on top of other clips in the same track in the timeline. You can drag them to another track in the timeline but not into the same track at the same time point as an existing clip. Contrast this to overwrite mode.
</translate><translate>
Timeline Edit Mode - Overwrite Mode
In this edit mode, you can drag a clip onto a track where there is an existing clip and the incoming clip will overwrite that portion of the existing clip (or clips) covered by the incoming clip.
BeforeAfter
In the "After" screenshot above, you can see that the clip which was dragged from the upper track has replaced a portion of the clip on the lower track.
</translate><translate>
Rearrange clips in the timeline
Performing a rearrange edit. This technique lets you quickly change the order of clips in the timeline.
Drag a clip, as you drop it to a new location performs an overwrite edit that overwrites the existing clip.
Timeline Edit Mode - Insert Mode
With this mode selected and you drop a selection into the timeline the selection will be inserted into the timeline at the point where the mouse is released. The clip that the selection is dropped on is cut and clips are moved to the right to accommodate the incoming clip.
BeforeDuringAfter. Incoming Clip inserted. Clips after the insert point are shifted Right
</translate><translate>
Rearrange edit in the timeline
Performing a rearrange edit. Only clips in the destination track are shifted; clips in other tracks are not affected. This technique lets you quickly change the order of clips in the timeline.
Drag a clip, as you drop it to a new location. Releasing the clip performs an insert edit that shifts clips in the destination track only.
Selection Tool
Use this to select clips in the timeline. The cursor becomes a hand when this tool is active.
</translate><translate>
Razor Tool
Use this to cut clips in the timeline. The cursor becomes a pair of scissors when this tool is active.
</translate><translate>
Spacer Tool
Use this tool () to temporarily group separate clips and then drag them around the timeline to create or remove space between clips. Very useful. Experiment with this tool to see how it works.
In the above example, these clips are not grouped. However, the spacer tool groups them temporarily for you so you can move them all as a group.
</translate><translate>
Fit Zoom to Project
This will zoom the project out so that it all fits in the timeline window. This is the same function that is triggered by Timeline Menu item, Fit Zoom to Project.
</translate><translate>
Zoom project
The magnifying glasses zoom in or out on the timeline. The slider adjusts the zoom by large increments. These same settings are controlled by the Timeline menu items, Zoom In and Zoom Out.
</translate><translate>
Split Audio and Video Automatically
When this is on and you drag a clip to the timeline, the audio in the clip will end up on an audio track and the video on a video track. You can achieve the same result if you select the clip, right click, Split Audio. When this is off and you drag a clip onto the timeline, both the audio and video tracks are combined into one video track.
</translate><translate>
Automatic Transitions
When active any transitions added to the timeline will have the automatic transition option checked by default.
See Automatic Transitions
</translate><translate>
Show Video Thumbnails
When on, the video clips in the timeline will contain thumbnails as well as a filename. Otherwise, they just have the clip filename.
When the timeline is zoomed in to the maximum, the video track will show a thumbnail for every frame in the clip. When the timeline is not on maximum zoom, the video track will show a thumbnail for the first and last frame in the clip.
</translate><translate>
Show Audio Thumbnails
When on, the audio clip will have a wave representation of the audio data as well as a filename. Otherwise, they just have the clip filename.
</translate><translate>
Show marker comments
This toggles on and off the display of the comments saved within markers (the text with the gold background in the example below) and within guides (the text with the purple background).
</translate><translate>
Snap
When this feature is on, dragging the beginning of one clip near to the end of another will result at the end of the first clip snapping into place to be perfectly aligned with the beginning of the second clip. As you move the two ends near to each other, as soon as they get within a certain small distance, they snap together so there is no space and no overlap. Note that this occurs even if the clips are on different tracks in the timeline.
Clips will also snap to the cursor position, markers and guides.
Cutting Footage from multiple aligned tracks - Ripple Delete
This is available on the Timeline menu under All clips->Ripple Delete[1].
Seems missing in Kdenlive 17.04 & 18.04
Mark In and Out points in the Project Monitor, then choose Timeline->All clips->Ripple Delete (or Ctrl-X). Kdenlive deletes all footage between the In and Out points in unlocked tracks, slides everything else back to fill the gap, and puts the playhead on the In point.
Subtitle
Since Version 20.12.0
The subtitling tool allows you to add and edit subtitles directly in the timeline on a special subtitle track or by using the new subtitle window. You can also import (SRT/ASS) and export (SRT) subtitles.
There are 3 ways to add subtitle:
Menu
Project -> Subtitle -> Add Subtitle
Keyboard
Shift+S adds a subtitle.
Icon and Mouse
Click the "subtitle" icon in the timeline toolbar to open the subtitle track in the timeline.
Double-click in the subtitle track to add a subtitle.
Adding and editing text
Add or editing text either directly into the subtitle clip or in the subtitle window.
Adjust the length of subtitle
Grab the end of a subtitle with the mouse and lengthen or shorten it as needed.
Set subtitle in/out can be achieved with the same shortcut as to set clip in/out (left/right parenthesis shortcut).
Subtitle window
The subtitles window allows easier editing and also makes it possible to easily navigate between subtitles with the left/right button.
With the plus sign, you can add subtitles.
The scissors are mostly here for divide subtitles: let's say your subtitle text is too long and you want to make it 2 different subtitles. Put the cursor in the text widget where you want to cut and click the scissors, it will split the text between 2 different subtitle items. The scissors are only working when the playhead is over the subtitle itself.
The tick adds the text to the subtitle.
Import and export subtitle
Importing SRT and ASS subtitle file: Project -> Subtitles -> Import subtitles file
SRT supports markup for: bold, italic, underline, text color and line break.
<b>text in boldface</b>
<i>text in italics</i>
<u>text underlined</u>
<font color="#00ff00"> text in green</font> you can use the font tag only to change color.
And all combined: <font color="#00ff00"><b><i><u>All combined</u></i></b></font>
Line break: Add on the end of each line a <br> (for break). Now the srt file is stored correct and reopened with the line break. The subtitle in the subtitle window will be all in 1 line after several save but the breaks is working.
Alt+arrow jumps from subtitle to subtitle.
Since version 21.04.0
Spelling check
Spelling check for subtitle is integrated and shows incorrect words by a red wiggly line. Right-click on the word and you get a list of possible words you can choose by click on it.
Speech to text
Since version 21.04.0
Install Python
Python needs to be installed on your computer. Download it from here https://www.python.org/downloads/ for installation on your computer.
Speech recognition requires the vosk and srt python modules
- On Linux open a terminal and put in and run: "pip3 install vosk;pip3 install srt".
- On Windows, you can download this batch file (File:Install vosk srt.zip). After download double click starts the installations.
Install a language
Goto Settings -> Configure Kdenlive -> Speech to Text
Click on the link to get a language model
Drag & drop the language you want from the vosk-model download page to the model window, and it will download and extract it for you.
If you have problems click on "Check configuration" button.
Speech recognition
Creating subtitle by speech recognition
1. Mark the timeline zone you want to recognize (adjust the blue line).
2. Click on the "Speech recognition" icon.
3. Choose the language.
4. Choose how the selected zone should be applied.
5. Click "Process"
The subtitle gets created and inserted automatically.
Remark: Only timeline zone is implemented for now in automatic subtitles.
Creating clips by speech recognition
This is useful for interviews and other speech-related footage.
Enable View -> Text Edit
Select a clip in the project bin.
1. If needed set in/out point in the clip monitor and enable "selected zone only". This will only recognize the text inside the zone.
2. Choose the correct language
3. Click "start recognition"
4. Selecting the text you want to either
5. Put into the timeline
6. Save as a new clip
7. Add a Bookmark. You can jump to these bookmarks in the timeline with alt+arrow or edit the bookmark by double click.
8. Delete the selection.
9. Here you can search in the text.
10. And navigate up
11. Or down in the text.
Warning
Speech to text doesn't work with version 21.04.2 due to vosk API issues. Use version 21.04.1 or 21.04.3 and later versions.
3 point editing
Since version 19.08.0
3 important points to understand the 3 point editing concept (with keyboard shortcuts):
Source
On the left of the track head the green vertical lines (V1 or A2). The green line is connected to the source clip in the project bin. Only when a clip is selected in the project bin, the green line shows up depending on the type of the clip (A/V clip, picture/title/color clip, audio clip).
Target
In the track head the target V1 or A1 is active when it’s yellow. An active target track reacts to edit operations like insert a clip even if the source is not active.
The concept is like thinking of connectors
Connect the source (the clip in the project bin) to a target (a track in the timeline). Only when both connectors on the same track are switched on the clip “flow” from the project bin to the timeline.
Be aware
Active target tracks without connected source react on edit operations.
Example of advanced edit
Here is a brief introduction to the 3 point editing system.
1. Select a clip in the project bin with an up/down arrow
2. Navigate the clip by the JKL keys or by the left/right arrows and set the IN and the OUT point by the I and O keys.
3. Hit T to change to the timeline
4. Select a video or audio track in the timeline (up/down arrow key) and set it as source with Shift+T.
5. Activate the track as a target with shortcut A (this connects the track to the source)
6. Hit V (insert) or B (overwrite) to add the clip at the play-head position or to fill the selected area in the timeline if it is active. If you need to activate it use the G key.
In the following example, we want only to insert the audio part of a clip in A2 and we want to create a gap in all the other video and audio tracks:
1. Activate all the target tracks which contain clips (yellow buttons).
2. Activate just the audio source on A2
3. Press V (insert).
↑available on bleeding edge versions > 0.9.10 (Jan2015)
Please note: The effects and compositions included will differ depending on the available plug-ins on the specific packaging on each operating system. Kdenlive will auto-detect and make available any supported LADSPA plug-in packages from your distribution. For the greatest compatibility, please use the AppImage version of Kdenlive.
Apply a Look Up Table (LUT) to the video. A LUT is an easy way to correct the color of a video. Supported formats: 3dl (AfterEffects), .cube (Iridas), .dat (DaVinci), .m3d (Pandora) (avfilter.lut3d)</translate>
Perform an RGB[A] dodge operation between the pixel sources, using the generalized algorithm: D = saturation of 255 or depletion of 0, of ((255-A)*256) / (b+1) (frei0r.burn)</translate>
remove banding artifacts from input video. It works by replacing banded pixels with an average value of referenced pixels (avfilter.deband)</translate>
Perform an RGB[A] dodge operation between the pixel sources, using the generalized algorithm: D = saturation of 255 or (A*256)/(256-B) (frei0r.dodge)</translate>
An audio filter that computes the FFT of the audio. This filter does not modify the audio or the image. It only computes the FFT and stores the result in the “bins” property of the filter (fft)
Fill borders of the input video, without changing video stream dimensions. Sometimes video can have garbage at the four edges and you may not want to crop video input to keep size multiple of some number (avfilter.fillborders)</translate>
Deinterlace input video by applying donald Graft’s adaptive kernel deinterlacing. Works on interlaced parts of a video to produce progressive frames. (avfilter.kerndeint)
This filter modifies image’s alpha channel as a function of its luma value. This is used together with a compositor to combine two images so that bright or dark areas of source image are overwritten on top of the destination image. (lumakey)
Removes stairstepping artifacts from Nikon D90's 720p videos. Sharp lines in videos from the Nikon D90 show steps each 8th or 9th line, assumedly due to poor downsampling. These can be smoothed out with this filter if they become too annoying (frei0r.d90stairsteppingfix)</translate>
Perform a RGB[A] screen operation between the pixel sources, using the generalised algorithm: D = 255 - (255 - A) * (255 - B) (frei0r.screen)</translate>
Changes Slope, Offset, and Power of the color components, and the overall Saturation, according to the ASC CDL (Color Decision List) (Frei0r.sopsat)</translate>
This performs the PSNR and SSIm video quality measurements by comparing the B frames to the refernce fram A. It outputs the numbers to stdout in space-delimited format for easy use by another tool. The bottom half of the B frame is placed below the top haf of the A frame for visual comparison. (vqm)</translate>
Adds a black matte to the fram. Use this if you filmed using a 360 camera but only want to use part of the 360 image - for example if you and the film crew occupy the 90 degrees behind the camera. (frei0r.bigsh0t_eq_mask)
converts an equirectangular frame (panoramic) to a rectilinear frame (what you're used to seeing). Can be used to preview what will be shown in a 360 video viewer. Delayed frame blitting mapping on a time bitmap. (frei0r.bigsh0t_eq_to_rect)
Converts a video frame with two hemispherical images to a single equirectangular frame. The plugin assumes that both hemispheres are in the frame (freior.bigsh0t_hemi_to_eq)
Converts a rectilinear (a normal-looking) image to an equirectangular image. Use this together with transform 360 to place "normal" footage in a 360 movie. (frei0r.bigsh0t_rect_to_eq)
Stabilizes 360 footage. The plugin works in two phases - analysis and stabilization. When analyzing footage, it detects frame-toframe rotation, and when stabilizing it tries to correct high-frequency motion (shake) (frei0r.bighsh0t_stabilize_360)
There are many ways to read comic books, and one of those that has become more common in recent years is on a computer. Peruse was created as a way to make exactly that as easy and pleasant as possible, and to simply get out of the way and let you read your comic books. One could say that it allows you to peruse your comic books at your leisure, but that would be a silly way of putting it - so, peruse your comic books at your leisure! (from the Peruse website)
Peruse provides also a comic creator. You can edit metadata and add new pages.
This setting is outdated, now plasma use baloo. If you want more information look at System Settings/File Search
Settings for desktop searching
Information
If you know something about these preferences then please help us by adding information. Don't worry about formatting. We will help you ensure that your text is properly formatted.
This module provides settings for Nepomuk and Strigi. Nepomuk allows you to attach metadata to your files, and to access this metadata in any application that supports Nepomuk. Strigi indexes such information and makes it availlable for intelligent searching.
In order to make use of these services, you must activate them in the Basic Settings tab.
In the Desktop Query tab, you can configure which folders you want Strigi to index. Click on the Customize index folders... in the right side of the window. This brings up a dialog. In the left part of this dialog, you will find a tree view of your file system. Here you can check those folders you want indexed. In the right half is a list of patterns; files matching any of these patterns are not indexed.
Options for backup are found in the Backup tab. Nepomuk is capable of creating regular backups of data that could not be restored otherwise. You can choose to have backups made automatically at regular intervals, or you can make a backup manually. There is also an option to restore a backup. Automatic backups are stored in $KDEHOME/share/apps/nepomuk/backupsync/backups/.
In the Advanced Settings tab, you can decide how much memory Nepomuk is allowed to use.
</translate>
It is simple to set environment variables that affect your whole session. Plasma will execute any script it finds in $HOME/.config/plasma-workspace/env whose filename ends in .sh, and it will maintain all the environment variables set by them. It is important that any variable you want to set must be also exported. In the case of PATH, for instance, your system will be set up with certain likely directories as the likely places to find things. Now you are adding an extra possible search place. You can see what is already set by opening Konsole and typing echo $PATH
To add paths to your PATH, simply create a file named $HOME/.config/plasma-workspace/env/path.sh with a contents similar to this:
export PATH=$HOME/.local/bin:$PATH
Let's explore that. The command export tells the system that this is something that should be saved and used when looking for files. Next you add the full name of the directory you want to add (in this case $HOME/.local/bin). Finally you see the $PATH variable itself - that's because you want to add your new path into it, not replace the existing path.
Warning
If you want to point your home don't use '~', use $HOME instead
Often that will work well enough for you, but as you get more familiar with the system you will probably want to have the same environment when using a console or accessing your machine via ssh, you will need to add to the end of your .bashrc something like this:
source $HOME/.config/plasma-workspace/env/path.sh
You can also check how Plasma actually does it. KDE startup is complicated, it ends up calling either /usr/bin/startplasma-x11 or /usr/bin/startplasma-wayland. If you are interested in reading the code, you can can view the startkde code online; search for environment variables.
See also
System Settings → Startup and Shutdown → Autostart shows what scripts and applications run and lets you add new ones; see Startup and Shutdown.
If you regularly work on a laptop but miss high quality music you could use an external sound card to add a set of speakers. This page is for documentation of experiences in getting those cards to work satisfactorily.
Creative USB XFi 5.1 Pro
Warning
Check System Settings -> Multimedia -> Phonon -> Backend tab and set it to gstreamer. You may see VLC recommended, but at the time of writing (March 2010) there are CPU usage issues with it.
Does Phonon see the soundcard?
System Settings -> Multimedia -> Phonon will probably have at least an entry for Internal Audio and hopefully your external card.
Do the speakers work?
Now move to the Speaker Setup tab, ensure that on the hardware section the correct card and profile is listed from the dropdown menu, and your speakers will be listed below. Clicking on each one will test the output.
Problems?
Try the following command:
pacmd list-cards
That should give output similar to this:
If that all looks OK, but your speakers still don't work correctly, try this command:
My Front Center and Sub-Woofer still do not work. It may not be possible to get them to work, as they may depend upon the output from the laptop, which appears in this case to be stereo only. If you think your system is capable of better, copy /etc/pulse/daemon.conf to ~/.pulse/daemon.conf and open it to edit. Find the following line:
enable-lfe-remixing
Uncomment it and change no to yes. If your system has suitable output this will enable the subwoofer. At the same time you may like to set the default-sample-rate to 48000, which many people think gives a better sound. Again you will need to restart PulseAudio or reboot.
Please add any more information you discover.
</translate>
Please use the discussion section of this page to voice your opinion on this.
<translate>
Available Tools
Page Layout helps to standardise the look of pages
Tool Box shows you wiki markup for the effect you need
Typographical Guidelines standardises markup for use in translation, either to official manuals (DocBook) or to other languages.
Workflow
Click on the Edit button
You should see a preview of the page, and the Edit box below it — you might have to scroll down. If you don't see the preview at first you can enable this in your preferences
Make your changes in the Edit box
Write a one-line summary of what you changed in the Summary box
Click the Show Preview button
Check how the page looks like in the preview. If you have included links, hover over them and look at the status bar to see if they are going to take you to the intended location; or better still, open the link in a new tab.
If you need to correct anything, make the changes in the Edit box and click Show Preview again. Repeat until you're happy with the results
Click on Save page to save your work
Warning
NEVER add new translate section tags (which look like <!--T:18-->). The software will do everything necessary with tags, and manually changing them will break the system.
A double-Enter is required to make a new paragraph - that is, there must be an empty line between the heading and the paragraph. Please use this, as it puts headings in a separate translation unit which is preferred by translators using external tools.
Note
If you are making frequent edits to your page, please use either {{Construction}} or {{Being_Edited}} so that translators and other contributors know to wait until you are finished.
Warning
Avoid using text smilies as they cause problems for translation applications. Instead use {{Smiley}}
Hints and Tips
You can experiment in the Sandbox page to familiarize yourself with page editing and the wiki markup
These instructions are only valid for kdepim and Korganizer version 4.3.7 and later. There are significant differences in the older versions, therefore, some instructions may not apply.
Note
For demonstration purposes, the Google account used in this tutorial is sync.with.kontact@gmail.com
How to synchronize Google Contacts with Kontact
Installing the Google Data API
To synchronize Google Contact and Calendar data, the Akonadi Google Data API must be installed on your system. Depending on your package manager, the install procedure may be different.
To install it, enter a terminal and type:
DEB based distributions:sudo apt-get install akonadi-kde-resource-googledata RPM based distributions:yum install akonadi-googledata
This will install the akonadi-kde-resource-googledata package as well as its prerequisite, libgcal0
Note
Your distro may not have apt-get or yum installed by default. Some distros use their own package managers. If so you can use that to install apt-get (on a DEB based distro) or yum (on an RPM based distro), or you can use your systems standard package manager to install the required packages directly. Some distros have entirely different packaging systems. Is your distro is one of those you should refer to the distro manual, to its web page or to its forums.
Warning
This instruction does not apply to later versions of Kdepim. Instead, the requirements are built-in. To see whether your version has this, check System Settings -> Personal Information and see whether you have google-contacts offered as a resource (in some versions you will find akonadi_gcal_resource4).
Configuring Kontact Integration
After installing the packages, go to the Contacts area of the Kontact left navigation bar.
Next, on the first panel, the Address Books panel, right click the window and select Add Address Book. Ensure that the Akonadi Google Contacts Resource is selected, and then click OK.
A pop-up window will appear that will ask for your Google account login credentials. Enter them and click OK. Check the box next to the akonadi_google_resource_0 and then press F5 to update your contacts.
Animated GIF Tutorial
Note
This animated GIF recaps the steps taken to obtain Google contacts synchronization.
Your contacts have now been synchronized!
</translate>
Marble 1.0 for Maemo is available for the Nokia N900 smartphone. This page guides you through the installation process: Installation of Marble itself and - optionally - adding more map themes and installing support for offline routing.
For the impatient, in a nutshell: Install the marble package in the Navigation section from the Maemo extras repository to install Marble. Additional map themes are contained in the marble-maps package in the Navigation section. Support for offline routing is provided by the monav-routing-daemon package, again in the Navigation section.
Information
If you prefer watching a video to reading instructions, please head over to our tutorial video. The first part shows the installation. (German speaker)
Installing Marble
Get your N900 within reach. Don't own one? Time to move on, this page will be of no use to you. On the N900, open the program manager. Choose Download and open the Navigation section. Scroll down and select marble. Follow the usual installation process steps.
Installing Additional Map Themes
The Marble - Virtual Globe package installed from the extras repository uses the OpenStreetMap map theme. Looking for something different? Atlas, Satellite and many other choices will be available when you install the Marble Maps package in the Navigation section of the program manager.
Within Marble, you can switch map themes in the Map View dialog available from the application menu. Please read on in the Map Themes Tutorial for a comprehensive overview of available map themes and their configuration.
Support for Offline Routing
Do you intend to use your N900 for routing? Without an Internet connection? Make sure to install the monav-routing-daemon package in that case. Just like the marble-maps package it can be installed from the Navigation section of the Maemo package manager.
Warning
Make sure to install the correct version of monav-routing-daemon: Version 0.2.release-2 from the extras repository works with all versions of Marble. Version 0.3.release-1 from extras-devel works with Marble 1.1.1 and later.
Marble will automatically include Monav for offline routing once the correct version of monav-routing-daemon is installed. You do need to install offline maps, however. This can be done conveniently from within Marble: See Offline Routing
Content on this page is outdated and may not work with recent versions of the software.
<translate>
Change the audio output when connecting new devices
If you want audio to automatically switch to HDMI when plugging in a new device, do the following:
Open the volume system settings module
go to the advanced tab
check "Automatically switch all running streams when a new output becomes available"
A Windows Vista-like sidebar with clock and news
Once again, the proof that KDE software can do at least as much as Windows...
Creating panel
Right-click on the desktop
Click on Add panel
Click on the Toolbox of this panel
Drag and drop the panel to a side of the screen clicking and holding on Screen edge
Configure the height and width as you wish, but keep quite wide to be able to display the widgets in it
Add widgets
Still in the panel click Add widgets
Add the Analog Clock widget and the News or RSSNow widget
Hide the panel
Click on More settings
Click on the Auto-hide option
You're done!
Result
</translate><translate>
Using Multiple Plasma Themes
The Plasma workspace allows users to create customized themes whose widgets can be themed using multiple themes. For example, it is possible to have the Taskbar be themed using Oxygen, to have the clock be themed using Aya, and much more customization, allowing you to pick the best plasma themes for each object.
Set up "(Customized)" Theme
Navigate to the Desktop Theme Details configuration dialog via either Krunner or the System Settings Dialog:
Here you can choose what theme is used for different objects in the Plasma workspace. Configure them to your pleasure (it often helps to test each individual plasma element by applying the entire theme to your desktop first) and press Apply.
Apply "(Customized)" Theme
At this point, the workspace settings dialog should list a Plasma theme entitled (Customized). This is the theme mashup that you have created. Select it and hit Apply.
These instructions are no longer needed because a Google Calendar resource is shipped with KDE. You do not need to use DAV any more. In KOrganizer simply go to Settings->General->Calendars and filter for google
Note
For demonstration purposes, the Google account used in this tutorial is sync.with.kontact@gmail.com
Introduction
Integrating Google Calendar with Kontact through DAV resource
To synchronize Google Calendar with Kontact, firstly access the Calendar area of Kontact by selecting it in the left navigation bar. Next, open the configuration window by going to Settings -> Configure Calendar.
Select the Calendars tab on the General area to prepare to add the Google calendar. Next, Select the DAV groupware resource (you may need to add this resource first by clicking Add... and selecting it in the list). After this click Cancel when a prompt appears asking to enter your credentials to login to the groupware server.
Another window will appear, and here you can enter the location of your Google Calendar resource. In the Server Configuration area, click on Add. Now, this opens the last window. Here, ensure that CalDAV is selected as the Remote calendar access protocol.
The remote URL takes the form:
https://www.google.com/calendar/dav/GoogleCalendarID/events/
For your main calendar, the GoogleCalendarID is your Google account (Gmail address). Select Use specific credentials. For Username again use your Google account while the Password field is your Google account password.
After this information is entered, pressing the Fetch button will enable Kontact to sync with Google to discover your calendar. Your calendar should display in the Discovered Collections window below.
Press OK and allow KDE Wallet integration as Always for convenience. To add additional calendars, simply click the Add button to follow the same procedure as above.
Note
For other Calendars, the calendar ID can be obtained by pressing the down arrow, and selecting Calendar Settings via www.google.com/calendar.
Press OK to finish adding the Google Calendar and then it should start to synchronize with Kontact. In the calendars list below, check the box beside your Gmail address to enable the display of a calendar. To refresh events, simply press F5.
Animated GIF Tutorial
Note
This animated GIF recaps the steps taken to obtain Google Calendar synchronization.
Congratulations, you have successfully setup Google Calendar Integration with Kontact!
</translate>
Here you can propose a new service provider, by adding it to the list.
Please add an example link that directly shows the departure board for a specific stop. Please also add some sample stop names, to easily try out the new service provider. Furthermore you can try to find out how to construct an URL to a departure board for a specific stop (by filling in the stop name somewhere into the url).
Don't forget to add your contact information.
Warning
If the service provider uses ASP it most probably won't work. But if you can construct an URL directly to the departure board for a specific stop and time all is fine.
Proposals
Status
Service Provider
Supported Region
Link to Departure Board
Sample Stop Names
Comments
Contact
Problem: ASP, cannot construct URLs directly to a departure board
For local transportation in Paris. the URL construct seems to be, at least for subway http://www.ratp.fr/horaires/fr/ratp/{TypeOfVehicle}/prochains_passages/PP/{stop}/{TransportLine}/{Target} (the Target is the letter A or R).
Trenitalia trains; real time data; no direct URL to timetable (if needed, I could make a wrapper on another server as workaround); direct URL for train details
High speed train (private competitor); ASP website, but direct URLs are used (for global data, station trains and train detail); real time data; under "Stazioni in tempo reale" there's a complete list of stations served
That script will update php.docrc and create php_fref.docrc.
php.docrc is the file for the normal index of the php-documentation.
php-fref.docrc is an additional index file for all pages, functions are listed in it. I thought it could be convenient.
Fourth: Optional: Get better look-and-feel for the pages
It's possible to use a css-file on the documentation. Install and open KFileReplace.
Click Customize Search/Replace Session
Change Location to /usr/share/doc/php-doc/html
Set Filter to *.html
Disable including subfolders
Set Encoding to utf8
Don't type anything in Search or Replace
Click Search Later
Click on the Add string Button in main window
Activate Search and replace mode
Search for:
<!DOCTYPE HTML PUBLIC "-//W3C//DTD HTML 4.01 Transitional//EN" "http://www.w3.org/TR/html4/loose.dtd">
 <html>
  <head>
   <meta http-equiv="content-type" content="text/html; charset=UTF-8"
Replace with:
<!DOCTYPE HTML PUBLIC "-//W3C//DTD HTML 4.01 Transitional//EN" "http://www.w3.org/TR/html4/loose.dtd">
 <html>
  <head>
   <link rel="stylesheet" type="text/css" href="style.css" />
   <meta http-equiv="content-type" content="text/html; charset=UTF-8"
Warning
Make sure that you don't have a newline at the end!
Click on the -> arrow.
Click OK
Click on the Replace Button (not Simulate) in the main window.
Create a style.css-File in /usr/share/doc/php-doc/html
Some of the features described on this page are only available in Marble 1.2 and later. This version has not been released in a stable version at the time of writing (2011/05/10).
This page gives a quick introduction to the search feature used in several places in Marble.
The search is not case sensitive. The search term must match the beginning of the name of the street/POI to be found.
Exact
The search is case sensitive. The search term needs to match the name of the street/POI to be found exactly.
GPS
The GPS device must be active and the current position must be known.
</translate>
<translate>
Searching
Both the Desktop version of Marble (top row) and Marble Mobile (bottom row) let you search in two areas: On the one hand to locate places (left column) and on the other hand to define via points for routing (right column).
Find a place in the Desktop version in the Navigation tab on the left side. Search for via points for a route in the Routing tab. The mobile version of Marble running on the Nokia N900 offers the Go To... dialog available in the main application menu to locate places. Enter via points in the Routing dialog, also available in the main application menu.
Installation
All search queries running online (see the table above) work out of the box in Marble — assuming an Internet connection is available. Offline search queries are possible once you install one (or more) offline maps for the region you're interested in. Please see Offline Routing for further details.
</translate>
There are several desktop applications for KDE that deal with some kind of a database. The most popular are probably Amarok the music player, digiKam the photo manager, and Akonadi the personal information framework.
To simplify their installation and limit their requirements, each of these programs ship a database of their own, in most cases using SQLite. Having many separate databases creates unnecessary overhead, and makes it more difficult to back up your data.
Database server
The only database universally supported in these programs is MySQL, so this is what we well use. It is also very easy to configure, either by command-line or with graphics tools.
Installation
First, we have to install the mysql server. Linux users will probably want to install a package from their distribution, other can get it from their homepage. Instructions to start MySQL at boot are distribution-specific, but since MySQL is a popular package, they shouldn't be hard to find. During the installation, the installer will probably ask you for a root password. Choose a secure password for this and remember it, this account will not be used by the desktop applications but only for database administration.
Configuration
For the server configuration, this we will assume that your database server is not used over the network, contains no sensitive data, and that you trust your applications. If you plan to use this database for Akonadi data, it's best if you copy the configuration file from the Akonadi code repository, which can be downloaded at here. Make a copy of your existing /etc/mysql/my.cnf, then replace it with the downloaded file.
Warning
This file disables network access and user authentication. The latter means that any application from your computer can connect to it without a password. This makes configuration of programs easier, and is well-suited for the general desktop use case.
Creating the databases
The first thing we have to do once MySQL is installed and running is add a separate database for each program. I generally name them after the programs that use them. This can be done with either GUI administration tools, but since we only have to do it once it's probably faster to write a few commands:
$ mysql -u root -p
At the password prompt, type in the root password set when installing MySQL. Now we can start creating databases. For example, to create a database named 'amarok', type in this command:
mysql> create database amarok;
Amarok
Amarok requires very little configuration, but it doesn't provide a way to migrate your old database. Go to Settings -> Configure Amarok... and go to the Database tab.
Fill in localhost in the Server textfield, 3306 in Port, and amarok in Database.
digiKam
Note
digiKam used to have a bug which prevented the same from working in versions prior to 2.0, so you will need a newer version of the program. In version 2.0 is still doesn't work perfectly: it pops up an error message at startup, but the tables are populated and the album data is stored correctly.
digiKam is somewhat special because it requires two databases: one for the images metadata, and one for thumbnails. Their names are not important, I chose to call them digikam and digikam_thumb:
In digiKam, the process is very similar to that of Amarok. The settings are located in Settings -> Configure digiKam... -> Database.
digiKam also comes with a handy database migration tool, available in Settings -> Database Migration. Fill in your previous database settings (you don't have to do anything if you haven't changed these options) on the left side and your new settings on the right side, then click Migrate.
Akonadi
First create a database for Akonadi:
mysql -u root -p
create database akonadi;
Akonadi is not supposed to be a user-facing tool, so there is no configuration GUI for it. However, you can edit
~/.config/akonadi/akonadiserverrc to have these contents:
</translate>
The default application launcher that provides a click-through interface for finding and launching applications. Kickoff has a search facility, allowing you to type the name of the application or its description to find it.</translate>
Error: No valid link was found at the end of line 3.
This speedy and intuitive application launcher provides a classical hierarchical menu that is easily customized to give quick access to various useful applications and services.</translate>
Excalibur is a simple application launcher with two columns and a search bar on top and a session control (logout, restart, shutdown) on the bottom.</translate>
There is also KRunner, which replaces the "run command" dialog, blurs the lines between task manager, desktop search, application launcher and command executor and provides a quick way to run applications or open documents among other things.</translate>
<translate>
The KDE 4 application menus Lancelot[1] and Homerun[2] are now outdated. However, Lancelot can be replaced by the similar style Excalibur and Homerun can be replaced by the similar style Application Dashboard.
</translate> <translate>
How to change the application launcher
To change the application launcher, right click on your current launcher and select Alternatives…
Next, choose the launcher you want to use.
Warning
Some settings of the currently used launcher might be reset to defaults when switching back
In case the desired application launcher is not in the list, you need to install it first. You may do that by using Discover or search for your launcher on the KDE Store. At the KDE Store you will also find several other application launchers to be tested.
How do I change which key opens the application launcher?
It's possible to do that in two ways: you may right click on your current launcher and select Configure Application Launcher…, selecting the tab Keyboard Shortcuts, clicking on the button and then typing the combination you want to use as keyboard shortcut.
You can also use System Settings → Shortcuts → Global Shortcuts → Plasma → Activate Application Launcher Widget.
And if you ever want to restore the default Meta key, you can use the combination Alt+F1, which serves this exact purpose.
I can't bind the Meta key to open the Application Launcher anymore!
This issue may occur because of the way KWin binds keys. Please refer to this section.
These instructions are only valid for kdepim and Korganizer version 4.3.7 and later. There are significant differences in the older versions, therefore, some instructions may not apply.
Note
For demonstration purposes, the Google account used in this tutorial is sync.with.kontact@gmail.com
Introduction
This tutorial will allow you to setup IMAP forwarding from a Gmail account to KMail, which can be accessible through Kontact.
Incoming Mail Forwarding (IMAP Connection)
Firstly, you need to open Kontact. You can access it by simply typing its name in the search bar. Now, after Kontact starts up, click on Mail in the left vertical navigation bar.
This brings you to the KMail part of Kontact. To set up the forwarding options, go to:
Settings -> Configure KMail.
The first step is to create a basic identify, this is to separate multiple accounts in the future, if you have them.
Setting up a new Kmail identity.
Configuring the new identity.
Next, go to the Accounts tab on the left navigation bar. Here you can configure the incoming and outgoing mail accounts.
The Incoming/Outgoing Accounts Screen.
Setting up Incoming Mail:
Click on Add, and then ensure that “IMAP E-Mail Server” is highlighted, and then click OK.
After this, 2 prompts will come up offering integration with the KDE Wallet service. For convenience, select the option entitled Allow Always.
Adding the new IMAP account.
Configuring KDE Wallet.
Now it is time to configure the incoming connection. Name your account Name whatever you want. Now, enter as the IMAP serverimap.gmail.com. Your Username is your email account, in this case mine is sync.with.kontact@gmail.com. The Password is the password of your Gmail account.
Next, go to the Advanced tab, and ensure that it is connected on Port 993 with the SSL/TLS radio button left on. As for authentication, according to the KMail documentation, DIGEST-MD5 encryption is recommended, however for now Google’s IMAP server does not support any of this, so cleartext must be selected.
Click OK.
Another KDE Wallet prompt should show up, and for convenience, you can select the Allow Always option.
To check your emails, find the Inbox of your newly setup account, in this case, Gmail Incoming, and press F5 to refresh and download new emails from the server.
Outgoing Mail Setup (SMTP Connection)
To setup an outgoing connection, similar steps must be taken to add the new connection, which is treated as a new account by KMail. Open up the KMail Configuration window, and go to the Accounts area in the left navigation bar. Instead of using the Receiving tab, which was used to setup the incoming (IMAP) connection switch to the Sending tab now.
Now, click on Add... and select the SMTP option and click OK. Afterwards, a Configure Account window will appear.
The following details are needed by Kontact.
Outgoing mail server smtp.gmail.com (Check the Server requires authentication button) LoginYour Gmail account. Here. it's "sync.with.kontact@gmail.com" PasswordYour Gmail password.
For convenience, check the Store SMTP password option.
Now, go to the Advanced tab of the window and enter the following information.
EncryptionSSL Port:465 AuthenticationPLAIN
After OKing the dialog, click the Set as Default button to make the newly added connection the default.
When sending your first email from Kontact, you will need to save the information in KDE Wallet once so it won’t have to be used later.
GIF Animation
Note
Click the image below to watch the GIF Animation which displays this process in sequence for convenience
Congratulations, now you can fully send and receive mail through Kontact!
The following applies to all KDE Wikis, not just UserBase.
Before you Start
First Things First
To contribute to KDE wikis you must register an account. See what advantages this brings you on the Quick Start page. There you will also find help to register and log in.
Be aware that your contribution will be governed by the Creative Commons License SA 4.0 for which a link is provided at the bottom of each page. Follow the link to read the details. You are agreeing to your contribution being publicly available and that others can use that information on their own sites.
Use the Talk page to communicate with other contributors or get help. Normally someone will get back to you within a day.
Relevance
All content added to the wikis should relate to KDE software, directly or indirectly. Currently the following wikis are intended for the following content.
UserBase
UserBase is for user content of any kind. E.g.
For New Users - helping to get started
For Regular Users - learning about new features and tips
For Advanced Users - but use sub-pages for this.
Community
Community Wiki is for developers and developer-focused information and tutorials. The only exception to this is code documentation, which should be part of the relevant repository.
TechBase
Warning
Don't use TechBase.
TechBase is currently in the process of being retired with any useful information being moved to Community or other docs. See this issue for further details.
Ways to Contribute
</translate><translate>
Update Existing Content
Update an image, replacing an outdated image with a newer one.
Check if all table cells have space after the pipe character. This rule conforms with traditional wiki formatting.</translate>
<translate>
Make application name formatting consistent (avoid using Amarok's, do use Amarok's).</translate>
<translate>
Ensure that all images are in PNG format (you can use JPEG as well, but in this case you should convert your images to PNG later). Save work by converting them before you start .</translate>
<translate>
Remove all non-printable characters from image names.
</translate><translate>
Working with Languages
Preparing a page for translation needs more patience than skill. If you can spare short periods of time, frequently, this is a very helpful task.
Translate a page. You need to be fluent in a language, but not a professional translator to translate a wiki page. Translating manuals is the skill of a special team. That page also points you to instructions for translating sidebar links.
WikiSentinel is a specialized feed reader that collects the translated pages that need to be updated. It allows you to see a preview of the changes in the selected page and open it directly in the web browser: ready to translate.
Hints and Tips
Attention
If a page is completely a duplicate or superseded and should be deleted, please mark it for deletion, see Propose Deletion for the full process.
Some Preferences that will help:
At the top of the page you will find the Preferences menu. In the Editing section you may want to enable Show preview on first edit - while you are editing you can glance at the original display for reference
The default display is to show the preview first, with the edit box below. If you prefer the edit box at the top, you can change that setting in the same place.
New welcome page! I have started it in my personal user space, but anyone can edit it.
A new Introduction to new contributors - it should be short and focus on the bare essentials; how to get an account, how to get in contact, a few things to avoid when editing existing pages, links to detailed info, etc.
The existing help pages need cleanup and restructuring.
Use [[Category:New page]] at the bottom of any page that we are currently working on (wheather it is a new page or an old page under revision. When the work is done change [[Category:New page]] to [[Category:Good page]]. (They won't be displayed on the actual page, these are hidden categories - they simply help us keep track of our work.)
{{Special:TranslationStats produces what look like an image frame that can't find the associated image file. TranslationStats is part of the Translate extension (Extension:Translate/Statistics and reporting has more to say about it).
<TopTenPages /> doesn't seem to be recognized any more.
The Translate system behaves somewhat unpredictably.
Pages that have been marked for translation do not always show up in Special:LanguageStats.
The given number of translation units that needs attention is sometimes not correct.
In the translation interface, when displaying differences, the whole page is being shown rather than just the actual unit.
KOffice, KWord, KCells, KChart, KFormula, KPlato, … - Are the old KOffice apps completely dead now? What about the tutorials, should they be adapted for Calligra Word?
QCA - this probably belongs on TechBase or Community.
Warning
Don't use the What links here wiki tool to check that a page is properly linked – it is no longer reliable! Use the {{LinksTo}} template instead; find this and other search tools on User:Claus chr/Search.
Admin
Cleanup of "dead" pages
Some pages have been deleted but their translations have been left behind. They don't seem to linger in the translate system (need to confirm this). Do the translated units still exist? This involves several pages in the Kexi Manual.
Archive obsolete pages
UserBase contains some pages that are no longer relevant and should be archived. We need to find out how to do this so that translations are archived with the original page rather than being left behind. In the meantime, such pages should be marked by adding the {{ObsoletePage}} template; that will add a warning box to the page and place it in the Obsolete tracking category.
Clean up categories
Make sure that all (English) categories are listed in the Pages category in English.
This page is the future version of the System Settings page. Don't release it to translation.
<translate>
KDE system manager for hardware, software, and workspaces.</translate>
<translate>
Features
System manager for global KDE platform settings
Customize and manage your desktop in one convenient location
Search function helps narrow down probable settings
Pointing at an icon displays a tooltip with more information about it
Search
When the keyboard focus is in the icon window, you can type the first few letters of any module name to select it.
System Settings has a search function to help in hunting down a setting. Simply type in a keyword in the Search field in the toolbar and System Settings will display modules that contain the keyword and hide those that don't.</translate>
<translate> Searching for "key".</translate>
<translate>
You can also search for and open System Settings modules in KRunner.</translate>
Preferences-desktop-plasma.png|48px|link=Special:myLanguage/System Settings/Workspace Theme]]||<translate>
Customize your desktop theme, cursor theme, and splash theme all from here.</translate>
Preferences-desktop-font.png|48px|link=Special:myLanguage/System Settings/Fonts (Category)]]||<translate>
Customize the fonts used on your system here.</translate>
Preferences-desktop-theme.png|48px|link=Special:myLanguage/System Settings/Application Style]]||<translate>
Customize your systems widget style (button themes), window decorations (how your titlebars look), and how GNOME (GTK) applications look..</translate>
Preferences-desktop.png|48px|link=Special:myLanguage/System Settings/Desktop Behavior]]||<translate>
Configure desktop effects such as window animations, transparency, or the desktop cube.
</translate>
Preferences-system-login.png|48px|link=Special:myLanguage/System Settings/Startup and Shutdown]]||<translate>
Configure your system behavior when starting up or shutting down.</translate>
Preferences-desktop-accessibility.png|48px|link=Special:myLanguage/System Settings/Accessibility]]||<translate>
Settings to help users who have difficulty hearing audible cues, or who have difficulty using a keyboard.
</translate>
Preferences-system-network.png|48px|link=Special:myLanguage/System Settings/Connections]]||<translate>
Preferences for your network connections.
</translate>
Preferences-desktop-peripherals.png|48px|link=Special:myLanguage/System Settings/Input Devices]]||<translate>
Configure your keyboard, mouse and joystick.</translate>
Preferences-desktop-display.png|48px|link=Special:myLanguage/System Settings/Display and Monitor]]||<translate>
Configuration of your monitor(s) and screensaver settings.
</translate>
Preferences-system-power-management.png|48px|link=Special:myLanguage/System Settings/Power Management]]||<translate>
Global settings for the power manager.
</translate>
This page is obsolete. For information on translation see Working with Languages and links in that section.
Much of the information that was on this page is now outdated. How-Tos exist for all the common contributor tasks, including translation, both on- and off-line, and can be found linked from Tasks and Tools.
Warning
When editing pages that are already marked for translation, you will see section markers similar to < !--T:1-- >. Usually each paragraph is one section. You should not change the markers, unless you fully delete a section, in which case you should simply remove the old marker. When adding new sections, you don't need to add marker to it – the marker will be added automatically when your changes are approved for translation. If you want to move a section, move also the section marker with it. That is the only time when you touch the markers - the system will do the rest.
Guidelines applicable to all Languages
Information
This section is new, and will be controlled by experienced translators.
KDE style
The KDE voice is helpful, aspirational, and genuine. Our communications strive to be:
Efficient
Highlight the elegance of efficiency — from steps removed and labor reduced to costs saved.
Effortless
Communicate in intrinsically simple terms. Be concise, intuitive, eloquent, and fluid.
Useful
Address real needs and open up new opportunities.
Immersive
Make communications as engaging and comprehensive as the technology they cover.
Meaningful
Use real examples and genuine recommendations to make the message personal and relevant.
Know Your Skills
KDE relies on volunteer translators to help make useful KDE information available around the world.
As volunteers, you are not required to have any formal language training, but we do ask that you know your fluency and get the support you need to finish a translation if you run into tricky language issues or content that lies outside your translation capabilities.
Because many of the articles on KDE wiki are technical in nature, it also helps to be familiar with—and even fluent in—KDE products.
You will need to be able to distinguish between common terms and technical terms in context and determine when user interface or workflow elements that are mentioned in the articles need to be translated.
General guidelines
Expressions, jargon, and humor
As you translate, you may encounter expressions, puns, or jargon that are specific to the original language and may be difficult to translate effectively.
In such cases, translate the concept or point the article is trying to convey and not the exact words.
Take care to ensure you capture the overall message, and don't worry about losing the humor or the colloquialism.
Proper names
Company names and product names should never be translated. Proper company names and product names should always remain in English, no matter what language you are translating for.
People's names should remain in English for Latin-based languages, but you may transliterate them for non-Latinbased alphabets.
Terminology
For help with translating tricky constructions or technical terms, consult the translation-sharing site to: TAUS.
Simply enter your desired text and then choose which language to translate it from and to. Not all terms are included for all languages, but this can be a helpful tool for completing accurate translations.
Titles of works
When you run across the title of a book, program, feature, distro, or other public work, check to see if that title has already been officially translated for your language (by the publisher or distributor), and if so, use that translation.
If you cannot find a translation for that particular title in your language, do your best to translate it as accurately as possible.
Units of measurement
Convert units of measure to make them relevant for the intended language or region. For example, some English-speaking countries use the unit of inch, but other countries may prefer centimeter unit.
User interface terms
Translate user interface terms as appropriate for your language.
I propose that the Discussion page attached to this page should be used for orderly debate about issues noted, particularly issues where existing markup is causing problems. Old threads, long since resolved will be cleaned out, and once decisions are made I will update the relevant help pages. I would ask you to put a Watch on Talk:Translation_Workflow.
Getting a Better Understanding of the Process
For a fuller description of the Translate extension, read the description on the developers' website
Tip
Monitor the status of your language statistics by monitoring the page Special:LanguageStats if you have your own language set as the interface language of UserBase.
</translate><translate>
Language-specific guideline pages
All Right-to-Left script Languages
Mediawiki is not yet good at supporting RTL languages. Currently, the workaround is to add < div dir="rtl" > at the start of your translation (i.e. in the first message) and < /div > after the final category statement
We propose to have Team Leaders for each language. As we get leaders appointed, they will take charge of a page of guidelines for their specific language, where they will be named. They will have final say on any question relating to their language. The guidelines are listed below:
It's time to start our project. After certain time we collect the information needed as completion percentage, worked hours, expenses.
Gantt chart
Now, as we have the baseline, we have prepared all the data needed for the next step which is controlling the working process! Before this, we have to check if everything is right. Looking at the Gantt chart we can see a big picture about our project and therefore be able to visually view if there are some errors.
So, have a look at the Gantt in Views -> Gantt, which should be like this
You can also configure the Gantt view to show scheduling errors!
If everything looks right, we can proceed forward.
Project performance chart
At this point the Project Performance Chart shows the baseline and the state before start. It should be like this:
Where BCWS means Budgeted Cost Work Scheduled, BCWP means Budgeted Cost Work Performed, ACWP means Actual Cost Work Performed. All these are considered as effort and costs. PI are the Performance Indexes, where CPI is the Cost Performance Index and SPI is the Schedule Performance Index.
Note
CPI is equal to BCWP/ACWP. When this index is below 1, means that you are over budget as ACWP is major than BCWP. If the index is over 1, means that the costs are under budget
Note
SPI is equal to BCWP/BCWS. When this index is below 1, means that you are behind schedule. A value greater than 1 means that you are ahead of schedule.
Task performance chart
On the Task Performance Chart we can analyse deeply each task or group of tasks with the same index as before.
This is really useful in long and complicated project.
Task status
In the Task Status View, you can check the actual situation of the project. Can be used as a daily check!
Is it time to simulate some work now!
So, let's start to enter some value, right clicking on the activity in the Next period -> mec design and choose progress from the menu that appears. This will appear!
In this task progress window, we can choose to define the starting date of the task. Click on the Started button on the upper right corner of the window and choose the date.
Then we choose to add a completion percentage for the task, clicking on the add entry button in the tab completion. Then click on the %Complete field and move the cursor that appears up to 20%. On the field at the right you can insert the effort used, in this case we will insert 32.
Warning
The edit mode must be set to 'Per task' (default is 'Calculate Effort').
The final window will be like this one:
Now we do the same for the second task that can be started, the "ele design". But for this task we choose the edit mode as per resource and compile the relative tab with 5 hours per day on Tue, Wed and Thu. The result will be like below:
Then we move briefly to the Task Execution View and choose the orders task and insert the progression using the calculate effort edit mode. Choosing the date we started and the % complete to 10%, the effort will be calculated automatically and the result should be like below:
then moving to the Task Status menu we'll find the following:
Task execution
In the task execution we can have a general view of the things going on.
Note
Note that BCWS are referred to Today!
This is a reasonable view to have a general check!
Gantt
The Gantt menu is a typical Gantt diagram where you can have a clear picture about the sequence and the duration of the project. With our example, it will be like this.
To have a better view of the Gantt diagram, it's possible to work on the zoom. This can be done by right-clicking on the upper part of the diagram where there are the months and days. This menu will appear:
With this menu it's possible to change the scale or the zoom in/out. Most useful could be the "zoom..." selection that can zoom in or out by a small menu. Try it!!
Milestone Gantt
Milestone Gantt is a part of the Gantt diagram with a filter only to the milestones. In this project we do not have any, so the window will be blank!
Resource assignment
The Resource Assignment view let's you check which resource is used in which day, how many hours and for what.
On the right window, between brackets are the hours of availability while just before the brackets the hours used for that resource.
Resource assignment gantt
The Resource Assignment Gantt is a Gantt diagram with the resource data. Can be useful to visualise the working period of the resources as well as quickly check about some availability to anticipate some tasks!
In this view we can see that the first resource is fully used for the first 3 days as in the main row related to the resource is written 1.0, this means 100%. then on the sub rows of the resource we can see the tasks and the time spent for each task.
Cost breakdown
The Cost Breakdown view represents the result of the accounting of the various tasks cost, generated according the cost assignment in the task and the cost breakdown structure that we decided at the beginning of the job.
On the left windows, in the total column, between brackets there's the total sum for the project according the task, while just before the brackets is the actual total expenses.
Reports
Reports are still in a early stage but you can choose to export as pdf some views, which can be good as the report!
</translate>
Click on the Edit icon and enter your username, the language you want to translate for and if you intend to translate off-line
Use Save page to save the information
When your user has been added to the group (you should get an e-mail notification), click on Start Translating in the sidebar
If the UserBase interface is in English and there are no any page titles showed on the page, you may need to enter the language you want to translate to in Language code and click on Go.
Note
Entering en (English) as the language code won't display any untranslated messages since all original content is written in English
Click on a page you want to translate in the list
In the Translate page, set View all untranslated messages in the first drop-down list or you can choose Review all translated messages to improve the translated messages
Check that the correct language code is showing
In the Navigation section, click on the link to the left of the message you want to translate
Enter the translation - a Google translation is provided for reference, but your own translation is usually preferred.
Click on Save and open next to continue with the next message or Save page to save the translation if you wish to stop working.
Warning
Do not create a localized page variant manually (by entering pagename/langcode and trying to translate the original). This will mess up the translation system and no translation will be shown at all.
Hints and Tips
Image display instructions
A typical example is [[Image:Plasma-kickoff.jpg|right|160px]]. The whole of this is a system instruction on how to display the image. None of it is translated.
Category statements
In this context, think of the word "Category" as a system word which therefore should not be translated. For example, [[Category:Administration]] would become [[Category:Administrasi/id]]
For consistency, we have lists of approved translations of categories, and ask you to use them. You can find one suited to your language linked from Translation_Help_Needed. If there are any blanks in your table, feel free to add a suitable translation.
Links to other pages on UserBase
These take the form [[Special:myLanguage/Other page|link text]] The link should remain untranslated, whereas the link text should always be translated. If no link text is present, please add a suitable (translated) link text. Note, that this also goes for subpage links, ie. links of the form [[Special:myLanguage/Page#Section|link text]].
Note: "myLanguage" will try to load the translated version of the link in the language you have set in your user preferences. If it fails to load it will just load the English original, so it is safe to use it for any internal link.
Links to external sites
These take the form [http://example.com link text] Like the internal links, retain the actual link and translate the link text.
These generally consist of a header word "Information" or "Note" and an editable information text. If the word "Information" is not in your language, you may need a localized version of the template.
Usually, you need to add a forward slash and a specific language code to show the title in your own language. For example, in the picture on the right-hand side, zh-cn is the language code for Chinese(China Mainland)
The following pictures show the result:
Before:
After:
Translated units are marked as fuzzy
Sometimes it may happen that you have translated a page, but the translation is marked as incomplete. Certain errors in the markup of the original page can cause this. The most common type of error is the appearance of unbalanced brackets or parentheses. The translation system requires that all opening brackets ('[', '{' or '(' ) have a matching closing bracket (']', '}' or ')' ) in the same translation unit, otherwise the translation is considered incomplete.
The same rule is not enforced by the wiki software, so it is easy for writers to miss those mistakes. If a bracket character is simply missing, just add it. However, sometimes the bracketed content extends over more than one translation unit, so that the matching closing bracket is in later unit. In this case you need to balance brackets in both units, but you can't simply add bracket characters without changing the meaning or formatting, so you must must comment out the added bracket character, like this
<!--}}-->{{Info|1=Beginning of long info box...
and in a later unit
...end of long info box}}<!--{{-->
If the offending bracket is part of a smiley, you can replace it with an emoticon icon. For the standard smiley, :-), you can use the template {{Smiley}}
Please also correct the original page so other translators won't have the same problem, or leave a message on the discussion page.
Language Statistics discrepancies
You may notice some slight discrepancy between the percentages stated on your LanguageStats page and the percentage on the language bar. This is normal. LanguageStats compares only the number of messages that are untranslated or outdated. The language bar statistic tries to be more intelligent. For instance, in one page (100 messages) 8 messages had a small (re-branding-releated) change, in each case, a single word was involved. There was 8% difference between the two statistics, since it was a substantial proportion of the messages, but a small proportion of the whole translation.
If you use the Chromium browser....
Be aware that there seems to be some sort of caching problem on the Chromium browser. I have noticed that even with forced refreshes, sometimes statistics do not show up as they should (I have seen other things affected, too), yet if I open the same page in Firefox I see the correct stats.
By now most of the problems experienced with the translation system seems to have been resolved by the recent system upgrade. However, it does seem that there are some old issues, that still affect us - most likely due to corruption of the database:
Some existing translations that have been in the system for a long time are flagged as being in need of an update even though they are fully in sync with the corresponding English unit. Typically such units are not displayed as outdated on the translated page (ie. no red background) and do not show up in the LanguageStat page under outdated units, so it is not a major problem. However, sometimes units that appear this way actually should have been marked as outdated, so it is necessary to check them all.
I have sees a few examples where properly translatable links (Special:myLanguage/...) does link properly to the translated page when accessed from the English page but not when accessed from the translated page. This does not affect alle translatable links om that page. See fx the Danish translation of Kmail/Getting_Started. The same problem appeared on KMail - there I may have solved it by changing the link in the translated unit back and forth a couple of times. It remains to be seen whether this is a lasting solution. Note: Now (the next day) links on both pages appear to work. Btw. the problem showed on multiple transations, but not always with the same links.
DPL searches (updated October 2022)
In the past we have used an external DynamicPageList like plugin for advanced searching. That plugin is no longer maintained, and has been continued by another external plugin: DynamicPagelist3, which is now installed. However, it is not a drop in replacement for the old dpl plugin, so our searching templates must be adapted. Preliminary experimentation indicates that DynamicPagelist3 may not suit our needs.
I can not make includematch work, and that affect many searching templates, including finding pages that link to a given page, since dpl - like mediawiki itself - does not recognize Special:myLanguage links.
System issues
Special:WhatLinksHere is not reliable - maybe this is due to poor (or no) integration with the translation system? It may report that no page links to a page even though in fact there are pages linking to it. We should probably remove the tool from the panel, as it does more harm than good in its present state. Can we find a replacement? (User:Claus_chr/Search#Search internal links does the trick but is a bit awkward to use.)
Result of using Special:WhatLinksHere on the page What is KDE. Note that the page Welcome to KDE UserBase should be in the list but isn't.
Searching for users: The search box at the top of our pages is not very helpful - it returns hits to all translated pages. Can it be replaced by a search box that respects the user language?
Searching for contributors: A lot of special-purpose search options can be found on User:Claus_chr/Search. However, these searches use DPL - an outdated extension. Should we update our search framework? (see above)
Add badge? (See this page or find a suitable image file).
After the 2020 update of the wiki software
Commenting system: all threads have been lost - it seems a plugin is missing
Translation system: Some old translations have been mangled and now have problems being translated. Needs investigation - who and what are affected? (only new units? only existing translations?)
DPL search: plugin needs to be installed
embedded video: does the {{#ev template still work?
{{Special:ContributionScores does not work anymore.
Issues as of January, 2021
On the panel on the left one bloc seems to be missing. Link to the "Special"-Pages is not there anymore.
Translation Systems seems not to work correctly. I have added two new German translations yesterday, but they do not show up on the German page [10]. However translations are there in the translation system. It seems that one step is missing on the update of translations.
And yes, embedded video template is not working. You may see it here. A plugin missing?
Well, I am not really a technical guy and I don't know how to investigate the cause of these issues, however, if there is anything I can do to help in that matter - never hesitate to contact me, please. Ikoch (talk) 19:01, 27 January 2021 (UTC)
Archived
Translation system
fuzzybot is slow or misses some updates completely?
When the site was updated a lot of pages that had been updated and marked for translation in recent years but had never shown up in the translation system suddenly showed up in the list of translatable pages needing updating.
Recently some pages were updated and marked for translation but have not shown up in the translation system 3 days later! Does the old problem persist?
e.g. Kdenlive/Manual was updated and marked for translation on July 20. The Danish translation has not been updated as of July 23. but the page reports it is 100% complete. As of July 25. the pages seems to have been processed.
The glitch discussed in the last messages of this thread.
If a page has been marked for translation, and fuzzybot has not yet handled it, it will none the less seem to be translatable when entering the translation page from a previously translated version of that page. If newly added units are then translated, they will not be entered properly into the system.
For a demonstration of this behaviour see Kdenlive/Manual/Effects And Transitions/uk I recently split the very long table into many new units, marked the page for translation and then proceeded to enter the individual rows from the original Ukrainian translation in their respective units. The result was that the content of the table appeared untranslated. In the translation page all units appeared to hold translated content, but nothing was saved. (When the Effects and Transitions page was finally ready to be translated all new units had to be translated again — everything that had been entered into new units had been lost).
As far as I can tell, this only affects pages that have been translated prior to being modified, and only languages that had translated (some of) the original content as other languages have no link to access the translation page. This is new behaviour.
After the recent system update the translation system now works again!
Formatting issues
Icon template: seems to align to the top of the line rather than to the middle causing images to extend too much below the line (see Toolbox#Inserting_GUI_Icons for examples). Also compare to entered as [[File:Icon-list-add.png]].
Links to pages that have not been written yet used to be red - seems to be blue now as in This page does not exist - done 25.07.2019
The Smiley template appears way too big inside a Warning template (see Create a Page at the bottom). - done 25.07.2018
Numbered lists: Sometimes some of the numbers are not shown. See for example Kdenlive/Manual under Effects. This looks like a Firefox bug :( tested with Firefox, Firefox Nightly and Chromium and only Chromium didn't have this issue. - 14.12.2020: Problem may have resolved itself.
Your Team Leader is Abella Remember that if you ask questions on the Discussion page attached to this others may benefit from it.
The Tasks and Tools page helps you to collaborate in the work of translation and new articles. Then you'll see a small guide of how to work (such as start, ToDo - memory tasks, translation, statistical language, all pages translated into Catalan, and documents created).
Primer s'ha de traduir l'arrel per on va navegant l'usuari. Fet! Aquesta tasca ja està feta però esteu a l'aguait per si n'apareixen de noves o aquestes queden desfasades.
Com això és el KDE sou lliure d'anar directe a l'aplicació que més us agradi.
Sou lliure de demanar a un altra traductor per tal de finalitzar una tasca pendent -trobeu que fa massa temps que està iniciada-. Si no us responen digueu-ho a la llista de correu i estareu beneïts. Endavant! :-)
Accediu a aquesta pàgina i empreu la capçalera «Completesa↓». D'aquesta manera seguireu les que falta actualitzar.
Aquí es mantenen els noms estàndard de les categories «Translation Help Needed» (veure l'entrada corresponent al llistat TODO on llistem certs problemes).
ToDo
Anotacions de treball:
Informació
Tots els traductors podem modificar el codi en aquesta pàgina segons es vagi avançant. El ToDo s'ha d'etiquetar per a saber si una tasca o referència pertany a un usuari en concret. No s'hi han d'apuntar totes les tasques que us assigneu. Tan sols si aquesta és important de recordar.
L'ús de les «Categories:» està activat: A mesura que es completi una traducció s'ha de fer el pas amb Sistema/ca. Cal mirar a System per si en falta cap per traduir o convertir (per si ens interessa tenir-la completa). Aquesta etiqueta no té suport de l10n pel que el seu manteniment es fa realment feixuc. Contacteu amb la llista de correu per parlar-ne.
Aquí es mantenen els noms estàndard de les categories:
Falten els enllaços a pàgines sense traduir (el qual deixa la traducció en desavantatge). - Feu-ne el seguiment a la pàgina de debat Talk:Translate_a_Page
Tot això és a efectes de solucionar aquests problemes a les categories i que es puguin emprar amb lògica o usabilitat.
Abella: Gairabé totes les pàgines estan desfasades (degut a canvis de l'equip de traducció al català) i s'han de passar a través de l'eina de revisió «pology» revisant les entrades de la IGU.
Manuals will be included as sub-pages of the main application page. For brevity, I will refer to that main page as Appname. The structure, therefore would be something like:
Appname
Appname/Hints and Tips
Appname/Manual # Your Contents page
Appname/Manual/An Introduction to Appname
Appname/Manual/Configuration Choices
Appname/Manual/The First Time you use Appname
Appname/Manual/section 1
Appname/Manual/section xxx
Appname/Manual/Hints and Tips
Appname/Manual/Troubleshooting
Appname/Manual/Bug reports
Appname/Manual/Get involved #link to techbase etc
If some of your sections grow too large, you can place subsections on separate pages. It might look like this:
Appname/Manual # Your Contents page
Appname/Manual/An Introduction to Appname
Appname/Manual/Configuration Choices
Appname/Manual/The First Time you use Appname
Appname/Manual/section 1
Appname/Manual/section 1/subsection 1
Appname/Manual/section 1/subsection 2
and so on.
Information
The page names do not have to follow the structure of the document closely! In the above example you could simply use Appname/Manual/subsection 2 instead of Appname/Manual/section 1/subsection 2 and similarly for sub-subsections (as long as this procedure does not produce duplicate names ).
Remember
Try to keep page names short and avoid long paths. Overly long page names are cumbersome to type when you link to them, and they don't look good on the wiki pages. And always remember: The page names and their structure have no influence on the finished handbook whatsoever! It is entirely determined by the headings in the actual text.
In order for the automatically generated Docbook to have the same contents page as the one you make on UserBase, and for links to work in the Docbook there are a couple or guidelines, that must be followed:
The Docbook Table of Contents will list all sections and subsections regardless of whether they have a page of their own. On the other hand, subsubsections won't be listed in the Docbook TOC even though they have a page of their own.
All pages should have a heading at the very top, either a section (== ... ==), a subsection (=== ... ===), or a subsubsection (==== ... ====), otherwise the Docbook structure will be messed up.
The title of the section/subsection must exactly match the page name, otherwise Docbook links won't work.
Subsection titles must be written like this: ===title===, even if it is the top level on a page. Otherwise the Docbook structure will be messed up. Similarly, if you have a very long subsection with subsubsections on pages of their own, these pages must have their titles written like this: ====title====.
Subsubsections that should not appear in the contents page and should not appear on a page of its own in the Docbook must be level 4 or below, i.e ==== or more.
Links to pages in the manual must exactly match the page name (i.e. no links via redirects!)
If you link to a subsection of a page, you must have an anchor at the target location. Failing that will mess up Docbook links as well as translations.
Note
Every subsection (===) gets a page of its own in the Docbook, even if it is part of a longer page on UserBase. This means that a section (==) that contain a number of subsections, but no text before the first subsection gets a Docbook page that contains nothing but links to the subsections.
Remember
If at some point you decide to change the title of the main (sub)section of a page (the first headline), it is important that you also change the name of the page accordingly, and also that all links to that page are modified to match the new name.
Remember
Please do not use any kind of punctuation in your page names — punctuation like question marks or periods creates serious problems for the wiki software, in particular for the translation system.
You will need a scratchpad to experiment with section headings/pages. You can use either your UserTalk page, or the discussion pages attached to the area where you are working. It's helpful if you remove anything no longer required, once the job is completed.
Developing a Manual
While developing your manual it is usually best to keep it separate from the regular UserBase content. Some prefer to edit their drafts as subpages of their Talk: page. We also have a special Draft: namespace for this purpose.
To create the content page of your manual, simply write http://userbase.kde.org/Draft:Appname/Manual in the address line of your browser, or place the [[Draft:Appname/Manual]] link in a page and then click it. Either way you will be taken to a page telling you that the page does not exist, but that you can create it clicking a link.
Contents
Once you have made the decisions (that can be a lengthy procedure), create appropriate links on the Contents page. It is, of course, possible to insert a section later if you find you've missed something.
Building your Manual
Use the red links to create the page, and write up a section at a time.
Note on the Discussion page anything you will need to refer to later, such as links that can't yet be created.
Remember
It's important to be consistent, particularly in Manuals, so here are some general rules:
Take care with heading levels - we start at second level (Mediawiki uses top level for page-name), using ==
Check if all table cells have space after the pipe character. This rule conforms with traditional wiki formatting.
Make application name formatting consistent (avoid using Amaroks, do use Amarok's).
Ensure that all images are in PNG format (you can use JPEG as well, but in this case they should be converted to PNG by the script). Save work by converting them before you start .
Remove all non-printable characters from image names.
Formatting considerations
In order for your manual to be translatable into Docbook format there are some restrictions on formatting that should be observed.
Notes and Warnings do not support alternative titles in Docbook. Don't write something like {{Remember|2=Don't Forget This!|1=You can use...}} The 2=... part has no meaning in Docbook and the program transforming the wiki page to Docbook might get very confused. Just write {{Remember|1=You can use...}}
Embed a Video has some limitations in its current implementation: Only YouTube and Vimeo are supported and only one value (the id of the video) can be passed as argument.
Searching your manual
At some point, you may need to find something that you wrote earlier, but can't remember where. Using the wiki search box may not be ideal unless the string you search for is very specific. You can get much better control over searches using the DPL extension. For example, to find the pages in your manual containing a certain string, you can add the following to any page:
<DPL>
  titlematch = %Appname/Manual%
  nottitleregexp = .*((/[a-z][a-z](.|-..)?)|([ _][(][a-z][a-z](...)?[)]))$
  namespace = | Draft
  include = *
  includematch = /string to search for/
  includemaxlength = 0
  resultsheader = Manual Pages:
  format = ,\n* [[Writing an Application Manual|Writing an Application Manual]]\n,,
</DPL>
Information
You can find more examples on using DPL on User:Claus_chr/DPL. An easier way to search for strings in a manual is to use the SearchPages template: To search for the string "timeline" in the Kdenlive manual enter {{SeatchPages|1=Kdenlive/Manual|2=[Tt]imeline}} in a page.
Pro tip: You don't need to save the page to see the search results — just preview the page and cancel the "edit" when you have found what you were looking for.
Note
If You are working on the Amarok manual be aware that some of the pages deviate from the normal naming convention. To find matches on all Amarok manual pages use
(Note that there can be no space characters on either side of the '|' character)
Preparing the Manual for Translation
The steps for markup editing can be found on Preparing a Page for Translation. Please adhere to that guide, since old markup styles may not still be relevant.
Producing a DocBook manual
Once your manual is written you can have it transformed into a DocBook manual, so that your work can be used like an ordinary KDE handbook. The procedure is described in this page.
</translate>
KWin is the default window manager (WM) in Plasma and has lot of features, but it only supports floating windows. Plasma lets you use another window manager, such as i3, bspwm or any other tilling window manager.
Plasma using i3 as window manager
Warning
Other window managers are only available when using X.org. These changes cannot be made for Wayland sessions yet. With Wayland maturing and Wayland extensions being standardized, this feature could be implemented in Wayland[1]
Most window managers require few, if any, changes to their configuration files.
Some considerations to be aware of when using another window manager:
Tiling window managers may have problems with components like panels. For some configurations, certain options will help alleviate issues
Most window managers do not have their own compositors, and therefore lack features like animations and transparency. If such effects are desired, a compositor is required - refer to Arch Wiki for options.</translate>
<translate>
Compositors can also help with screen tearing, however check first if you can resolve it with your video drivers, as this will be a more performant solution in most cases.
Set-up
To use a different window manager with Plasma, replace the systemd service for KWin with a new user unit for your preferred WM. A tutorial can be found in the ArchWiki.
Configuration
To make a non-standard WM work well with Plasma, some additional configuration may be required.
i3
Installation
Before starting the configuration, you should make sure i3 or i3-gaps are installed on your system. If they are not, use your package manager or Discover to install one of these two packages.
Configure i3
When you first start i3, its default global configuration (at /etc/i3/config) will start i3-config-wizard, which will provide a dialog for Mod key selection and generate the user local configuration at ~/.i3/config.
If you wish to maintain the same configuration across users (they can still override it with their own local config), remove the wizard invocation from the global configuration file and use it directly.
The following i3 window rules will help you with notifications and some other plasma windows:
If you are using a non-English installation of Plasma, you need to find out what the exact window title of the Desktop is. One way is to do this is with wmctrl -l.
Notification positioning can be tricky, since not all notifications have the same size depending on their content. You can also use coordinates positioning, knowing your screen resolution. For example, for a 1920x1080 screen and notifications in the top-right corner we can use:
for_window [class="plasmashell" window_type="notification"] floating enable, border none, move position 1450px 20px
If you want to unlock KWallet automatically on login, configure PAM and then add the following line to your i3 configuration file:
exec --no-startup-id /usr/lib/pam_kwallet_init
Configure Plasma
You may get into issues related with the "Activities" feature - activating it via keyboard shortcuts (some of which are also used by i3, like "Meta + Q") seems to make i3 unresponsive. Removing Activity related global shortcuts seems to resolve this.
To get the Plasma provided pager display desktops as i3bar, set Pager Settings > General > Text display to "Desktop name"
Bspwm
For the most part, bspwm requires little additional configuration.
A single Plasma panel, in most cases, is detected properly and bspwm will not place windows in its space. If the panel ends up presenting a problem, or when using multiple panels, the following may be added to .bspwmrc
bspc config top_padding size
where size is the size of the panel in pixels. Also valid are bottom_padding, left_padding, and right_padding. As many of these directives may be used as necessary for multiple panels.
awesomewm
Following rules help Plasma to work as intended.
Add these entries into awful.rules.rules table
{ -- General plasma rules
    rule_any = {
        class = {
            "plasmashell",
            "ksmserver-logout-greeter",
        },
    },
    properties = {
        floating = true,
        border_width = 0,
        titlebars = false, -- custom property to control titlebars
    },

<!--T:83-->
},
{ -- KDE apps
    rule_any = {
        class = {
            "spectacle",
            "krunner"
        }
    },
    properties = {
        floating = true,
    }
},
Plasma widgets hide when they become unfocused. We do not want Desktop and Panel to be focusable, but want other plasmashell windows to remain focusable. A way to achieve this is with "manage" signal handler. An example handler:
client.connect_signal("manage", function(c)
--... your config

<!--T:84-->
if c.type == "dock" -- Plasma Panel
    or c.type == "desktop" then -- Plasma Desktop
    c.focusable = false
    c:tags(c.screen.tags) -- show on all tags from this screen.
end

<!--T:85-->
-- Show titlebars only if enabled.
if c.titlebars then
    awful.titlebar.show(c)
else
    awful.titlebar.hide(c)
end

<!--T:86-->
-- Place floating windows. Plasma widgets provide this info
 if c.floating then
    if c.size_hints.user_position then
        c.x = c.size_hints.user_position.x
        c.y = c.size_hints.user_position.y
    end
    if c.size_hints.user_size then
        c.width = c.size_hints.user_size.width
        c.height = c.size_hints.user_size.height
    end
end
..
end)
You may match Plasma Desktop using the following rule:
 rule_any = {
     name = {
       "Desktop.*Plasma",
     },
 },
Hints and Tips
DBus
Since Meta key handling is in part performed by KWin, you will have to handle these shortcuts manually when you switch to a different window manager.
You can open some Plasma components with DBus commands. You can use this to map corresponding keybindings to DBus commands. To find a specific DBus command, you can look at dbus-monitor or qdbusviewer while you invoke the component in a standard Plasma set-up.
For i3, you can map a keybinding with the bindsym command. Use --no-startup-id to prevent the command from generating "i3" entries in the task manager.
If you want to map the modifier key itself, use the bindcode command - you have to specify the keycode generated by the key, which you can get via the xev utility.
There are separate pages explaining syntax with example code.
Important
Adhering to these typographic guidelines will ensure that your documentation can be accurately and easily exported for translation purposes. Some guidelines may not be applicable for non-English languages. These should be noted on specific language pages, linked from Translation Workflow. If no such page exists for your language, please add one and make guidelines there.
Links
Links to other UserBase pages should follow this pattern:
[[Special:MyLanguage/page name|whatever]]
[[Special:MyLanguage/Welcome to KDE UserBase|start page]] links to the welcome page in the readers language if the translation exists or else to the english version of that page.
Links to external pages follow normal wiki syntax:
[https://web.site.xxx/page text]
Bold Text
Use bold text to highlight
Window titles
Common labels that are not user-configurable
Icon captions
Program names
For example:
Highlighting a selection of text will copy it to Klipper.
Italic Text
Use italic text to emphasise
Words or phrases as in general writing.
Titles when referencing other works.
The first use of an unfamiliar word.
Some examples:
Save your work at this point.
Details can be found in Samba 3 by Example....
KDE Manuals are in Docbook format.
Tip
Programs are launched by users, components are used by programs
Combined Bold and Italic Text
Use this combination for replaceable or variable text.
Some examples:
To connect to your remote server, type sshusername@domain.name in Konsole.
In rpm-based distributions, the command rpm -qpackagename will result in package-version-release.
Mono-spaced Text
Code should be presented in mono-spaced text, usually boxed, as shown below. Input text will be on a light yellow background. For output text, the background colour will be a light grey.
Code, whether single lines or blocks, use templates to ensure consistency
{{Output|1=<nowiki>terminal output
is also shown as code,
but on a grey background</nowiki>}}
which displays as
terminal output
is also shown as code,
but on a grey background
Note
Note the use of 1=<nowiki> some text </nowiki>. Occationally, parts of literal displays may confuse the wiki parser. The <nowiki>...</nowiki> block protects against that. Also if something like n= appears in the literal body, the template parser may get confused. The initial 1= protects against that. Otherwise this markup has no effect. In short: it can't hurt, and it protects against the possibility of some nasty side effects.
Starting an Input or Output template on a new line will break the display format if it is within lists. Simply continue on the same line if you need to correct this.
You can also combine input/output areas with GeSHi syntaxhiglighting. An input area like this
# Initialise common code$preIP=dirname(__FILE__);require_once("$preIP/includes/WebStart.php");
Single code words can be kept in-line by using
<code></code>
It will display like this. Note, that if the <code> tag is immediately preceded by a newline character, it will not display properly.
File names and paths should use the Path template (see below).
Warning
In-line code markup should be short! It looks strange - and ugly - if a string of code words is split between lines. And remember: even if it looks good in your browser, not everyone uses the same screen size! And even if your text looks good on all screen sizes translations may still suffer. It is best to use the Input template for code unless it is really short.
Note
Please avoid using shell commands or other code words as verbs. This does not translate well. Always treat code words as proper names.
Block Quotes
The tags <blockquote> and </blockquote> should be used when quoting other works or other pages. This produces a proportional italic font, with some padding.
Here is an example of the display that you get by using the blockquote tags.
Text in Section Headers
Even though the criteria above may be met, do not use Bold text in section headers or in links.
Text in Information, Note, Tip or Warning Templates
Bold text should be avoided in the text within these templates. Italic text for emphasis may still be used - use sparingly for maximum effect.
</translate><translate>
Lists
You can have various kinds of lists in your pages — bulleted, numbered or itemized. Find details on the Toolbox page.
</translate><translate>
Keeping things together
After your text is written some markup is automatically added by the translation system. This means that whenever it sees a blank line, it starts a new unit. When your text is presented to translators, they typically see it one unit at a time, so it is important not to leave a blank lines in the middle of something that should be treated as a unit. Normally an entire paragraph should be kept in a single unit; and under no circumstance should a sentence be split between units!
If you need a linebreak in the middle of a section, the preferred way to achieve this without breaking units is to use <br /> at the end of the line where you want to break to occur (not on a new line). If you need space between the lines add <br /><br />.
</translate><translate>
Unbalanced brackets
The translation system marks any translated unit as incompletely translated if it contains any kind of unbalanced brackets. If you need to have unbalanced brackets in your text, please add a balancing bracket in a comment tag, like this:
<!-- }} -->{{ A line

<!--T:38-->
Another line}}<!-- {{ -->
This goes for all kinds of brackets, even ordinary parentheses. (Of course it is normally better to avoid blank lines within a mark up unit - see Keeping things together.)
Special Tags
Key presses and menu selections
<keycap> and </keycap> denote (keyboard) key names e.g. Enter
<keycap></keycap> can also be used around groups of keys to be used concurrently, e.g. Ctrl + Alt + F1 to launch a virtual terminal. (Note that "(space)+(space)" is used to link keys to be pressed concurrently).
Sequences of menu choices should use <menuchoice> and </menuchoice> for example View -> Message List -> Aggregation -> Standard Mailing List
In general, if the user needs to choose an element, even if it is not in a menu, the <menuchoice></menuchoiсe> markup should be used.</translate>
<translate>
If you are contributing to a manual page, you should always use the markup describes above. For other pages, though, there is a template to enter menu selections: {{Menu|Top|sub|...}}. Fx, {{Menu | View | Message List | Aggregation | Standard Mailing List}} yields View → Message List → Aggregation → Standard Mailing List</translate>
<translate>
If you want to use the <menuchoice> but use → in stead of ->, you write & rarr; (without a space between '&' and r!) as in <menuchoice> View</menuchoice> & rarr; <menuchoice>Message List</menuchoice> which yields View → Message List. (Note, that the → character has to be outside of the menuchoice tags to be shown properly
Files and file paths
Traditionally, file names and paths have been marked up between <tt>...</tt> tags.
<tt>~/.kde/share</tt>
yields
~/.kde/share
There is now also a template for this, which should be preferred in new content for ordinary UserBase pages (but not for manual pages, please!):
{{Path | ~/.kde/share }}
yields
~/.kde/share
The Problematic Pipe
In some situations the pipe symbol can't be used - for instance when adding parameters into a template. In any such case, please use {{!}} which will display as a pipe symbol. For example, if you want to display a command line containing the pipe character using the {{Input|...}} template, the simplest way to do it is this: {{Input|1=cmd1 {{!}} cmd2}} which displays
cmd1 | cmd2
If you just write {{Input|cmd1 | cmd2}} you get instead
cmd1
the problem being, that cmd2 is seen as a second parameter to the template, which in this case is not used.
In many cases, you can also enclose the text containing the pipe character between <nowiki>... </nowiki> tags, like this {{Input|1=<nowiki>cmd1 | cmd2</nowiki>}}, which also displays
cmd1 | cmd2
Translatable Content
Everything that is translatable is contained within <translate> and </translate> tags. In most cases any images should be contained within the translatable section, as it is sometimes necessary to use localised versions of the images to explain a point. The rule of thumb is "If in doubt, include it!".
</translate>
One of the core features of Marble is the support for different maps (map themes in Marble speak) and different planets. Each of them can be viewed in different projections: Make the planet look like a globe using the Spherical projection or view it like a printed map in the Mercator projection.
Map themes are configured in the Map View dialog in Marble. You find it in the tab bar on the left in the Desktop version.
Marble's mobile version on the Nokia N900 offers you to open the Map View dialog via the main application menu.
The Map View dialog lets you choose a projection, the planet (celestial body) and a map theme. The rest of this tutorials explains these choices in detail.
Planet Choices
Marble supports about a dozen different planets. In the Map View dialog you can choose those planets where at least one map theme is installed for.
Earth. Plenty of different map themes are available.
Moon. We're aware it's not really a planet.
Mars
Venus
Projection Choices
The projection defines how the surface of the planet is presented on the screen. This can be a globe or some sort of a flat map.
Spherical Projection
Flat Map Projection
Mercator Projection
Example
Common Usage
Distant view, measuring large distances
Distant view
Close view, navigation
Tip
Unsure which projection to choose? A rule of thumb is to use the Spherical projection at very large distances and the Mercator projection otherwise.
Map Theme Choices
Overview Maps
Map Theme
Preview
Description
Atlas
A classic topographic map. It uses vector lines to mark coastlines, country borders etc. and a height relief.
Plain Map
A simple version of the Atlas theme without topography.
Satellite View
Earth as seen from space with sun illumination. Includes a cloud layer with real-time data.
Natural Earth
Natural Earth portrays the world environment in an idealized manner with little human influence. Includes a cloud layer with real-time data.
Earth at Night
Earth as seen from space without sun illumination.
Street Maps
These maps are optimized for high zoom levels, showing many details on the street and city level. Some of them provide good country and even continent or space views, but that's not their primary area of use. Need to find a route? Do you like hiking or biking? Want to explore the neighborhood? Pick one of these maps.
</translate>
The famous OpenStreetMap Mapnik layer. A general purpose map with useful information for the most common use cases. The map is identical to that shown on openstreetmap.org.
Combine this map theme with the Mercator projection for optimal speed and a sharp map view.
</translate>
<translate>
Osmarender
General purpose
The OpenStreetMap Osmarender layer. A general purpose map with useful information for the most common use cases. The map is identical to that selectable in the top-right toolbox on openstreetmap.org.
Compared to the Mapnik layer (OpenStreetMap theme), this theme has more lively colors and presents some different data. The view from space looks better than that of Mapnik. On the other hand, Mapnik handles conflicting elements at the street level better. In Osmarender, icon sizes are less balanced and the z-order (stacking) is wrong for some elements. Labels overlap in densely packed areas.
Combine this map theme with the Mercator projection for optimal speed and a sharp map view.
</translate>
<translate>
OpenCycleMap
For bikers
OpenStreetMap data presented for bikers. The map is identical to that selectable in the top-right toolbox on openstreetmap.org.
Combine this map theme with the Mercator projection for optimal speed and a sharp map view.
</translate>
<translate>
OSM Hike & Bike Map
For hikers and bikers
A map theme optimized for hiking and biking, based on OpenStreetMap data. Includes a very nice hillshading layer that shows the terrain (activate it in the Legend tab).
Combine this map theme with the Mercator projection for optimal speed and a sharp map view.
</translate>
<translate>
Educational Maps
Map Theme
Preview
Description
Historical Map 1689
A historical world map from the year 1689 created by G. van Schagen in Amsterdam.
Historical Map 1720
A historical world map from the year 1720 created by Guillaume de L'Isle in Paris.
Historical Map 1786
A historical world map from the year 1786 created by William Faden in London.
Precipitation (month)
Colors indicate the precipitation in the given month. Open the Legend tab to find out which color matches which precipitation.
Temperature (month)
Colors indicate the average temperature in the given month. Open the Legend tab to find out which color matches which temperature.
Restricted Maps
These map themes work fine in Marble from a technical point of view. The terms of service of the companies offering these maps, however, may prevent you from using it. If you want to use these map themes, you must install them manually. Make sure their terms of service allow you to use them within Marble.
Warning
To the best of our knowledge the usage of these restricted maps is forbidden in an application like Marble. We only want to demonstrate the technical feasibility here. Please don't add details on their installation in Marble to this Wiki. We don't want to promote the usage of maps which we think are not free.
Please install the Marble Maps package from the extras repository (the same where you installed Marble - Virtual Globe from). See Maemo Installation (Nokia N900 only).
Download Maps feature
Please use the Download Maps feature in Marble from the File menu (KDE only).
Manual installation
Please follow the link (if any) and install the map theme manually.
When you open the program for the first time, the below window will appear.
We choose the 8 hours day, 40 hour week template to start
Main project setting
Then we give the project a name and a manager, and set some other general information. To do this you need to click on the Edit main project icon on the top left of the screen and then the following window will appear.
On this window we can write the name of the project, choose a manager from a list already present in the system (if you have KDE and Kontact) or write a new name as per your convenience.
The target times Earliest start and Latest finish are used when scheduling the project. We want to schedule forward, so we set earliest start to when we want the project to start, and the latest finish we set to the latest time the project should finish. If the project cannot be scheduled to finish before this time, a scheduling warning will be given.
At the bottom of the window can be inserted a comment on the project. These data will be used for the reports or for other general purposes during the working period.
Tip
Remember to press Ctrl + S to save the file sometime!! Plan regularly updates a backup file in case it crashes
Currency setting
We can choose to work in different currency. As the English is set to $, we need to change to €. To do so, we need to select the menu Tools -> Define Currency and the below window will appear.
Then, change the currency symbol from $ to € and click OK as the other features are ok.
Work calendar
Have a look at the work & vacation calendar in View Selector in the upper left part of the window under the Editors group. The following view will appear:
In the centre we can add different calendars for different time zones and week efforts. On the right there's a month calendar, on it's upper part, there's the configuration for the working week hours, typically 8 hours from Monday to Friday and non working days for Saturday and Sunday.
Let's add a new calendar for our future purposes, clicking on the Add calendar icon, then for the name we write
Installation
and for the time zone we choose Asia/Ho_chi_minh from the selection menu.
We now need to select the installation calendar and define the relative working week.
On the right upper corner of the calendar, there are some spaces indicating a typical working week.
Right click on the blank one below the Monday indication and a menu will appear with the possibility to choose between Work, Not Working and Undefined.
Click on Work and the following window will appear
We add typical working hours for installation work. 10 hours per day from Monday to Saturday and 4 hours on Sunday. In case needed we can also choose to insert the pause time.
So, starting from 7 am for 10 hours and then click add and then ok.
Repeat the same for the other days up to Saturday while for Sunday insert 4 hours from 8 in the morning.
You can also select multiple days or weekdays by using Shift + LeftMouseButton or Ctrl + LeftMouseButton
We can also right click on a date in the calendar and doing the same considerations about the working and non working days or time. This is especially needed when you need to work with different holidays from yours!
Anyhow, the final result should be similar to the below image.
Cost breakdown structure
Here we define which will be the cost centres we wish to use in the project. We can have different groups and subgroups.
Click on the Cost breakdown structure item on the left side of the window, just under the work and vacation item you pressed before.
As per costs managing needs we divide the structures of the costs in the following way
Play with the Add Account and Add Subaccount icons to reach the full tree! This is a personal approach for a complete ETO project due to my experience.
For example you can have a "direct employee" account to manage the cost for your employee, or to have an idea about the cost of your suppliers using a dedicated account as soon as you insert their work.
Resources
So, now it's time to define our team and the material!!
You can access to the resources window clicking on the Resource item on the left side of the window, just under the cost breakdown structure item pressed before.
The resources are organized as resource groups and resources. So, first we insert the team group as resource group clicking on the Add Resource Group icon for each item as below.
As soon as you complete the group it's time to insert the people and the materials!
Work Resources
Now it's time to edit each single resource for the purpose to define it. Right click on the resource name to open the resource setting window.
Therefore we add the initials and the email address, switch the calendar to "base" calendar, insert the cost as per need. The account is set to none as in this case we do not charge the cost to a specific cost account.
Tip
Instead of right clicking each item, we can change directly on the main window clicking on each characteristic we wish to change
Remember that for the installation resources there will be a different calendar, the "installation", that we inserted before!
Tip
As entering resource characteristics is a long work that probably is needed for other project, it might be better to maintain you resources in a separate file and insert them when you start a new project using Tools -> Insert Project File. This will preserve the (internal) identity of the resources which may come in handy if you want to coordinate multiple projects later. See Managing Resources
Material Resources
We decided to add the workshop machines to consider some costs as well as their use.
For this purpose in the resource we add the workshop as a material and a CNC machine as well as assembly tools package.
Warning
It is important to insert these sub group materials in a “material” group otherwise they cannot be used in the “required resources” selection with the work in the resource setting as well as they cannot be selected in the Task Settings->Resources. See the below images.
Calendar preference
One other interesting thing to note is that we use different calendars for different resources.
The calendar on the task has the precedence on the resource's calendar. The availability date for a resource largely depend if this resource is available only for a period of time. In this case we need to be sure that all the resources are available from the beginning to the end of the job.
Overtime rate is not yet implemented.
Task
Now it's tasks time !!!!
You can access the task window clicking on the "task" item on the left side of the window, just under the resource item you pressed before.
We have to insert the following items:
As we inserted the each name, we can edit each item right clicking the name. The following will appear on the first task:
There are five tabs: General, Resources, Documents, Cost, Description.
On the General tab insert the name of the task, you can choose a responsible person if needed, then define the timing and the risk associated to the task. The schedule type is typical for planning, "as soon as possible" is the most used. Other kind of type, generate a need to compile the date and time on the right of the drop-down menu.
The estimate is the time required to complete the task, can be in different units: h (hours), d (days), w (weeks) and M (months).
Note
The estimation can be in effort or duration. Effort is the need of working time for a task, Duration is the working duration for a task. The main difference is that for an effort if you use two workers, the total time will be cut by two! If you have duration, the total time will be the same even if you use more workers. This implicitly impacts the cost for the task.
The risk level as well as the optimistic and pessimistic timing will impact the calculation of the total project considering the PERT technique. In this case -5% and 20% are the value as well as the risk is considered "High".
On the Resource tab, we choose the desired resource to be used as well as its availability in % and eventual resources associated.
In the Document tab we can link documents pertaining to the task. Not used for our tutorial.
The fourth tab is the Cost tab. Here we can associate the running cost of the task to an account previously defined into the "Cost breakdown structure".
We can also choose to add startup and shutdown cost for the task, that can be associated to different account.
Note
The startup and shutdown cost are integrated into the BCWS
The last tab is the Description tab where we can insert our comments, mainly the list of the deliverables related to the task.
Dependencies
Now it's time to prioritize the activities! Let's click on the Dependencies (Graphic) item on the left side of the main window.
So this is what should appear as soon as you open the right window.
Let's start to give priority at the tasks in order to obtain a full list of dependencies. This can be done graphically with the mouse, clicking at the right or left side of the task and then drag the relative arrow to the desired position of the other task. It should be better to connect only the tasks and not the summary. The result should be like below.
Schedule
Wow, now it's time for schedule and prepare the baseline for the project!
Clicking on the left menu on the Schedule will bring you to the schedule activities!
Now we create a new schedule clicking on the button Add schedule at the top of the window, then we choose a PERT analysis for the distribution type and then we click on Calculate button. As soon as the calculation is finished, press on Baseline button on the top of the window. The result will be like this:
Tip
Always check the scheduling log as looking for some error messages in the "severity" column could be helpful.
Here, for reference, is a copy from the Plan manual of the field's definitions in the schedule
Column
Description
Name
The name of the schedule.
State
The schedules state. Shows a progress bar during scheduling.
Direction
The scheduling direction.
If direction is Forward, the project is scheduled starting at the projects earliest start time specified in the main project dialog. If direction is Backward, the project is scheduled starting at the projects latest finish time specified in the main project dialog.
Overbooking
Controls resource overbooking when scheduling.
If overbooking is allowed, a resource may be booked (on working days) to work more than it is available. This can happen if the resource is allocated to multiple tasks or are booked on other projects. If overbooking is to be avoided, resources will not be booked more than they are available. On resource conflict, tasks will be delayed until the resource is available.
Distribution
The distribution to be used during scheduling.
If distribution is 'None', the tasks estimate is used as is during scheduling. If distribution is 'PERT', the estimate (E) used is calculated based on the entered optimistic- (O), pessimistic-(P) and most likely (M) estimate. The formula used for this is:
E = (O + 4 * M + P) / 6.
Planned Start
The scheduled start time.
Planned Finish
The scheduled finish time.
Scheduler
The scheduler used for calculating the project schedule.
The default built-in scheduler is the Network Scheduler. Other schedulers presently available is RCPS if libRCPS is installed on your system. RCPS is a genetics based resource constrained project scheduler
So now we have finished our planning activities for the project!!!
</translate>
This page is for UserBase translations. For interface and documentation translations, please refer to KDE Localization portal.
<translate>
Translator Account
In order to become a translator on UserBase you first need an account on the KDE Identity system (the procedure is described on the Introduction to new contributors page). Then you just
add your name to this list in order to request translator rights. We usually respond within a few days - a short greeting is added to your application to show, that you are now an official UserBase translator.
Warning
Please add your user name and info at the bottom of the page! And please make sure that you spell your user name correctly. We need it to be able to instruct the system to grant your translator rights.
</translate>
Example (please add yours to the bottom of the page) :
Welcome to the Translator group Claus chr (talk) 09:10, 2 February 2020 (UTC)
User Name: Antoni0
Language(s): Italian
(Optional) Do you expect to work off-line?: No
Welcome to the Translator group Claus chr (talk) 05:49, 3 February 2020 (UTC)
User Name: Ezequias Santos
Language(s): Brazilian Portuguese
(Optional) Do you expect to work off-line?: No
Welcome to the Translator group Claus chr (talk) 05:58, 10 February 2020 (UTC)
User Name: Imgradeone
Language(s): Chinese (China)
(Optional) Do you expect to work off-line?: No
Welcome to the Translator group Yurchor (talk) 06:47, 17 February 2020 (UTC)
User Name: Karellism
Language(s): Dutch
(Optional) Do you expect to work off-line?: No
Welcome to the Translator group Yurchor (talk) 09:33, 19 February 2020 (UTC)
User Name: KKatanov
Language(s): Russian
(Optional) Do you expect to work off-line?: No
Welcome to the Translator group Claus chr (talk) 05:44, 25 February 2020 (UTC)
User Name: Wessell Urdata
Language(s): Chinese(Traditional)
(Optional) Do you expect to work off-line?: no
Welcome to the Translator group Claus chr (talk) 09:34, 29 February 2020 (UTC)
User Name: Michael Liang
Language(s): Chinese
(Optional) Do you expect to work off-line?: no
Welcome to the Translator group Claus chr (talk) 07:55, 4 March 2020 (UTC)
User Name: Falion
Language(s): English, German, Turkish
(Optional) Do you expect to work off-line?: No
Welcome to the Translator group Yurchor (talk) 05:44, 14 March 2020 (UTC)
User Name: niamfrifruli
Language(s): Spanish
(Optional) Do you expect to work off-line?: No
Welcome to the Translator group Yurchor (talk) 16:54, 30 March 2020 (UTC)
User Name: panxiaoyu
Language(s): Chinese(Simplified)
(Optional) Do you expect to work off-line?: No
Welcome to the Translator group Claus chr (talk) 07:26, 9 April 2020 (UTC)
User Name: Xeyyam
Language(s): Azerbaijani
(Optional) Do you expect to work off-line?: Yes
Welcome to the Translator group Claus chr (talk) 06:14, 13 April 2020 (UTC)
User Name: Ikoch
Language(s): German
(Optional) Do you expect to work off-line?: No
Welcome to the Translator group Claus chr (talk) 07:07, 11 April 2020 (UTC)
User Name: Cyril
Language(s): French
Do you expect to work off-line?: why not.
Welcome to the Translator group Claus chr (talk) 06:07, 13 April 2020 (UTC)
User Name: Svetlij
Language(s): Russian
(Optional) Do you expect to work off-line?: Yes
Welcome to the Translator group Yurchor (talk) 17:59, 18 April 2020 (UTC)
User Name: kayterina
Language(s): Hellenic (el/cy)
(Optional) Do you expect to work off-line?: Yes
Welcome to the Translator group Claus chr (talk) 06:41, 3 May 2020 (UTC)
User Name: xoch
Language(s): Spanish
(Optional) Do you expect to work off-line?: Maybe
Welcome to the Translator group Claus chr (talk) 04:56, 3 June 2020 (UTC)
User Name: Manicap
Language(s): Czech
(Optional) Do you expect to work off-line?: I am not sure for now.
Welcome to the Translator group Claus chr (talk) 08:00, 9 July 2020 (UTC)
User Name: Reverier
Language(s): Chinese(Simplified)
(Optional) Do you expect to work off-line?: Maybe.
Welcome to the Translator group Claus chr (talk) 07:34, 23 August 2020 (UTC)
User Name: Hakanydin
Language(s): Turkish(tr)
(Optional) Do you expect to work off-line?: Maybe
Welcome to the Translator group Yurchor (talk) 17:40, 16 September 2020 (UTC)
User Name: ColibriCosmique (wiki), colibricosmique (KDE Account)
Language(s): French
(Optional) Do you expect to work off-line?: Maybe sometimes
Welcome to the Translator group Yurchor (talk) 12:15, 27 September 2020 (UTC)
User Name: boutiflet
Language(s): French
(Optional) Do you expect to work off-line?: No
Welcome to the Translator group Yurchor (talk) 05:43, 14 October 2020 (UTC)
User Name: Fhek
Language(s): Brazilian Portuguese
(Optional) Do you expect to work off-line?: No
Welcome to the Translator group Claus chr (talk) 07:55, 20 December 2020 (UTC)
User Name: marcinsta
Language(s): polish
(Optional) Do you expect to work off-line?: No
Welcome to the Translator group Claus chr (talk) 07:04, 28 January 2021 (UTC)
User Name: LakeJason
Language(s): Simplified Chinese and Traditional Chinese
(Optional) Do you expect to work off-line?: No
Welcome to the Translator group Yurchor (talk) 14:04, 10 February 2021 (UTC)
User Name: hasntbeentaken
Language(s): Chinese(Simplified)
(Optional) Do you expect to work off-line?: No
Welcome to the Translator group Claus chr (talk) 07:42, 21 February 2021 (UTC)
User Name: akagusu
Language(s): Brazilian Portuguese
(Optional) Do you expect to work off-line?: No
Welcome to the Translator group Yurchor (talk) 06:51, 25 February 2021 (UTC)
User Name: zerox
Language(s): Arabic
(Optional) Do you expect to work off-line?: No
Welcome to the Translator group Claus chr (talk) 06:51, 8 March 2021 (UTC)
User Name: Vegata
Language(s): Japanese
(Optional) Do you expect to work off-line?: No
Welcome to the Translator group Yurchor (talk) 05:44, 12 March 2021 (UTC)
User Name: toyamasoujinn
Language(s): Japanese
(Optional) Do you expect to work off-line?: No
Welcome to the Translator group Claus chr (talk) 06:57, 10 April 2021 (UTC)
User Name: Fdekruijf
Language(s): Dutch
(Optional) Do you expect to work off-line?: yes
Hi Fdekruijf
It seems you already have the requested rights - are you experiencing problems accessing your old user account? Claus chr (talk) 04:55, 16 April 2021 (UTC)
User Name: phylastik
Language(s): French
(Optional) Do you expect to work off-line?: No
Welcome to the Translator group Yurchor (talk) 06:09, 2 May 2021 (UTC)
User Name: Jesusmeneses
Language(s): English-Spanish
(Optional) Do you expect to work off-line?: No
Welcome to the Translator group Claus chr (talk) 04:53, 18 May 2021 (UTC)
User Name: Antemyste
Language(s): French
(Optional) Do you expect to work off-line?: occasionally
Welcome to the Translator group Claus chr (talk) 05:20, 26 May 2021 (UTC)
User Name: Vlcerqueira
Language(s): Brazilian Portuguese
(Optional) Do you expect to work off-line?: Sometimes
Welcome to the Translator group Claus chr (talk) 04:52, 31 May 2021 (UTC)
User Name: fyn
Language(s): Chinese(Simpled)
(Optional) Do you expect to work off-line?: No
Welcome to the Translator group Claus chr (talk) 06:19, 20 June 2021 (UTC)
User Name: Coioidea
Language(s): Chinese(Simplified)
(Optional) Do you expect to work off-line?: No
Welcome to the Translator group Claus chr (talk) 05:06, 21 June 2021 (UTC)
User Name: Pzm
Language(s): Chinese(Simplified)
(Optional) Do you expect to work off-line?: No
Welcome to the Translator group Claus chr (talk) 05:58, 26 June 2021 (UTC)
User Name: Siderealart
Language(s): Traditional Chinese
(Optional) Do you expect to work off-line?: Yes
Welcome to the Translator group Yurchor (talk) 08:29, 27 June 2021 (UTC)
User Name: Cheredin
Language(s): Russian
(Optional) Do you expect to work off-line?: No
Welcome to the Translator group Yurchor (talk) 18:03, 4 July 2021 (UTC)
User Name: Notifyctrl
Language(s): Chinese
(Optional) Do you expect to work off-line?: No
Welcome to the Translator group Claus chr (talk) 06:07, 13 July 2021 (UTC)
User Name: Brsvh
Language(s): Chinese
(Optional) Do you expect to work off-line?: No
Welcome to the Translator group Claus chr (talk) 07:42, 19 July 2021 (UTC)
User Name: Bardia
Language(s): Persian
(Optional) Do you expect to work off-line?: No
Welcome to the Translator group Claus chr (talk) 06:11, 28 July 2021 (UTC)
User Name: marcoxiao
Language(s): Chinese English
(Optional) Do you expect to work off-line?: No
Welcome to the Translator group Claus chr (talk) 05:02, 21 August 2021 (UTC)
User Name: shan
Language(s): Turkish, English
(Optional) Do you expect to work off-line?: Mostly on-line
Welcome to the Translator group Claus chr (talk) 05:18, 25 September 2021 (UTC)
User Name: archandilinux
Language(s): German, English, French, Spanish, Tagalog/Filipino, Japanese
(Optional) Do you expect to work off-line?: no
Welcome to the Translator group Yurchor (talk) 14:13, 11 November 2021 (UTC)
User Name: namatullahkhan
Language(s): Urdu
(Optional) Do you expect to work off-line?: Yes
Welcome to the Translator group Claus chr (talk) 08:10, 14 November 2021 (UTC)
User Name: Justman
Language(s): German
(Optional) Do you expect to work off-line?: ?
Welcome to the Translator group Claus chr (talk) 05:57, 22 May 2022 (UTC)
User Name: Aisekleovus
Language(s): Russian
(Optional) Do you expect to work off-line?: Yes
Welcome to the Translator group Claus chr (talk) 06:37, 18 June 2022 (UTC)
User Name: Sihnu
Language(s): Spanish
(Optional) Do you expect to work off-line?: No
Welcome to the Translator group Claus chr (talk) 13:14, 22 August 2022 (UTC)
User Name: Rhabacker
Language(s): German
(Optional) Do you expect to work off-line?: No
Welcome to the Translator group Claus chr (talk) 08:05, 23 August 2022 (UTC)
User Name: gkpiccoli
Language(s): Portuguese-BR
(Optional) Do you expect to work off-line?: No
Welcome to the Translator group Claus chr (talk) 07:44, 2 September 2022 (UTC)
User Name: mvillarino
Language(s): galician, spanish
(Optional) Do you expect to work off-line?: No
Welcome to the Translator group Claus chr (talk) 14:27, 28 September 2022 (UTC)
User Name: esari
Language(s): Turkish
(Optional) Do you expect to work off-line?: No
Welcome to the Translator group Claus chr (talk) 08:21, 7 October 2022 (UTC)
User Name: Futurelemon
Language(s): Japanese
(Optional) Do you expect to work off-line?: No
Welcome to the Translator group Claus chr (talk) 07:00, 2 November 2022 (UTC)
User Name: Evs
Language(s): Russian
(Optional) Do you expect to work off-line?: Yes
Welcome to the Translator group Claus chr (talk) 08:13, 22 November 2022 (UTC)
User Name: mib
Language(s): German
(Optional) Do you expect to work off-line?: No
Welcome to the Translator group Claus chr (talk) 10:30, 19 December 2022 (UTC)
User Name: gheescoo
Language(s): Chinese (Simplified)
(Optional) Do you expect to work off-line?: No
Welcome to the Translator group Claus chr (talk) 09:12, 30 December 2022 (UTC)
User Name: axelkeller
Language(s): German
(Optional) Do you expect to work off-line?: No
Welcome to the Translator group Yurchor (talk) 17:18, 23 January 2023 (UTC)
User Name: michielfotograaf
Language(s): Dutch
(Optional) Do you expect to work off-line?: No
Welcome to the Translator group Claus chr (talk) 12:49, 9 February 2023 (UTC)
User Name: stepanzubkov
Language(s): Russian
(Optional) Do you expect to work off-line?: Sometimes
Welcome to the Translator group Claus chr (talk) 09:49, 14 February 2023 (UTC)
User Name: জয়শ্রীরাম সরকার
Language(s): Bengali
(Optional) Do you expect to work off-line?: yes
I have added translator rights to user Joysriramsarkar - I assume this is your login name. Let me know if this is not correct. User name জয়শ্রীরাম সরকার is not known to the system.
Welcome to the Translator group Claus chr (talk) 16:05, 13 November 2023 (UTC)
User Name: kazu
Language(s): Japanese
(Optional) Do you expect to work off-line?:No
Welcome to the Translator group Claus chr (talk) 10:59, 19 November 2023 (UTC)
User Name: pzamponi
Language(s): Italian
(Optional) Do you expect to work off-line?:No
Welcome to the Translator group Claus chr (talk) 11:18, 7 February 2024 (UTC)
User Name: Alem
Language(s): Italian
(Optional) Do you expect to work off-line?:No
Welcome to the Translator group Claus chr (talk) 11:18, 7 February 2024 (UTC)
User Name: Gedon
Language(s): German, English
(Optional) Do you expect to work off-line?: Sometimes
Welcome to the Translator group Claus chr (talk) 09:26, 3 April 2024 (UTC)
User Name: Kokaia
Language(s): Georgian
(Optional) Do you expect to work off-line?: No
Welcome to the Translator group Claus chr (talk) 09:13, 13 April 2024 (UTC)
User Name: Sriveenkat
Language(s): Tamil
(Optional) Do you expect to work off-line?: No
I'm sorry to have kept you waiting. Somehow I missed your request.
Welcome to the Translator group Claus chr (talk) 06:12, 4 June 2024 (UTC)
User Name: Gschegosch
Language(s): Russian, Ukrainian, Polish
(Optional) Do you expect to work off-line?: No
Welcome to the Translator group Claus chr (talk) 06:12, 4 June 2024 (UTC)
User Name: Iskandarma
Language(s): Chinese
(Optional) Do you expect to work off-line?: No
Welcome to the Translator group Claus chr (talk) 07:50, 15 October 2024 (UTC)
This page offers examples of formatting code for common tasks
Add an Introductory Screenshot and Description
Whenever possible we begin an application's top-level page with this. The code to achieve it is
{|class="tablecenter vertical-centered"
|[[Image:YourScreenshot.png|250px|thumb]]
|Your descriptive text
|}
Format Your Text
Use Headings
Each heading goes on its own line starting and ending with two or more '=' characters. Once there are more than a handful of headings on a page they automatically create a Table of Contents, so use them. The number of '=' characters determines their level in the Table of Contents, thus your headings should be '==Main section name==', '===Subsection name===', '====Sub-subheading name here====', and so on. Avoid using single '=', as that denotes a page heading and every wiki page already has one made from its name; for example, this page's title "Claus chr/DPL" appears as its page heading.
Use bold and italic
Blips are used to specify bold and italic words.
Use '''bold text''' to specify bold text and
''italic text'' to specify italic text.
In order to ensure we get easy and accurate translations, please adhere to the typographical guidelines.
Add a Code Snippet
We have templates to assist in correctly displaying code snippets. Examples of use in various situations are available on the typographical guideline page
If you have problems displaying pipe characters in your code snippet, please see the explanation and markup detailed on Typographical Guidelines
Add Indents
":" is used for an indent, and was used in multiples in some old pages. This is deprecated, and causes some problems, so the multiples will be removed as they are found. A single ":" indents by four characters.
Format Dates
Dates in a purely numerical format cause confusion, due to differences in expectations of geographical zones. Please format dates as
18 Mar 2011
with the month either spelled out completely or in abbreviated form, and the year in 4-digit format. The day may be single or double-digit.
</translate><translate>
Bulleted Lists
* is the symbol to use for bulletted lists. ** gives a second level:
You can have an enumerated sublist in a bulleted list and vice versa, like this:
* Nuts
*# Cashew
*# Crazy
* Other things
produces
Nuts
Cashew
Crazy
Other things
while
# Nuts
#* Cashew
#* Crazy
# Other things
produces
Nuts
Cashew
Crazy
Other things
Note
Enumerations should never have blank lines in them: it breaks the sequence and numbering starts at one again. Similarly, there should never be blank lines before a sublist item whether enumerated or bulleted: it creates two levels of item markings (bullets or numbers)
Note
Please remember, that long lists are a problem for translators. With single level bulleted lists, place each bullet in a section of its own, i.e. make a blank line between bullets. With two levels of bullets the subitems must be kept in the same section as their top level bullet; if you have to use subbullets, please keep the sublists short! With enumerations involved, you must keep everything in one unit. Please try to avoid enumerations, and if you find that you must use them try to keep them short.
Workaround
Though it is important to avoid blank lines in enumerations and nested lists it is still possible to split such lists in several translations units. This is highly recommended!
To get each bullet and each sub bullet in its own translation unit you can enter something like this:
* First bullet </translate >
<translate >
** First sub bullet </translate >
<translate >
** Another sub bullet<br /><br />This one consists of two paragraphs </translate >
<translate >
* The next main bullet </translate >
<translate >
** And so on
This displays like this:
First bullet</translate>
<translate>
First sub bullet</translate>
<translate>
Another sub bullet
This one consists of two paragraphs</translate>
<translate>
The next main bullet</translate>
<translate>
And so on
The same method should apply to the other kinds of lists.
If on the other hand you need to have more sections in the same item, you can do something like this to have each section in a translation unit of its own:
* First bullet </translate >
<translate >
* Second bullet, first section. </translate><br /><br /> <translate > Second section of the
second bullet. This section has a translation unit of its own </translate >
<translate >
* And so on
This displays like this:
First bullet</translate>
<translate>
Second bullet, first section.</translate>
<translate>
Second section of the second bullet. This section has a translation unit of its own</translate>
<translate>
And so on
Itemizations
Itemizations are produced using ; and : alternatively. They are best for giving short descriptions for a group of related objects.
;Animals
: They move around and devour other creatures.

<!--T:46-->
;Plants
: They have roots and feed upon ground water and sun.
produces
Animals
They move around and devour other creatures.
Plants
They have roots and feed upon ground water and sun.
Note
As always, please keep each item in a section of its own; it helps translators a lot.
Add a Link
There are three kinds of links to learn, internal ones, to another userbase page, internal links to a section of a userbase page, and external URL links.
For an internal link the format [[PageLayout]], where you want to display the name of the page, does work, but it is not ideal, particularly for translation to docbook and for localisation. It is better to use the form [[Special:myLanguage/PageLayout|Page Layout]], because that allows translators to link correctly even though the page name is localised. The result is that it directs to the correctly translated page, if one exists. You often need to include the link in a sentence, so in that case you would use
With this kind of link it is very important, that the page you link to declares the reference anchor. If the anchor contains space characters, replace them by character '_' (underscore) when calling the reference. If the reference is found, the section will be automatically displayed by your browser (if it manages anchors). If it is not the case, you will have to go down through the page to find the referenced section.
External links are given as the URL and a text separated by a space and delimited by single square brackets as in
[https://en.wikipedia.org/wiki/KDE KDE's Wikipedia page]
Anchor declaration must be done immediatly BEFORE the referenced section, and followed by a blank line separating the anchor and its headline. In the following example just copy in the ID value, the title of associated section. It should look like this:
</translate><span id="Working with Languages"></span> <translate>
If the page containing the section that you link to is not yet marked up for translation, you should omit the </translate > and <translate > tags.
External links are slightly different so
[http://techbase.kde.org/Schedules our road map]
displays
our road map, which would take you straight to the techbase page.
One last thing to note - when you preview your page, all links are live. This gives you two benefits. You can check (by hovering) that your links are set up as you expected, and you can use a red link to create a new page.
Make an application list
If you want to make a list of applications like the ones in the subpages of Applications, you should use the AppItem template. Simply enter
{|
{{AppItem|System Settings/Locale|Preferences-desktop-locale.png|
Settings for localized handling of numbers, dates, etc}}A short text.
A few more short lines about the app. This is optional.
|-
{{AppItem|System Settings/Shortcuts and Gestures|Preferences-desktop-keyboard.png|
Shortcuts and Gestures}}Another short text. If you do not type <keycap>Enter</keycap> between the texts
you get one section no matter how long the text is.
|}
Another short text. If you do not type Enter between the texts you get one section no matter how long the text is.
Note, that you should not prepend "Special:myLanguage" to the page name - the template takes care of that. Also note, that you must give a title, even if the title is the same as the page name.
Footnotes
Footnotes are rarely used in our pages, but if you need them you can place a <ref>text</ref> in the source where the footnote mark should appear. There has to be one <references /> somewhere in the source as well, usually towards the end of the page. This is where the text added by the <ref> tags will appear. For more info see the Wikipedia help page.
Illustrate Your Text
Add a single image, centered
[[File:KMail-kde4.png|250px|center]]
Note that you can change the position of the image, but the default is left. The size of the image depends on the circumstances, but for screenshots I recommend no less than 250px and no more than 500px.
Also note that Image: and File: are synonyms.
So that [[Image:KMail-kde4.png]] is the same as [[File:KMail-kde4.png]]. However Image: is deprecated, so prefer File: in new content.
Where you need to show more detail, create a moderately sized image, clickable, so that the full-size can be seen. Simply add the parameter '|thumb' within the image parentheses.
A caption can also be added as a parameter, but will only show if '|thumb' is present.
Example:
[[File:file_name.png|thumb|this will be the caption]]
Add a caption without a thumbnail
Captions also appear on images marked up with the frame syntax.
Example:
[[File:image.png|frame|left|this will be the caption]]
Prevent text from flowing around image
Sometimes you might not want the text to flow down the sides of your image. You can prevent this by adding a <br clear=all> tag between the file tag and the text in question.
Example:
[[File:image.png]]
<br clear=all>
This text would normally flow down the sides of the image but now it will be found under the image
Note that all the parameters for one image are contained within [[...]], and cells are separated by '||'. To start a new line, insert '|-' on an otherwise-empty line, then '|' at the start of the next one.
As of July 2012 the MediaWiki EmbedVideo extension has been installed on userbase.kde. This means you can embed videos from various video hosting sites into the page content and have them display in line.
EmbedVideo parser function expects to be called in any of the following ways:
service is the name of a video sharing service (See "service name" in the list below)
id is the id of the video to include
width (optional) is the width in pixels of the viewing area (height will be determined automatically)
align (optional) is an alignment (float) attribute. May be "left" or "right".
desc (optional) is a short description to display beneath the video when it is aligned
For example, to include the famous "evolution of dance" YouTube video, you'd enter:
{{#ev:youtube|dMH0bHeiRNg}}
And if you wanted scaled down to thumbnail size, on the right with a short description, you could use:
{{#ev:youtube|dMH0bHeiRNg|100|right|This is an embedded video!}}
As of version 1.0, EmbedVideo supports embedding video content from the following services:
Indented boxes do not display correctly! Never put a colon in front of a box; it will make the box look very odd.
Where a note or warning is relevant within your text, use these templates:
{{Info|This is general information}} displays
Information
This is general information
{{Note|Some important information at this point}} displays
Note
Some important information at this point
{{Tip|A helpful piece of advice, something to remember}}displays
Tip
A helpful piece of advice, something to remember
{{Warning|Take care - this is a dangerous thing to do}} displays
Warning
Take care - this is a dangerous thing to do
Where the strongest possible warning is needed, the Remember box can be used, but please use sparingly.
{{Remember|1=This is for things that definitely must not be forgotten}}
Remember
This is for things that definitely must not be forgotten
You can also change the heading:
Don't Forget This!
You can use parameter number 2 to set an individual box heading:
{{Remember|2=Don't Forget This!|1=You can use...}}
Page Redirection
You can make a page to redirect to another page automatically by using:
#REDIRECT [[Pagename]]
KDE3 and KDE SC 4 Versions of Applications
By default, KDE SC 4 is assumed. If the KDE SC 4 version is not yet ready for release, or where only a KDE 3 version exists, it may be necessary to document the KDE3 version. In this case you should add the template {{KDE3}}
which displays
Should you be writing about a KDE3 version and KDE SC 4 version on the same page, use icons for both — {{KDE4}} which displays
Other Useful Templates
</translate><translate>
Inserting GUI Icons
The best way to refer to icons in the GUI is to display it in the text. This can be done with a template like this: {{Icon|list-add}}. This will display the icon.
For this to work, the icon image must have been uploaded to the wiki. See Update an Image for an explanation on how to upload images. The .png files can usually be found here: usr/share/icons/oxygen. If possible use the 16x16 icon. The file name should have an Icon- prefix as in Icon-list-add.png — apart from the prefix the filename should exactly match the usual name. Note, that when using the template you should neither write the Icon- prefix nor the .png file type extension.
The icon can also be written as {{Plus}}, and the icon as {{Minus}}. You can also use {{Configure}} to get the icon, and {{Exit}} gets you the icon.
Community Applications
The final consideration concerns those applications which are not distributed as core KDE applications. These need to be indicated by an icon, placing {{Community-app}}
at the end of your sentence or line, just as you would to denote a footnote in general writing. You then need to add {{Community-app-footnote}} which will create a footnote, like this:
Support for this application can be found from the project's home page
Making Major Edits to Existing Pages
If a page is likely to be open for editing for some time there is a danger of conflicts - someone else may edit at the same time, and saving your edit will cancel out theirs, or vice versa. The way to avoid that is to make a temporary entry, directly under the language bar, using {{Being_Edited}} which will display
Currently Being Edited
This page is currently being edited. If this notice persists for an unreasonable time, please either notify irc.freenode.org #kde-www or report on Claus chr's Talk page
Note: Pages should not normally be marked for translation while they are being actively worked on
Don't forget to remove it when you have finished!
Adding a New Complex Page
If you need to be able to work on a page for quite some time, over several days, for instance, you may like to use the Construction template - {{Construction}}, which displays
Under Construction
This is a new page, currently under construction!
Links to Pages in the Neighbourhood
You can add links to a preceding or a following page using the {{Prevnext2}} template…
{{Prevnext2
 | prevpage  = Previous Pagename
 | nextpage  = Following Pagename
 | prevtext  = The page before this one
 | nexttext  = The next page you should read
 | index     = Index page
 | indextext = Back to Menu
}}
All six arguments are optional, but keep in mind that if you don't specify a value for the indexname parameter, the untranslated name of the current page will be displayed. For the first and last pages in a series, the template is most often used like this:
First page
Last page
{{Prevnext2
 | nextpage  = Following Pagename
 | nexttext  = Read this page next
 | indextext = Tasks and Tools
}}
{{Prevnext2
 | prevpage  = Previous Pagename
 | prevtext  = The page before this one
 | indextext = Tasks and Tools
}}
You should always specify link text (use piped links) for the pages you link to, and you should always prefix your wikilink targets (the part before the |) with Special:myLanguage/ lest you create problems for the translators.
Links to bugs
You can link directly to a bug in Bugzilla by using this template:
{{Bug|123456}}
Please do not forget to add the <s> and </s> to strike through a bug that is closed.
Adding a List of Sub-Pages
== Subpages of {{FULLPAGENAME}} ==
{{Special:PrefixIndex/{{FULLPAGENAME}}/}}
is very useful when you want to list subpages with active links, such as
Subpages of User:Claus chr/DPL
It does, however, also list all "other-language" pages, so use with discretion.
This information here is valid for Okteta 0.10 (released with KDE SC 4.10). Some functionality may not be available with older versions.
It is possible to define structures using either XML or JavaScript.
Errors in the definition are viewable by opening the script console in Okteta.
Directory layout
Each structure definition consists of a folder containing two files.
Inside this folder there must be a .desktop file (recommended name is metadata.desktop) for the metadata.
If you decide to use XML you will need a <id>.osd file. The id is the value of the X-KDE-PluginInfo-Name entry in the metadata
Note
As of Oketeta 0.11 (Released with KDE SC 4.11) the filename main.osd will be checked first, if it doesn't exist <id>.osd will be used.
If you use JavaScript instead you will need a file named main.js
The metadata file
The metadata file is a standard .desktop file.
It has the following entries in the [Desktop Entry] section:
Entry details
Icon (optional)
The icon that will be displayed in the configuration UI. You can use any icon name known to KDE, or alternatively an absolute filesystem path.
Type (required)
Always use Service here
ServiceTypes (required)
Always use KPluginInfo here
Name (required)
The name of this structure. Will be displayed in the selection UI.
Comment (optional)
A short description of this structure. Will be displayed in the selection UI.
X-KDE-PluginInfo-Author (optional)
Your name. Will be displayed in the selection UI.
X-KDE-PluginInfo-Email (optional)
Your email address. Will be displayed in the selection UI.
X-KDE-PluginInfo-Name (required)
This entry will be used as the ID of this structure
The value here must be either structure if you are writing an XML structure or structure/js if you are writing a JavaScript structure
X-KDE-PluginInfo-License (optional)
A license like e.g. GPLv3
A valid sample metadata.desktop could look as follows:
[Desktop Entry]Icon=application-zipType=ServiceServiceTypes=KPluginInfoName=Foo filesComment=My own custom compression format (.foo)X-KDE-PluginInfo-Author=Foo BarX-KDE-PluginInfo-Email=foo.bar@example.orgX-KDE-PluginInfo-Name=compressed-fileX-KDE-PluginInfo-Version=0.1X-KDE-PluginInfo-Website=http://www.example.org/X-KDE-PluginInfo-Category=structure/jsX-KDE-PluginInfo-License=GPLv3
Available datatypes and their properties
Structures
A structure is a container type in which the children are read sequentially. This is analogous to the C/C++struct type.
Property fields: list of datatypes
This property holds a list with the children of this struct. They will be read in the order they are defined.
This property is also available at runtime to allow modifying the field.
This read-only property holds the number of fields.
Unions
A union is a container type in which the children are read sequentially, but always from the same starting offset. This is analogous to the C/C++union type.
This datatype exists to simplify using structures that have a different layout depending on one key field. This is intended for C/C++ structures like this (example from Wikipedia):
In the structures view only the relevant type will be displayed.
E.g. if kind has the value Square the structures view will display a struct Square with the fields centerx, centery, kind and side.
Property fields: list of datatypes
This is the list of fields that are common to each type. In the example, this would be
int centerx
int centery
enum ShapeKind kind
Property alternatives: list of object
This is a list of the alternatives that exist for this tagged union.
Each alternative consists of three properties:
fields: The list of fields that this alternative has
selectIf: A function that returns true if this alternative should be selected. If there is only one field in the tagged union then an integer value is also permitted. In that case, this alternative will be selected whenever that integer value is selected.
structName: The name that should be displayed for the whole structure if this alternative is selected.
The value of alternatives for the example
fields
selectIf
structName
int side
function() { return this.kind == Square; }
"Square"
int length, int height
function() { return this.kind == Rectangle; }
"Rectangle"
int radius
function() { return this.kind == Circle; }
"Circle"
Property defaultFields: list of datatypes
This property defines which fields should be displayed if none of the alternatives matched. By default, this will be none.
Arrays
A collection of elements which have the same type. This is analogous to the C/C++ array concept.
Note
Array length is limited to 10000 since larger arrays would use too much memory. If this is a problem for your file format please file a bug report.
Property type: datatype
The type of this array. Can be any other element, even another array.
Property length: unsigned integer or function
Holds the length of the array. Can be either a fixed number or a JavaScript function that returns a number.
If set to a JavaScript function, this function will be called every time before the array is read and set the array length to the return value. Since arrays are limited to 10000 return values larger than that are set to the maximum.
Example:
function(){returnthis.parent.datalen.value}
A shorthand is also available: You can specify the name of another element (must be a primitive type like integers, pointers, enums, flags)
Note
Referencing the name of another element only available in JavaScript as of Okteta 0.11, XML has always supported it. For older versions the function() { return ... } syntax must be used.
Note
The result of the length function is not rounded down, it must always return an exact Integer. If you work with divisions remember to use Math.floor().
When reading at runtime it will always return the current length as a number. There is no way to obtain the length function dynamically at runtime.
Warning
When writing to this property currently only unsigned integers are accepted. The only way to change this function is to replace the array with a new array with a different function. This will be fixed in Okteta 0.11.
Strings
Represents a string with a specified encoding. By default strings will be C-style null terminated strings.
The hyphens may be omitted. I.e. utf16le is the same as utf-16-le
Property terminatedBy: unsigned integer
This property determines the length of the string. The string extends until the current [11] is equal to terminatedBy. For C-style null terminated strings set this property to zero.
Property maxByteCount: unsigned integer
Set the maximum number of bytes in this string.
Note
For UTF-16 maxCharCount is no equal to 2*maxByteCount, since there may be surrogate characters
This read-only property holds the number of code points in this string
Primitive data types
The following primitive data types are available
int8, int16, int32, int64: Signed integers with 8, 16, 32 or 64 bits precision
uint8, uint16, uint32, uint64: unsigned integers with 8, 16, 32 or 64 bits precision
bool8, bool16, bool32, bool64: A boolean value (0 is false, any other value is true)
float: a 32 bit IEEE754 floating point number
double: a 64 bit IEEE754 floating point number
char: a single ASCII character (8 bits, although only values up to 0x80 are valid)
Property value (runtime only): number or string
Holds the value of this element.
Warning
Due to JavaScript limitations (every number is stored as a 64 bit floating point number) some values larger than 32 bits cannot be represented exactly, therefore for all 64 bit values decimal strings are used instead. This means you should always use strings in comparisons with 64 bit values. E.g,: if (this.value == "9007199254740993")
Bitfields
noframe
TODO
TODO
Pointers
Pointers are primitive data types (the value property is also available) that also act as containers.
The children of a pointer will be read at the offset equal to the value of the pointer.
Property type: datatype
The underlying primitive type of this pointer. Must be on of uint8, uint16, uint32 or uint64.
Property target: datatype
This property holds the type that is being pointed to. Can be any other element, even another pointer.
Enumerations
Enumerations are a primitive type where the textual value will be displayed instead of the numeric value.
This is analogous to the C/C++enum type.
Since enumerations are primitive types they have the same properties as all primitive data types.
Note
The value property holds the numeric value not the textual one
Property type: string
This property must hold one of the strings int8, int16, int32, int64, uint8, uint16, uint32, uint64, since only integer type enumerations are allowed.
A workaround for floating-point enumerations is interpreting the bit pattern of the corresponding floating-point value as an integer and using that for the enumeration value.
Property enumName: string
Contains the name of the underlying enumeration. This property exists so that the type column can display the name of the enumeration referred to instead of simply the string enum
Property enumValues: map
A list of key-value pairs which is used to perform the integer value to text translation
Bitflags
Bitflags are very similar to enumerations, only that a bitwise-or of the appropriate textual values will be displayed.
For flags usually the enumerated values will be single set bits (i.e. numbers that are powers of 2), but any other value
is also supported. If there are enum values that completely contain the bits of other values (e.g. 7 contains 2 and 4) only that value will be displayed.
Example: Asumming you have an enumeration representing UNIX file access rights: R = 4, W = 2, X = 1. Then the value 7 will be displayed as R | W | X. If you add another value ALL_RIGHTS = 7 to your enumeration the value 7 will be displayed as ALL_RIGHTS instead. This can be useful if you want to have a shorter or more readable string displayed.
Properties are the same as the properties for enumerations.
Properties common to all types
Property defaultLockOffset: number
Since Okteta 0.11
Setting this property allow you to ensure that the structure is locked at that offset whenever a new file is opened.
Otherwise, it will be read from the cursor position. When this property is set you can of course still unlock the structure manually from the UI.
This is mainly intended for e.g. file headers, which will usually start at offset 0. This way you no longer have to move the cursor to offset 0 select the structure and then press the lock button.
The property is only useful for the root element. If you put it on any other element it will be ignored.
For an example look here (XML) or here (JavaScript),
Property name: string
The name of this element in the resulting structure. Note that if you name your element the same as a property you cannot access it with the normal syntax in script code.
If you have an element named byteOrder you have to write parent.child("byteOrder") instead of parent.byteOrder since the latter will return the value of the byteOrder property of parent instead of the child element.
Property byteOrder: string
Set the endianess. The following values are possible:
big-endian: Always use big endian
little-endian: Always use little endian
from-settings: Always use the value specified in the settings page
inherit: Use the value of the parent element . For the root element this is equivalent to from-settings
The default value is inherit.
Property updateFunc: function
A JavaScript function which gets called every time this element is read. Allows you to modify this element and its children.
This allows your structure to dynamically change its visualization depending on the data.
Since this function gets called before the data for this element is read you can only read the values of elements that come before. Specifically accessing this.value will not work.
See #Update_and_validation_functions
Property validationFunc:function
A JavaScript function which gets called whenever the user presses the Validate button.
This function should return a boolean value or a string. If a string is returned that string will be displayed as the validation failure message. Returning true will mark the element as successfully validated, false will display a validation error without a message.
When writing definitions in XML you have to escape some characters, since otherwise the document may be malformed
Property parent (runtime only): datatype
This read-only property can be used at runtime to access the parent element. Should not be read in the root element.
Property wasAbleToRead (runtime only): boolean
This property holds the value true if the value could be read, or false if end of file was reached.
Property validationError (runtime only): string
This property can be written to inside a validation function. It is useful if you want to validate more than one child without writing a validation function for each of them.
Example:
function(){//ensure that the magic values hold 0xdeadbeefvarvalid=true;if(this.magic[0]!=0xde){this.magic[0].validationError="This byte must have the value 0xde";valid=false;}elseif(this.magic[1]!=0xad){this.magic[1].validationError="This byte must have the value 0xad";valid=false;}elseif(this.magic[2]!=0xbe){this.magic[2].validationError="This byte must have the value 0xbe";valid=false;}elseif(this.magic[3]!=0xef){this.magic[3].validationError="This byte must have the value 0xef";valid=false;}returnvalid;}
Obviously this example does not make that much sense since it would be easier to simply write
function(){//ensure that the magic values hold 0xdeadbeefif(this.magic[0]==0xde&&this.magic[1]==0xad&&this.magic[2]==0xbe&&this.magic[3]==0xef){returntrue;}else{return"Magic bytes must be equal to 0xde, 0xad, 0xbe, 0xef";}}
but there may be cases where this makes sense.
XML structures
A sample .osd is a XML file with <data> as the root element and may look as follows:
Properties may be specified either as an XML attribute or as an XML child element (mostly useful for properties which contain longer text and linebreaks like e.g. updateFunc).
The following two declarations are equivalent:
As of Okteta 0.11 it is possible to write e.g <array type="uint8"> as a further shorthand. This works for all primitive type strings
<pointer>
A shorthand for using the type property exists. Instead of needing a child <type> element, it is also possible to write <pointer type="uint32" />. Remember that only unsigned integer types are allowed.
To reduce verbosity the target attribute may be omitted. If no <target> element exists, the first child element with a valid type will be used instead.
<enum>, <flags>
The enumName and enumValues properties do not map directly to XML. Instead there is an XML attribute enum which references an <enumDef> element defined somewhere below the <data> element. This is so that the enum values can be reused by other <enum> elements
The enumName property maps to the attribute name of the <enumDef>
The enumValues property maps to the list of <entry> elements in the <enumDef>
The type attribute on the <enumDef> element is needed so that it can be verified that all values are within the representable range for that type. This information is pretty redundant, but is due to the way the code was originally written.
<primitive>
As of Okteta 0.11 it is possible to write e.g. <uint8 />, <float /> instead of <primitive type="..." />
JavaScript structures
A JavaScript structure definition must contain a function called init which returns an object that can be converted to one of the datatypes.
noframe
TODO
0.11: list of objects
The sample from the #XML_structures section would look as follows in JavaScript:
The parameters fields and defaultFields are the same as the fields parameter of struct() or union().
The parameter alternatives is a JavaScript list of objects that have the properties fields, selectIf and optionally structName. To simplify creating this object an function alternative(selectIf, fields, structName) exists (3rd parameter is optional).
The example from the #Tagged_unions section would look as follows in JavaScript:
for #Enumerations. Using enum is not possible since this is a JavaScript reserved keyword.
Enum values can be any JavaScript object that can be interpreted as a string-number map.
For example:
64 bit values must represented as a string. If the string starts with "0x" it will be interpreted as a hexadecimal number, otherwise as a decimal number.
To set the additional properties that are not set by these functions you can either set them using standard JavaScript property assignment or alternatively there is also a set() function defined on all the returned objects:
varfoo=string("utf8");foo.maxByteCount=12;foo.validationFunc=function(){...};//also possible like this:varfoo2=string("utf8").set({maxByteCount:12,validationFunc:function(){...}});//this syntax is mainly useful in inline expressions (the deeper nested you structure is the more useful)varsomething=struct({x:uint8(),y:uint8(),name:string("utf8").set({maxByteCount:12})});//without the set function this would look like this:varsomething2=struct({x:uint8(),y:uint8(),name:string("utf8")});something2.fields.name.maxByteCount=12;
There is also a setUpdate(func) and setValidation(func) function defined for all those objects to save a bit of
typing:
//these 3 object are equivalentvarx1=array(uint8(),12).setUpdate(function(){...});varx2=array(uint8(),12).set({updateFunc:function(){...}});varx3=array(uint8(),12);x3.updateFunc=function(){...};//the same herevary1=array(uint8(),12).setValidation(function(){...});vary2=array(uint8(),12).set({validationFunc:function(){...}});vary3=array(uint8(),12);y3.validationFunc=function(){...};
Update and validation functions
At runtime (during evaluation of updateFunc or validationFunc) accessing properties is slightly different than within the init() function, or the XML definition.
This is due to the fact that at runtime you are accessing a JavaScript proxy to a C++ object, and at definition time it is just a plain JavaScript object.
A update function looks as follows:
function(root){//modify this object}
The argument root is optional, if you do not need it, it can be omitted. It holds the root element of the current structure so that you don't have to write this.parent.parent.... to access it.
Within that function this refers to the current element.
Examples for what is possible in an updateFunc:
functioninit(){varobj=struct({foo:uint32(),numbers:array(int16(),10),childCount:int8()});//note that field name childCount is also the name of a property of structobj.updateFunc=updateMyStruct;//does not have to be defined inline, can be anywhere in the filereturnobj;}functionupdateMyStruct(root){varfooValue=this.foo.value;//reads the value of field foovararrayLen=this.numbers.length;//10varwrongChildCountValue=this.childCount.value;//ERROR: cannot access childCount like this//this.childCount will return the number 3, which has no property named value//the correct way to access it is by writingvarchildCountValue=this.child("childCount").value;//to access fields whose name matches that of a property you must always use the .child("...") syntax//children of an array can be accessed using standard array syntax (starting at 0):varfirstNumber=this.numbers[0];this.name="updatedStruct";}
Properties can be written to just the same as within the init() function. However an error will be logged evertime you try to access a property that does not exist. This is not possible in the init function due to the fact that these objects are plain JavaScript objects. Every property read or write access in the update functions will be handled by C++ code, which makes the logging of errors possible.
Searching for pages containing a certain text string
Matching content in pages: You need to include the contents of pages in this page (include = * does that) and then do a perl-like regexp on their contents to filter interesting pages (includematch = ...). If you are searching in translated pages (fx all Danish pages) it is often advantageous to have namespace = Translations set; otherwise you will get both all full pages and all translation units containing matching text — that could be a very long output.
<DPL>
  titlematch = %/da
  namespace = Translations
  include = *
  includematch = /[Aa]pplikation/
  includemaxlength = 0
  resultsheader = Danish translation units containing the string "applikation"
  format = ,\n* [[%PAGE%|%TITLE%]]\n,,
</DPL>
Warning
There is something very, very wrong with this query!
Searching for pages that hasn't been marked for translation
<DPL>
  nottitlematch = %/__|%/zh-%|%pt-%|%(%)
  namespace = Main
  include = *
  includenotmatch = /<languages/
  includemaxlength = 0
  resultsheader = Danish translation units containing the string "applikation"
  format = ,\n* [[%PAGE%|%TITLE%]]\n,,
</DPL>
Find discussion threads contributed by a user
Perhaps more talk namespaces needs to be searched.
<DPL>
  titlematch = %
  namespace = Archive
  columns = 2
  format = ,\n* [[%PAGE%|%TITLE%]],,
  resultsheader = There are %TOTALPAGES% pages in the Archive namespace. These are:\n
</DPL>
NoIndexed pages
<DPL>
  titlematch = %
  category = Noindexed_pages
  columns = 2
  format = ,\n* [[%PAGE%|%TITLE%]],,
  resultsheader = There are %TOTALPAGES% pages in the Archive namespace. These are:\n
</DPL>
<DPL>
  titlematch = %_(%)
  notcategory = Template
  notnamespace = Thread
  notnamespace = Summary
  columns = 2
  format = ,\n* [[%PAGE%|%TITLE%]],,
  resultsheader = There are %TOTALPAGES% pages (partly) remaining in old-style translations. These are:\n
</DPL>
Pages with old i18n bar
<DPL>
  titlematch = %
  namespace = Main
  uses = Template:I18n/Language Navigation Bar
  columns = 3
  format = ,\n* [[%PAGE%|%TITLE%]],,
  resultsheader = There are %TOTALPAGES% pages that still display the old i18n language bar\n
</DPL>
Pages with old i18n bar but w/o old-way-translated ones
<DPL>
  nottitlematch = %_(%)
  namespace = Main
  uses = Template:I18n/Language Navigation Bar
  columns = 3
  format = ,\n* [[%PAGE%|%TITLE%]],,
  resultsheader = There are %TOTALPAGES% relevant pages that still display the old i18n language bar\n
</DPL>
Pages not updated since 1st July 2010
<DPL>
  namespace = Main
  lastrevisionbefore = 201007010000
  columns = 2
  ordermethod=lastedit
  format = ,\n* (%DATE%) [[%PAGE%|%TITLE%]],,
  resultsheader = There are %TOTALPAGES% pages without recent updates\n
</DPL>
Listing Non-Translation Pages
<DPL>
  nottitlematch = %/__|%/zh-%|%(%)
  titlematch = Amarok%
  namespace = Main
  columns = 1
  format = ,\n* [[%PAGE%|%TITLE%]],,
  resultsheader = There are %TOTALPAGES% Amarok pages, not counting translations\n
</DPL>
List all pages in a specific namespace
<DPL>
  nottitlematch = %/__|%/zh-%|%pt-%|%(%)
  namespace = MediaWiki
  columns = 3
  format = ,\n* [[%PAGE%|%TITLE%]],,
  resultsheader = These %TOTALPAGES% pages are in the Mediawiki namespace\n
</DPL>
To count translated pages in a specific language:
<DPL>
  titlematch = %/en
  notnamespace = Translations
  columns = 3
  format = ,\n* [[%PAGE%|%TITLE%]],,
  resultsheader = There are %TOTALPAGES% pages (partly) translated to English. These are:\n
</DPL>


 . Many more are available from Wikimedia Commons .


 button in the Playlist toolbar. Slow-click the disc icon to chose to save to your harddisk, or to the database.


 Icons shows each file or folder as an icon with its name
 Compact is the same as icons, but in a more compact form, allowing more folders and files to be displayed at once
 Details presents a list of files and folders, giving information on each, including but not limited to size and date

 icon
icon


 button on the left and give your filter a name (this will appear on the shortcut also, I simply used "Archive")</translate>
 icon to select a shortcut (I used q because it didn't conflict with anything else)</translate>
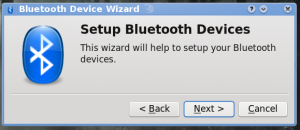
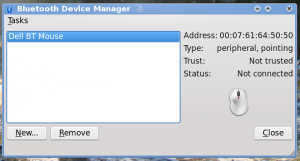


 .</translate>


 and enter your username, the language you want to translate for and if you intend to translate off-line
.png.png)

 to
to 


.jpg)